
What’s a night sky image without stars? Unfortunately, it’s hard to get starts to show up in images, especially if you have a bright subject in the foreground. The weak light of the stars gets lost in the background.
Hey there, I’m Cara! And I’m here to tell you that you can have your cake and eat it too. Using Photoshop, you can add realistic stars to your night sky image either by using an overlay or creating them from scratch.
In this tutorial, let’s look at two methods to add stars to a photo in Photoshop!
Note: I took these screenshots from the Windows version of Photoshop CC. If you are working with a Mac you will find that the workspace looks a little different!
Table of Contents
Method 1: Adding Stars by Overlaying Another Image
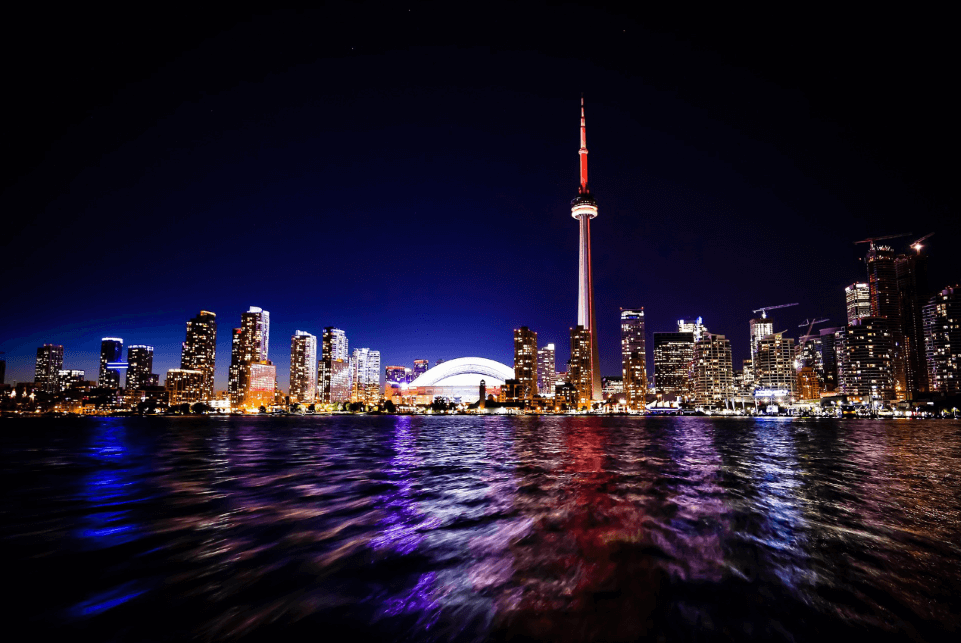
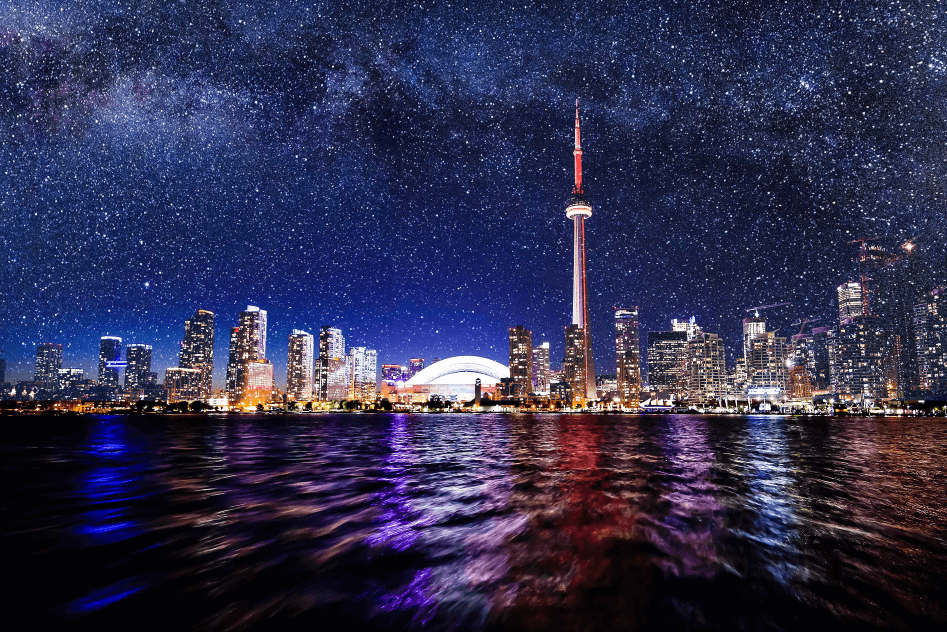
This is a pretty quick method of adding stars in Photoshop. All you have to do is grab an image of stars and lay it over your night sky image. It’s super easy and I’ll be showing you an example of this image I got from Pixabay.com.
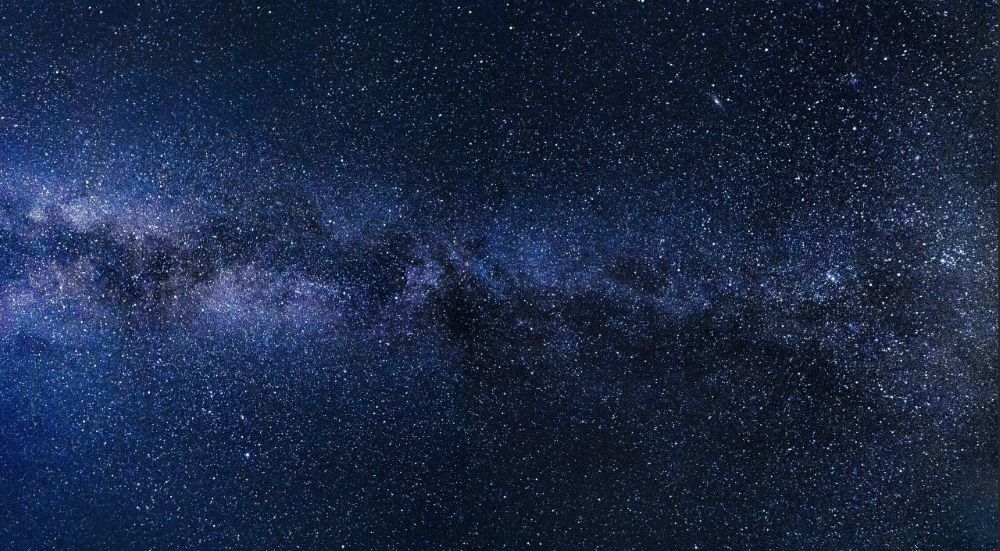
Then, we’ll use this other image for the overlay.
Step 1: Layer the Star Image Over Your Photo
Open your night sky image in Photoshop. Then go to File in the menu bar and choose Place Embedded.
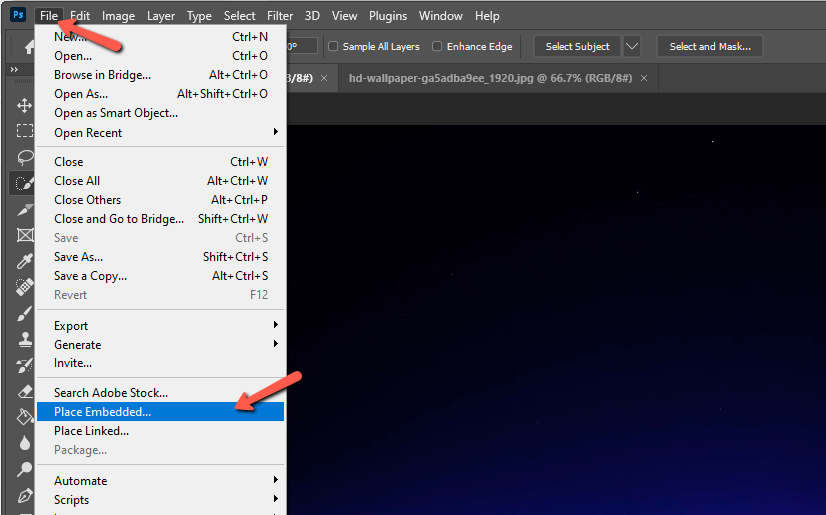
Navigate to your star image and select it. The star image will appear over the top of your night sky image with the Transform tool automatically activated.
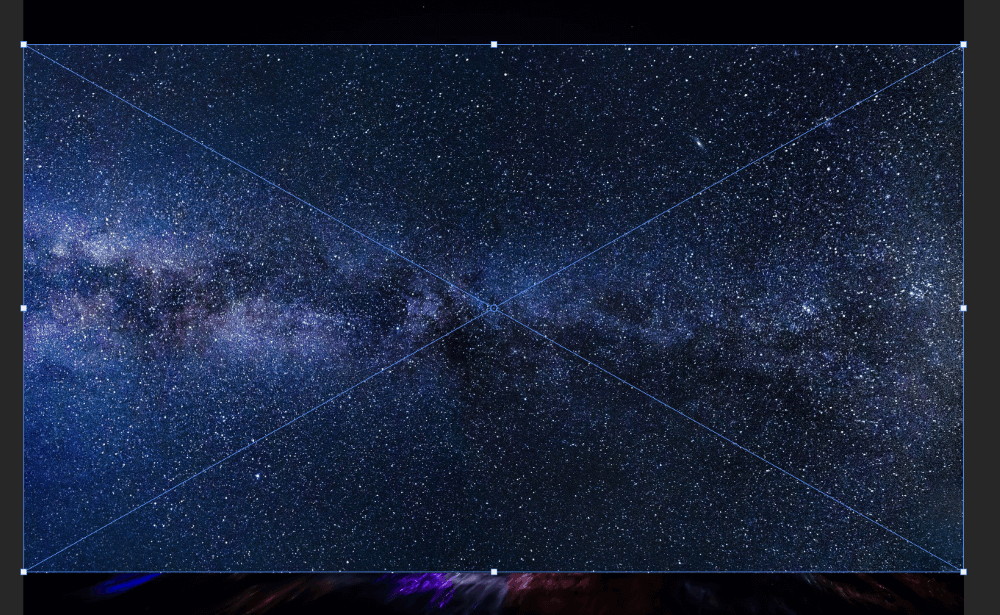
You can reposition or resize the star image with the Transform tool. You can resize the image using the handles in the corners and along the sides.
Once you’re happy with the placement, click the checkmark in the Options bar.

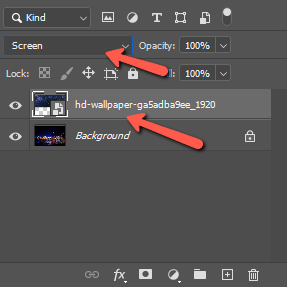
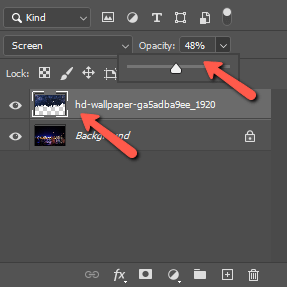
Step 2: Change the Blend Mode
Obviously, we want to only see the stars, not the whole sky behind them. To do that, we need a blend mode that will remove the dark parts of the image while keeping the light parts.
With the star layer selected, choose Screen from the blend mode box at the top of the Layers panel.
Boom!
Step 3: Clean Up and Adjust
There are a few stars showing up on the buildings where we don’t want them, but that’s an easy fix. Just grab the Eraser tool from the toolbar on the left.

Drag over the areas where you don’t need stars to remove them. You may need to zoom in to see what you’re doing as you work.
When you overlay an image, Photoshop automatically adds it as a Smart Object. When you try to erase it, you’ll probably get a warning like this.
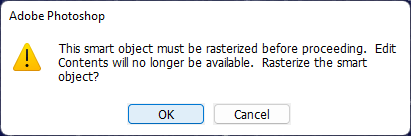
Just press OK and proceed with the erasing.
If the sky seems too strong (stars are faint after all), bring down the Opacity on the overlaying layer. With the star layer selected, just drag the opacity slider down until it looks right.
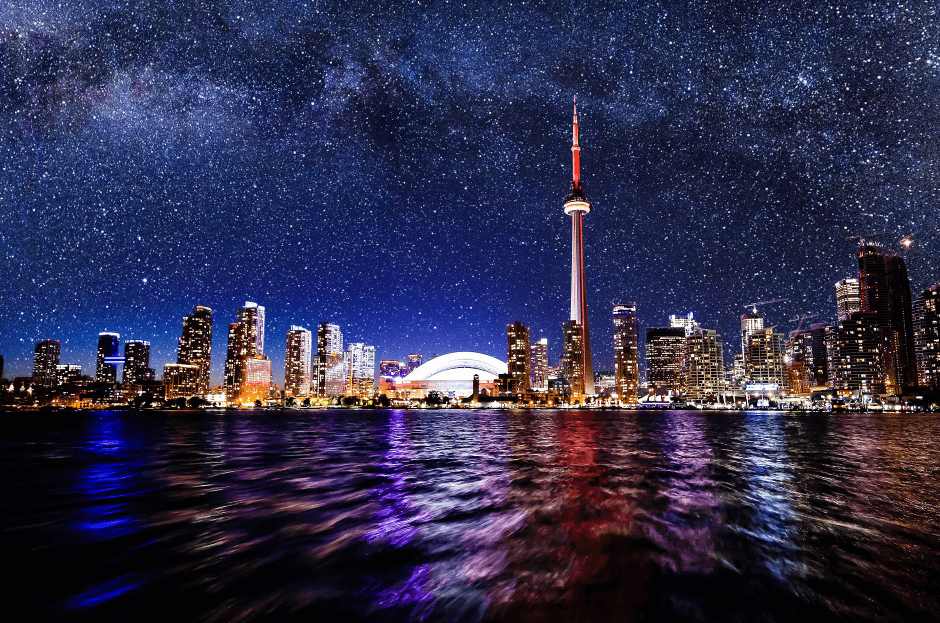
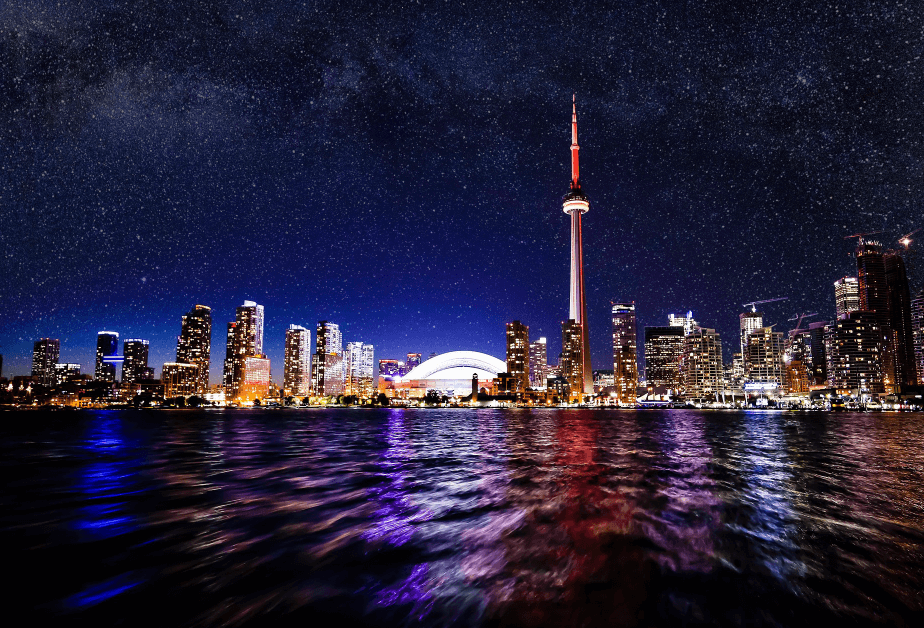
And here’s the final result!
Method 2: Create Stars in Photoshop
Overlaying an existing star image is quite easy, but what if you want to create your own stars in Photoshop? It turns out, that isn’t too hard to do either. Let’s look at the process here.
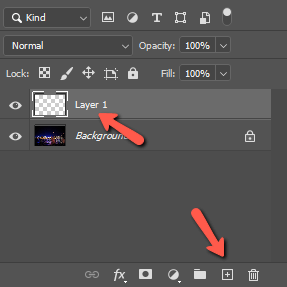
Step 1: Create a New Black Layer
Let’s go back to our original image, and then create an empty layer on top of it. Press the New Layer icon at the bottom of the Layers panel.
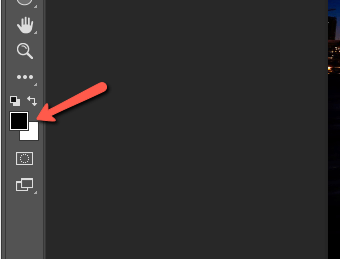
You’ll need to fill your new layer with black. Press D to make sure your foreground and background colors are set to the default.
Then press Shift + Backspace or Shift + Delete and change the Contents box to Foreground Color.
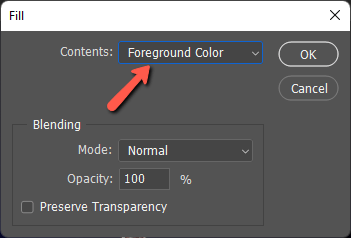
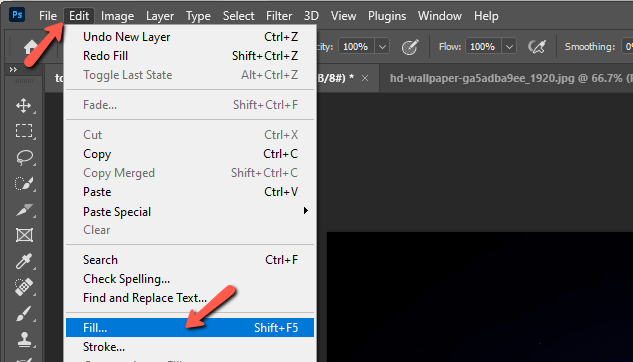
Or go to Edit and choose Fill. Then do the same thing in the Fill box.
Step 2: Add Noise
Your image will fill over with black, but don’t panic! That’s what’s supposed to happen.
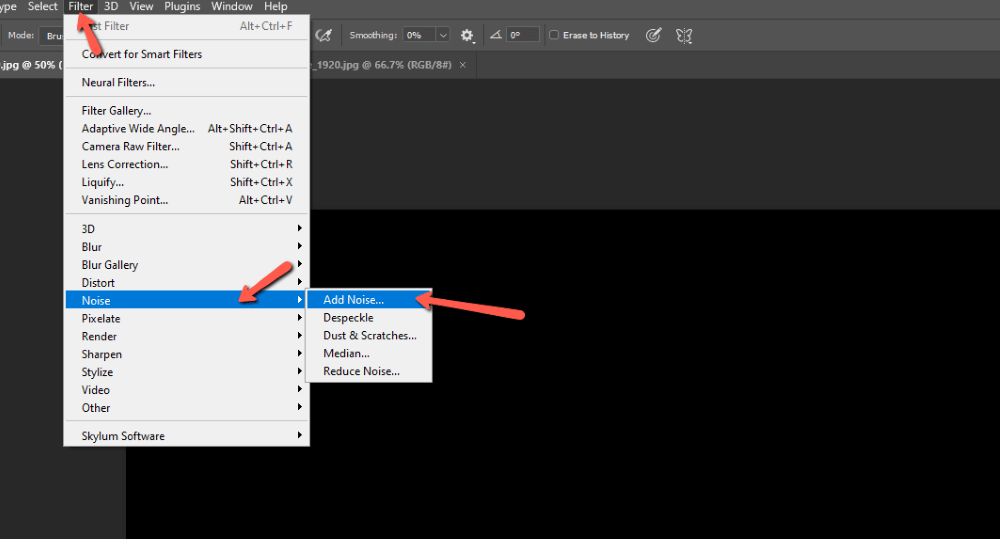
Now go to Filter, hover over Noise, and choose Add Noise.
In the box that opens, put the Amount at about 50%. The actual amount needed will vary depending on the look you want and the size of your image, but let’s start there.
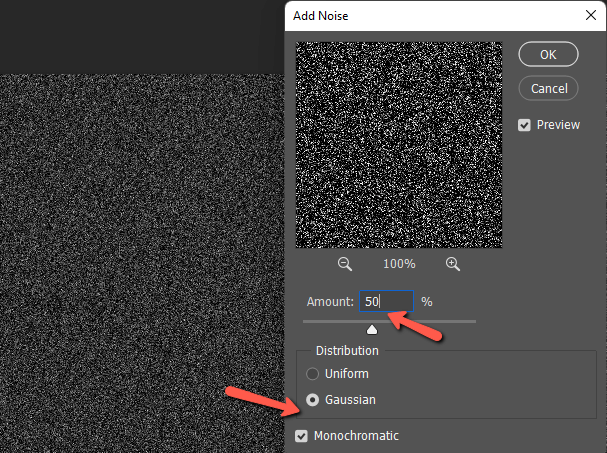
Make sure that both the Gaussian and Monochromatic boxes are checked. When you press OK, your image will fill with random noise.
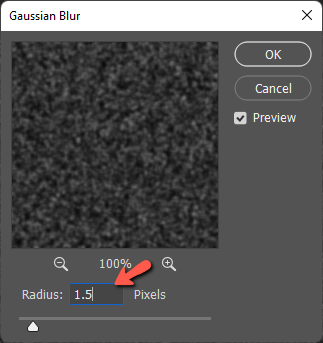
Now let’s blur it a bit with a Gaussian filter. Go to Filter, hover over Blur, and choose Gaussian Blur.
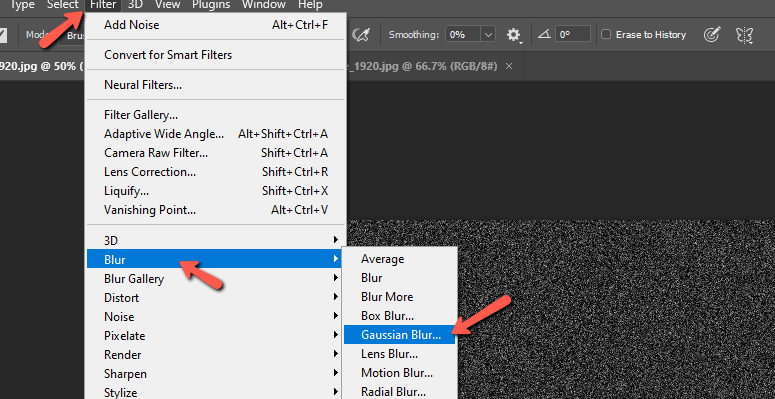
We just want to soften the noise a little so a Radius of about 1.5 pixels should be good.
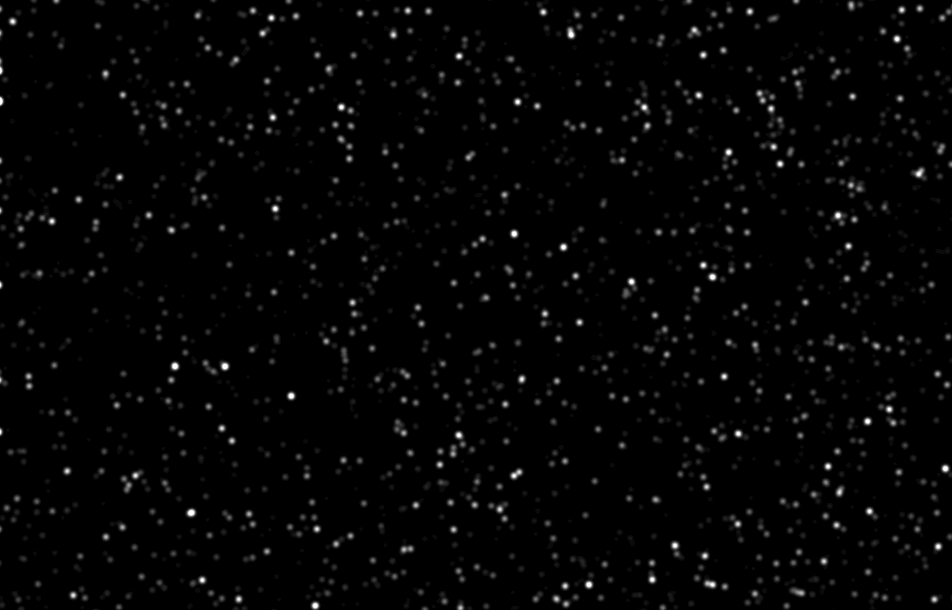
Step 3: Turn Noise into Beautiful Stars
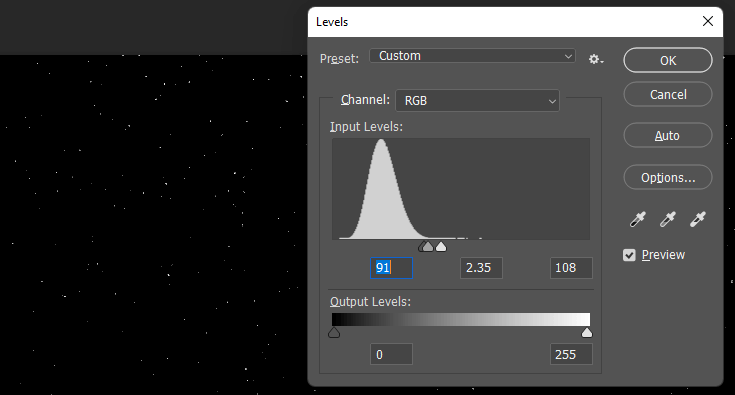
Seems like there should be some kind of sweet metaphor about this, creating stars out of noise. But I digress. Go to Image, hover over Adjustments, and choose Levels. Or simply press Ctrl + L or Command + L.
In the Histogram, drag the black point (the leftmost tab) to the right to darken the blacks and remove the excess noise. Bring the white point (the right tab) down to the left to brighten the remaining whites. Adjust the sliders until you have a field of stars you like.
Press OK when you’re done.
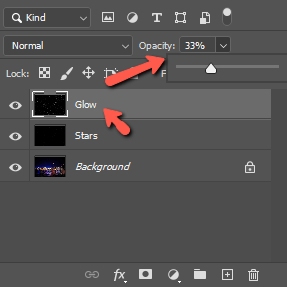
They wouldn’t be stars without a little glow, right? Let’s add some glow by making a copy of the stars layer with Ctrl + J or Command + J. Name your new layer Glow to keep things organized.
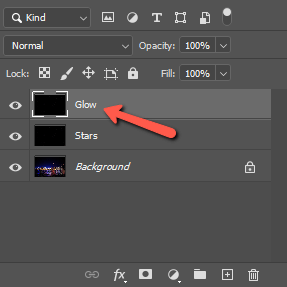
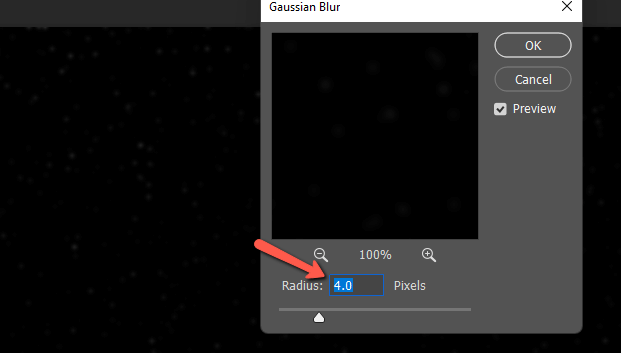
With the new Glow layer selected, let’s go back and add another Gaussian Blur filter.

This time let’s make it more intense and choose a higher pixel amount like 4.
The stars will look too faint at this point, but that’s not a problem. Go to Image and pick Auto Contrast. Your stars will brighten right back up, a little too much.
Back off the effect by lowering the opacity of the glow layer in the layers panel. With the Glow layer selected, slide the Opacity slider down until your scene looks right.
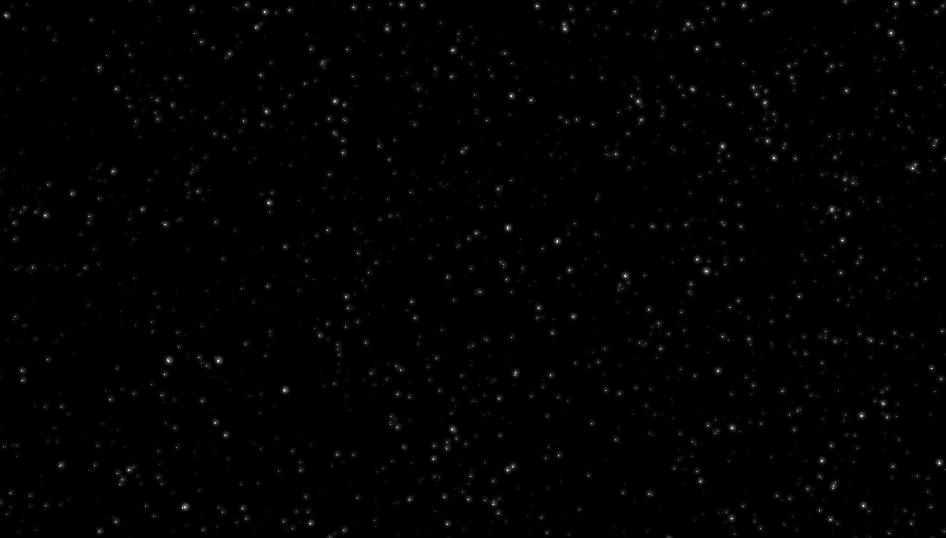
Our field of stars is starting to look much more star-like now.
Step 4: Color Your Stars
Stars aren’t actually pure white so adding a touch of blue or reddish-orange will make them look more realistic. You can add color with a Hue/Saturation layer.
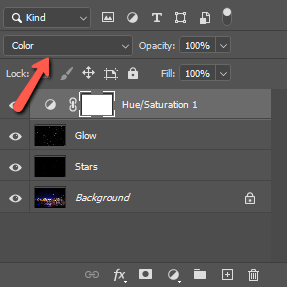
Press the Adjustment Layer icon at the bottom of the layers panel (it looks like a half-filled circle). Choose Hue/Saturation from the list.
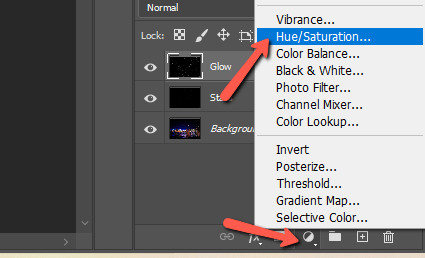
Make sure the Colorize box is selected or nothing will appear to be happening. Then move the Hue slider into the blue range. You’ll want to bring down the Saturation as well. You don’t want to overdo the effect.

At the top of the Layers panel, change the Blend Mode of the Hue/Saturation layer to Color. This will make sure only the color is affected and not the brightness or anything else.
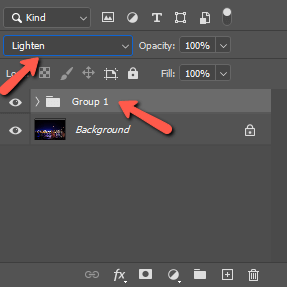
Step 5: Blend the Star Layer into Your Image
Just as we did with the overlay method, we now need to blend our stars into the image. But we have three layers working together to create the stars. Select them all and press Ctrl + G or Command + G to group the layers together.
Now change the Blend Mode to Screen or Lighten.
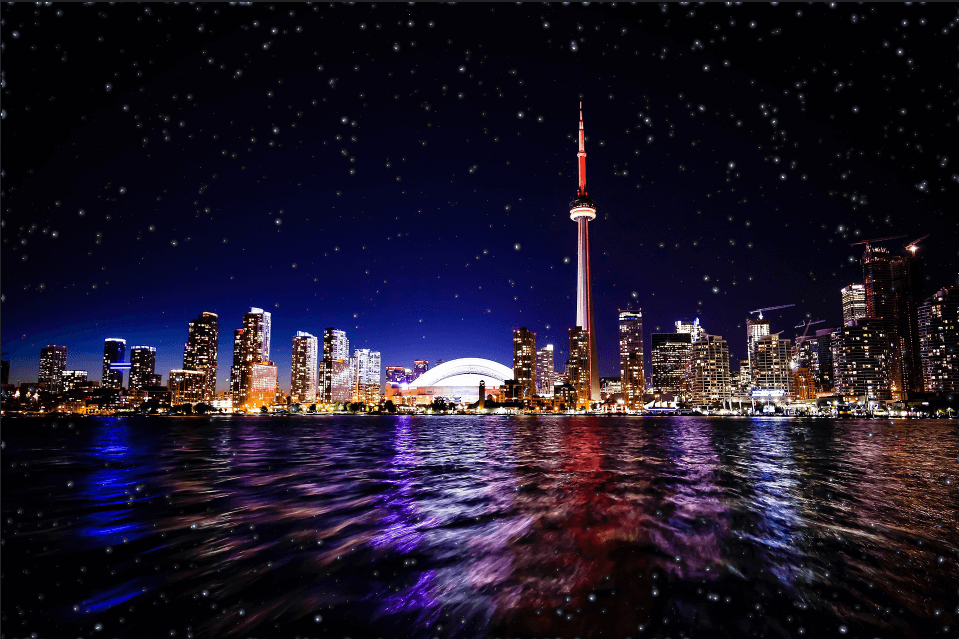
And now you get to see the results of your star creation!
Again, you’ll see there are stars where you don’t want them. Simply remove them with the Eraser tool. Or add a mask and paint with black if you want the option to correct mistakes.
You can do that by pressing the Mask button at the bottom of the Layers panel.
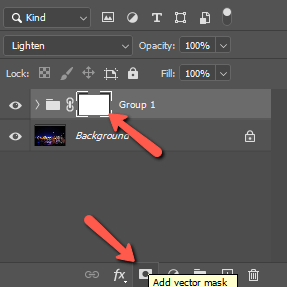
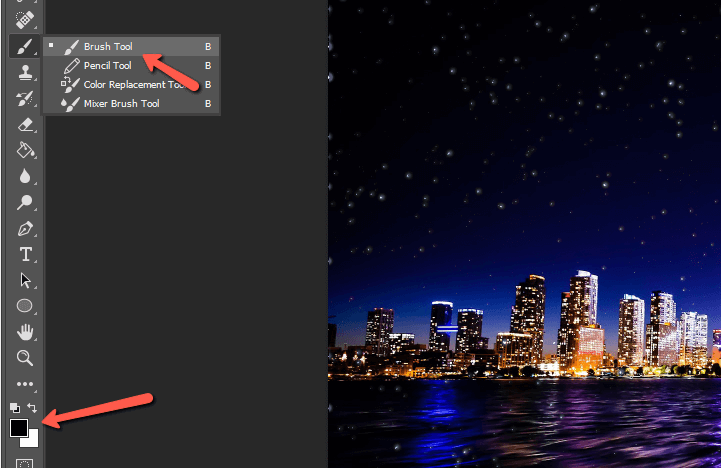
Then press B on the keyboard or choose the Brush tool from the toolbar on the left. With your foreground color set to black, paint wherever you want to remove the stars. If you make a mistake and want to add something back in, just switch to white and repaint that area.
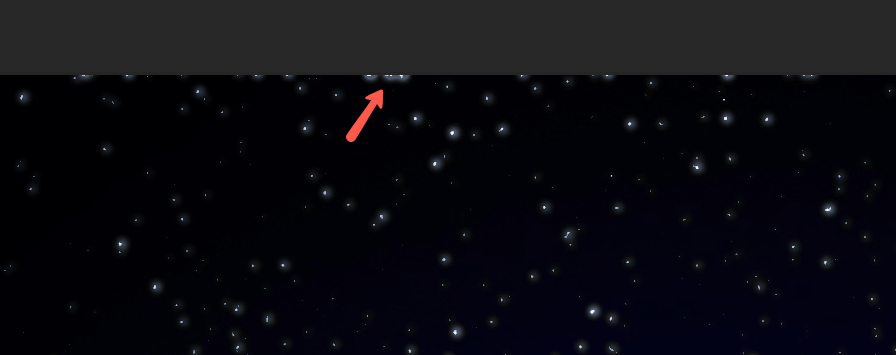
Because of how the noise filter works, you might notice some weird clumps of stars at the edges of the image. Erase those for a more natural look.
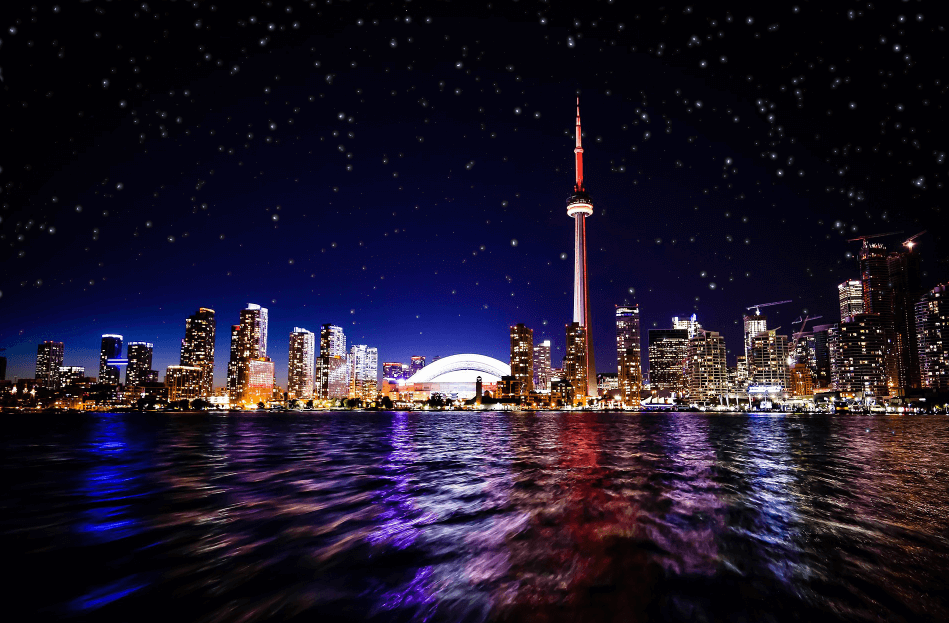
Pretty nifty, right?
Have fun making your star-studded photographs! And check out how to add a fog effect here!
About Cara Koch