Why stick another image on top of your image in Photoshop? Overlaying images gives you the opportunity to create tons of exciting images. You can add effects, create composite images, make double exposures, make image collages, and so much more!
Hello! I’m Cara and as a portrait and product photographer, I have used overlays to add creative effects to my images. I think it gives them that little something extra that some images need to really stand out.
Curious about how this works? Come along with me and I will show you how easy it is!
Note: the screenshots below are taken from the Windows version of Adobe Photoshop, if you’re using the Mac version, the navigations may look slightly different.
Table of Contents
Step 1: Choose Your Images
The process of overlaying images in Photoshop is really simple. It can get time-consuming depending on how detailed you need to get with the fine-tuning. Most of the time, however, it’s pretty straightforward and quick.
What I find to be the most difficult is choosing the right image for the overlay. It gets harder as you try to imagine overlaying several images on top of one another. However, the endless sea of possibilities is what makes this technique so creative and fun!
To show you how the process works, I’m going to use this sushi image I took yesterday.
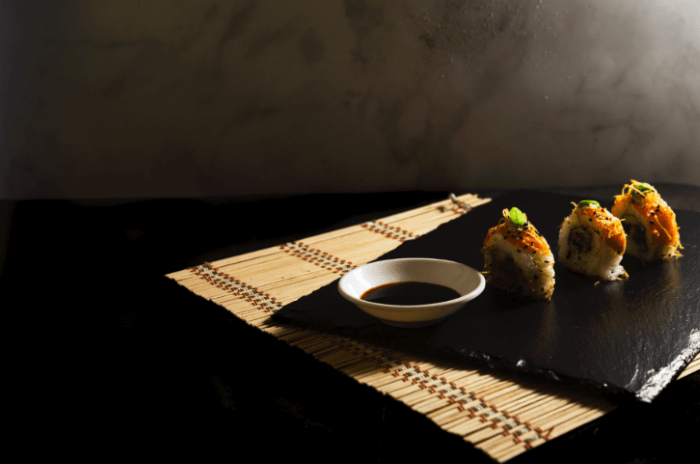
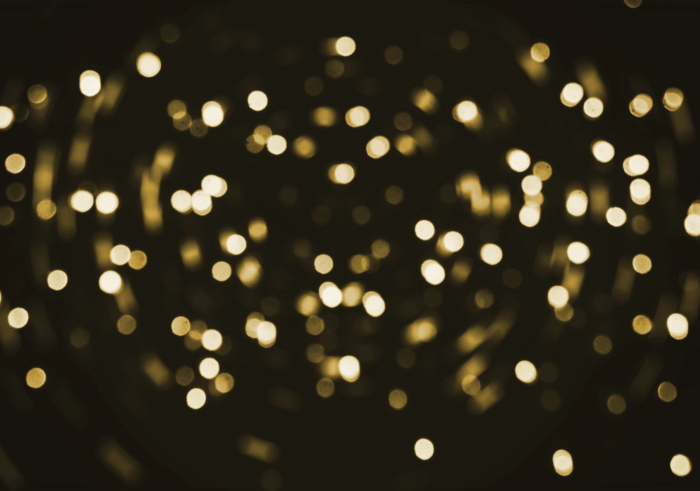
It’s a cool image with interesting lighting, but a little plain. So I’m going to spice it up by overlaying this bokeh image from Lemon and Lace.
Step 2: Put the Images on Top of Each Other
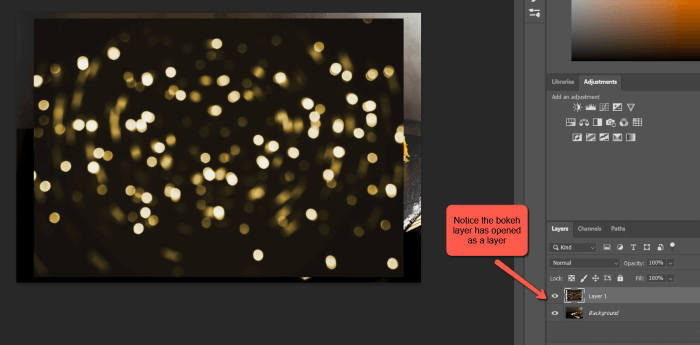
Start with your base image open in Photoshop. I’ve got my sushi image here. Now I need to drop the bokeh image on top.
There are a couple of ways I can do this. Grab the overlay image (from the desktop or somewhere) and drop it directly on top of the base image. It will open as a new layer.
You can also open the overlay image separately in Photoshop. Hit Control + A (Command + A) to select the whole image, then Control + C (Command + C) to copy it. Go back to the base image and paste it with Control + V (Command + V). Again it will open as a new layer.
This method is helpful when using only part of the overlay image. Learn more here about moving a selection.
Step 3: Choose a Blending Mode
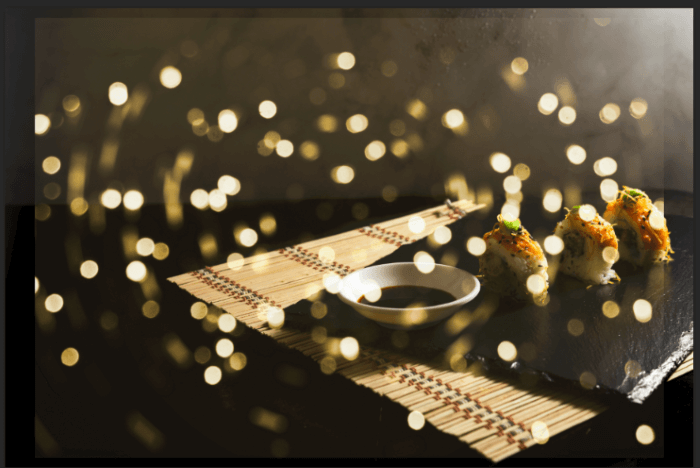
Obviously, this isn’t going to work because the bokeh layer completely blocks out my bottom image. To blend the two images together better, we can use one of Photoshop’s 27 blending modes.
With the bokeh layer selected, click in the blending mode box (which says Normal by default).
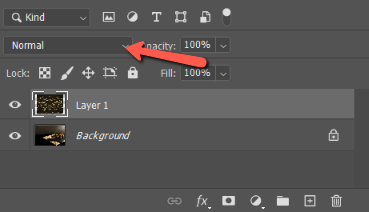
Then this menu appears.
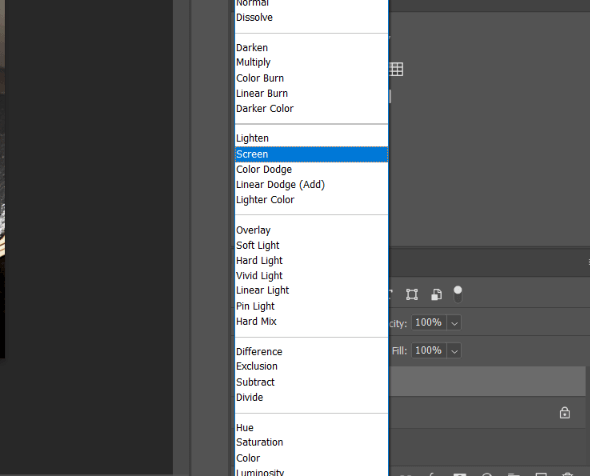
Understanding how each of these modes blends the images is a complex topic and beyond the scope of this article. For a visual demonstration of how each one works, hover over each type and Photoshop will offer a preview.
I’m going to choose Screen for this project. This blending mode keeps the brightest parts of the image and the dark parts fade away. And here’s how it looks.
Step 4: Resize and Position
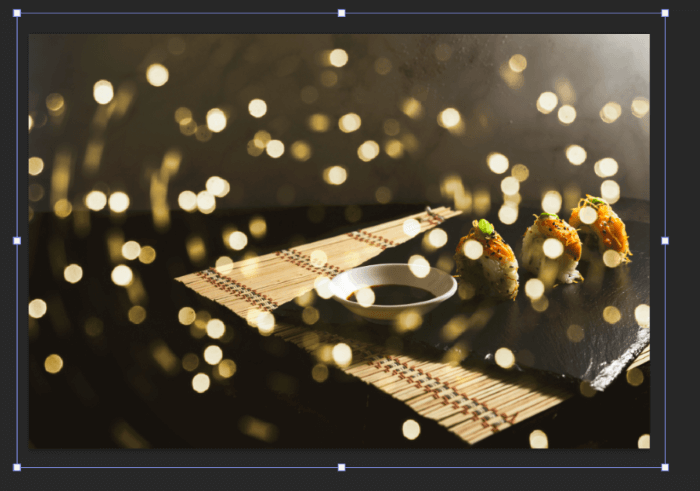
My overlay image is smaller than the original image. I want it to cover the whole image so I need to resize it. Sometimes you will want it to cover only a portion of the base image. Whatever you need the process is the same.
With the bokeh layer selected, hit Control + T (Command + T) to open the Transform tool. A box will appear around the layer with boxes in the corner. Click and drag those boxes to change the size.
You can also flip the image horizontally or vertically by Right-Clicking within the image and selecting the appropriate command.
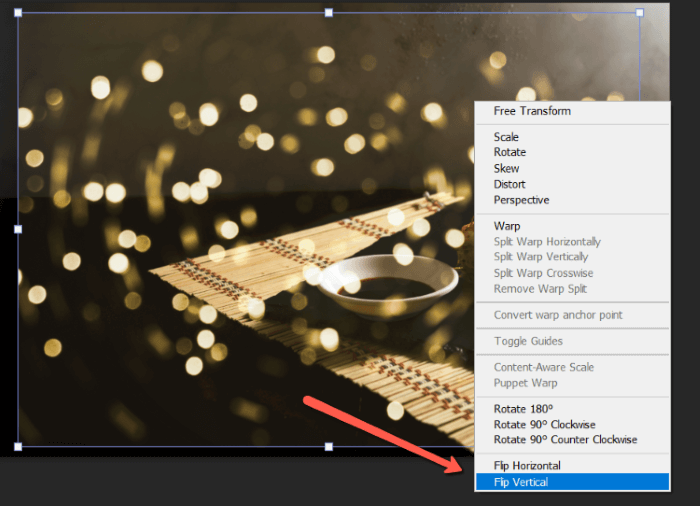
I’m going to make my bokeh layer just a little bigger than the base image.
Step 5: Fine-Tune the Image
The bokeh is a little distracting as it is so I’m going to make a few adjustments.
First, remove the overlay from parts of the image. This will help draw the eye to the subject rather than distract from it.
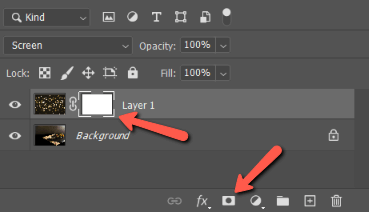
To do this, I’ll create a layer mask and brush away where I don’t want the bokeh dots. With the bokeh layer selected, I’ll hit the mask button at the bottom of the Layers panel. A white mask will appear on the bokeh layer.
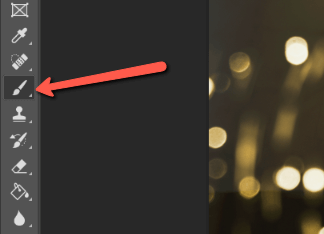
I select a brush by hitting B on the keyboard or selecting the Brush tool from the toolbox on the left.
Now I’ll paint over the areas where I want to remove the overlay with black as the foreground color. I don’t want to clear away too much of the bokeh or it will look unnatural, so I’ll just carefully remove the most distracting dots.
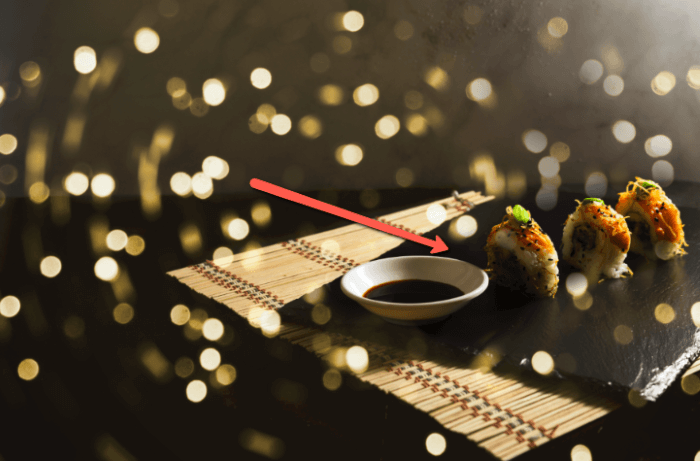
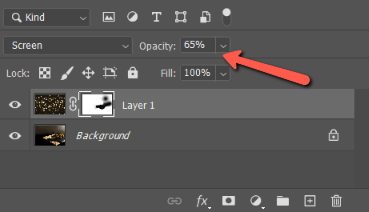
Now the view of the sushi isn’t so cluttered, but the effect still looks cool. It’s a little strong, though. To fix that, I’ll bring down the opacity of the layer by changing the percentage in the opacity box. Learn more about this in our opacity tutorial.
I’ll set it at 65%.
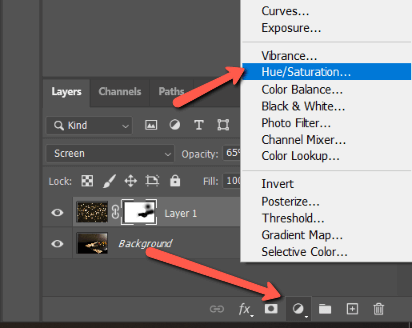
To finish it off, I will adjust the color a tiny bit to better match the base image. Click the adjustment layer button at the bottom of the Layers panel. It looks like a half-filled circle. Then choose Hue/Saturation.
In the panel that pops open, clip the adjustment layer to the overlay layer. This will tell Photoshop to only apply the adjustments to the overlaid image.
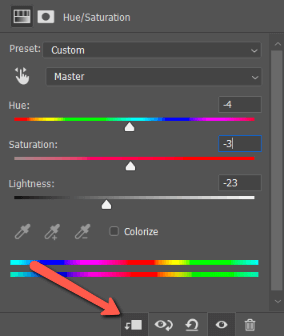
Then adjust the Hue, Saturation, and Lightness until you get a look that you like. Here’s my final image followed by the image I began with for comparison.
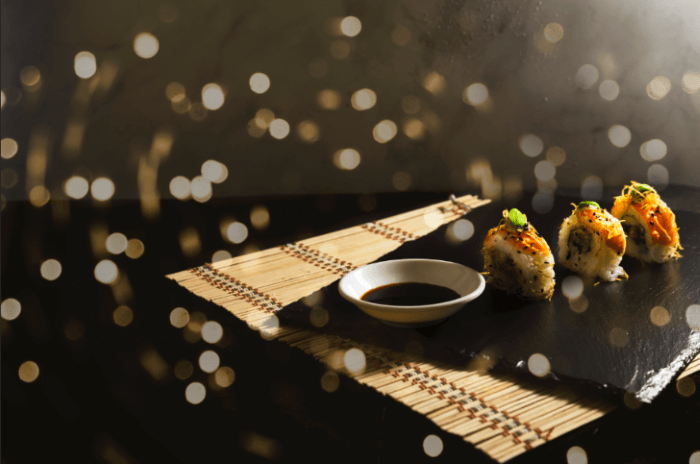

It adds a nice touch of sparkle, don’t you think?
Ready to learn more about the amazing things you can do in Photoshop? Check out our tutorial on how to make an image black and white except for one color!
About Cara Koch