How do I get my image to do something different?
One of the most basic tenets of Photoshop is the ability to manipulate images. You’ve no doubt seen some incredible images of impossible things fashioned by Photoshop masters.
Hello! I’m Cara and though I wouldn’t rank myself up there with the great Photoshop masters, I’ve spent hundreds of hours working on my own projects in Photoshop. One of my favorite tools that I use most often is the Transform tool.
It allows you to resize, rotate, skew, distort, and change the perspective of any image in Photoshop. It’s pretty cool! Let me show you how it works.
Note that the tutorial and screenshots below are from the Windows version of Photoshop CC. If you are on a Mac, they can be different.
Table of Contents
5 Ways to Use the Transform Tool in Photoshop
There are various ways to transform an image with the Transform tool in Photoshop. Let’s dive in and look at how it works with this image I downloaded from Pexels.com.
Before showing you what you can do, you’ll need to find the Transform tool first.
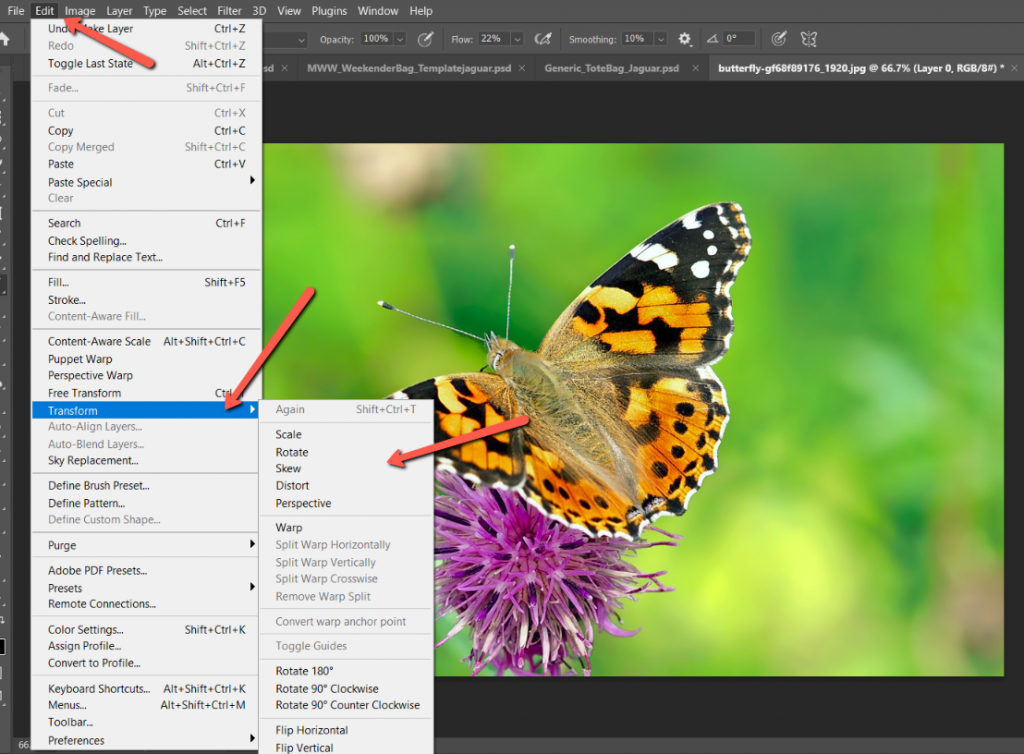
Access the Transform tool and its various options through Edit in the Menu bar. Scroll down and hover over Transform then choose the appropriate option from the flyout menu.
What if the Transform option is grayed out? This will happen if you try to transform a background layer.
Check the Layers panel. A background layer will automatically be named Background and there is a little lock icon on the right side of the layer.
To unlock the layer, click the lock icon. The layer will rename itself Layer 0, the lock will disappear and when you go into the Edit menu, the Transform command will be available.
Once you have the Transform tool active, you can switch to the different types of transformations by right-clicking within the image. It’s a little quicker than digging through the Edit menu every time.

1. Scaling an Image
First up, let’s look at resizing an image in Photoshop. Keep in mind that if you make an image smaller, information is lost. If you then decide to make it bigger again, Photoshop will have to make up information, resulting in image quality loss.
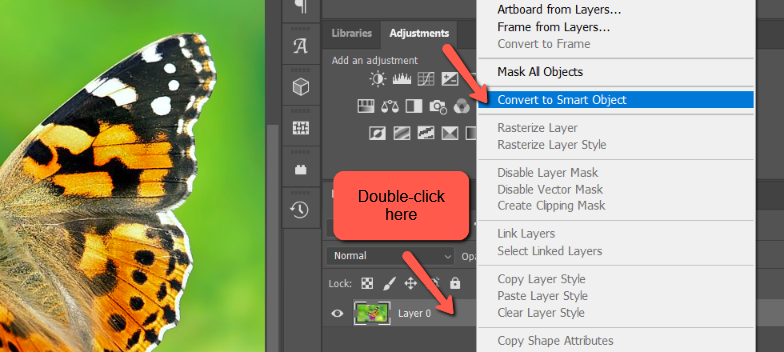
To avoid this problem, turn your layer into a Smart Object before resizing. To do this, right-click on the layer and choose Convert to Smart Object from the menu.
The image is placed inside a container of sorts, which allows you to scale the image up and down without quality loss.
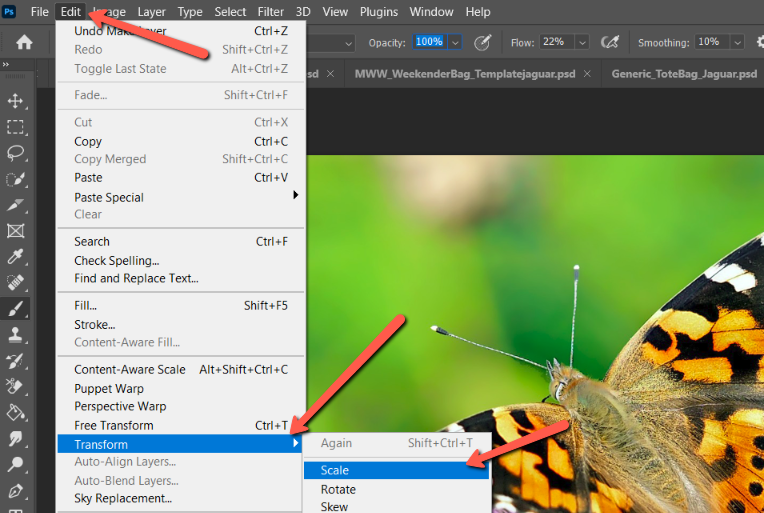
Go to Edit, hover over Transform, and choose Scale. This tool allows you to resize your image.
A blue box will appear around your image. Grab any of the white box handles and drag to resize the image. Notice that the background appears transparent if you make the image smaller.
Photoshop automatically resizes the image proportionately. If you want to resize the image disproportionately hold the Shift key while dragging.
If you want the image to resize proportionately around the edges (such as to add a border), hold the Alt or Opt key while dragging.
2. Rotating an Image
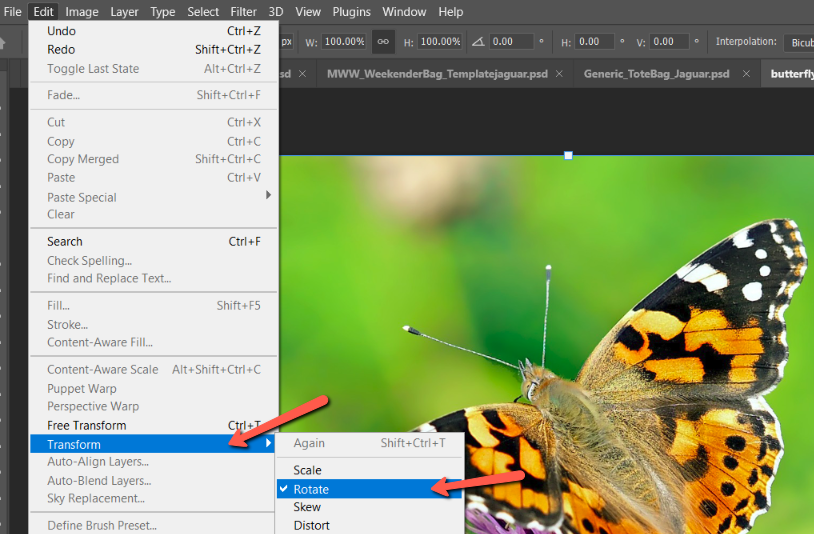
The next option in the Transform tool is to rotate your image. Again, go to Edit, Transform, and choose Rotate.
Hover the mouse near one of the handles and you’ll see it turn into a double-headed 90-degree arrow. Click and drag to rotate the image. Hold Shift while dragging to rotate in even 15-degree increments.
You can also type a specific angle into the box in the Options bar to jump right to it.
A Word About Reference Points
By default, the image rotates around a reference point in the center of the image. But what if you want to rotate around a different point?
Activate the reference point control by clicking the checkbox in the Options bar.
Instead of sticking with the default center point, I moved it up to the top middle. Notice how the image rotates around the new point?
You can also grab the reference point and place it where you want on the image. You are not limited to the 9 points Photoshop offers.
3. Skewing an Image
Skewing an image is kind of interesting. Choose the Skew option either through the Edit menu or by right-clicking on the image with the Transform tool active.
To skew evenly, grab one of the middle points and drag it to the left or the right.
To skew one of the sides either horizontally or vertically, grab one of the corner points and drag it in the desired direction.
4. Distorting an Image
Distorting images is pretty fun and for this one, let’s cut out the butterfly and get it by itself.
Right-click or go through the Edit menu to access the Distort option. Grab the handles to move around parts of the layer to reposition/reshape your object.
Original:
Distorted Butterfly:
5. Changing the Perspective
Finally, let’s take a look at the Perspective option. This one allows you to change the perspective of the image or layer.
Whew! That was a lot of fun and this poor butterfly sure got a workout! Transforming an image in Photoshop gives you a lot of options for image manipulation. Have fun turning your images into pretzels!
Curious about what else you can do in Photoshop? Check out how to add fog to your images with this tutorial!
About Cara Koch