Seems like everything is getting smart these days. Smart TVs, smartphones, smart thermostats, and even smart power strips. It only makes sense that Photoshop would jump on the bandwagon as well.
Hello! I’m Cara and as a professional photographer, I’ve thought that Photoshop is already pretty smart. So what specifically is a smart object in Photoshop? Why convert elements in the image to smart objects?
Let’s dive in to learn about smart objects and how you can use them to improve your Photoshop experience.
Table of Contents
What is a Smart Object in Photoshop
In Photoshop, a smart object is a layer that contains image data from vector and raster-type image files. This includes Photoshop and Illustrator files.
The image data is perfectly preserved within the smart object and is not destroyed as you make changes. This non-destructive style of editing allows you to make changes like resizing, distorting, skewing, and more without affecting the image quality.
Plus, you can add non-destructive filters to layers and be able to come back and make adjustments at any time.
All in all, it’s a useful feature.
Note: the screenshots below are taken from the Windows version of Photoshop CC. If you are using the Mac version, they will look slightly different.
How to Convert to Smart Object in Photoshop
Converting a layer to a smart object is simple and can be done in a few ways. Which method you use will depend on your objective.
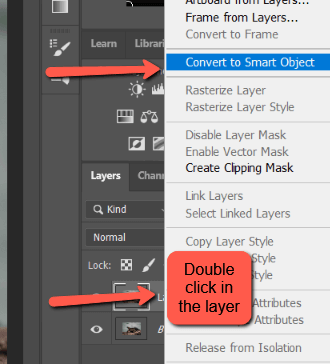
First, you can right-click on the layer you want to convert and choose Convert to Smart Object. You can also go to Layers in the menu at the top, hover over Smart Objects and choose Convert to Smart Object.
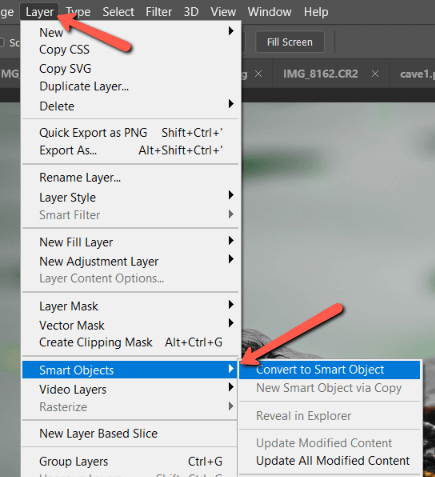
If you want to bundle several layers together, select all the layers you want to convert. Then go to Layer, hover over Smart Objects, and choose Convert to Smart Object.
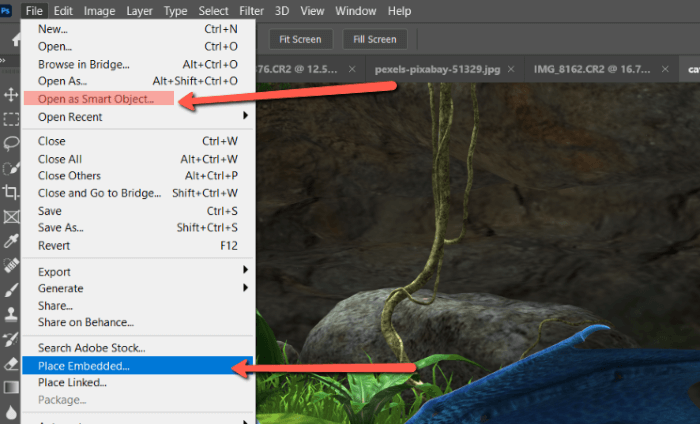
You can also directly open a file as a smart object from the File Menu up in the menu bar. Use Place Embedded to import files as a smart object into an open Photoshop document. Or open an entire file as a smart object by choosing the Open as Smart Object command.
Advantages of Using Smart Objects
There are many advantages of using smart objects, and I’m going to talk about two of the most important ones in my opinion.
1. Retaining Image Quality
One of the big advantages is that you can resize images, distort, skew, and more without losing image quality.
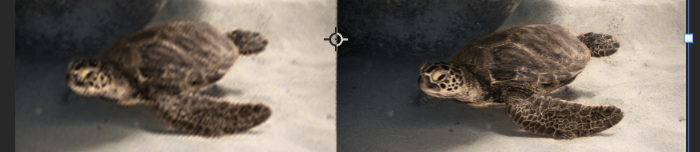
Take a look at the comparison photo below I got from Pexels.com. This is the same photo in two different layers. The one on the right, I converted to a smart object.

This is what they look like after I resized and rotated them with the Transform tool a couple of times. The one on the right (smart object) looks unchanged, while the one on the left has experienced a significant loss of quality. A win for the smart object!
2. Apply Non-Destructive Filters
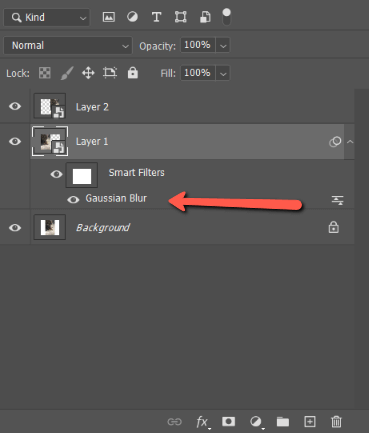
Another advantage is being able to come back and make adjustments to filters. All you have to do is double-click on the applied filter in the box where it appears under the layer in the layers panel.
In this case, I would double-click on where it says Gaussian Blur to make adjustments to the filter.
A third advantage is that you can link layers together and make synchronized adjustments across all layers. Any adjustments you make to the source file will be simultaneously applied to all linked smart objects.
Limitations of Smart Objects
Keep in mind that one major disadvantage of using smart objects is that you can’t make any adjustments that alter the pixel data. This means you can’t perform actions such as dodging and burning, cloning, or painting.
If you need to make these kinds of changes, you can clone a new layer on top of the smart object layer or work with a duplicate.
Regardless, smart objects can be very useful in the right circumstances. It’s simply a matter of choosing carefully when to use smart objects and when to avoid them.
Interested in learning more cool things about Photoshop? Be sure to check out more of our tutorials and articles!
About Cara Koch