
With the help of the Photoshop Perspective Warp tool, you can have complete control over the perspective of your photographs because the tool is created especially for architectural photography and other building-related pictures where perspective distortion frequently needs to be fixed.
But you can also use it to manage perspective concerns in composite editing, product photography, and more.
I have over five years of Adobe Photoshop experience and am Adobe Photoshop certified. In this article, I’ll teach you how to use perspective warp in Adobe Photoshop.
Key Takeaways
- If you want your image to be “lifelike” and feel very surreal the perspective warp tool is a great way to enhance your images.
- This tool is great for crooked images or straight images that need to be changed from a different angle.
How to Use the Perspective Warp Tool in Photoshop
Have the image your wish to use up and ready on your screen using the latest version of Adobe Photoshop. I would also suggest converting your image to a smart object if it isn’t already, then follow the steps below to use Perspective Warp in Photoshop.
Step 1: Start by selecting Layer > Duplicate Layer on the Layers menu in Photoshop to duplicate the background layer.
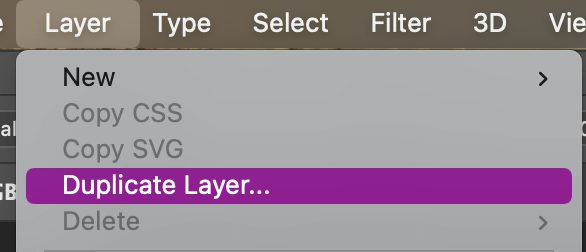
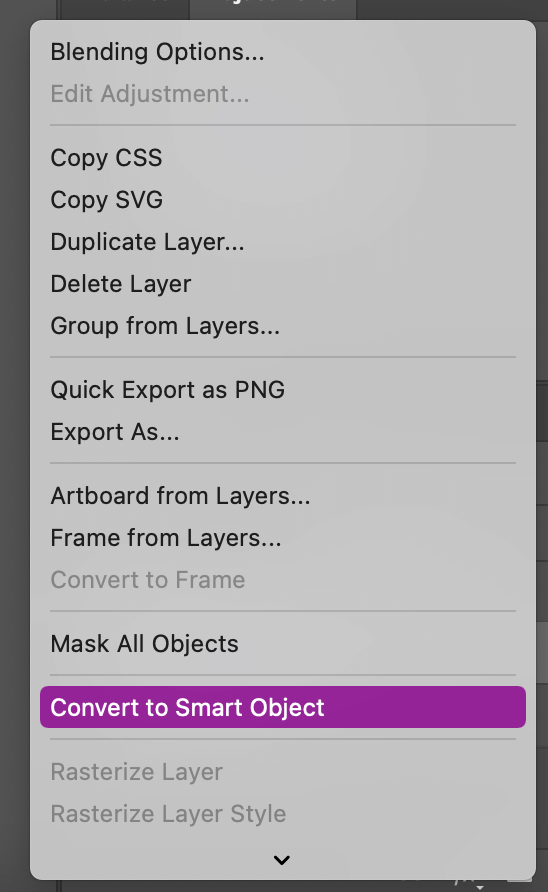
Then select Convert to Smart Object by right-clicking on the duplicate layer.
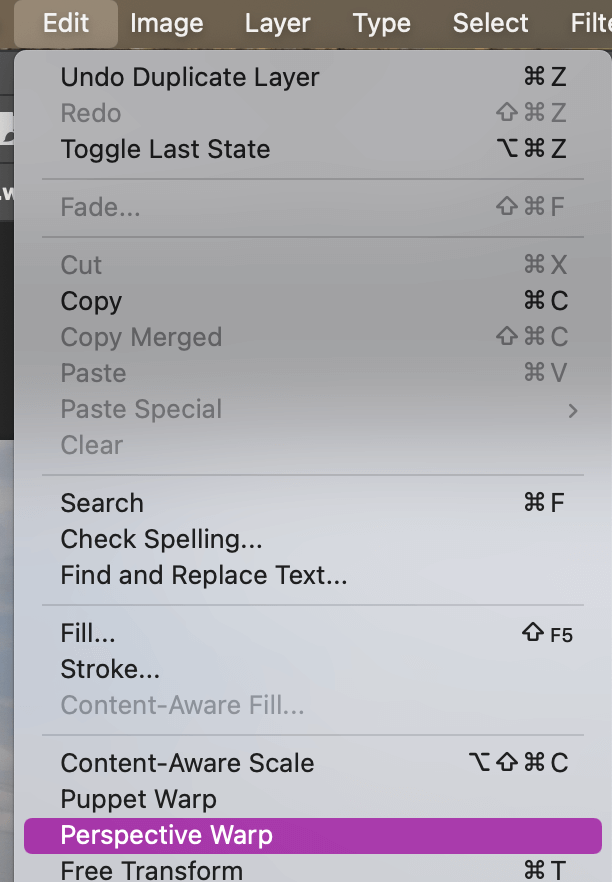
Step 2: Go to Edit > Perspective Warp, you can turn on perspective warping. It will introduce a new workspace (and you might get a pop-up window with instructions, which you can read and then close).
Step 3: You’ll see that there are two choices in the toolbar menu: Warp and Layout. The layout should be chosen when you initially open the Perspective Warp tool. This is the mode you’ll use to draw the quad grids.
Step 4: Click and drag the pointer across the canvas to create a quad. Just make one grid, then let go of the mouse. The end product should resemble this:
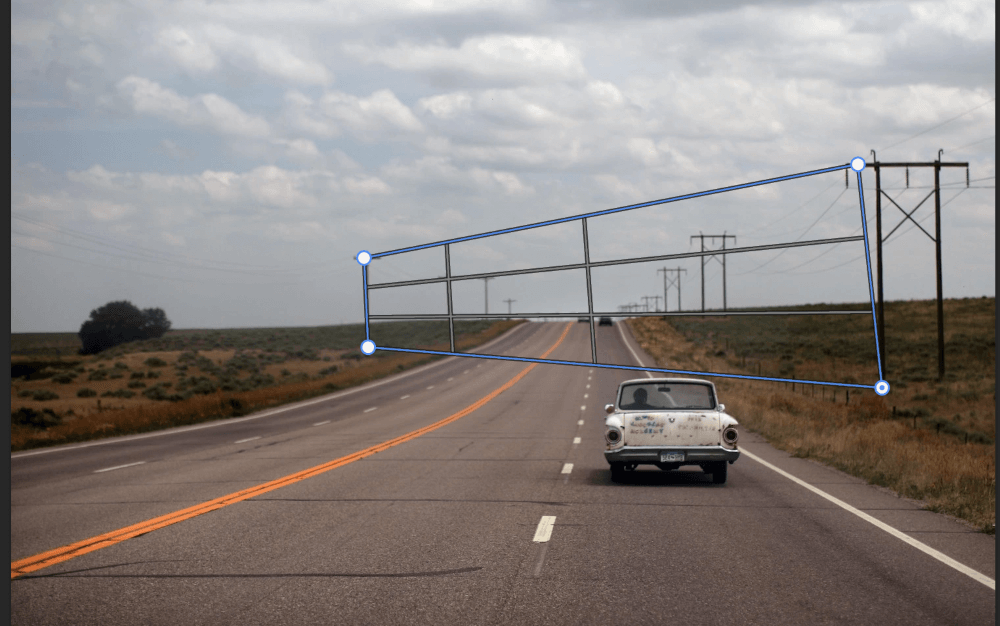
You won’t need to match the grid to the subject just yet because you can do that in the next stage.
Step 5: The overall quad shape can be changed by clicking and dragging the grid handles. Making the quad align with the borders of the object you want to control is the idea.
Step 6: Once your quads are prepared, move from Layout to Warp in the Perspective Warp menu or you can use the keyboard shortcut W.
By clicking on the icons in the top bar, you can select one of the auto-correct alternatives. If not, you can manually change the perspective by clicking and dragging the quad handles.
Press the L key to return to the Layout mode if necessary. When finished tap Enter on your keyboard, or press the checkmark.

Step 7: And that’s it! Your image should now be warped and look more real. If empty areas remain on the frame’s edge after this manipulation, either crop the image to get rid of them or use the Content-Aware Fill tool to fill them in.
Tip: You can also add more than one quad on your image to warp, just go through the same process on the photo once more to add a quad.
Final Thoughts
The perspective warp tool in Photoshop is an excellent tool for making any crooked edge look straight once more, even though the end effect may not always be a significant improvement.
Perspective warping is a very simple process that anyone can learn. It is really a great tool if your original images are a little lopsided or not as straight or curved as you would like them to be. Plus perspective warping can really change the look of a photo to draw the viewer’s attention to a certain area.
Any questions about perspective warping in Photoshop? Leave a comment and let me know.
About Aly Walters