
The aspect ratio of a photo is an important element, especially when printing images. If the aspect ratio is incorrect for the frame you want to use, one side of the image will be too long or too tall and your photo won’t fit in the frame.
Some programs might even automatically crop the image to make it fit, but they might do it differently than you would prefer.
Hello! I’m Cara and I’m here to assure you that Photoshop makes it simple to change your photos to the right aspect ratio. This will ensure that your photo is exactly how you want it when it’s time to print or even just creatively crop so the subject stands out better.
In this article, you will learn how to change the aspect ratio when cropping an image. There are three essential steps and I’ll go over the steps in detail along with some tips.
Note: I use the Windows version of Photoshop. If you are using a Mac, the workspace will look slightly different from the screenshots displayed here.
Table of Contents
Step 1: Figure Out the Aspect Ratio You Need
You’ll need to know which aspect ratio you want to use for the final image. If you’re planning to frame it, you must base your calculations on the frame. If you’re creatively cropping, you can choose whatever aspect ratio you want.
To figure out the aspect ratio of an image, you simply write the width over the height as a fraction, then reduce it to the smallest possible numbers.
For example, say you have an 8×10 frame. You need to write 8 by 10 as a fraction, which is 8/10. You can divide both by 2 which gives you 4/5. Thus, the aspect ratio is 4×5.
If the math is a little too confusing, don’t worry about it, you can let Photoshop figure it out for you.
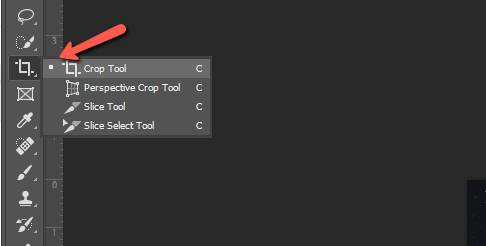
Step 2: Select the Crop Tool
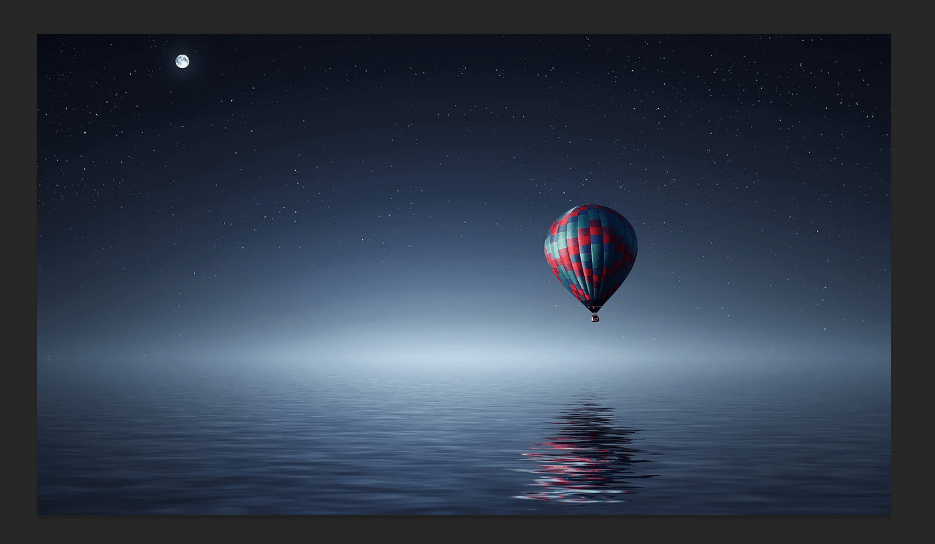
To demonstrate, I’m going to use this image that I downloaded from Pixabay.com as an example.

It’s a really awesome image, but there’s some extra space at the top and bottom. Let’s see what it would look like using a narrower 16 x 9 aspect ratio.
Select the Crop tool from the toolbar on the left.
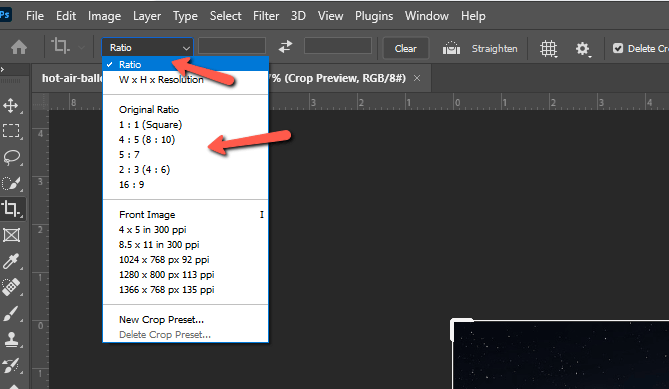
Step 3: Input the Values
Up in the Options menu, and click the arrow to open the dropdown menu. To select your own aspect ratio, choose Ratio at the top. You can also choose one of the available presets.
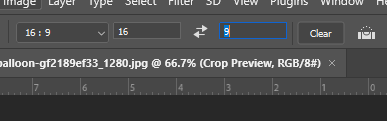
So let’s choose 16×9 (or choose Ratio and write 16 and 9 in the boxes). Keep in mind the first number is the width and the second is the height. If you want to switch directions, press the double arrows between the boxes. Then the tool will switch to 9×16 which means 9 wide by 16 tall.
A preview box will appear around your image.
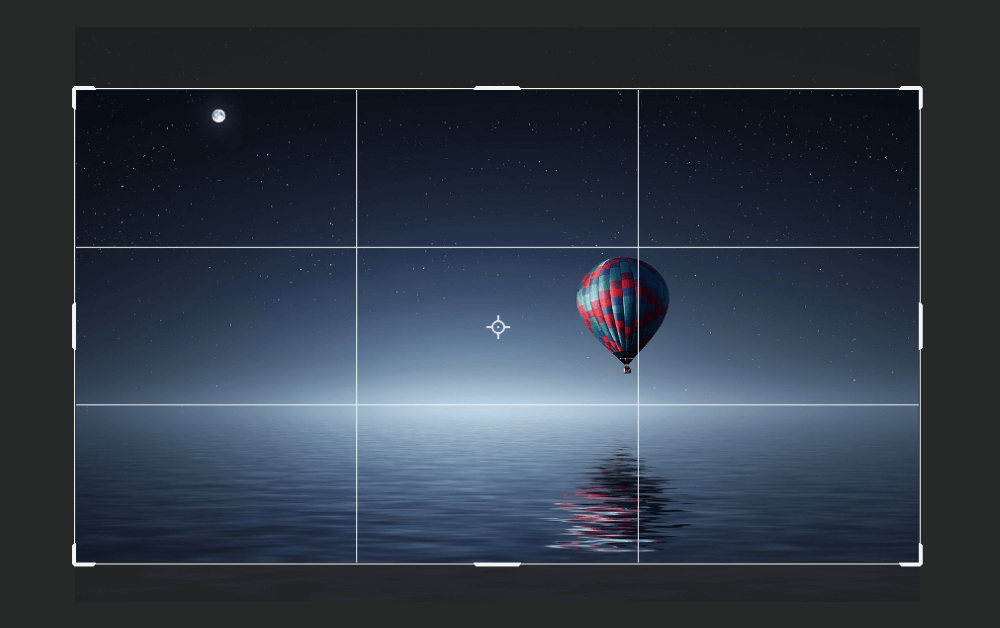
Click and drag your image to position it exactly how you want. You can also grab the handles in the corners to crop the image tighter if you prefer. Once the image is in position, press Enter or click the checkmark in the Options bar.
Voila! The image is now cropped to your new aspect ratio!
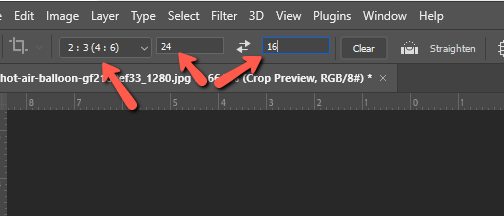
What if, as we mentioned earlier, you’re having trouble figuring out the aspect ratio of your frame? Let’s say your frame is 24×16. Remember, you just have to write the dimensions as a fraction 24/16, then reduce it to the smallest possible numbers.
In this case, 3/2 or 3:2 is an available aspect ratio preset in Photoshop.
However, you don’t even have to do the math. Just choose Ratio from the dropdown and input 24 and 16. Photoshop will automatically choose the right aspect ratio for you. Super handy!
If you’re going to be printing images, you may need to know how to change the DPI to ensure the correct resolution. If you have no idea what I’m talking about, check out this tutorial to learn about DPI, PPI, and what you need to know for printing!
About Cara Koch