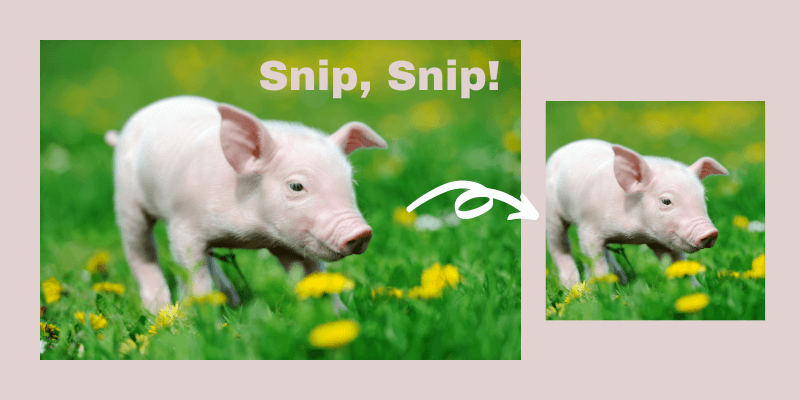
Cropping a photo in Photoshop can’t be too complicated, right? After all, you’re probably already a cropping pro on your phone as you post photos to Instagram.
Hello! I’m Cara, a professional photographer, and lover of all things photography. While I always strive to get my composition correct in a camera, sometimes a photo can use a bit of adjusting in post-processing. You might want to straighten a horizon line or focus closer on the subject.
As you might imagine, Photoshop offers extra options that are more than your average crop tool. Learn how to crop an image in Photoshop here!
Note: the screenshots below are taken from the Windows version of Photoshop CC. If you are using the Mac version, they will look slightly different.
Table of Contents
Where is the Crop Tool in Photoshop
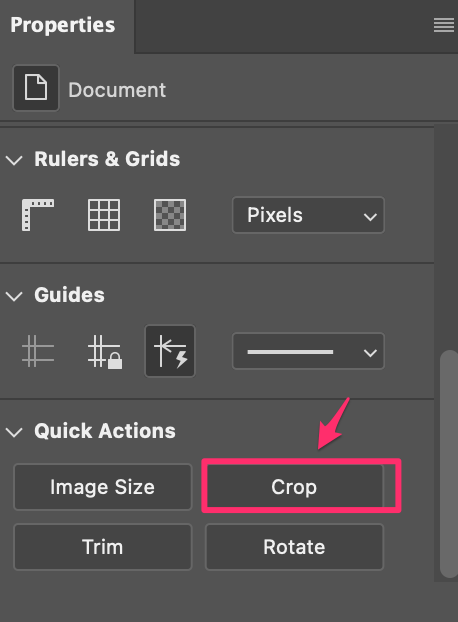
The quickest way to find the Crop Tool is by using the keyboard shortcut C. You also can find the Crop Tool in the Properties > Quick Actions panel when you select an image, or from the toolbar.
How to Use the Crop Tool to Crop an Image in Photoshop
Now that you’ve found the Crop Tool, follow the steps below to crop your image.
Step 1: Choose the Crop Tool
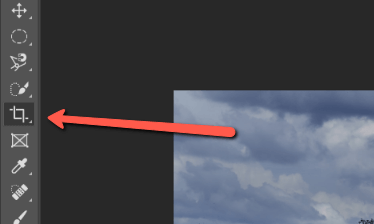
Open the image you want to crop in Photoshop and select the Crop tool from the toolbox on the left side. You can also press C on the keyboard. The cropping border will appear around your image.
Step 2: Set Your Aspect Ratio
If you want to maintain the same aspect ratio (the same width to height ratio) select Original Ratio from the dropdown menu in the options bar at the top.
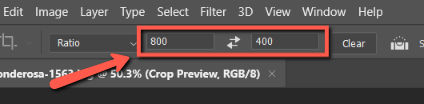
You can also choose from several popular image aspect ratios including 4×5 (Instagram), 5×7, 16×9, and others. If you want the freedom to crop the image to whatever height and width you want, select Ratio.
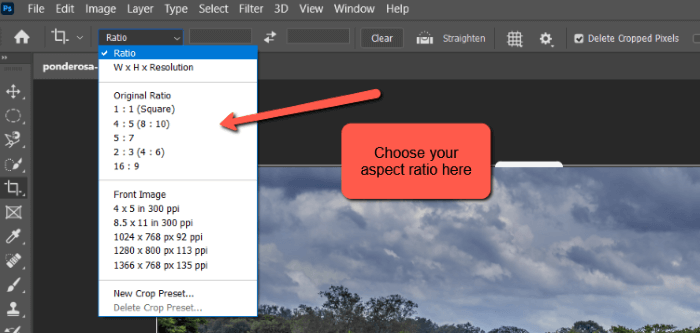
Alternatively, you can choose a specific pixel size in the boxes to the right of the aspect ratio dropdown box. The first box is the width and the second box is the height.
Step 3: Crop the Image
With your aspect ratio set, you can grab the handles in the cropping border to move it to where you would like to crop the image. Once you’re happy with the framing, hit Enter or click the checkmark on the right side of the Options bar.
Special Features of the Crop Tool
That’s it! The basic crop is simple to use and very similar to what you may have already used on your phone.
However, this is Photoshop we’re talking about here. There is a lot more you can do with the crop tool than simply cut down your image.
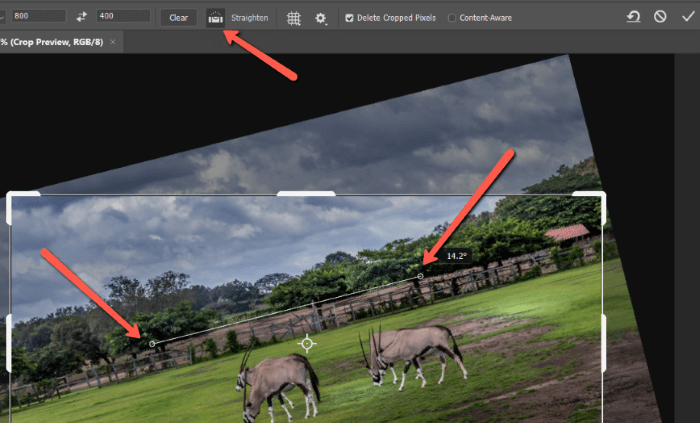
Straighten
The next feature to the right of the sizing boxes is the straighten tool. Click the tool to highlight it, then you can select two points on the image.
Once you’ve selected your two points, the software treats them as the horizon line and automatically rotates your image to make the line straight.
You can also straighten the photo manually by hovering just outside one of the image corners till the bent arrow appears. Click and drag to rotate to the desired position.
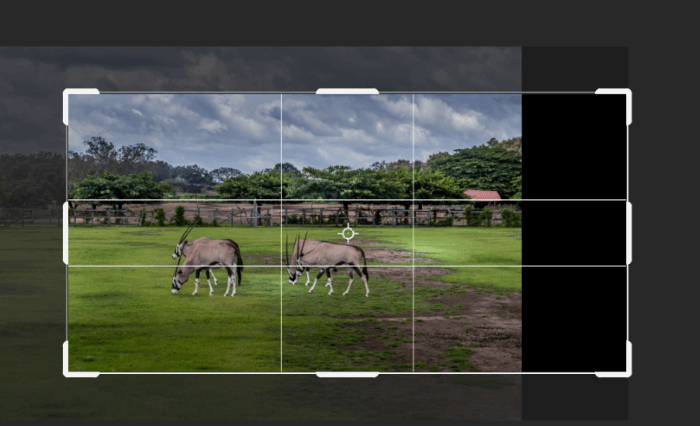
Overlays
The next tool is helpful for creating strong compositions. You may be aware of composition rules such as the rule of thirds or the golden ratio. It can be hard to freestyle it and make sure your subject falls in the area of the image where it should.
When cropping, you can overlay these compositional guides to give you a solid idea of where to place your subject as you crop.
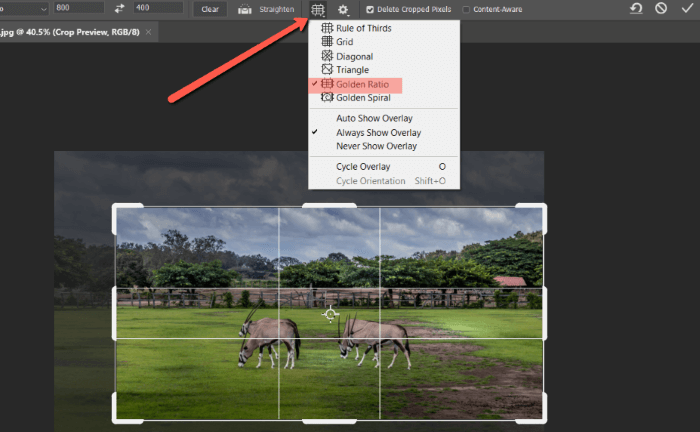
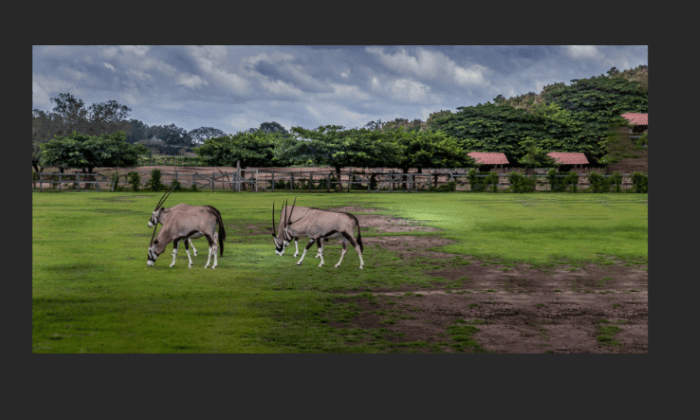
In this image, you can see that I’ve got the Golden Ratio overlay selected. Notice the lines that appear over the image. I can now move the cropping border around and/or resize the image until I get those antelope to fall on the intersecting lines of the Golden Ratio, then crop.
Delete Cropped Pixels
The Delete Cropped Pixels check box allows you to decide whether you want to destructively or non-destructively crop the image. In other words, if you crop the image while the box is checked, the pixels are erased.
If the box is not checked, the pixels are preserved. You can still see those pixels outside the cropped area at a later point if you desire.

Content-Aware
The Content-Aware box is one of those awe-inspiring Photoshop features that makes your life as a photographer so much easier.
For example, what if you need to rotate an image to straighten the horizon line, but in so doing you cut off a corner of the image that you want? Or what if you just need a tiny bit more image on the right to get your subject onto one of those intersecting lines in the composition overlay?
You can make that happen by checking the Content-Aware box.
With this box checked, you can let the cropping border hang off the edge of the image. When you hit crop, instead of having an empty space, the software will do its best to fill it with pixels that match the image.
This:
Becomes this:
It’s not perfect, but it’s still pretty cool and definitely useful for filling small portions of the frame. It also does a better job when the background isn’t so busy. For example, adding more sand to a beach.
Cropping Images in Photoshop
There you have it! As you might have expected, the crop tool in Photoshop is no ordinary crop tool. You can get your basic crop, but there is plenty more you can do with it.
Looking for more great Photoshop tips and tricks? Be sure to check out more of our blogs!
About Cara Koch