Knowing how to use Photoshop to create a glossy effect allows you to add luster to the subjects in your digital photos and other images.
You can add gloss in Photoshop by employing manual approaches such as election and painting tools. You can also apply a filter to your image, which instructs Photoshop to do calculations that imitate a gloss look.
My name is Aly, I have been using Adobe Photoshop for over five years now, and have been certified in Photoshop. In this article, I am going to be showing you two ways to make something look glossy in Photoshop.
Table of Contents
Key Takeaways
- Adding a glossy filter can help to draw the eye more into your image.
- This effect may not be appropriate for all images and can produce an unnatural appearance.
Method 1: Automatic Gloss
This is one of the techniques you can use to add a glossy filter over an image. Although this technique may not work on all images, I like to show how to use it because it can be a helpful tool when learning Photoshop and is useful in a time pinch.
Step 1: Open the photo that you would like to add gloss texture to in Photoshop. Most photos will work with this filter as long as you don’t have any previous effects on the image that could distort the new filter.
Step 2: Once your image is open in Photoshop, navigate to the top menu bar and click on Filter > Render > Lighting Effects to display a dialog box where you can enter settings to create a glossy look.
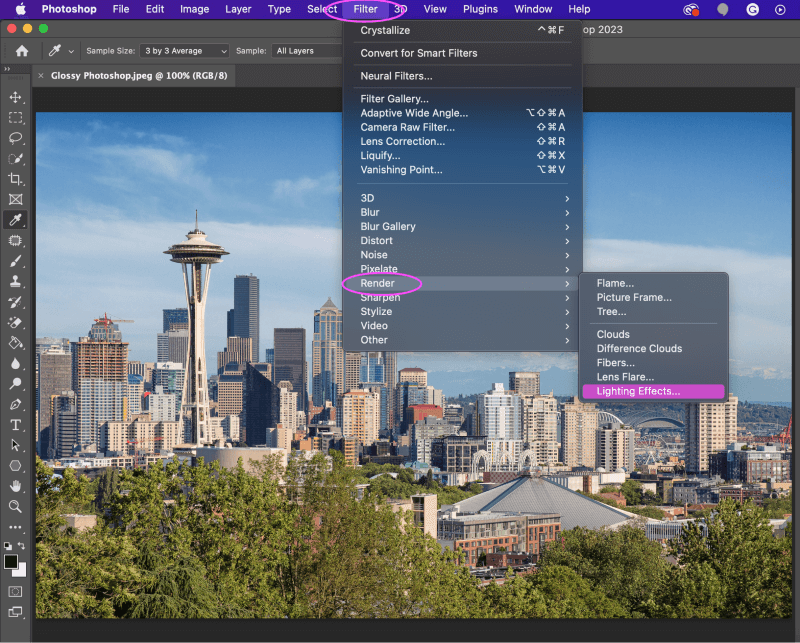
Step 3: A menu option will pop up, now these settings that I’m showing you are specific to my image, so experiment with the sliders to find the correct level of gloss that you are looking for.
Once you have selected your levels on the sliders, hit Enter/Return or press OK at the top of the menu bar.
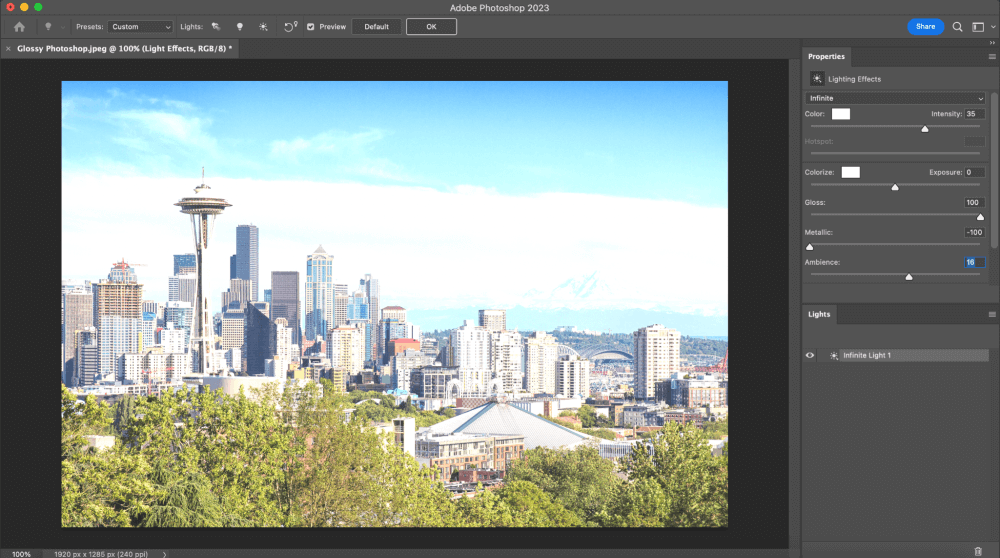
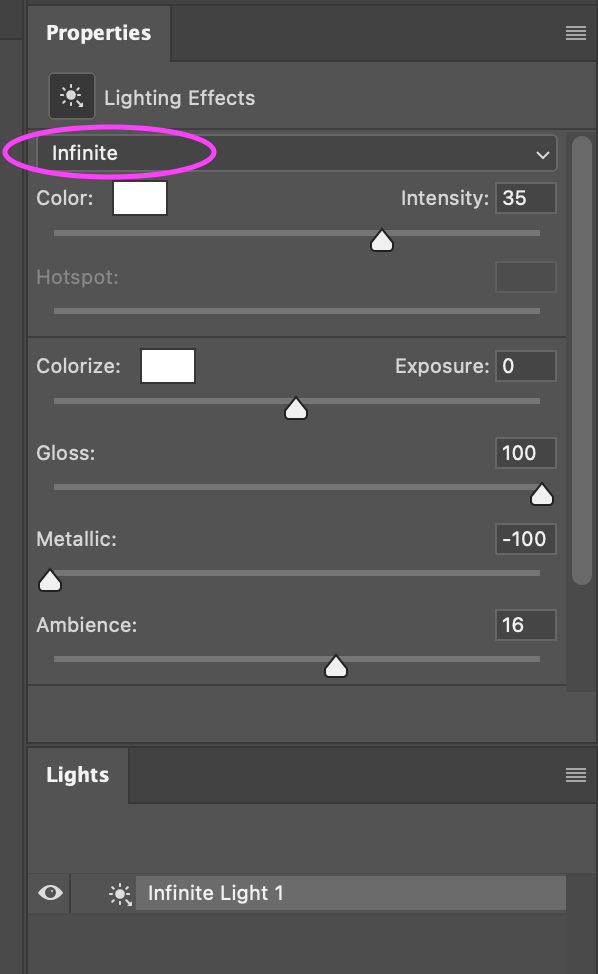
Step 4: If you want your entire image to be glossy and not just a section, find the drop-down bar right under lighting effects on the menu and set it to Infinite.
That is all for this technique, as I mentioned it may not work the best on every single image, but it does work to an extent. It’s good for the subtle effects of a gloss. Don’t worry if it didn’t work out, I have other methods to get that glossy effect on an image.
Method 2: Manually Creating a Gloss Effect
You can also manually add a gloss effect to an image by adding a new layer.
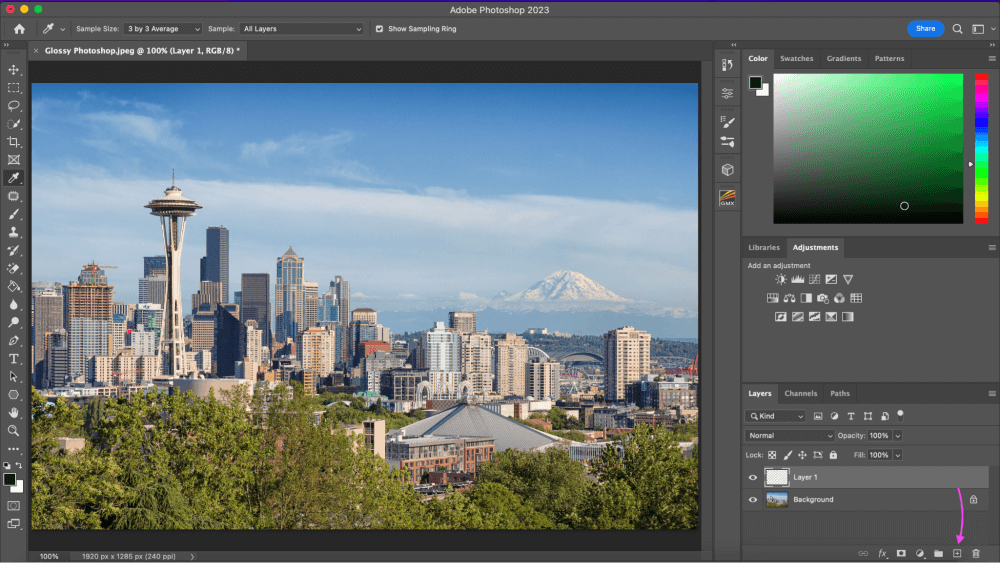
Step 1: Have the image you want to have the gloss effect on open in Photoshop, once you do that in the Layers box, click Create a New Layer and a new layer called Layer 1 will appear above the background layer shown below.
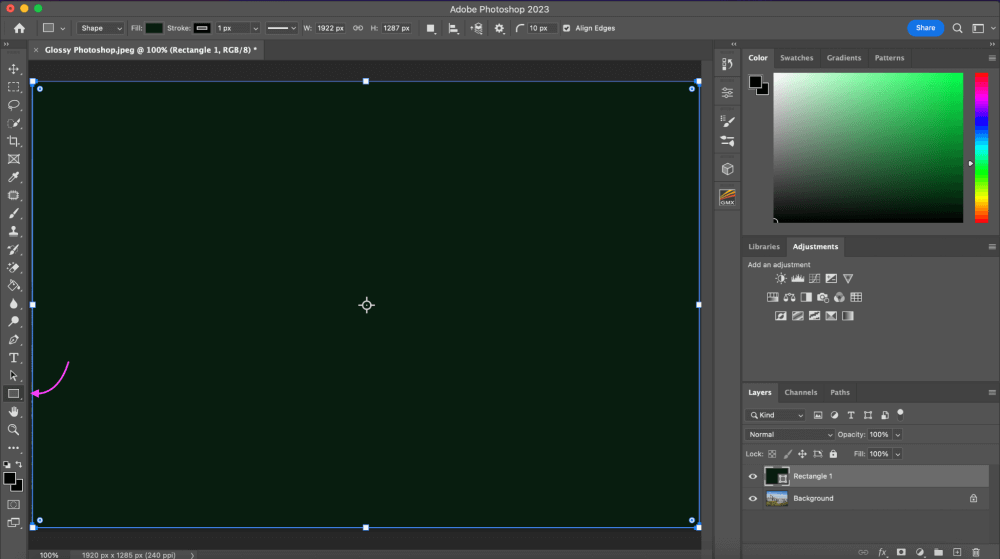
Step 2: Once you have created a new layer, we will go over to the left-hand side menu and find the Rectangle Tool under shapes. After you’ve selected the rectangle tool, click on your image and draw a rectangle to cover your entire image.
Don’t worry if your image is covered up by a black screen we will fix this in the next steps.
Step 3: With your image being covered we will now need to fix that to be able to see your image. We need to change the Fill and Stroke colors. You can find these by going into your Properties panel and finding fill and stroke.
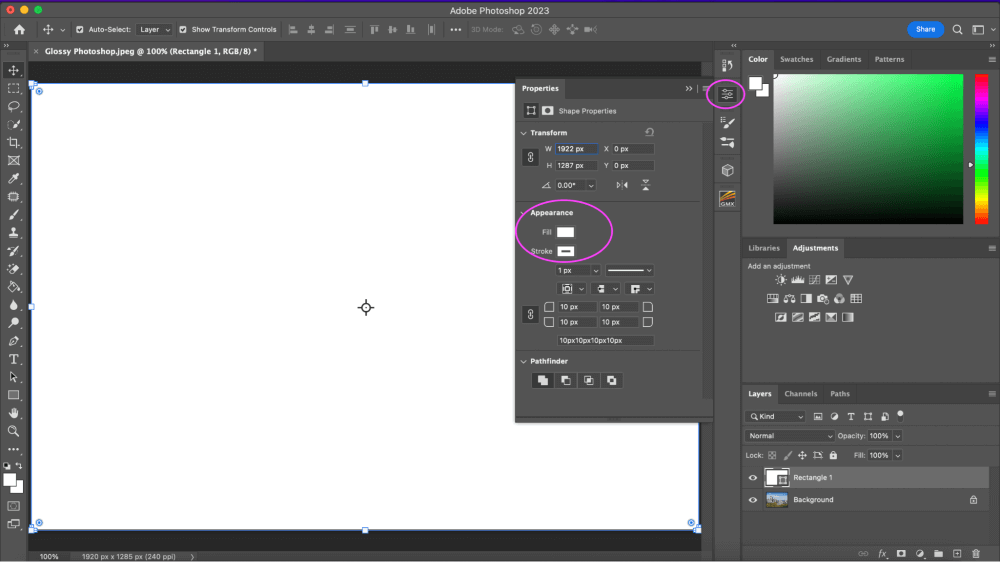
Step 4: Now, click on both the fill and stroke to change the color of the rectangle. It works best to change them both to white if you are going for a clear glossy look. If you want a colored glossy look change them to the color that you like and hit the Enter/Return key.
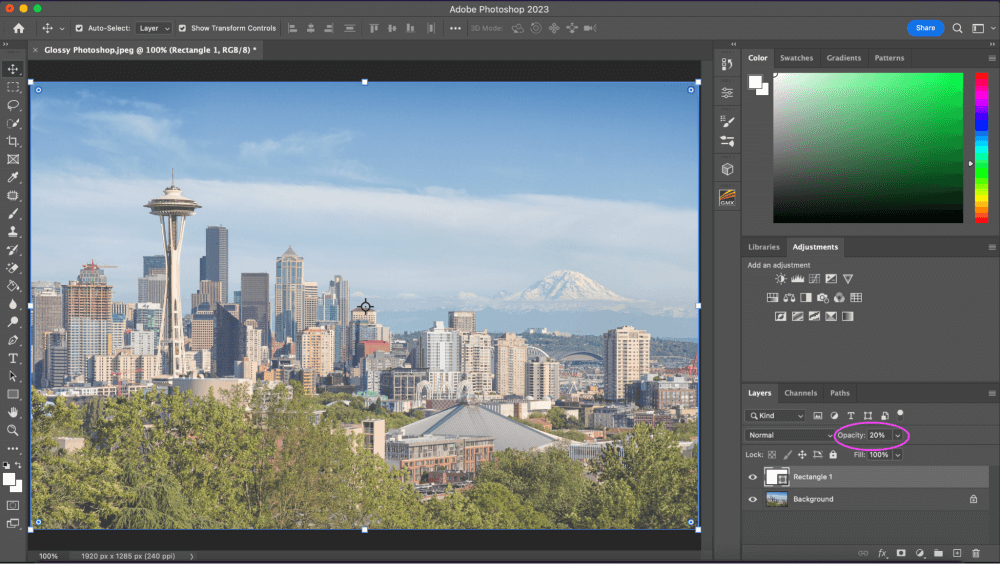
Step 5: We don’t want the white rectangle to cover up your image, so we need to turn the opacity down. In your Layers menu, you will see above the Opacity percentage.
The opacity is set to 100% by default. I set mine to 20% just to have a slight fogginess to it to help the glossy effect we will put on it.
Step 6: We now need to convert the layer to a Smart Object. Go to the top menu, select Layer > Smart Object > Convert to Smart Object or you can right-click on the rectangle layer and find Convert to Smart Object there as well.
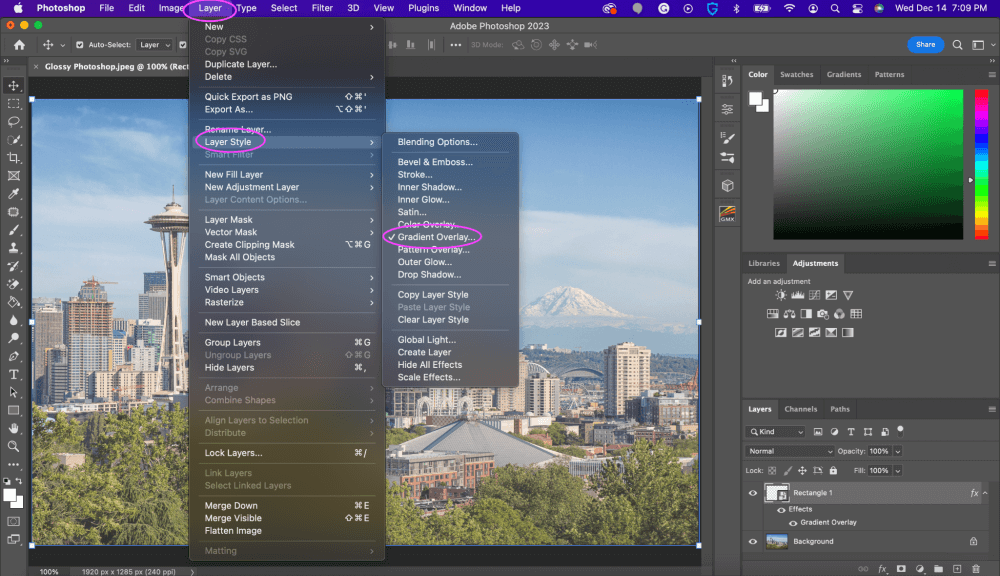
Step 7: After you have converted your layer to a smart object, go up to Layers > Layer Style > Gradient Overlay which will now add a glossy type effect to your image.
And now you have a glossy effect on your image! If you want it to be less glossy, click on the opacity percent and change it from 100% to whatever you think looks best for your photo. Pretty simple right?
Pro Tips
- Make sure to always convert your effect layer in our case the rectangle layer to a smart object. This implies that we don’t harm the original photo in any way and can always edit the already existing image if needed.
- Feel free to experiment with more layer styles other than gradient overlay, you might decide a different style looks better for your image.
Final Thoughts
After creating your glossy effect, you can adjust it by switching the color of the rectangle or by overlaying a texture or pattern. To give your glossy image a more three-dimensional appearance, you may also apply a drop shadow.
Using manual methods like those involving the selection and layering tools, you can produce a gloss effect in Photoshop. Alternatively, you can apply an automatic filter to your photo by instructing Photoshop to make assumptions that mimic the gloss look.
In Photoshop, there are many ways to create glossy effects, so play around and have fun! It’s worth the time and effort to learn these tools so they can be put to good use in the future on projects.
Any questions about making a glossy effect on an image in Photoshop? Leave a comment and let me know.
About Aly Walters