
Whenever you try to remove a background in Photoshop, the most annoying thing happens. This odd checkered background appears. It’s even more distracting than plain white!
Hey there, I’m Cara. Today I’m here to soothe your frustrations with Photoshop. If you try to remove the background of an image and the checkered background appears, you did it right and Photoshop is working correctly.
Even so, there are ways to change it or get rid of it. Let me show you how to remove the checkered background in Photoshop.
Note: I use the Windows version of Photoshop. If you are using a Mac, the workspace will look slightly different from the screenshots displayed here.
Table of Contents
What is the Checkered Background in Photoshop
First, let’s understand what we’re working with. That checkered background is the default view for how Photoshop represents transparency. The program can’t actually turn the background transparent. There’s gotta be something there.
So the default view is to use a checkered background. A solid color background to represent transparency could get confusing, but a checkered background is harder to mistake. Here’s what the default option looks like.
As long as you save your image as a PNG, the background will stay transparent when you export your image.
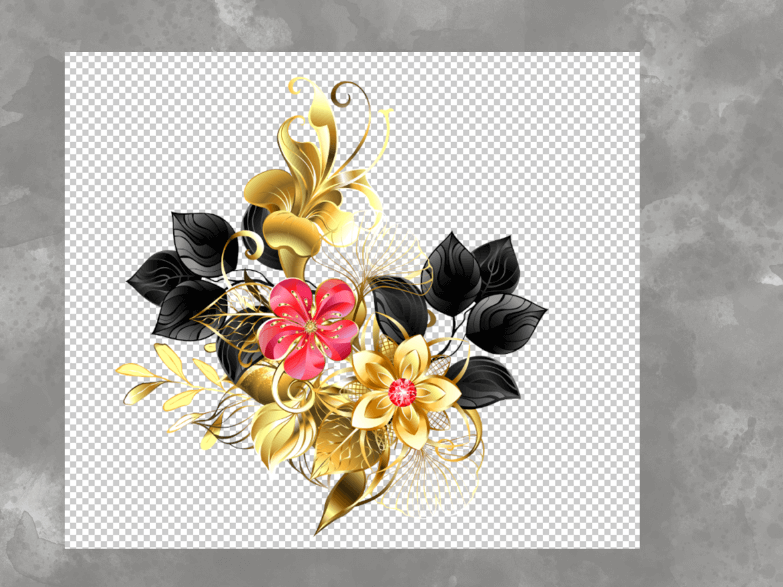
For example, I can place the flowers on top of this gray background and none of the checkered parts come with it.

Ever wondered why your images lose transparency when you export them? You’re probably exporting them as JPEGs and it will never work. JPEG doesn’t support transparency and will automatically add a white background to images containing transparency.
Once you understand the purpose of the checkered background, you may no longer be interested in “removing” it. Especially since, technically, it isn’t there to remove.
But, depending on your image, the checkered background might be too distracting as you work. Maybe it’s hard to see some details you’re working with because of the grid lines.
So let’s look at how to change it.
How to Change the Checkered Background in Photoshop
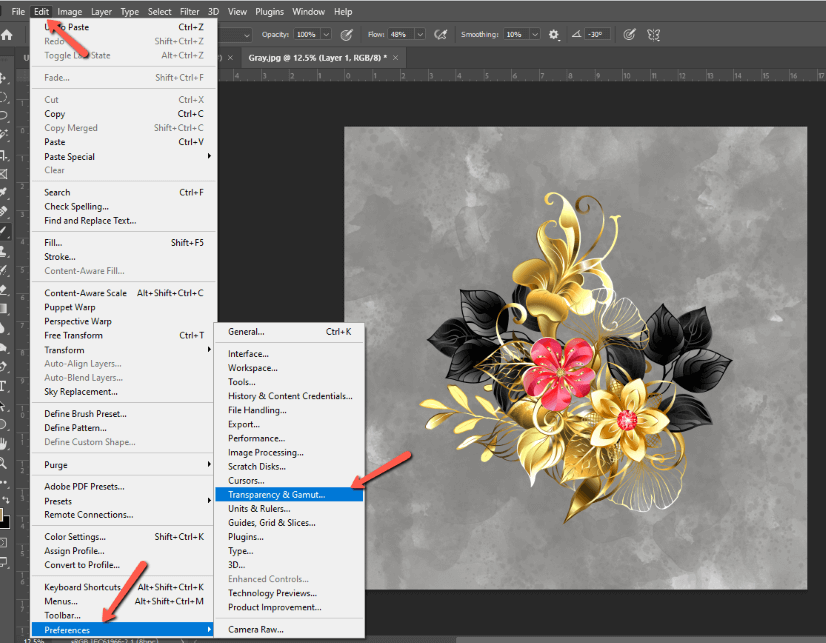
Photoshop gives you various options for how the transparent background can look. To make changes, go to Edit, hover over Preferences, and choose Transparency & Gamut. On a Mac, go to Photoshop > Preferences > Transparency & Gamut.
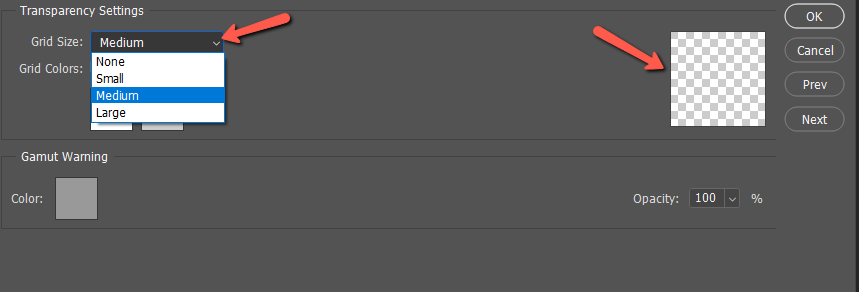
First up, in the Grid Size box, you can change the grid size. You’ll see a preview of how it will look on the right side of the dialog box.
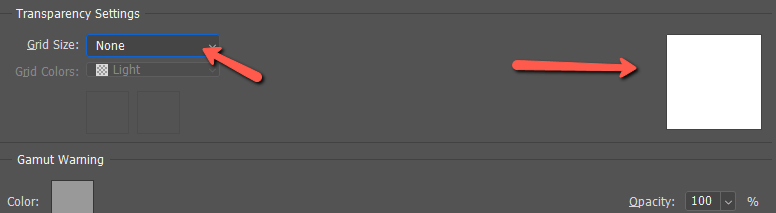
If you don’t want the grid to appear, choose None in the Grid Size box. However, the only option is a white background and this will be confusing with images that have white backgrounds.
Right under that, in the Grid Color box, you can choose light, medium, or dark gray. You can also change the grid color completely to red, orange, green, blue, or purple.
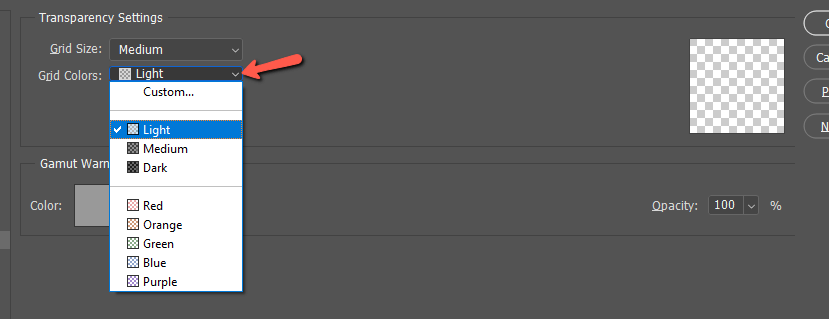
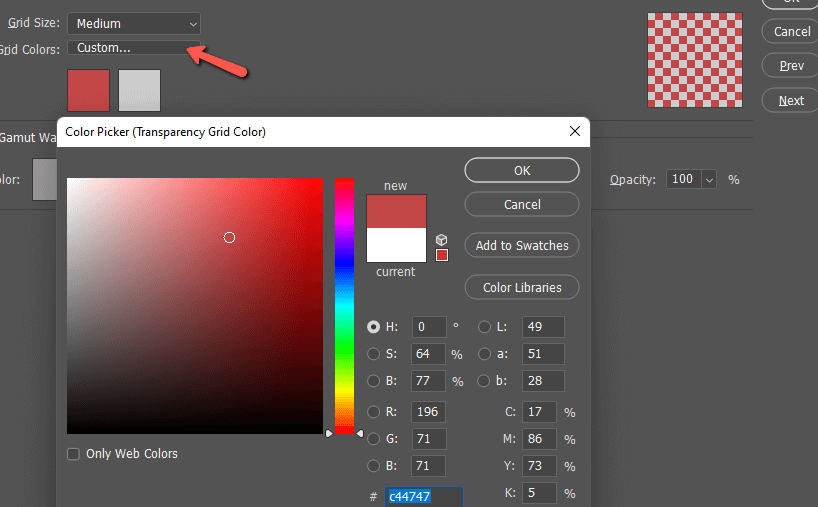
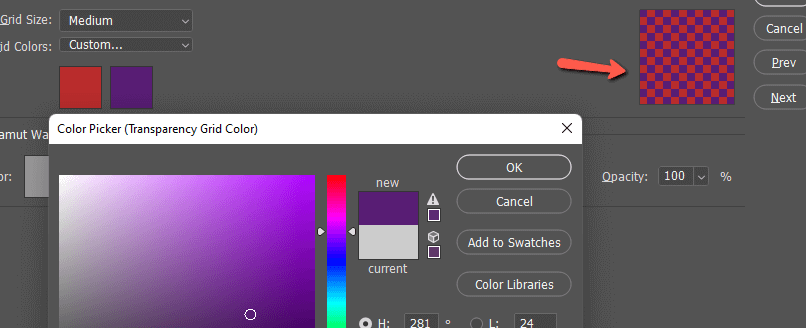
Choose the Custom option to open the color picker and you can choose whatever color you want to use. Alternatively, click one of the two color swatch boxes to change the colors of the grid individually.
You can get as crazy as you want, though crazy can be distracting when working with images. However, if you’re working with something that has a lot of gray, switching to an outlandish color can make it easier. You can always switch it back to the default later.
That’s all there is to it changing the checkered background settings in Photoshop.
How to Remove a Checkered Background That Came with the Image
We’ve talked about why you don’t need to remove the checkered background, but there are cases when you’ll need to.
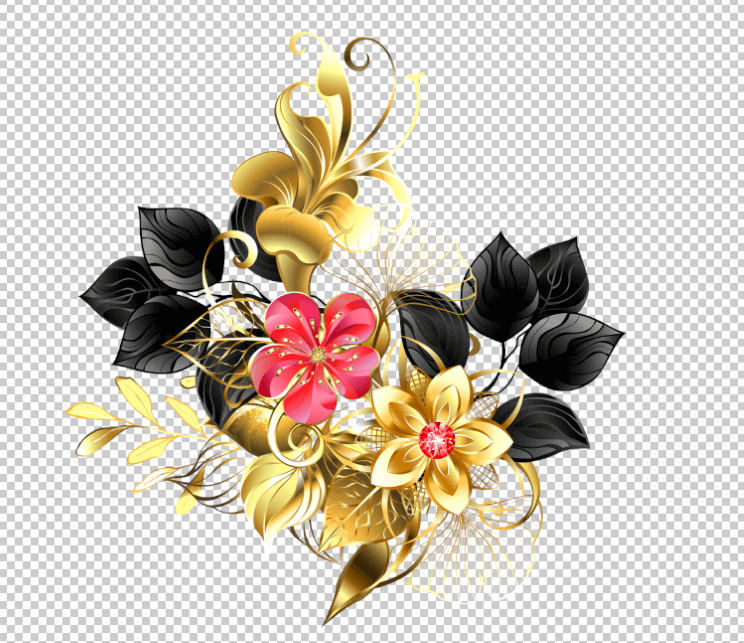
For example, say someone sent you a screenshot of an image with a checkered background behind it.
Like the flower image, I pasted above. When opened in Photoshop, the flower image has a transparent background, but if you tried to manipulate my screenshot, you would quickly discover the checkered background is attached to it.
How do you remove it?
It’s quite simple, really. And Photoshop does most of the work. For example, let’s open the screenshot I took of the flower image in Photoshop.
If I try to copy and paste the screenshot version of the image onto my gray background, here’s what I get.
To fix it, open the screenshot in Photoshop. You’ll want to make sure the Properties panel is open. Go to Window and click Properties if there is no checkmark next to it. If there’s a checkmark, the panel is already active on the right side of your screen.
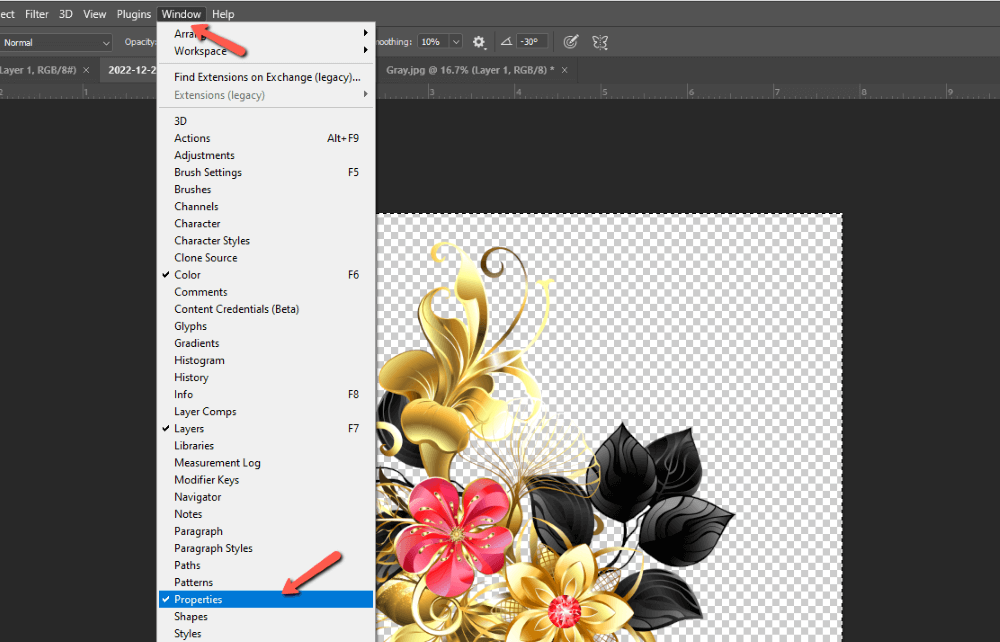
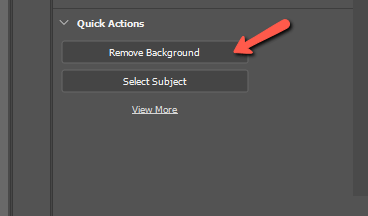
Head over there and you’ll find a section called Quick Actions. There’s a handy button there called Remove Background. Click it and watch the magic happen.
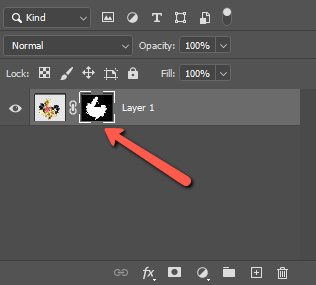
Okay, well honestly it will look like nothing happened because your checkered background will turn into a checkered background. This is where changing the color of the checkered background in Photoshop can come in handy so you can see the changes.
However, if you notice in the layers panel, you now have a layer mask added to your image. Everything around the image is in black, which means it is hidden, in this case, transparent.
Now you can save it as a PNG with a transparent background. Want to learn more about working with transparencies in Photoshop? Check out how to make a layer transparent here!
About Cara Koch