
Blending the edges of two images together is a great technique for creating collages and other creative effects. The photos look nicer fading into each other rather than with a hard line between the two of them.
Hey there, I’m Cara. Though this technique might look complicated, it’s actually quite easy to do. As usual, Photoshop does most of the heavy lifting for us, so all we need to do is do some easy touch-ups.
Let’s get started learning how to blend two images side by side in Photoshop!
Note: I use the Windows version of Photoshop. If you are using a Mac, the workspace will look slightly different from the screenshots displayed here.
Table of Contents
Step 1: Choose and Open Your Images
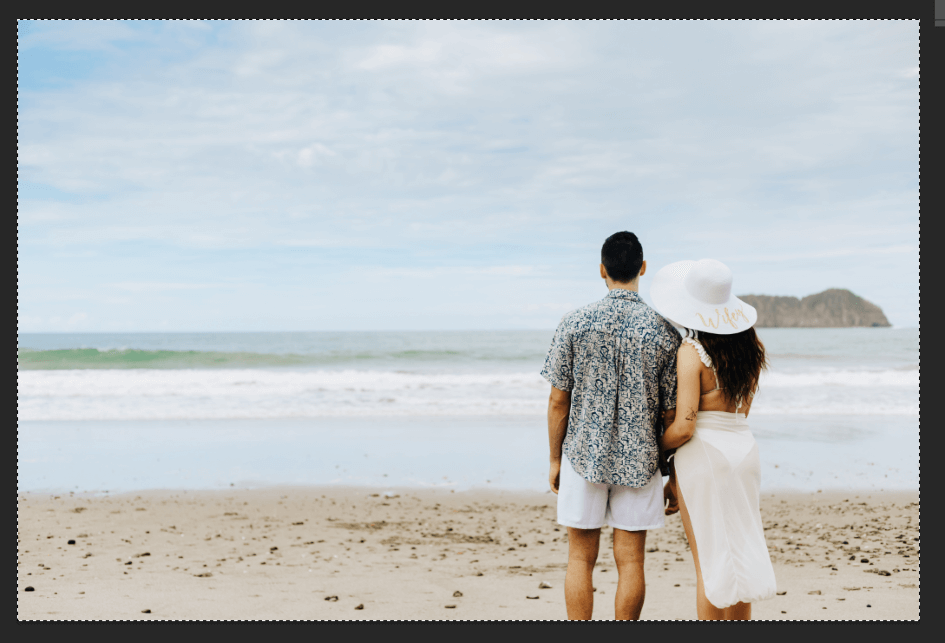
The first step is to pick the images you want to blend together. I’m going to use these two images I took of a couple on the beach here in Costa Rica a while back.
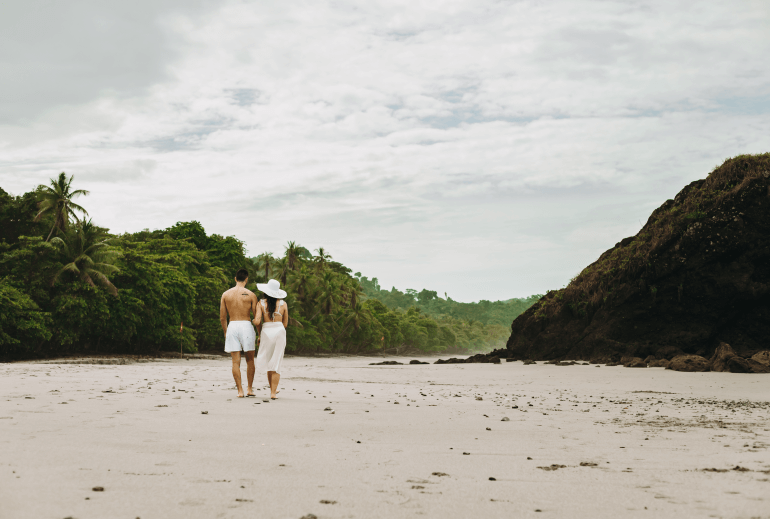
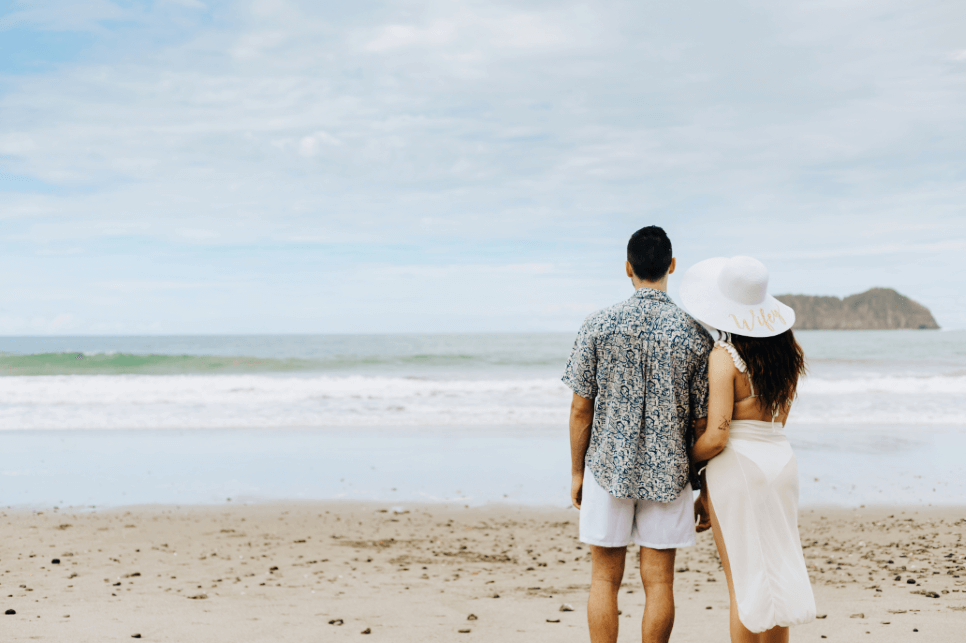
Obviously, because of the color differences, they are still going to look like two images side-by-side. However, blending them together is so much softer on the eye than having a hard line between the two.
If you use images that have a similar background, you can make them look like they’re supposed to go together.
Step 2: Extend the Canvas
We’ll need space to put the two images side by side. Unless you’re planning on removing half of each image, we need more canvas space behind it.
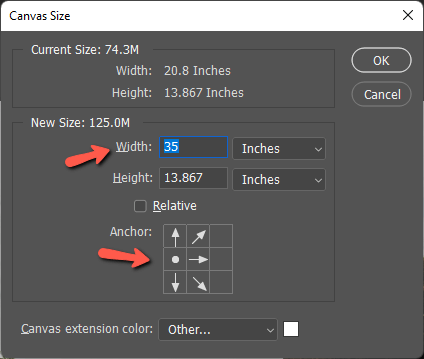
Open your first image in Photoshop. Go to Image and choose Canvas Size or press Alt + Ctrl + C or Option + Command + C.
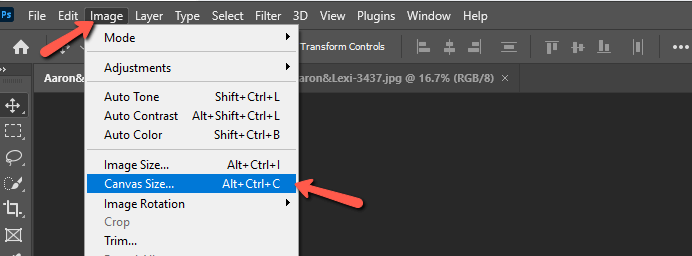
We’re going to use this image as the leftmost image, so press the arrow to the left. This will leave the image hugging the left side and extend the canvas out to the right.
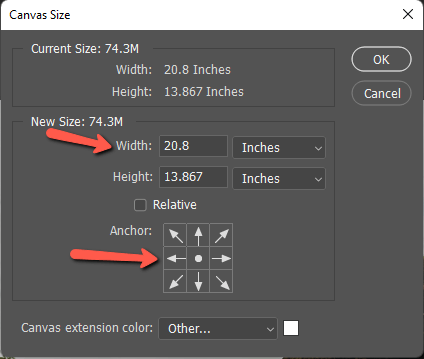
Then, you need to choose how much you want to extend the canvas. My image is 20.8 inches wide. To double the canvas, I’d need to set it to almost 42 inches. Since I’m going to be overlapping the images, I don’t need that much space
I’ll go with 35 inches for now. We can always trim off the excess later. So here’s what your settings should look like.
Step 3: Add the Second Image
I’ve already got my second image open in another tab of Photoshop. Press Ctrl + A or Command + A to select the entire image. Then press Ctrl + C or Command + C to copy it.
Switch back to the first image and press Ctrl + V or Command + V to paste it. Photoshop will put it right in the middle so press Ctrl + T or Command + T to activate the Transform tool.
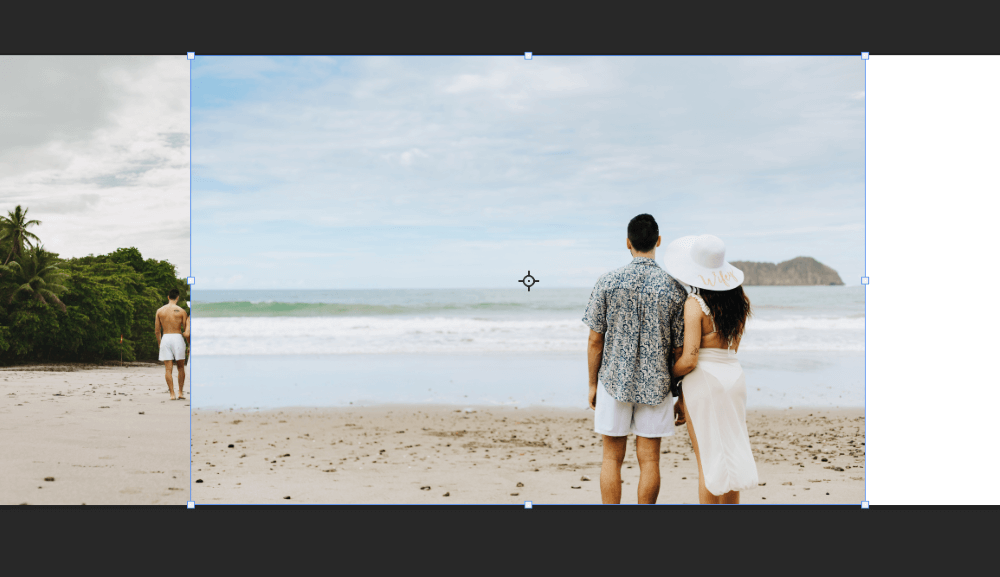
Now you can click and drag it to the right. Press Enter or the checkmark in the Options bar once the image is in position.
Step 4: Add a Layer Mask
To blend the images together, we’ll use the Gradient Tool to gradually fade the images into transparency. To keep this non-destructive, we’ll do it with layer masks.
Let’s start with the right photo, so make sure that one is selected in the Layers panel. Then click the Layer Mask button, which looks like a rectangle with a circle in the center.
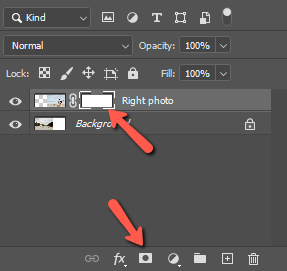
This will add a layer mask which appears as a white rectangle next to the layer image thumbnail.
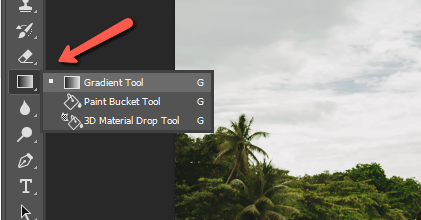
Step 5: Select the Gradient tool
Now choose the Gradient tool from the toolbar on the left.
Let’s make sure the settings are correct in the Options bar. We want to use the foreground to transparent gradient. You can find the preset for it in the Basics folder. Just click the arrow next to the preview box to open those options.
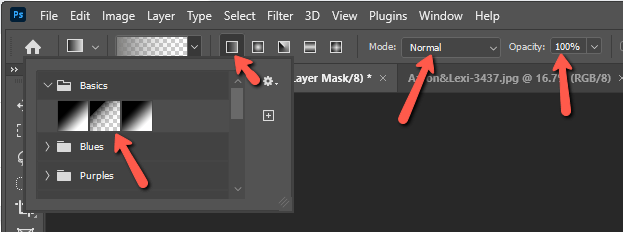
Make sure the gradient is set to Linear gradient, which is the first box to the right of the preview box. The Mode should be normal and the Opacity should be 100%.
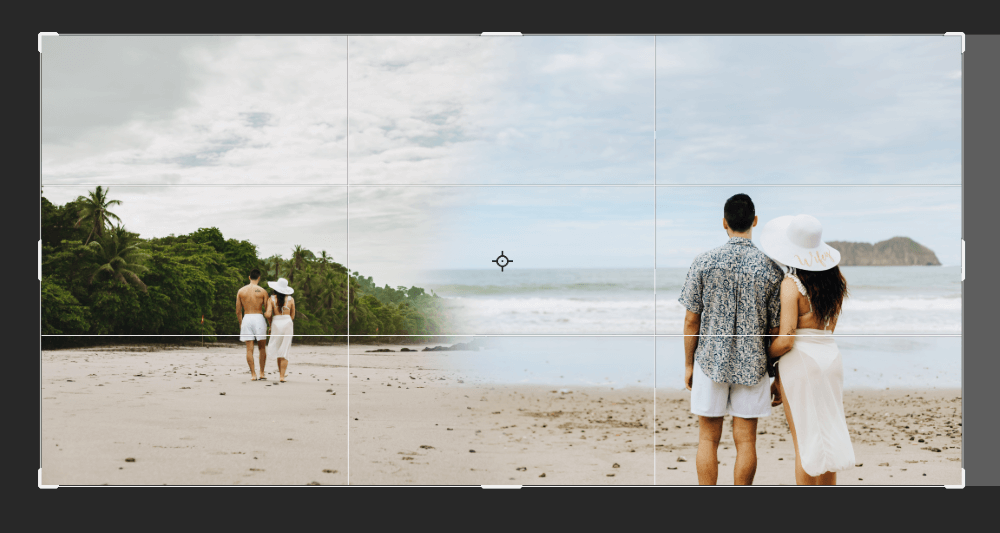
Now click on the left side of the image and drag toward the right. This will turn the edge of the image into a gradient.
The longer you drag, the more gradual the gradient. You can also place gradients at different angles and slowly build your faded edge until it looks right. Don’t forget that you can hit Ctrl + T or Command + T to reposition the image as needed.
Keep playing with it until you get the look you like. If you don’t like how it’s going, you can always undo it with Ctrl + Z or Command + Z and start over.
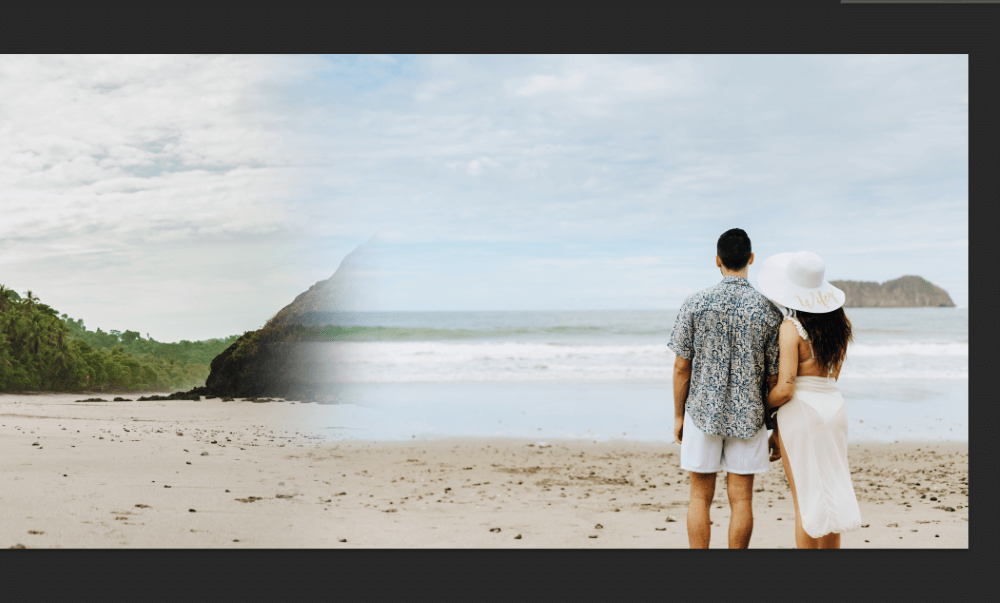
Here’s my result.

Step 6: Trim the Excess Canvas
You’ll usually end up with excess canvas. When you’re extending the canvas at the beginning, it’s better to go bigger so you have room to work with. Now we’re going to trim off the excess.
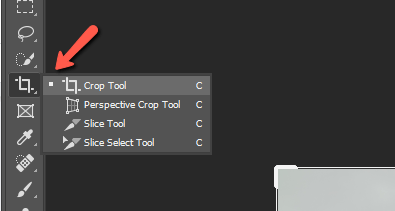
To do that, just grab the Crop tool from the toolbar on the left. You can learn more about working with the crop tool here.
In the Options bar, make sure the tool is set to Ratio and there are no values in the two boxes to the right. This will allow you to choose your own aspect ratio.
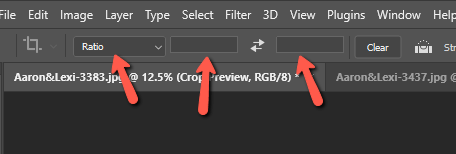
Then, click and drag the white handles around the image until you’ve trimmed off the excess canvas.
Press Enter or the checkmark in the Options bar to accept the changes.
Voila! A nicely blended pair of images. Curious about other cool ways to collage images? Check out how to get the circle crop here!
About Cara Koch