
When you open a document in Photoshop you get two shape options, square or rectangle. But sometimes it’s fun to create images or designs that aren’t square or rectangle.
What do you do?
Hey there! I’m Cara and as a photographer, I love all the things Photoshop allows me to do with my images. What do I do when I want a circular crop on my image? The crop tool only works in squares and rectangles.
It’s a little bit of a work-around to get a circle crop, but totally doable. Let me show you how!
Table of Contents
Step 1: Unlock the Background
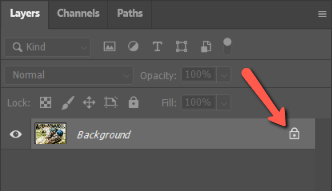
The first thing is to open your image in Photoshop. If your image has no other layers like mine, you’ll need to unlock the background layer to make it editable. Do this by clicking the little padlock icon on the right side of the layer.
Step 2: Create a Circle Selection
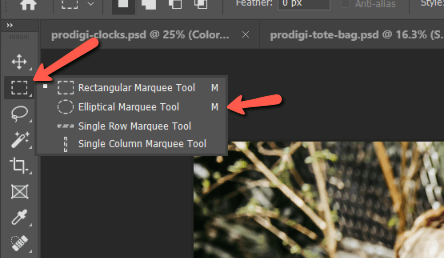
Let’s use the Elliptical Marquee tool to add a circular selection to the image. You can find the tool near the top of the toolbar on the left. It may be hidden behind the Rectangular Marquee tool. Find it by right-clicking on the tool icon.
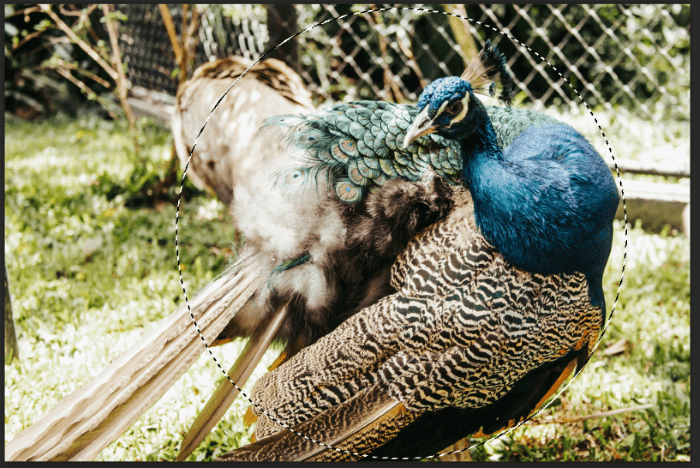
Hold Shift and Alt or Option, then click and drag to make your selection. If you don’t hold Shift, it is super hard to make a perfect circle, but the Shift key constrains the selection to a circle.
The Alt or Option key helps you get your circle in the right spot. While holding this key, click in the exact center of where you want your circle and drag it out from there.
Once you’ve got your circle, you can also readjust by clicking on the selection and dragging it around. I’ve created my selection around this peacock that I photographed at the Rescate Wildlife Rescue Center here in Costa Rica.
Step 3: Invert the Selection
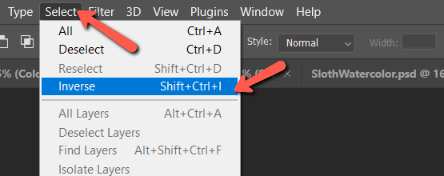
When we make a selection with the Marquee tool, everything inside the shape is selected. In this case, we want to select everything outside the circle, so we need to invert the selection.
Do this by going up to Select in the menu bar and choosing Inverse. Or you can hit Shift + Ctrl + I or Shift + Command + I on the keyboard.
You’ll see the marching ants appear around the border of the image as well.

Step 4: Delete the Selection
Now hit the Backspace or Delete button to delete the selected area, leaving you with just the circle.
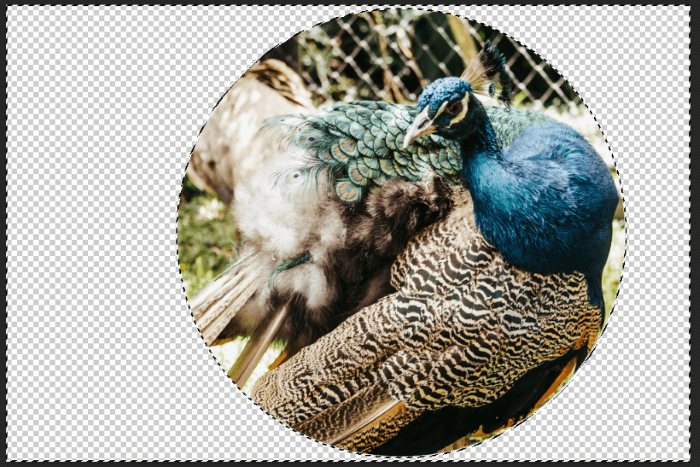
Remember that the checkerboard pattern represents transparency. When you print this or paste it onto another document, you will only see the circle and what’s inside it.
Alternate Step: Create a Mask
Deleting the pixels is just what it sounds like. The pixels are gone for good. The only way to get them back is to undo the action. This quickly becomes an inconvenient option after you’ve made a few more edits.
But there is a way to non-destructively crop the image. Instead of hitting Backspace or Delete, let’s make a mask instead.
Back up to this point, right after making the circle selection and before inverting it.

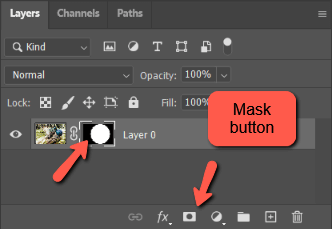
Now, click the Mask icon at the bottom of the Layers panel. Then a mask will appear linked to the image. The white circle represents what we can see while the black is concealing.
All the pixels from the original image are still there and you can come back and make adjustments at any time. But this is what we see in the workspace.
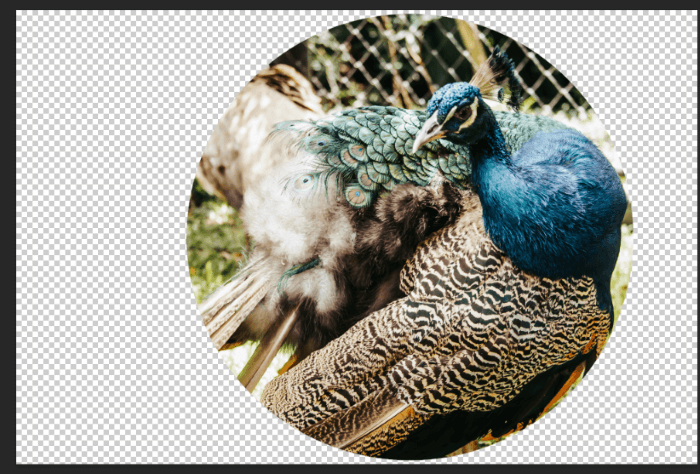
And there it is! I can drop this in a different design or print it out with a perfect circle around my peacock!
Excited to learn more fun tricks in Photoshop? Check out how to use the Color Replacement tool here!
About Cara Koch