Glass effect may be quickly and easily added to any layer or text object in Photoshop, as well as saved as a layer style preset or copied and pasted into additional layers.
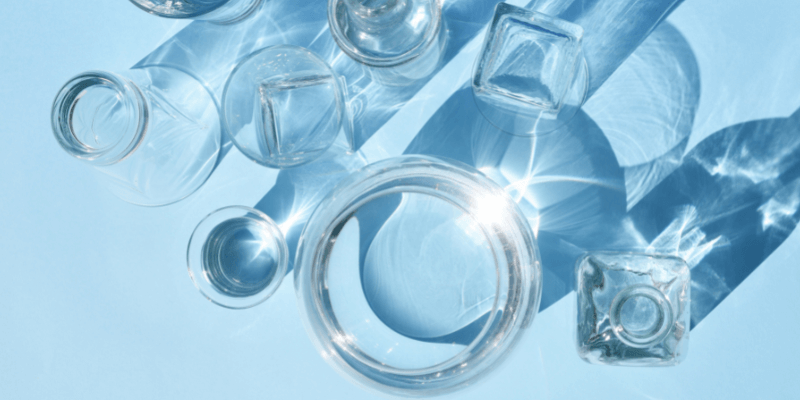
Creating a glass effect on your image in Photoshop is a great way to add eye-catching detail to your project. The best thing is, it’s so simple even a beginner can do this!
My name is Aly, I have over five years of Photoshop experience and I’m Photoshop certified. In this tutorial, I will show you how to create a glass effect in Adobe Photoshop.
How to Create a Glass Effect in Photoshop
You can add a realistic-looking glass effect to an image by using the Photoshop filter known as the “glass” effect.
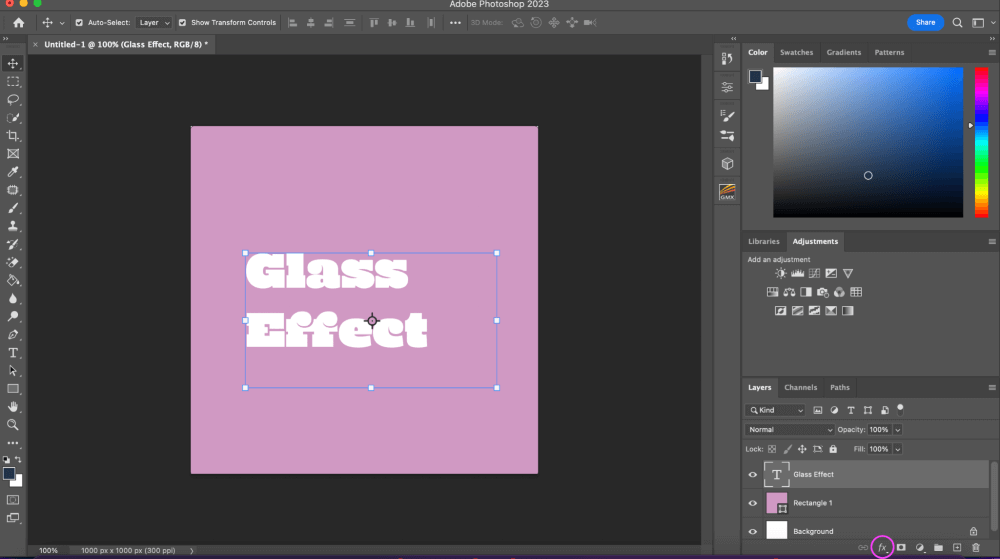
Step 1: Add the image or text you want to add to the glass effect. For example, I am going to be using text over a background. So I’ll use the Type Tool to add text.
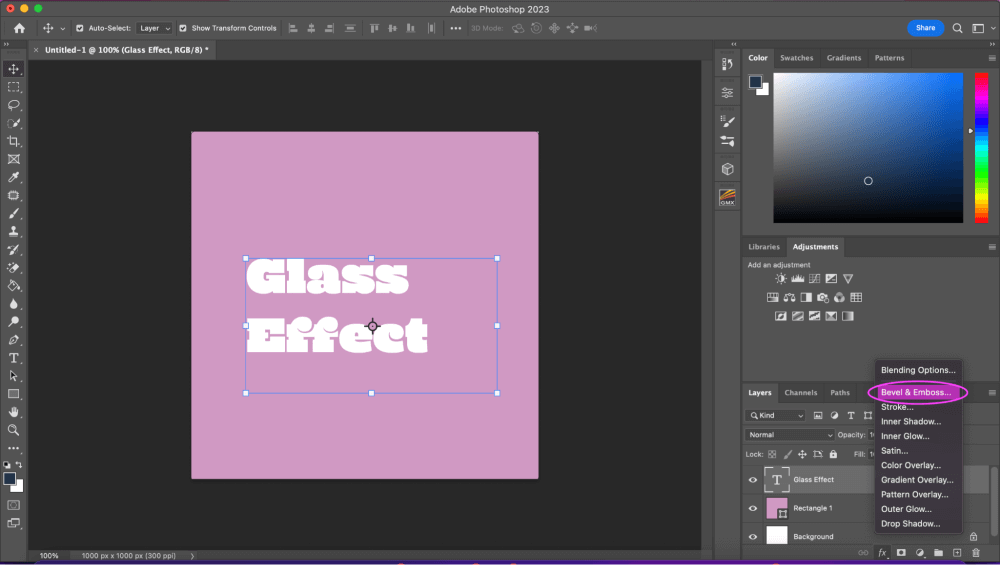
Step 2: Once you have your text or image up, go to the bottom right-hand corner and find the effect (fx) icon otherwise known as Layer Style.
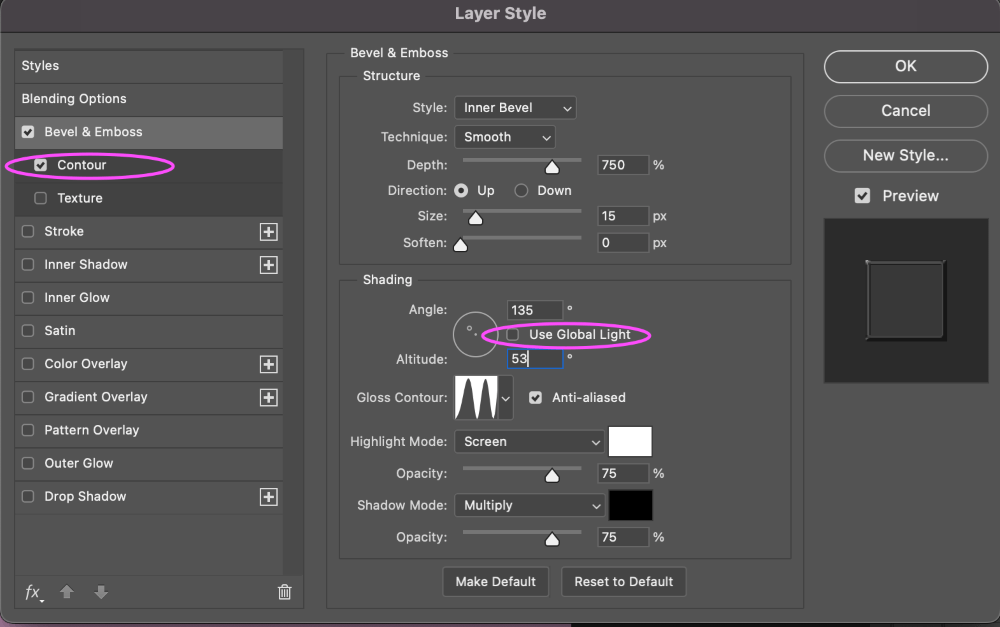
Step 3: Select Bevel and Emboss from the list of choices.
Step 4: Make sure Global Light is off before using the settings we’ve specified here. Select the Double Ring option under Gloss Contour and make sure Anti-aliased is checked. Don’t click OK quite yet.
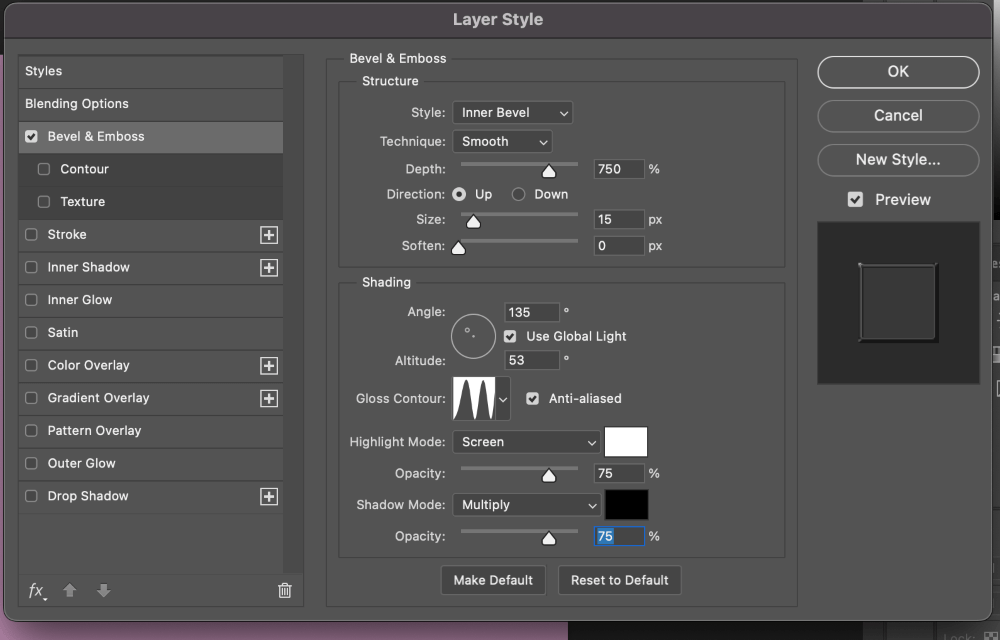
Step 5: Click Contour under Bevel and Emboss on the left menu. Select the same Double Ring Contour Gloss effect and make sure Anti-Aliasing is also selected.
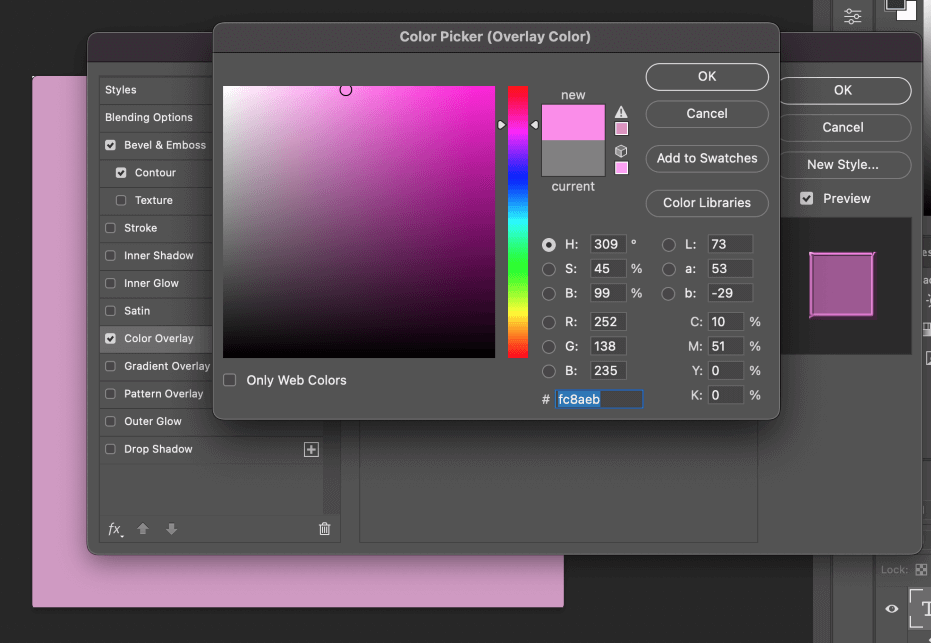
Step 6: From the option on the left, select Color Overlay. With an Opacity of 15%, we have selected a light pink color.
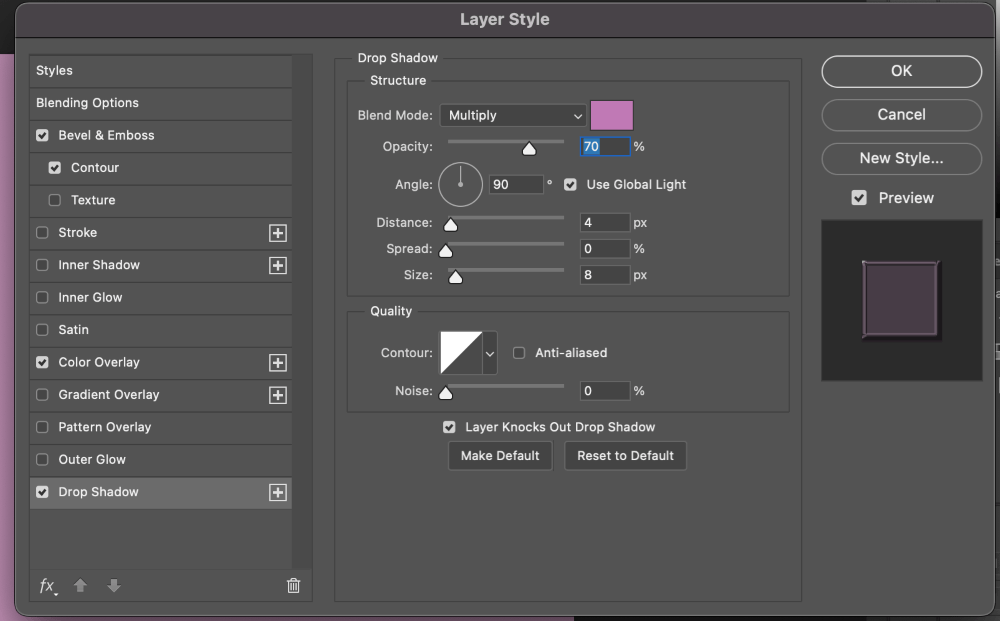
Step 7: We’ll then add a small drop shadow after that. To do this, select Drop Shadow from the menu on the left’s bottom. Once more, we’ve gone with a pink color and decreased the opacity to about 70%.
You can now experiment with the shadow’s size, spread, and distance until it appears appropriate and natural for your image. When you’re ready, click OK.
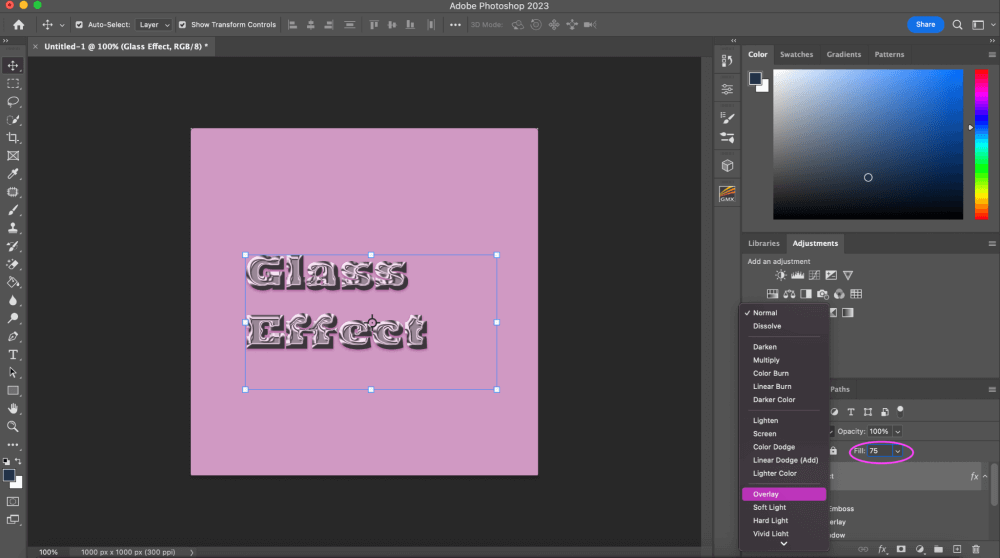
Step 8: Reduce the Fill after changing the Layer mix to Overlay. You can experiment with the number to determine what works best for your image; I’ve decreased mine to 75%.
And that’s all there is to it! As I said it’s a pretty simple tool to use and very personalized to
your liking.
Final Thoughts
Using the glass effect, you may make your pictures or text appear more realistic. Additionally, it’s a wonderful opportunity to play with various hues and textures. Therefore, don’t be reluctant to experiment with the Glass filter until you find a style that you enjoy!
Any questions about creating a glass effect in Photoshop? Leave a comment and let me know.
About Aly Walters