Embossing text is a fun effect that adds an elegant look to any design. The cool thing is that you can take anything – text, graphics, etc and make it look like it is rising up out of the paper.
Hey there, I’m Cara, here to show you another fun effect you can create with Photoshop. As usual, the effect seems really fancy and difficult, but isn’t that hard to do at all if you follow the four (or three steps if you don’t want to make it fancier) essential steps in this tutorial!
So come along and let me show you how to emboss text in Photoshop!
Note: I use the Windows version of Photoshop. If you are using a Mac, the workspace will look slightly different from the screenshots displayed here.
Table of Contents
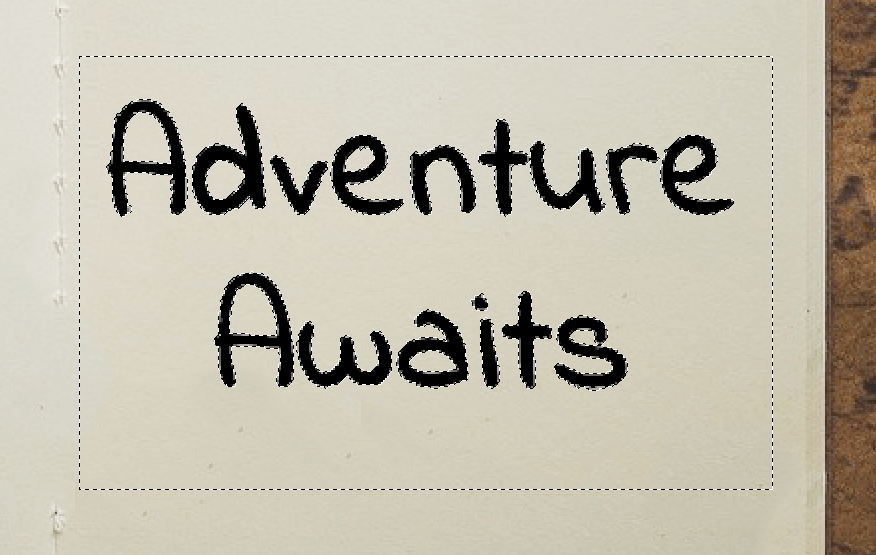
Step 1: Write Some Text
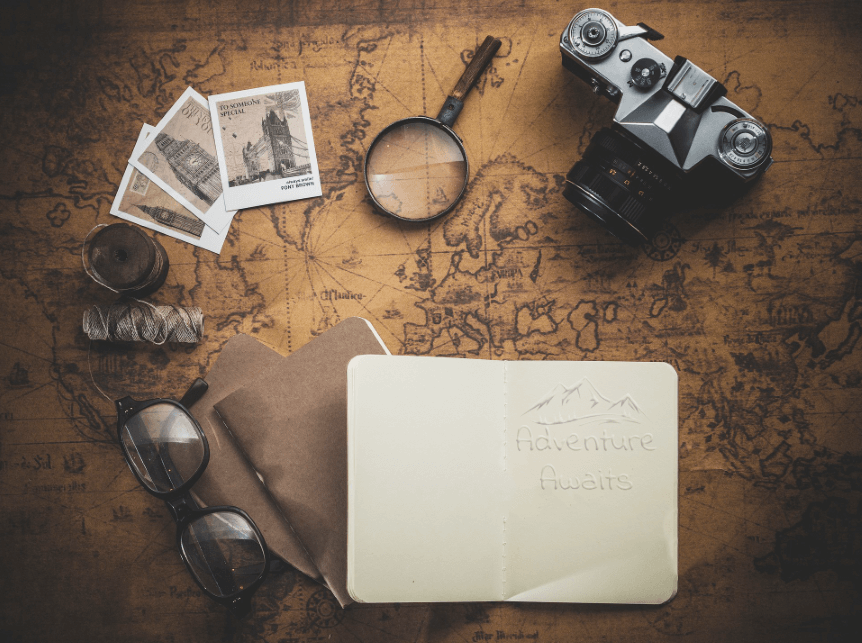
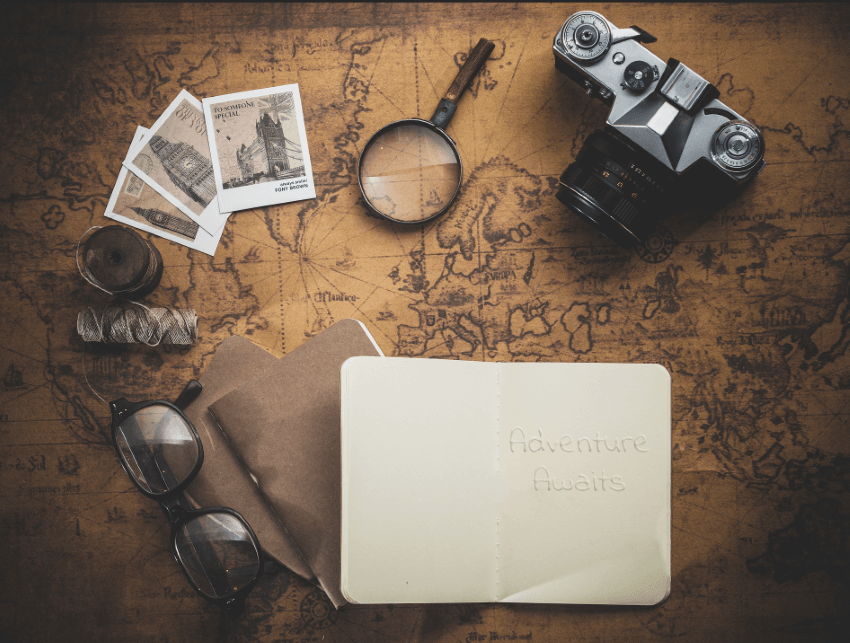
For this example, I downloaded this image from Pixabay to use as a background for our design.

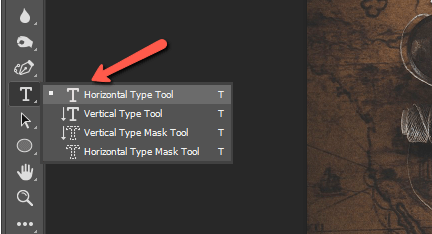
To add some text, let’s select the Horizontal Type tool from the toolbar on the left.
Click on the project and write some text. You can use the settings in the Options bar to choose the font. Hold down the Ctrl or Command key and drag the corners of your text box to resize or grab the box to reposition it.

Step 2: Add Some Texture
The paper in my example doesn’t have a particularly strong texture. But often you’ll be working with textured paper so you’ll need to know how to do this.
When you write text or add a graphic to your image, the edges will be sharp. But that sharpness makes the text look out of place. Text that is actually printed on a piece of paper takes on the texture of that paper.
So let’s look at how to add a touch of texture to our text.
Add a white background
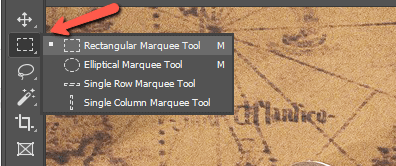
First, we need the text on a white background, so grab the Rectangular Marquee tool from the top of the toolbar on the left.
Click the New Layer icon at the bottom of the Layers panel and drag the new layer under your text layer.
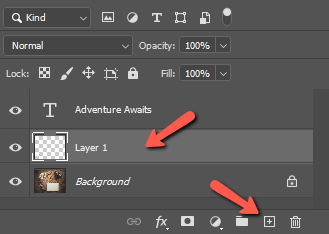
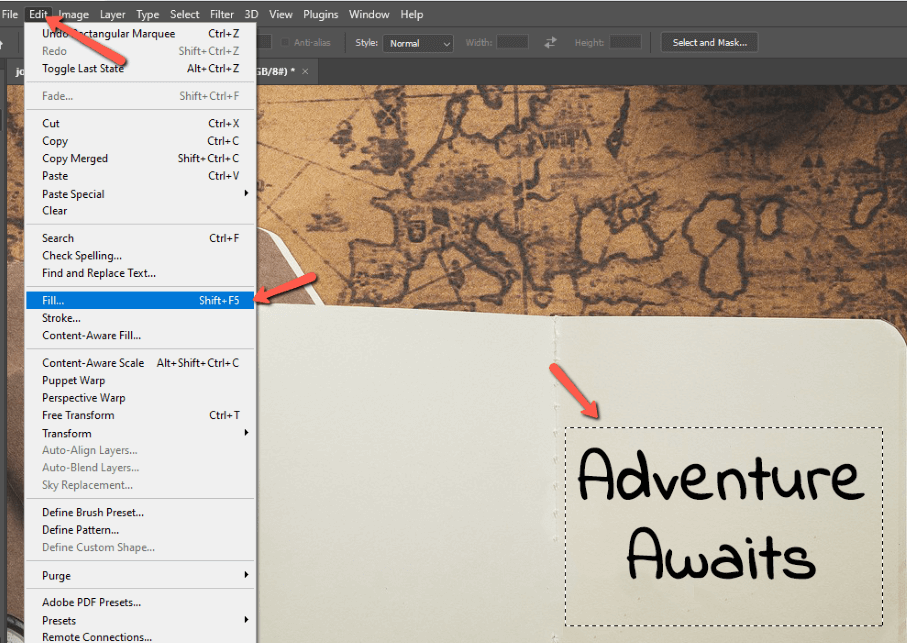
Draw a box around your text with the marquee tool. Press Shift + F5 or go to Edit and choose Fill.
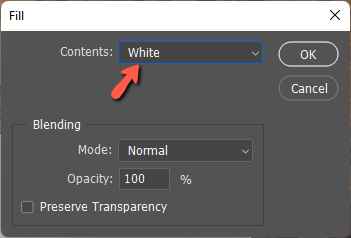
Put White in the Contents box and click OK.
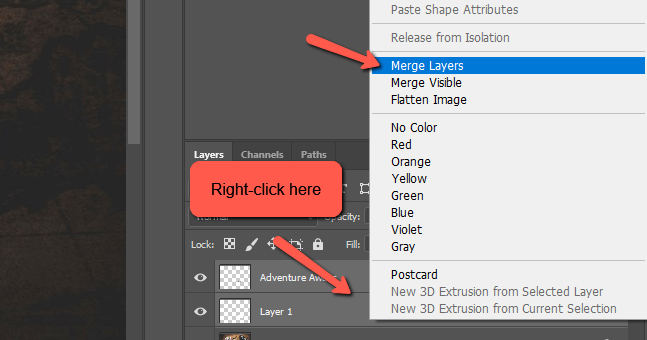
Merge the Layers
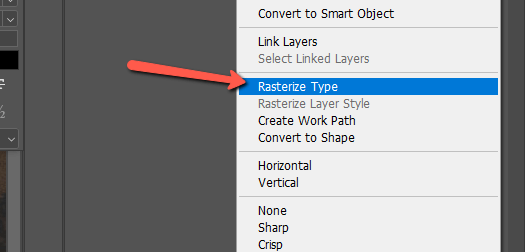
The filter we’re going to use in a moment requires the white and black to interact on the same layer. But you can’t merge a text layer with another layer without rasterizing it first. Once you rasterize it, you can’t make changes to the text so make sure you have it how you want it.
Right-click on the text layer and choose Rasterize Type.
Then, hold down Shift while clicking to select both the text layer and the white box layer. Then right-click and choose Merge Layers from the menu.
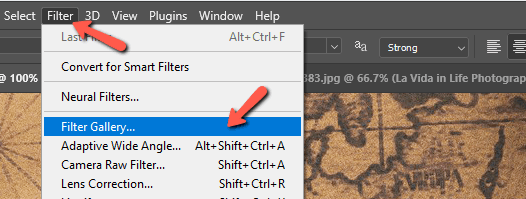
Add a Filter
To create the texture we’re going to add a filter. Before we do that, let’s turn our layer into a smart object. This will allow you to come back and edit the filter in the future.
Right-click on the layer and choose convert to Smart Object.

Now go to Filter in the menu bar and open the Filter Gallery.
Open the Brush Strokes filters and choose Spatter. On the left side, you can see how the filter will affect the text. On the right, you can adjust the sliders to adjust the strength of the effect.
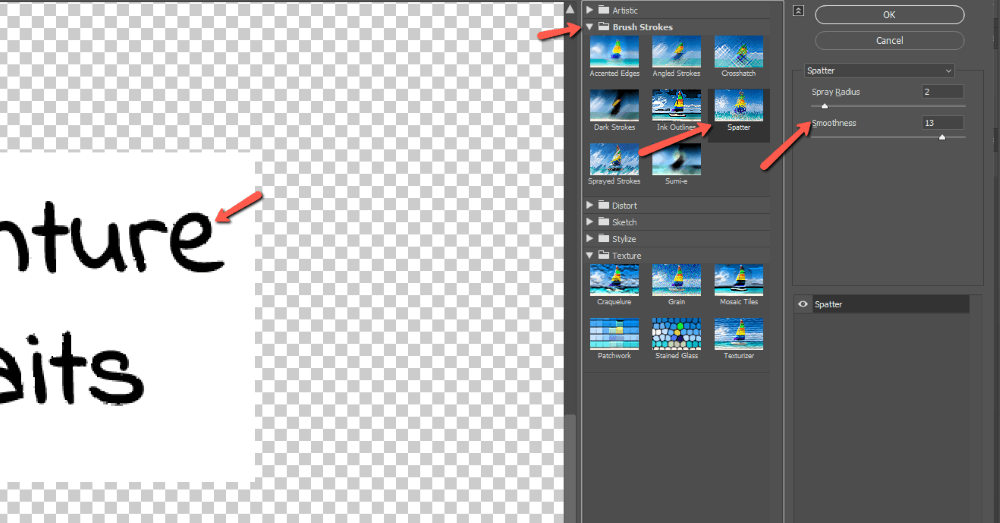
The paper in my example image doesn’t have much texture, so I’m going to go fairly light. Press OK when finished.
Remove the White Background
We don’t need the white background anymore so to get rid of it, choose the Magic Wand Tool from the toolbar on the left.
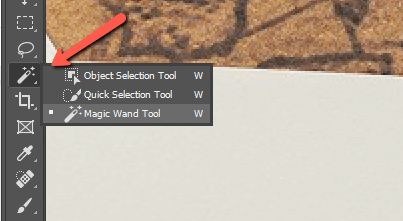
Click somewhere on the white part to make a selection, then press Backspace or Delete to remove the white background.
Press Ctrl + D or Command + D to remove the selection.
Step 3: Emboss the Text
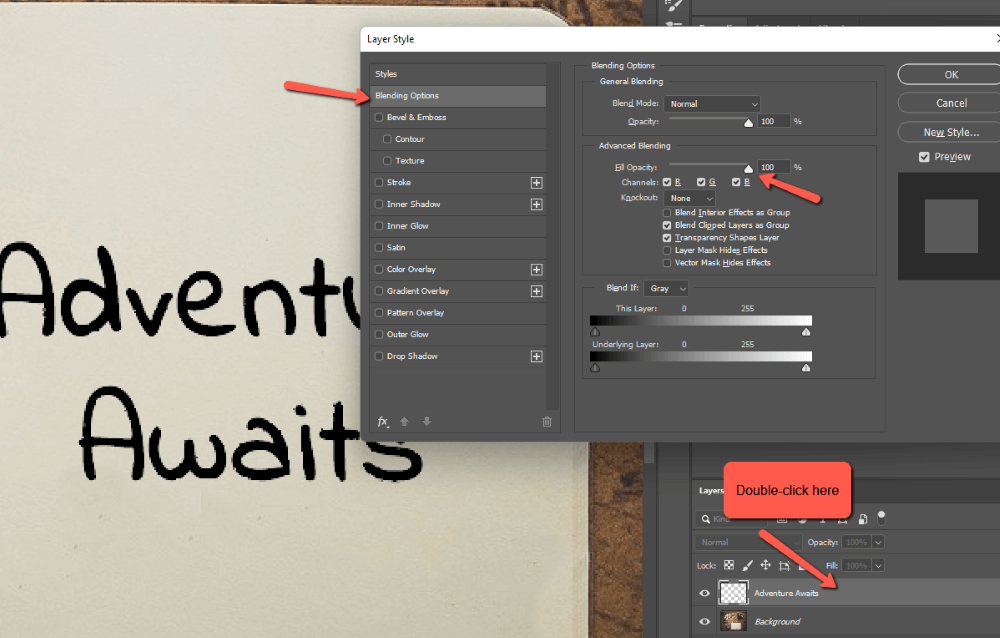
With our text textured and ready, it’s time to add the emboss effect. Double-click on the layer to open the Layer Style box.
It will open up in the Blending Options tab so while we’re here, let’s reduce the Fill Opacity to zero. Your text will disappear, but that’s not a problem. We don’t need colored text for the embossed effect.
Move to the Bevel & Emboss tab, making sure to check the box so the effect will be applied.
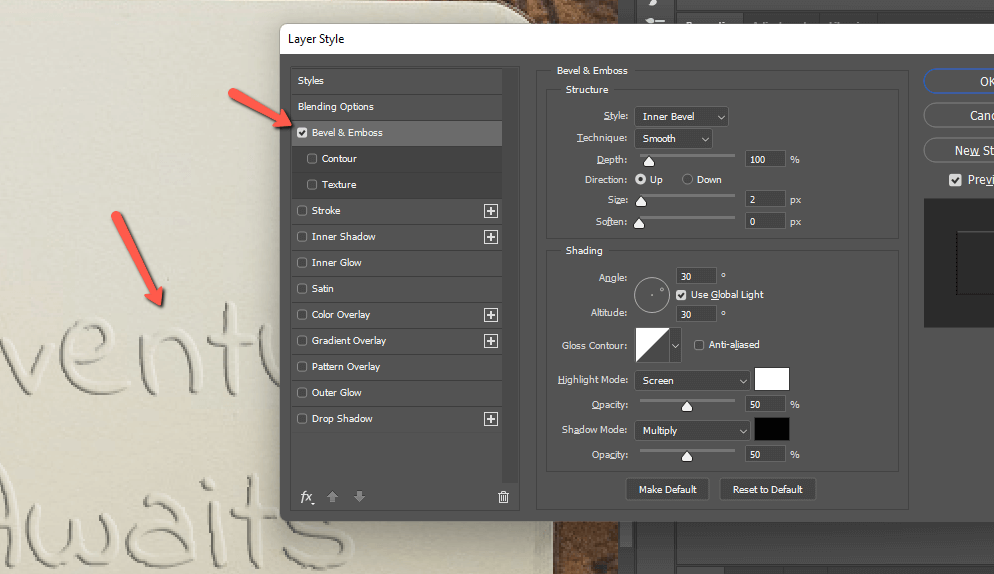
Here’s where you’ll fine-tune the effect. Choose Inner Bevel from the dropdown menu in the Style box. The top sliders’ Depth, Size, and Soften control how the shadow looks.
Make sure to match the angle of the shadow with the angle of the shadows of other objects in the photo. You can also match the color (shadows aren’t always black) by clicking on the color swatch and using the color picker to sample an existing shadow in the image.
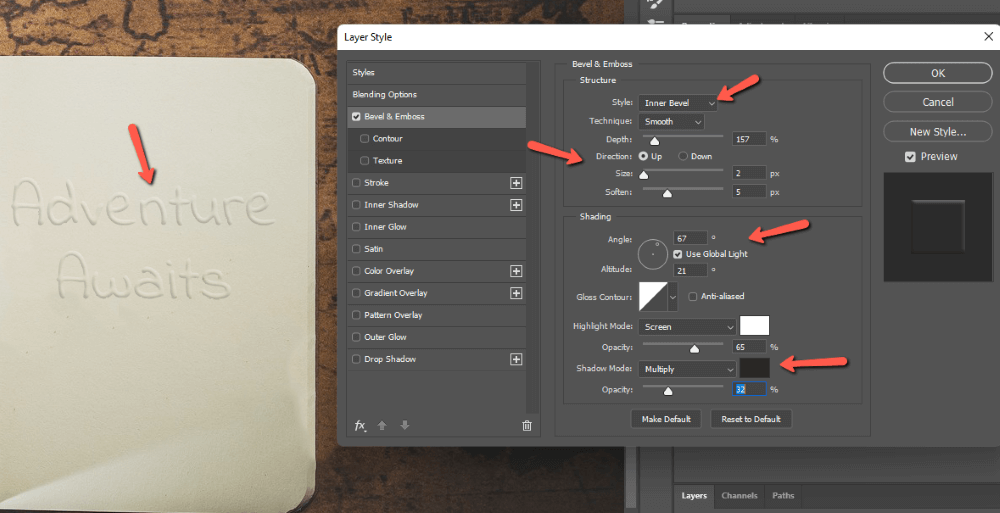
This will take a little experimentation, so just shift the sliders around until you get a realistic look.
Finally, we should texture the top of the letters to match the paper’s texture. We added a texture to the edges, but the tops of the letters are still smooth.
Click the Texture box under Bevel & Emboss and click on the tab.
Choose a pattern for your texture. You can just use one of Photoshop’s included grass textures. Make sure to adjust the Scale and Depth to match the texture of the paper.
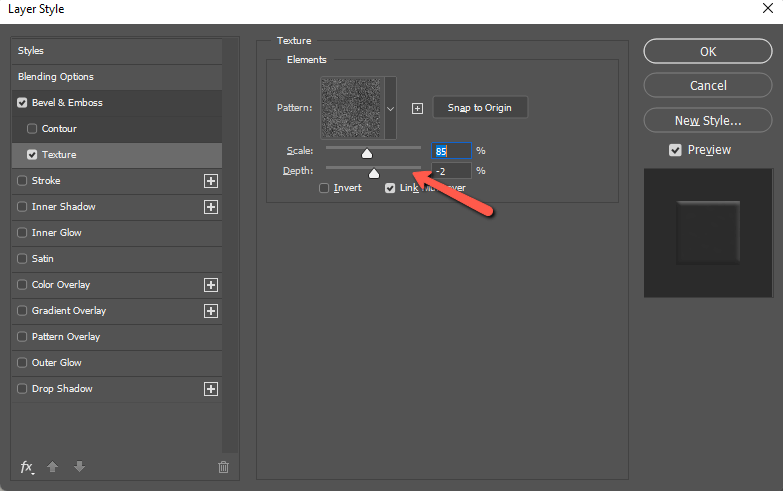
Press OK when finished.
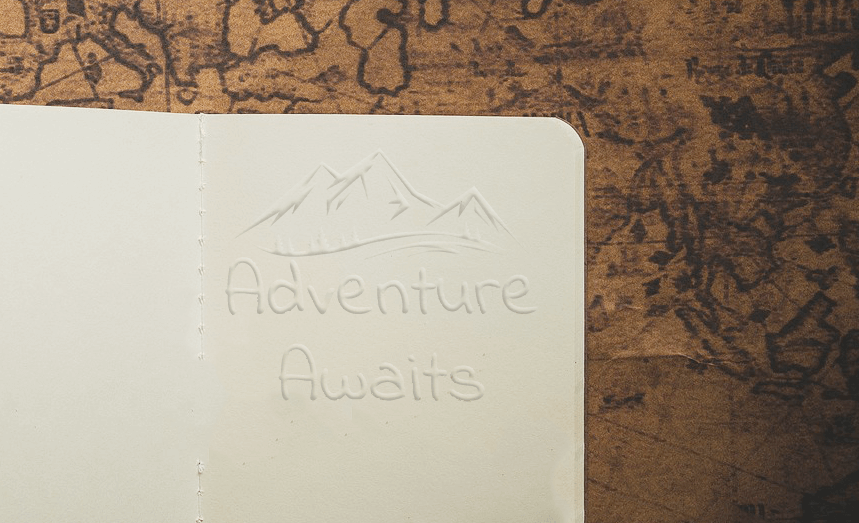
And there is our embossed text!
(Optional) Step 4: Add Other Embossed Elements
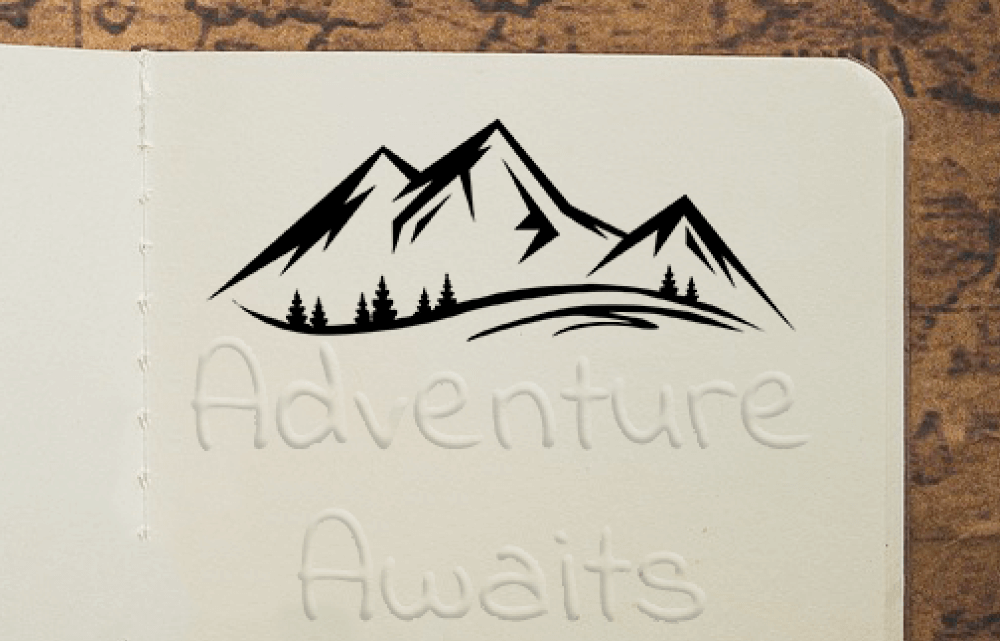
We’ve got our embossed text, and it looks great. But what if we wanted to add other embossed elements to the design? Do we have to go through everything all over again? Nope!
Let me show you how to quickly drop the effect onto other layers so you can add whatever other elements you like.
To get started, go to File and choose Place Embedded.
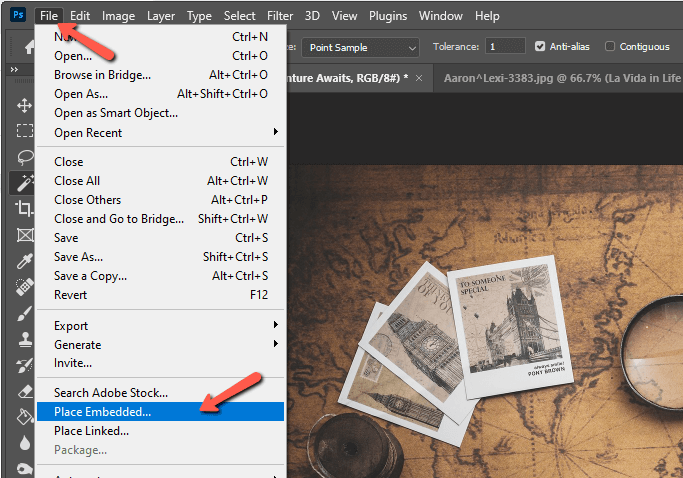
Navigate to the graphic you want to add and click Place. Photoshop will open the element onto a new layer with the Transform tool already active. Resize and reposition your element as desired.
You can always access the Transform tool again by pressing Ctrl + T or Command + T on the keyboard.
To transfer the emboss effect, head over to the Layers panel. Hold down Alt or Option while clicking on the fx icon on the right side of your embossed text layer.
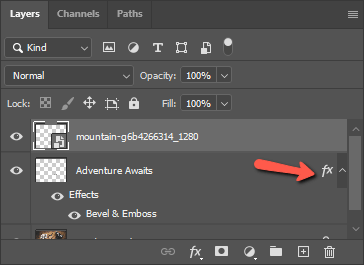
Make sure you click right on the fx to copy only the layer style effects. A faint “fx effects” tag will appear next to your cursor if you did it right. Then drag and drop onto the new element’s layer.
All the effects you applied to the other layer are instantly copied over to the new one. The only thing left to do is bring the Fill Opacity box down to 0%.
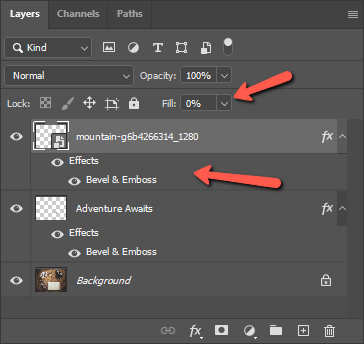
And voila! Just like that, we have a cool embossed mountain too!
Curious about other fun things you can do with text in Photoshop? Check out how to make a metallic text effect here!