
Wouldn’t it be nice to wave a magic wand and make an unwanted background go away in an image? Well, you basically can with the aptly named magic wand tool in Photoshop.
I’m Cara and as a photographer, I’ve found it handy to be able to easily make a selection, often to remove a background. The magic wand tool does this and works best when the background is mostly the same color and the subject is a different color.
Check out how this handy tool works here!
Note: the screenshots below are taken from the Windows version of Photoshop CC. If you are using the Mac version, they will look slightly different.
Table of Contents
Step 1: Create a New Layer
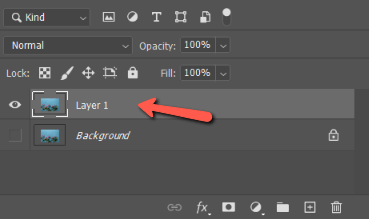
With your image open, hit the keyboard shortcut Ctrl + J (Command + J on a Mac) to copy the layer. This will allow us to return to an untouched layer for non-destructive editing.
Click the eye icon next to the background layer to hide it. Skip this step and you won’t be able to see your changes when you select and mask later on.

Step 2: Select the Magic Wand Tool
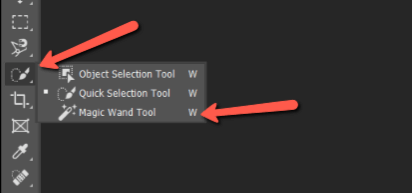
The Magic Wand tool won’t always be easy to find. In the “Essentials” workspace, the default position is hiding under the Quick Selection Tool.
To find it, you have to right-click on the Quick Selection tool and choose Magic Wand Tool. Once you know it’s there, finding it is a cinch.
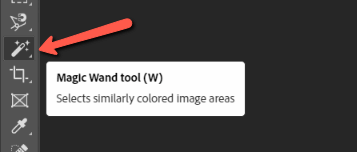
Once the Magic Wand tool is on top, it will replace the Quick Selection tool in the toolbar. Now you can just hit W on the keyboard to switch to the Magic Wand tool as you work.
Step 3: Refine the Magic Wand Tool
Many of the other selection tools in Photoshop work by trying to follow the outline of the subject. The Magic Wand tool selects everything in the image that is a similar color.
In the options bar at the top, there are a few useful tools that allow you to refine what the tool will select. To get the most wow factor from this tool, you’ll want to have these set correctly.
The Tolerance sets how closely the pixel color has to match the pixels you click on to be selected. A lower number means the color has to be closer and a higher number will include a wider range of colors.

I made the selection in this image from Pexels.com in one click with the tolerance set to 25.

This is also one click, but with the tolerance set at 75.

Feel free to play with the tolerance to see what works best for your image.
The Contiguous box is also important. If this box is checked, the wand will only select pixels that are next to each other. Left unchecked, the software will select all pixels within the color range in the entire image.
For this image, I want to select all the blue areas around the flowers and leaves so I left the box unchecked.
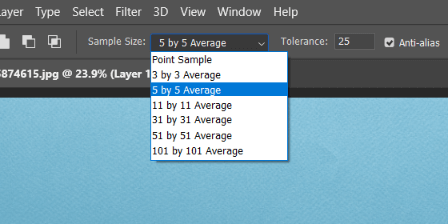
You can also choose how many pixels the software will examine when you click. Point Sample in the Sample Size box means it will take the color from only the pixel you click on.
The others are an average of the chosen number of pixels. 5 by 5 average means that the program will analyze and average the colors across a square of 25 pixels (5 high by 5 wide).
Step 4: Make the Selection
Let’s get to making the selection. Make sure you are working with the duplicated layer and not the hidden background layer.
These flowers are a very different color from the background. Thus, I could crank up the tolerance to 95 to get this selection.
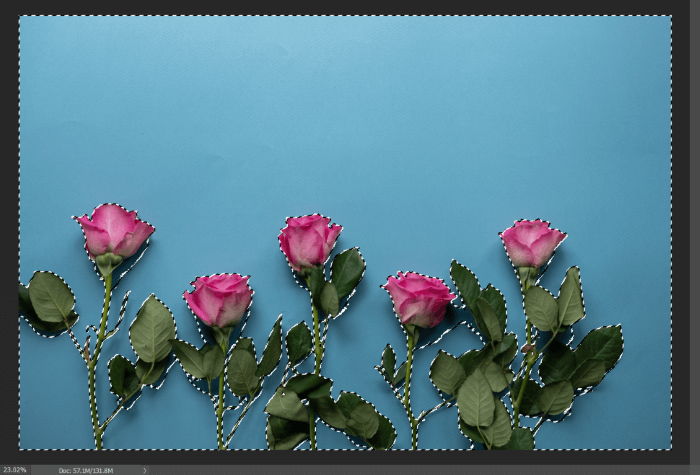
We’re almost there but there are still a few unselected areas in the darker blues of the shadows.
To add those areas, hold the Shift key. You’ll notice a tiny plus sign appear next to your cursor. I clicked once while still holding the Shift key to get this selection.

Not bad for two clicks, right?!
Note: If you want to remove parts of the selection, hold Alt(Option for Mac users) while clicking instead.
Step 5: Select and Mask
To create the selection and mask it off, go up to Select in the Menu bar or right-click within the selection. Then choose Select and Mask.

Everything that was not selected goes away. This checker pattern indicates transparency.
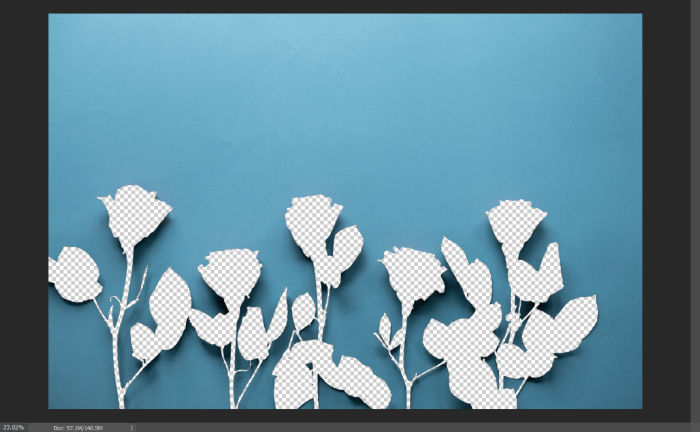
But I want to remove the background, not the flowers, so I inverted the selection.
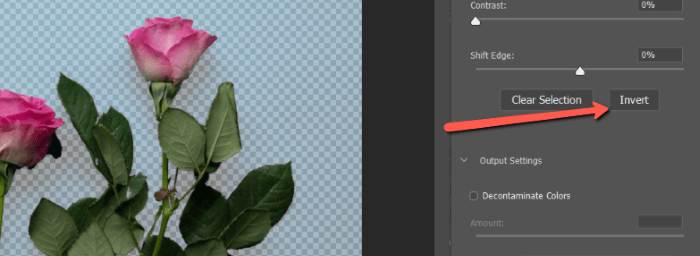
You can also hit Shift + Ctrl + I (Shift + Command + I) to make it happen.
Step 6: Refine the Mask
Zooming in, you can see there is a faint blue line around the outline of my selection.
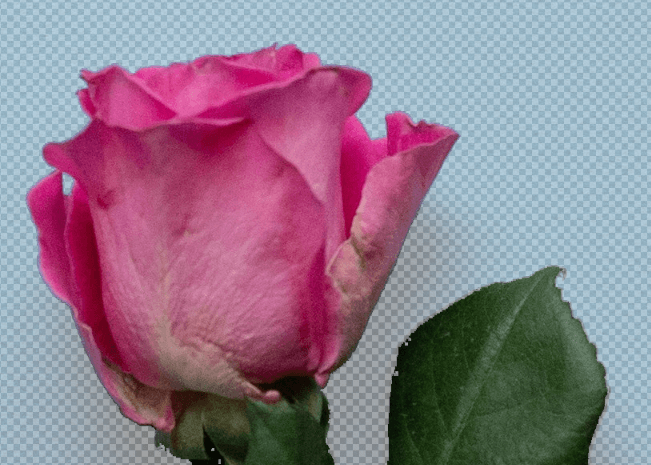
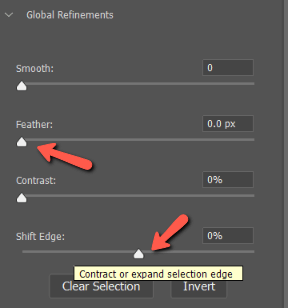
To get rid of it, adjust the Shift Edge and Feather sliders in the Global Refinements menu on the right.
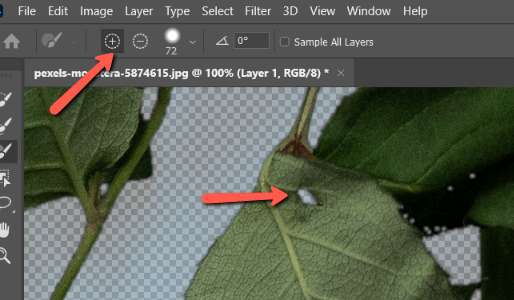
There are also a few spots on the leaves that didn’t get picked up. I can add back in those sections with the plus brush or remove any extra sections with the minus brush.
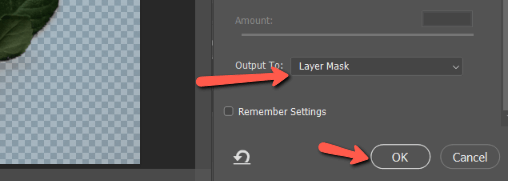
Once you’re finished with your adjustments, make sure the output is set to Layer Mask then click OK.
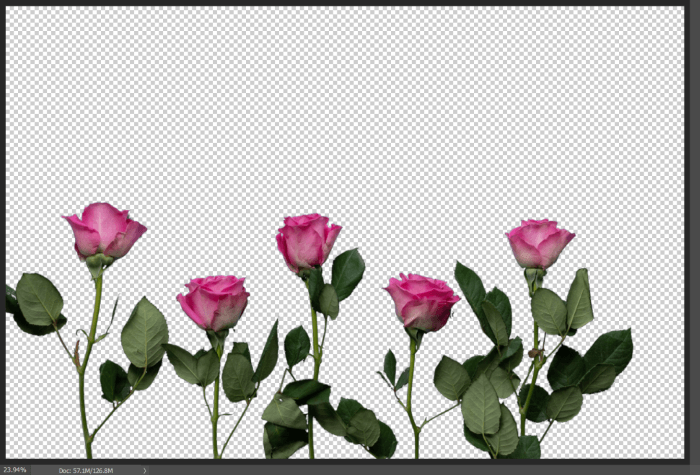
Voila! What looked like it was going to be a painstaking process turned out to be super easy!
Interested in learning more about the magic of Photoshop? Check out more of our tutorials such as how to copy and paste selections.
About Cara Koch
Maxis Richards
Thank you so much for this. Exactly what I was looking for. Perfect.