Have you ever wanted to get really crazy with an image in Photoshop? What if you could turn the colors inside out in all or part of an image?
Hey there, I’m Cara! As a photographer, sometimes it’s fun to get a little funky and create something extra special (or extra strange, lol).
Photoshop gives us an easy way to invert the color of an image for just such an interesting effect. It’s based on the idea of developing black and white images from negatives by turning light areas dark and vice versa.
Nowadays, Photoshop will replace colors with their opposite for some truly unique images. What’s more, it’s super easy. Let’s look at how to invert the color of an image in Photoshop.
Table of Contents
Step 1: Invert the Image
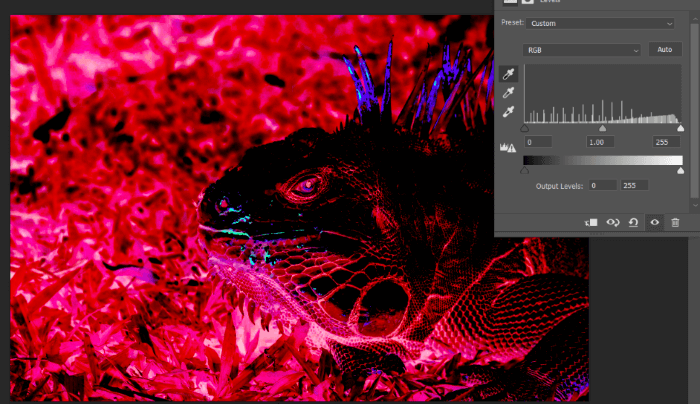
Today I’ve got this handsome dude to help me out. I photographed this really large iguana at the Zoo Ave wildlife park in Costa Rica. BTW, that’s some kind of fruit (probably papaya) smeared all over his muzzle.

Invert the colors in the image by opening an Invert adjustment layer. Click on the half-filled circle icon at the bottom of the Layers panel. Choose Invert from the menu that appears.

Alternatively, you can take the super short route and hit Ctrl + I or Command + I on your keyboard.

Voila!
Okay, that’s cool, but maybe not exactly what you had in mind. Let’s fine-tune it.
Step 2: Adjust the Levels
Open a Levels adjustment layer by clicking on the half-filled circle at the bottom of the Layers panel. Choose Levels from the menu.

In the panel that appears, you can make adjustments to the darks, midpoint, and highlights of the image. Grab the little triangles at the bottom of the histogram and slide them left to right to do so.

You can also set the black point, gray point, and white points with the three eye-dropped icons to the left of the histogram. Depending on where you click in the image, you can get some interesting color combinations.

You can also play with the Brightness and Contrast adjustment layer to further refine your image.

The Curves adjustment layer can also produce some interesting results. Learn about how to use curves in Photoshop here.

From here, it’s just a matter of playing with the sliders and adjustments to see what you can create!
Invert the Colors of Part of an Image
What if you want to invert the colors of only part of an image? You can do this by making a selection first. As a quick example, I made a rough selection with the Quick Selection tool.
Apply the Invert adjustment layer or hit Ctrl + I or Command + I to invert and you’ll see that only your selected object’s color is inverted. Make adjustments as needed to set the image to your liking.

Excited to learn more tricks in Photoshop? Check out how to fade an image into a background color here!
About Cara Koch