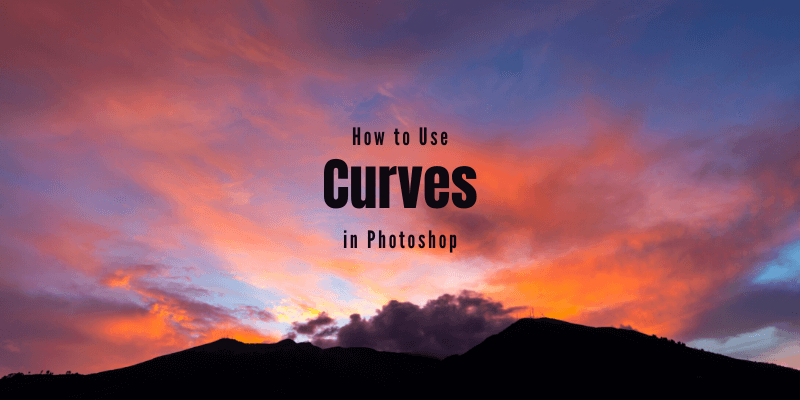
How do people get those amazing, contrasting images that jump out at you and demand your attention?
Hey there! I’m Cara and as a professional photographer, I love Photoshop! There are so many amazing things it allows you to do!
The Curves Adjustment is one such incredible tool. It can help you turn a ho-hum photo into a stunning image that is sure to draw attention.
However, using the Curves Tool isn’t exactly self-explanatory unless you’re already familiar with how similar tools work. Let me take you for a spin around this panel so you can learn how to take your images to the next level!
Note: the screenshots below are taken from the Windows version of Photoshop CC. If you are using the Mac or other versions, they will look slightly different.
Table of Contents
Open a Curves Adjustment Layer
With an image open in Photoshop, open a Curves adjustment layer. If you don’t know where the Curves adjustment is in Photoshop, there are a couple of ways you can get to it.
Click on the Adjustment Layer icon at the bottom of the Layers panel (looks like a half-filled circle). Then select Curves from the menu that opens. You can also click the Curves icon from the Adjustment Panel. It looks like a grid with an S-curve running through it.

What is Curves in Photoshop and How to Use It
The Curves tool in Photoshop allows you to control shadows, highlights, and midtones separately. When Photoshop adds the Curves Adjustment layer, you’ll see the Curves Properties panel appear. If you can’t find the Curves panel, simply go to Window in the menu bar and select Properties. As long as the Curves layer is selected, the correct properties panel will appear.
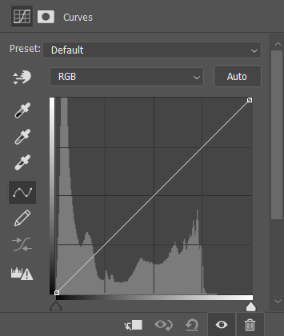
You’ll notice that the main portion is a large square with a straight diagonal line running through it. Behind it, you’ll see a histogram representing the proportion of darks and lights in the image.
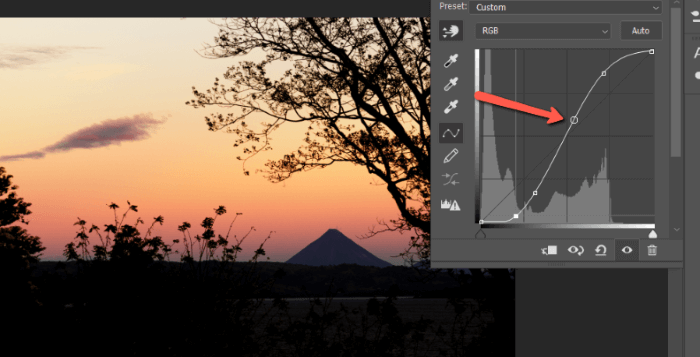
The bottom left of the square is the shadows and the top right is the highlights. You can click anywhere on the line to create a control point. Drag this point up to lighten and down to darken the image.
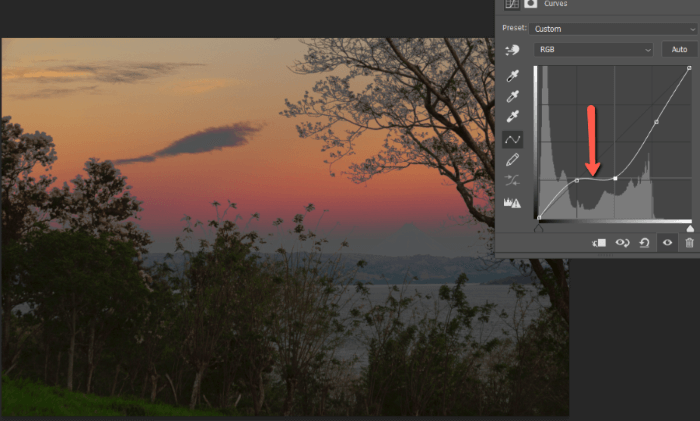
If you drag the shadows down and the highlights up, you’ll create the basic S-curve. This adds contrast to the image. You can control how much by how far you pull the points.
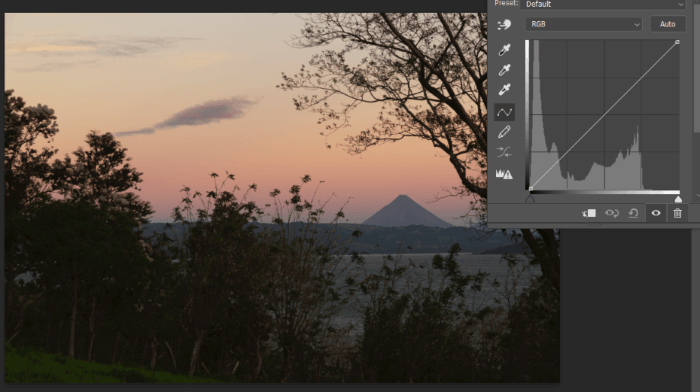
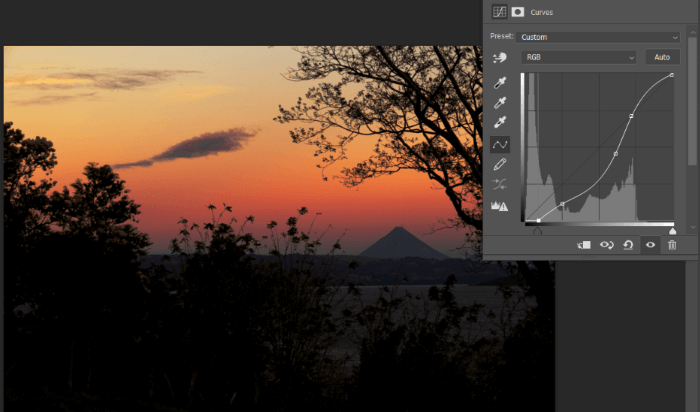
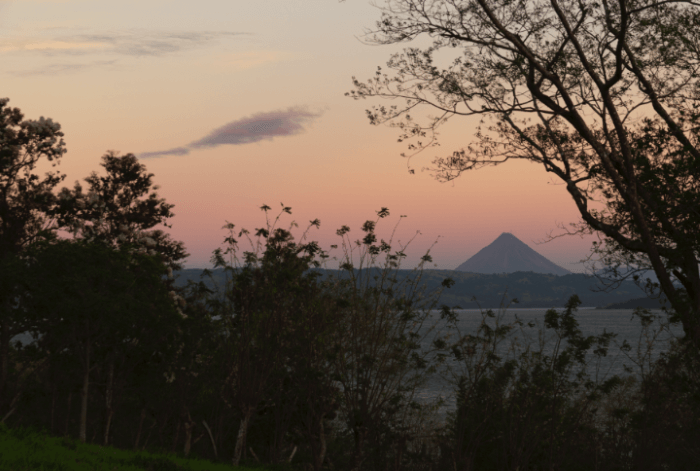
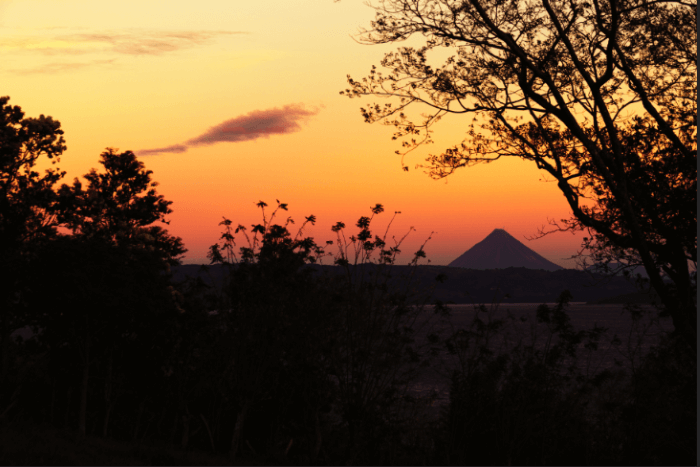
Check out this image I took at sunset of Arenal Volcano in Costa Rica.
Now, look what happens when I add an S-curve to the Curves panel. The shadows get darker and the highlights get brighter, adding lots of contrast to the image.
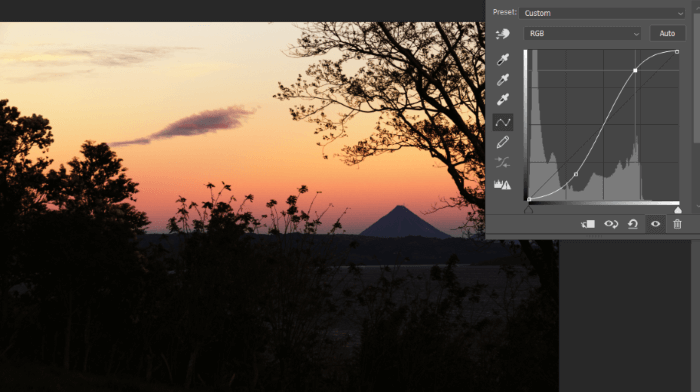
You can add control points wherever you want on the line to manipulate the lights and darks in the image. Drop points to maintain a part of the line in a certain area or use them to pull the curve.
Make sure to avoid flat horizontal lines, as this will add undesirable gray to the image
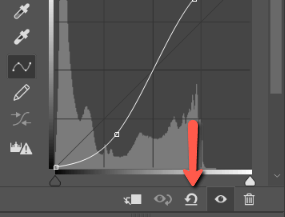
Removing Points
If you find that you don’t need a control point, you can grab it and drag it off the panel to delete it. Alternatively, you can hold Ctrl or Command while clicking on the point. If you want to reset the board, click the backward curving arrow at the bottom of the panel.
Adjust Image Colors and Tones Using Curves in Photoshop
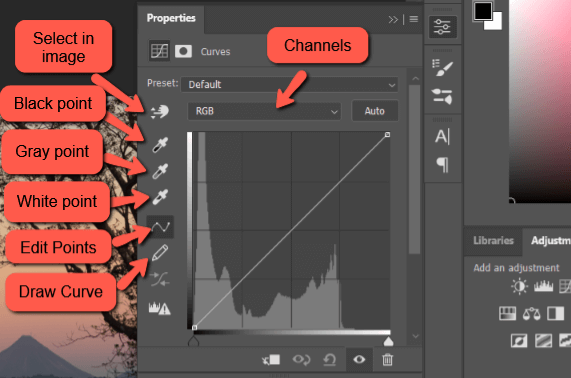
Lights and darks aren’t the only things you can adjust with the Curves panel. At the top of the panel, you’ll notice a dropdown that says RGB by default.
Click the arrow to reveal the Red, Green, and Blue channels. You can use this to adjust the color balance in the image.
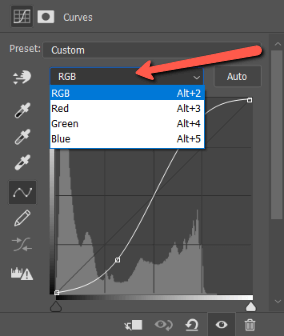
Each channel controls the named color and its opposite. So Red controls red and cyan, green controls green and magenta, and Blue controls blue and yellow. Pull your control point up for the named color and down for the opposite color.
Watch what happens when I add blue to the highlights.

And now a little yellow to the shadows.
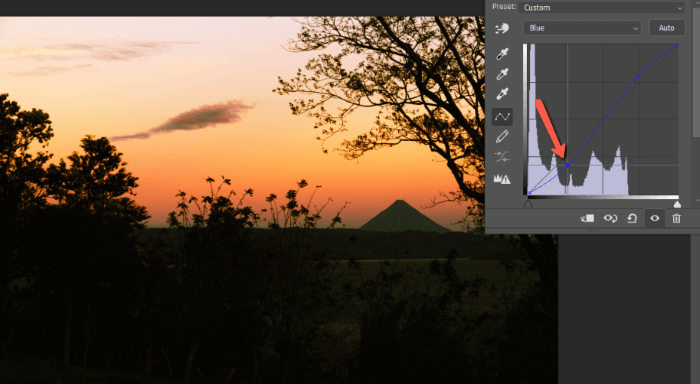
As you can see, there is a lot to play around with here.
Overview of the Curves Panel
Now that you’ve got the gist of using the curves, what do all these other icons do?
The little hand at the top allows you to click anywhere within an image, then drag up to lighten or down to darken. This can help you be more exact in choosing points. You don’t have to guess where to click on the line to affect a certain part of the image.
Notice there’s a little circle jumping around on the line as you hover over the image. Once you click on the image, Photoshop will put the point on the line for you.
Next, there are three eyedropper icons. From top to bottom, they are the Black point, Gray point, and White point.
When you select the Black point, Gray point, or White point icon, you can set the corresponding point in the image. The program will then adjust the Red, Green, and Blue channels accordingly. You can then switch over to those channels and fine-tune them as needed.
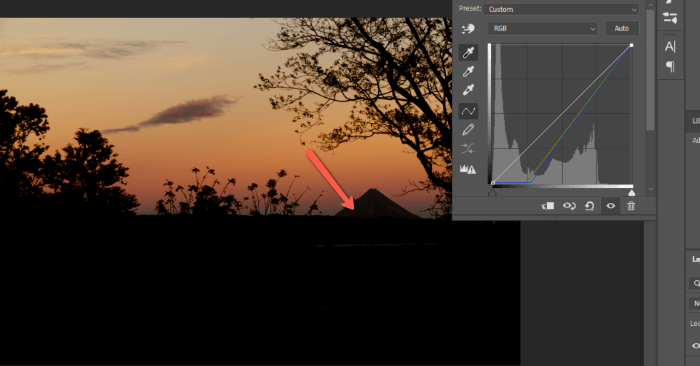
Here’s what happens when I click on the mountain back there with the Black point icon selected.
The two icons below the Black, Gray, and White points allow you to control how you want to manipulate the curve. The default is to use points (the first icon) as we’ve been talking about.
The second option is to draw the curve freehand. It’s a little more unwieldy but can give you more precise control over the line.
There are all sorts of stuff you can do with these controls to adjust images. Play around and find settings that you like!
Here’s my before:
And here’s my after with just a few adjustments in the Curves tool:
Quite a difference!
FAQs
Here are more questions related to using Curves in Photoshop.
What is the shortcut for curves in Photoshop?
The keyboard shortcut to open Curves adjustment is Command + M (or Ctrl + M on Windows).
What to do when Curves is not working in Photoshop?
The easiest solution that works 99% of the time is to reset the preference. Go to the overhead menu Photoshop > Settings > General, and click Reset Preferences on Quit. Click OK, restart Photoshop and it should work.
Interested to learn more about the handy tools in Photoshop? Check out some of our favorite tutorials like how to use the Color Replacement tool here!
About Cara Koch