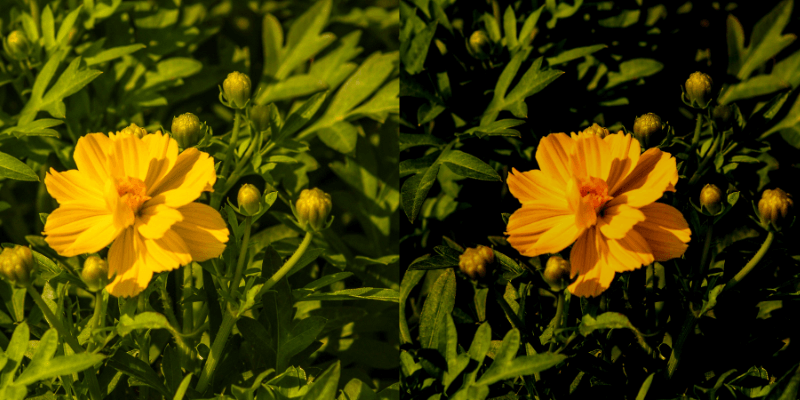
Are you finding that your photo is a bit too bright for your taste? Or maybe you want to take a normally exposed image and give it a darker, moodier feel? Or maybe the highlights in your image and somewhat blown out and you’re trying to salvage it.
Hello, I’m Cara and here I am once again with good news, Photoshop makes this super simple! There are three simple methods you can use to darken your images. Which one you choose will depend on your preferences as well as the final look to a certain extent.
So let me show you how each one works and you can experiment to find what works for you!
Note: I use the Windows version of Photoshop. If you are using a Mac, the workspace will look slightly different from the screenshots displayed here.
Table of Contents
Method 1: Brightness/Contrast Adjustment Layer
If you’ve used Photoshop for any length of time, you’ll probably have seen this adjustment layer. This method is the down-and-dirty method that is quick but perhaps not as sophisticated as the ones we’ll get into in a moment.
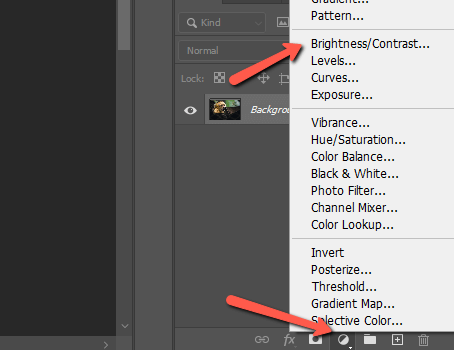
You can find the adjustment layer by clicking the half-filled circle icon at the bottom of the Layers panel. This will open a list of adjustment layers. Choose Brightness/Contrast from the list.
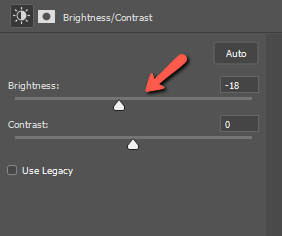
The adjustment layer will be applied as a new layer and you’ll get this control panel. Drag the brightness slider to the left to darken the image. You can also adjust the contrast slider which controls the intensity of the highlights and shadows.
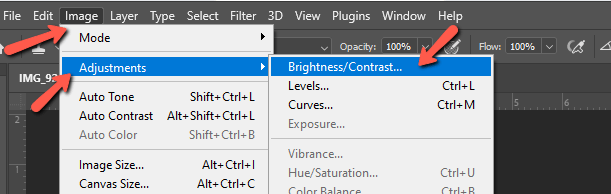
Alternatively, you can activate this adjustment through the menu at the top of the workspace. Go to Image, hover over Adjustments and choose Brightness/Contrast…
However, the adjustments used with this method are applied directly to the image, not to a new layer on top of the image. This makes the edits destructive, meaning you can’t go back and change them.
Personally, I like to stick with adding an adjustment layer in the Layers panel. This gives me the freedom to continually make adjustments as I work. It’s rare that I know the exact settings I’m going to want for an image!
Method 2: Exposure Adjustment Layer
Next, we’ll look at the Exposure Adjustment Layer. This one works with the image’s overall exposure. This should be your choice if you’re working with blown highlights.
Again, you can get to the exposure tool through the menu bar at the top. Go to Image, hover over Adjustments, and choose Exposure.
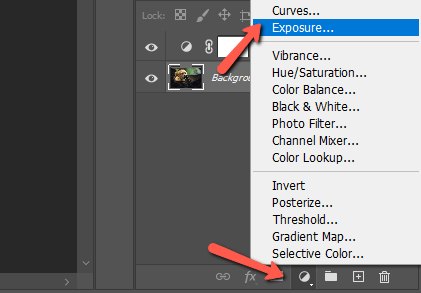
However, to edit non-destructively, I prefer to add an exposure adjustment layer from the bottom of the Layers panel. Click the half-filled circle and choose Exposure from the list.
After this, you’ll be presented with this panel.
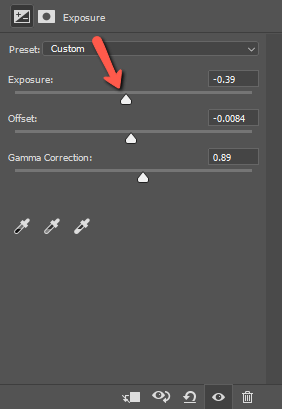
Darken the image by sliding the Exposure slider to the left. The Offset slider allows you to adjust the base point of the shadows. Bring it up to flatten the shadows and give the image a matte look. Take them down to deepen the shadows and give the image more contrast.
The Gamma Correction slider lets you adjust the brightness of the mid-tones. A little bit goes a long way to adjust your image so slide slowly.
Method 3: Camera RAW
The final method is a favorite of Lightroom fans. The tools available in Camera RAW are similar to those in Lightroom.
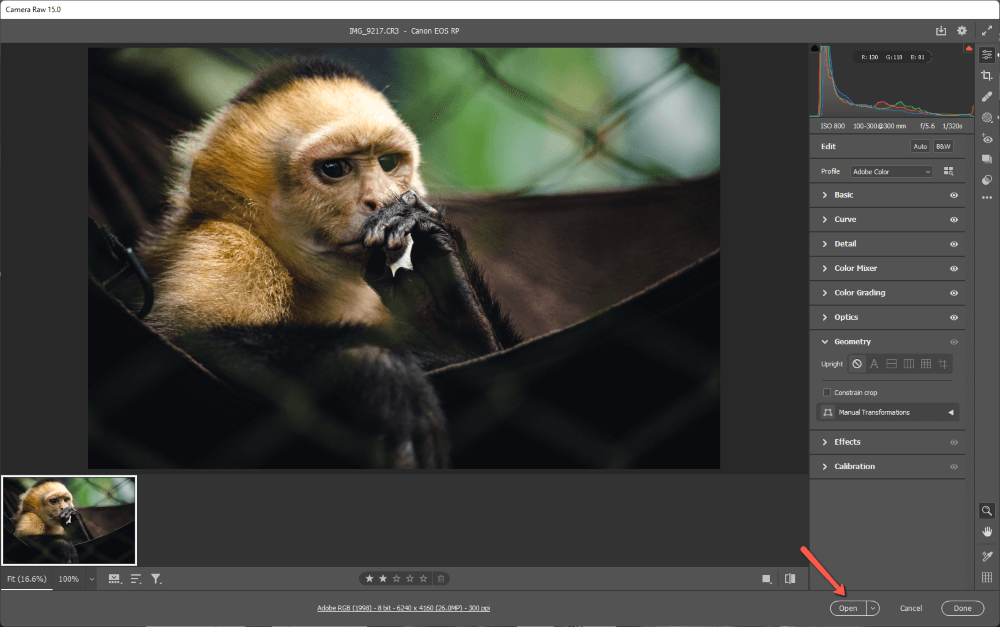
When you open a RAW file directly in Photoshop, it will open in the Camera RAW interface to start. You can make adjustments here before moving into the main Photoshop workspace. If you don’t want to do anything, just click Open and proceed.
Of course, this isn’t the only way to get to Camera RAW. If you already have your image open in Photoshop (or it’s not a RAW file), you can access Camera RAW through the Filter menu in the menu bar.
But before we do that, there’s an important thing to note. Filters are not editable when you add them to normal layers. Changes with Camera Raw Filter are applied directly to the image, we won’t be able to adjust them later.
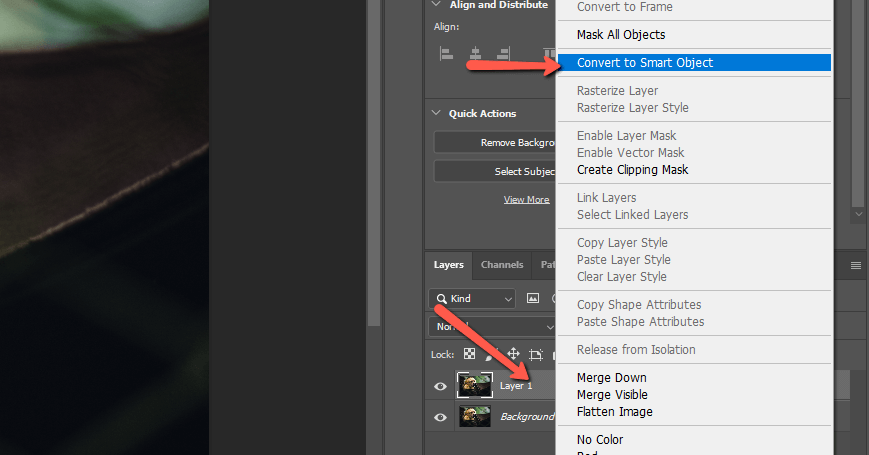
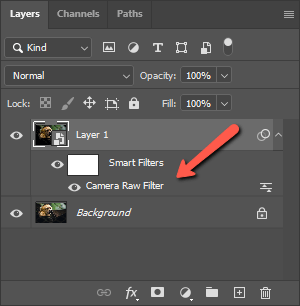
To make the filter non-destructive, let’s make it a smart filter. Do this by converting the layer to a smart object before opening the Camera RAW filter.
Right-click on the layer and choose Convert to Smart Object. Now when you add the filter, it will be added as an editable smart filter that you can come back to and adjust later.
To add the filter, go to Filter in the menu bar and choose Camera Raw Filter.

And here we are, once again. On the right, you’ll notice a series of panels. Click on them to open the tools and you’ll see lists of tools like what you would find in Lightroom.
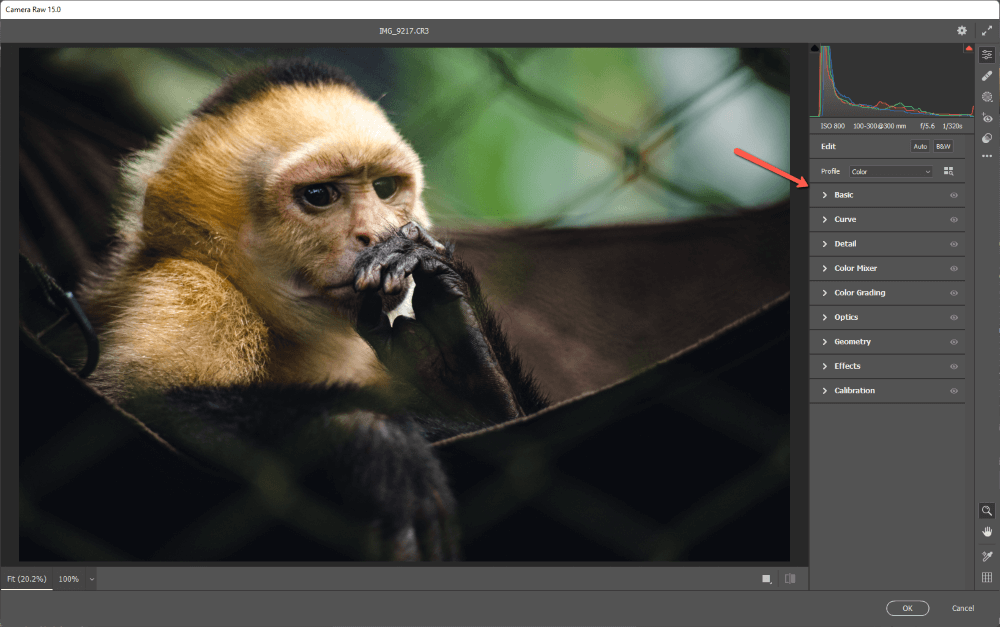
To darken the image, let’s open the Basic panel. You’ll notice the Exposure slider near the top and that’s the place to start. Slide it to the left to darken the image.
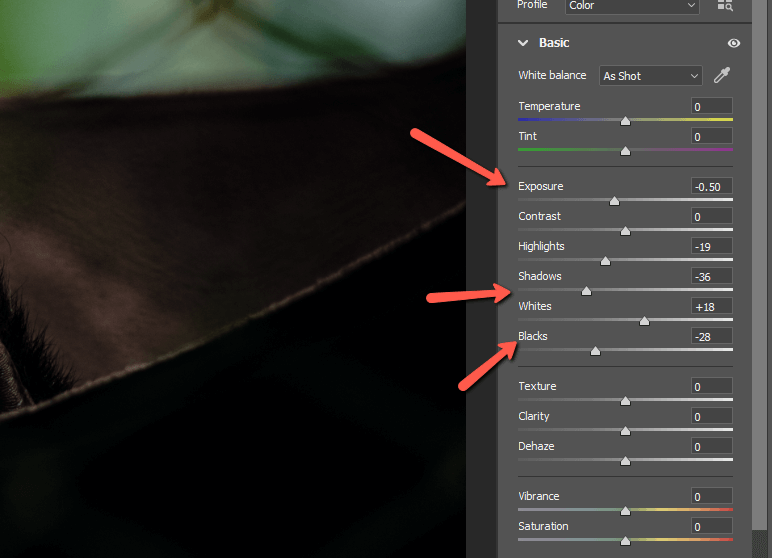
You can also play with the Shadows and Blacks. Even though we’re darkening, you might adjust the Highlights or Whites sliders as well to balance the darkening changes you’re making. You can also use these to darken the brightest areas of the photo only.
Once you’re happy with your adjustments, click OK.
Photoshop will return you to the Photoshop workspace. But notice how the layer looks in the Layers panel. There is some filter information there. To make adjustments, simply double-click on the Camera Raw Filter to open it back up.
Piece of cake! Photoshop won’t always be able to save every blown-out image, but it can sure help in some cases! Plus, you can darken images for creative effects or whatever else strikes your fancy. Curious about how to brighten an image? Check it out!
About Cara Koch