
No matter if it’s a DSLR or a smartphone, modern digital cameras are amazing pieces of technology. But even though they all have excellent automatic exposure control, you’ll inevitably find yourself with an underexposed photo that would be a much better image if it was just a bit brighter.
There are several different techniques in Photoshop that can lighten your image, but the most powerful and flexible method to brighten a photo in Photoshop is the Curves tool.
Curves can be a little bit difficult to learn at first, but it gives you an unparalleled degree of control over the brightness of your photo. Since it can take some time to use, I’ll also include a faster but less polished method that you might prefer.
Table of Contents
Method 1: Brightness/Contrast (The Fastest Way)
This method probably won’t produce a good quality result, but it’s the fastest way to brighten a dark picture in Photoshop.
Step 1: With your photo open in Photoshop, open the Layer menu, select the New Adjustment Layer submenu, and click Brightness/Contrast.
Step 2: In the Properties panel, increase the Brightness slider until your photo is bright enough.
As you’ll see fairly immediately, brightening a photo with this tool is a one-size-fits-all approach that can create ugly, overblown highlights that lose all detail – but it does make your photo brighter!
I wouldn’t recommend using this method except for quick-and-dirty edits where image quality doesn’t matter
Method 2: Using Curves (The Best Way)
It’s a bit difficult to put together a quick guide to using the Curves tool because of how complex it can be, but if you’re already familiar with the Curves concept, this will show you how to use it in Photoshop.
If you’ve never used Curves before, that probably leaves you scratching your head – especially the histogram grid. It’s a complex process that needs a bit of explanation for new users, so read on for a more detailed explanation of how to use the Curves tool to brighten a photo in Photoshop.
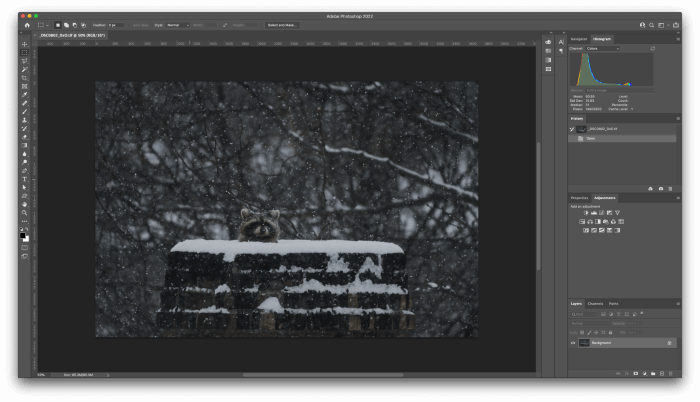
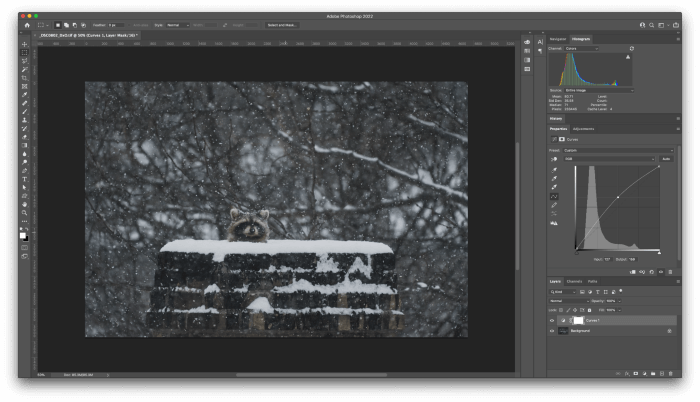
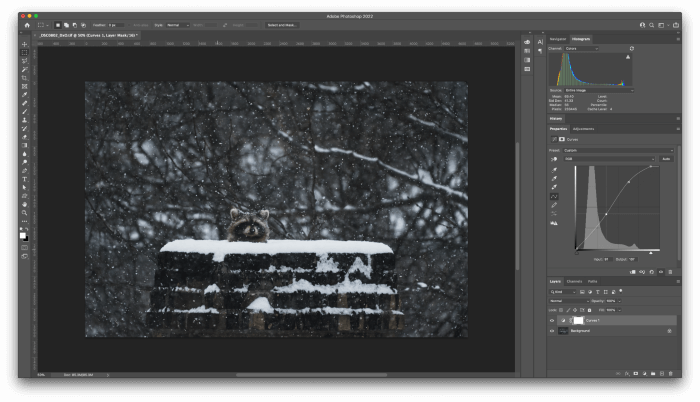
In this example, I’m going to brighten up a photo I took recently of one of Toronto’s many raccoons taking shelter in a chimney during a snowstorm.
The light was very bad, and my super-telephoto lens only opened up to f/6.3 at 600mm, so I wound up with a cute but underexposed photo. Let’s brighten it up a bit!
Step 1: Creating a Curves Adjustment Layer
I think I probably say this in 50% of the articles I write for PhotoshopBuzz, but it’s true: there are almost always multiple different ways to complete the same task in Photoshop.
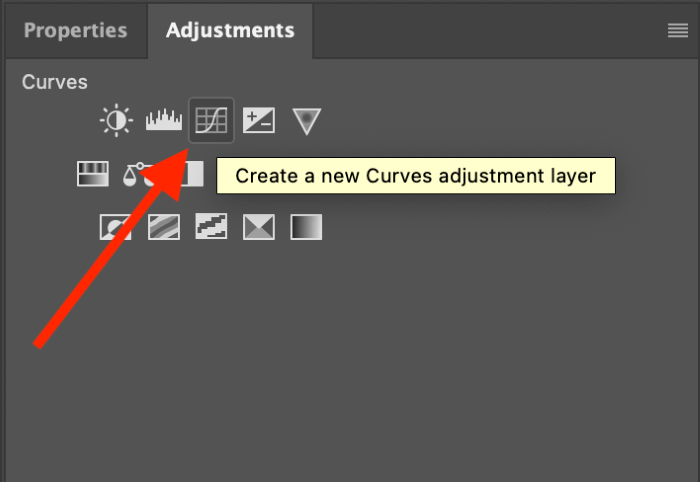
You can create a Curves adjustment layer by opening the Layer menu, selecting the New Adjustment Layer submenu, and then clicking Curves – but you can also just click the icon in the Adjustments panel, as shown below.
If you use adjustment layers regularly (and you should be!), then it’s very useful to have the Adjustments panel open. If it’s not part of your current workspace, you can make the panel visible by opening the Window menu and clicking Adjustments.
Step 2: Understanding The Curves Tool Dialog
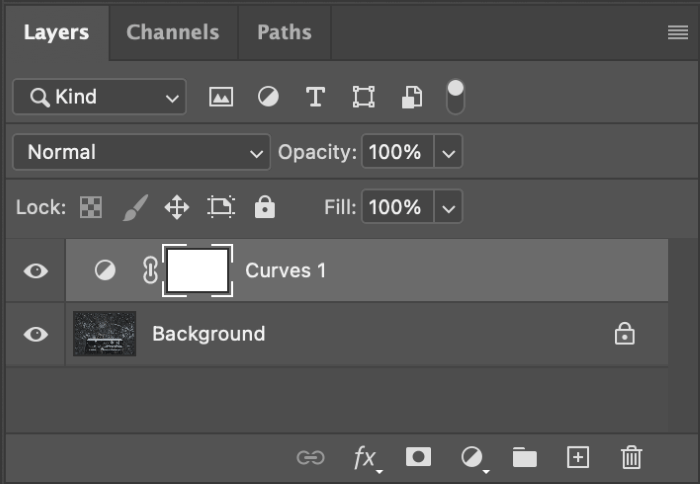
Once you’ve added an adjustment layer, you’ll see a new entry in the Layers panel at the bottom right of the interface. Make sure the layer is selected, and then switch to the Properties panel, which is nested in a tab beside the Adjustments panel.
If it’s not visible, you can open it using the Window menu. You may also need to resize your panels a bit to show the full contents of the panel, the way I have done below.
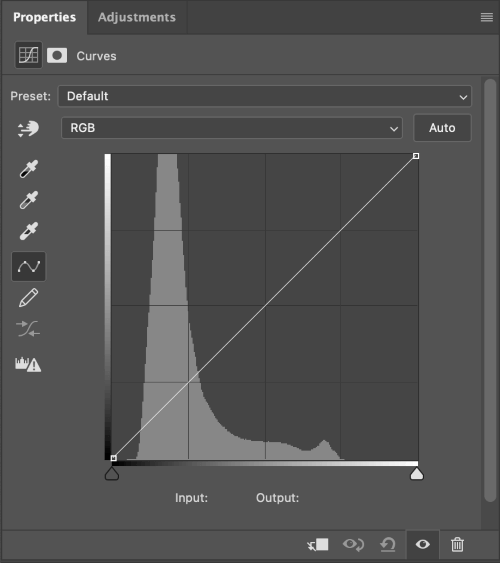
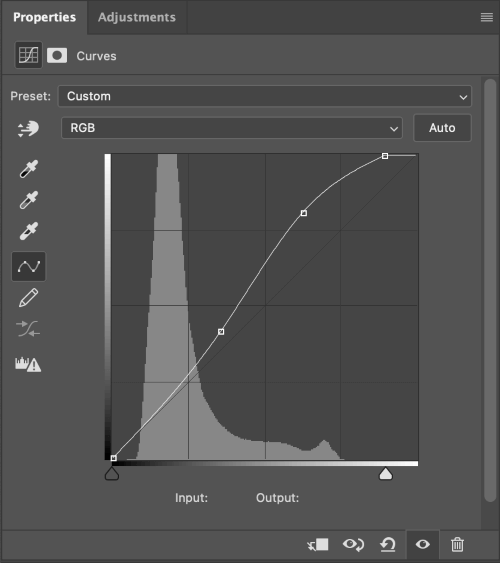
If you’re familiar with the idea of a histogram, you’ll immediately recognize the primary feature of the Curves tool. For those of you who are new to histograms, the relative brightness of your image data is represented as a chart.
The height of the chart indicates the number of pixels that have a specific tone. In the example above, you can see that there are a lot of fairly dark grey pixels in this image, which makes sense when you remember how underexposed it is.
Since there’s a bunch of bright snow in the image, there should be more pure white pixels, but they’re also a bit underexposed. There’s a slight bump towards the end of the histogram data, but it’s located in a gray midtone area instead of at the pure white end of the gradient, which is why the snow doesn’t look quite right.
Along the horizontal axis, the left side represents pure black, and the right side represents pure white, with all the other gray tones distributed as a gradient between the two. The vertical axis represents the modified tones you’ll create using your adjustments.
The diagonal line running from the bottom left to the top right is where you’ll make your adjustments. Click anywhere along the line to create an adjustment point, and then move the point up to brighten the corresponding tones, or move the point down to darken them.
This can be a bit difficult to wrap your head around at first, but in my experience, the best way to understand Curves is to use it!
There are a lot of different ways to interact with the Curves tool (see all the icons on the left side), but they all follow the same general principle.
Step 3: Lighten Your Dark Photo
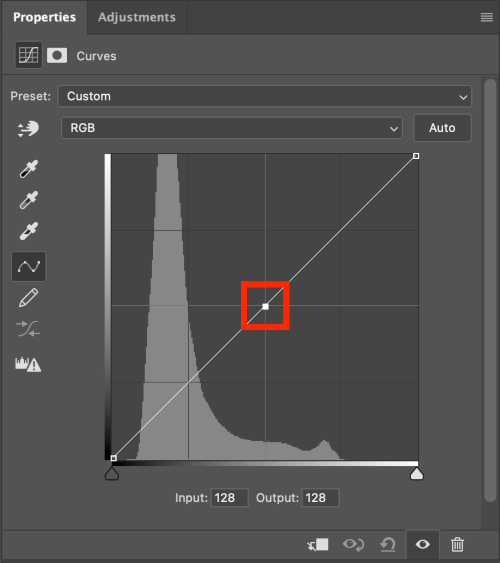
To brighten the mid tones of your photo without wrecking the highlight and shadow balance, click in the very center of the diagonal adjustment line to create an adjustment point (highlighted in red below).
Next, click and drag that adjustment point upwards, and you’ll immediately see why the tool is called Curves.
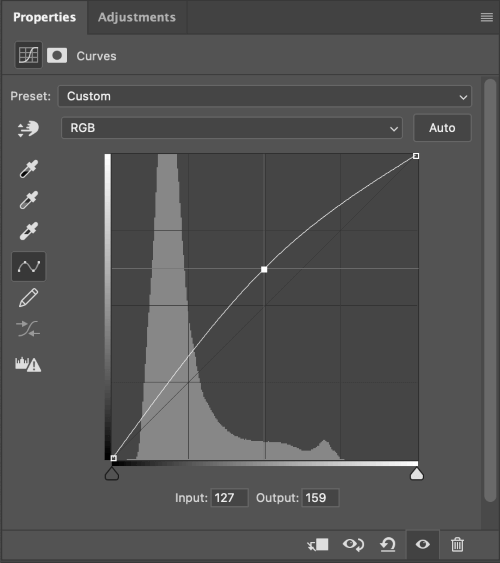
In order to create a smooth transition between areas of different tonality, the adjustment isn’t just made in one place but affects the nearby pixels along a curve. You can add as many adjustment points as you want, although too many can become counterproductive.
In this case, the image is a bit brighter, but some of the shadows have become a bit too bright, so adding another adjustment point in the darker section of the Curves adjustment line and moving it down will prevent the dark areas from getting overly brightened.
Sharp-eyed readers probably spotted the Auto button in the upper right corner of the Curves panel. This is a quick and easy way to brighten your photo using Curves, without the drawbacks of using the Brightness/Contrast tool.
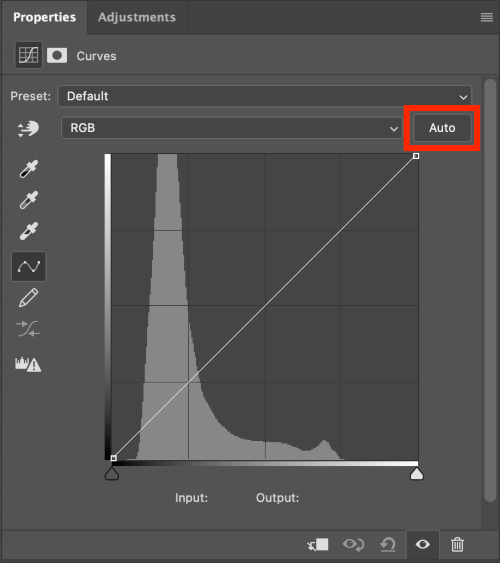
It doesn’t work perfectly in every situation, and it won’t always create the result that you want, so it’s still a good idea to understand how the Curves tool works. But for the purposes of learning Curves, it can be very helpful, so let’s give it a try and see what it does.
The Auto feature moved the white point slider closer to the actual pixel content, so the snow appears much brighter. It also added some adjustment points in the bright midtones and highlighted sections of the adjustment curve, brightening the whole photo overall.
You’ll notice that it also didn’t adjust most of the tones in the darkest third of the image, ensuring that dark areas don’t get ruined, preserving the contrast of the image.
A Final Word
Those are the best ways to lighten a photo in Photoshop, but there are lots of other methods. Part of becoming an image editor is exploring new techniques and figuring out which works best for your particular workflow and editing style.
That being said, you’ll have to learn to use Curves eventually, so it’s better to take the plunge and unlock your impressive editing powers as early as possible. It does take some practice to get the hang of it, so get back into Photoshop and start now =)
May your photos always be bright – or at least, as bright as you want them to be!
About Thomas Boldt