Copy and paste in Photoshop works much the same way as copy and paste in a word processor. It’s helpful when you want to put elements from one image into another image or when you want to duplicate objects within the same image.
Hello, my name is Cara and as a professional photographer, I’ve run into the need to copy and paste selections in Photoshop more than a few times.
The great news is that it is easy to do. Check it out!
Note: the screenshots below are taken from the Windows version of Photoshop CC. If you are using the Mac version, they will look slightly different.
Table of Contents
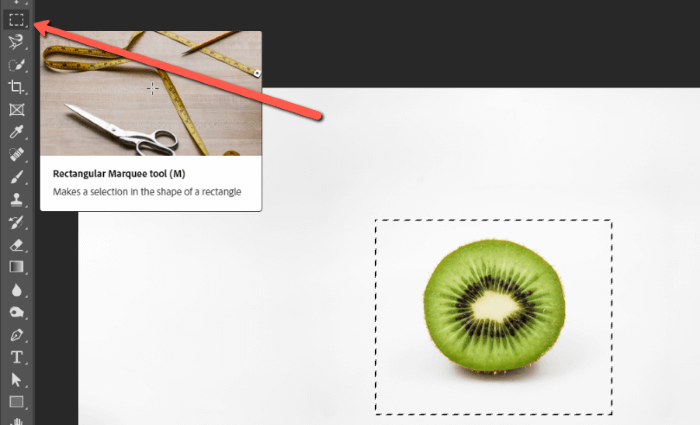
Step 1: Make a Selection
There are various ways to make a selection in Photoshop. You might use the Rectangular Marquee tool if you just need a basic shape or the Lasso, Object Selection Tool, or Quick Selection Tool to create customized selections.
For this tutorial, I’m just going to make a quick selection around the kiwi in this image from Pexels with the Marquee tool.
Step 2: Copy the Selection
The easiest way to copy and paste is using the keyboard shortcut.
Now, just like in your word processor, hit Ctrl + C (Command + C on a Mac) to copy the selection. You can also go to Edit in the menu bar and choose Copy.
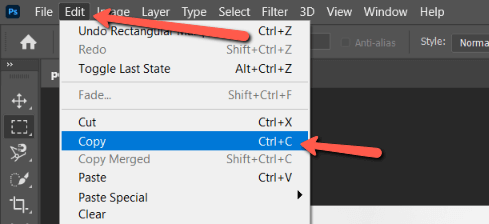
If you want to copy multiple layers, hit Shift + Ctrl + C (Shift + Command + C) or select Copy Merged.
Step 3: Paste the Selection
If you want to paste the selection into another image, open the desired image or create a new document. If you’re pasting within the same image, simply continue.
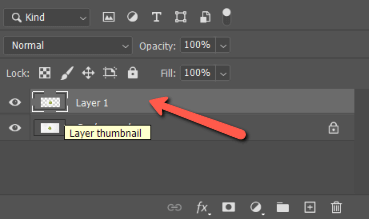
Hit Ctrl + V (Command + V) or select from the Edit menu to paste the selection. A new layer will appear in the layers panel with the pasted selection.
If you’re pasting into the same image, the pasted selection will appear on top of the original selection so you might not notice it. Just check to make sure a new layer appeared in the layers panel.
Step 4: Move the Selection
You probably don’t want your pasted selection right on top of the original one. So hit V on the keyboard or select the Move tool from the toolbox on the left.
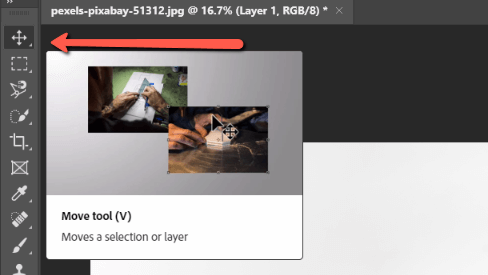
A box will appear around the selection. Click and drag the selection to its new position. Repeat as necessary for your project.
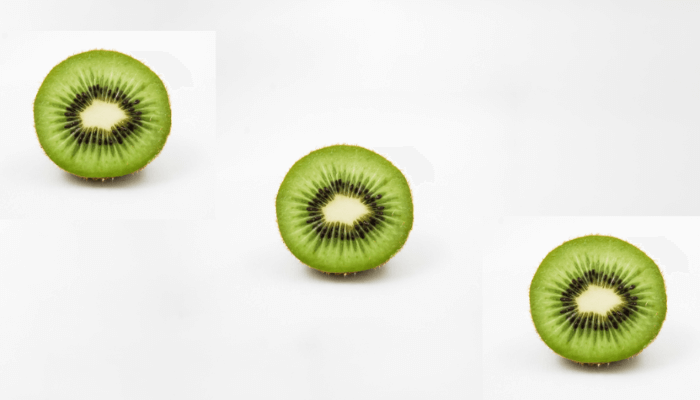
Wouldn’t it be awesome if it were as easy to replicate kiwis in real life? Delicious!
Looking for more quick Photoshop tips? Check out this article to learn how to deselect selections in Photoshop here!
About Cara Koch
Mark
Cara, I’m using the latest version of Photoshop. Now, when I copy and paste a section into the same graphic, I’m not seeing a line around the box that I have pasted. Is there a function I’m missing? Thanks.
June
Hi Mark,
When you copy and paste, you don’t always see the bounding box (line) on the object. If you want to see the selection box, you can activate the transform tool using the keyboard shortcut Command + T (Ctrl + T for Windows).
Hope this helps!
Jaryn Sullenger
hi i loved this info
Mike
If I follow you process when I try to copy the lasso selected portion of my picture I get the message “Could not complete the Copy command because the selected area is empty”.
It clearly isn’t empty because I can see it. What am I doing that causes this anomaly?
June
Hi Mike, is your image locked?
Daphne
i’m having the same issue and no my image isn’t locked
June
Can you elaborate more your case so that I can better help you?