
“I would like that object to magically disappear from my photo,” you say. While that might seem like a tall order, with Photoshop your wish is the program’s command!
Hey there, I’m Cara. It is downright astonishing the things that Photoshop is capable of doing. Even after using the program for years, I still get amazed sometimes at what I can do with my images!
Today let’s look at how to use content-aware fill in Photoshop. This is a surprisingly easy technique you can use to make objects, people, and whatever else disappear from your image in seconds!
Note: I took these screenshots from the Windows version of Photoshop CC. Those working with a Mac will find the interface slightly different.
Table of Contents
2 Ways to Use Content Aware in Photoshop
Okay, if we’re being honest, content-aware fill doesn’t work magically in all photographs. While it does an amazing job in general, Photoshop can get confused sometimes about which pixels to select for the fill.
Thus, there are a couple of ways that you can use content-aware fill in Photoshop. The first way is really simple and quick. Once you get it down, it takes three seconds to use the technique.
The second way allows you to tell Photoshop which parts of the image to choose from when creating the fill. We could call it the complicated way, but it isn’t really that complicated at all.
Method 1: Lasso Tool (The Simple Way)
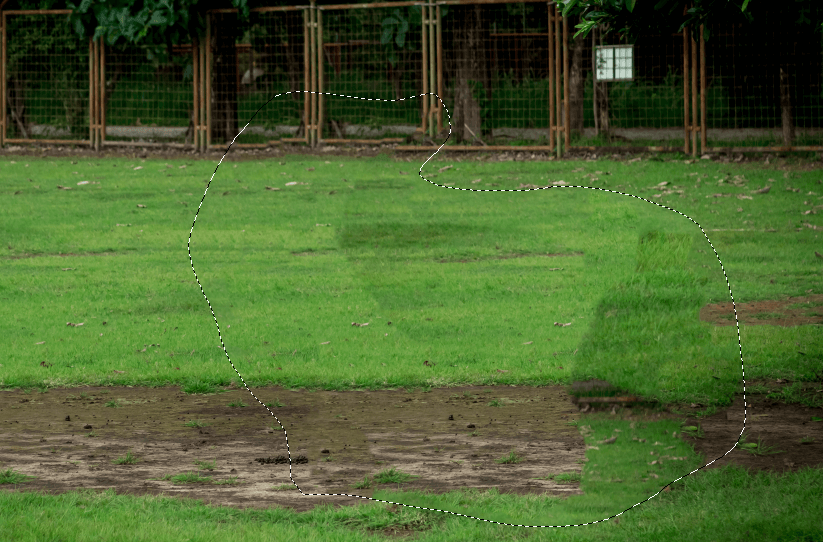
Let me show you how this works, starting with the simple way. First, Photoshop needs to know what you want to remove from the image. So you need to make a selection around it.
I know what you’re thinking. But making selections can be so tedious! Yes, but not this time. All you need is a quick, loose selection around the object you want to remove. Because precision doesn’t matter, you can use pretty much any of the selection tools to make the selection.
Step 1: Create a Selection. I’ll grab the Lasso tool from the toolbar or press L on the keyboard.
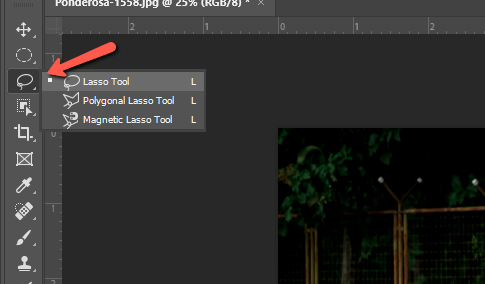
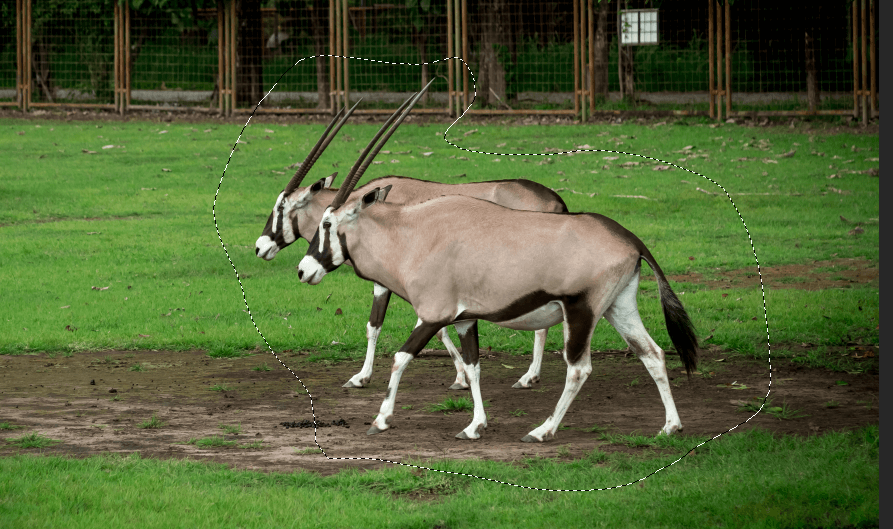
Click and drag to draw a rough selection around your object.
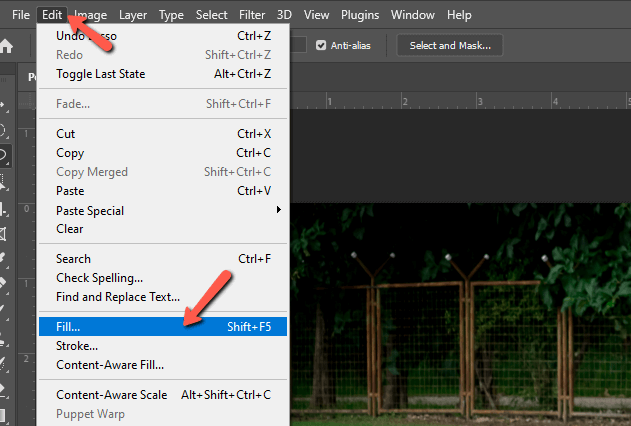
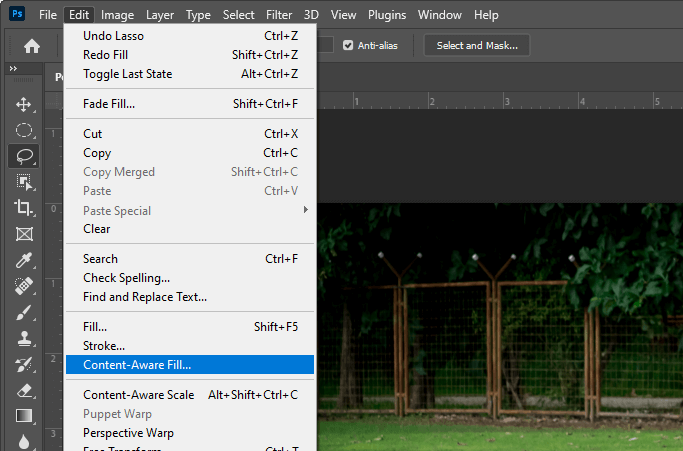
Step 2: Apply Content-Aware Fill. Now go to Edit in the menu and choose Fill. Or just hit Shift + F5 on the keyboard.
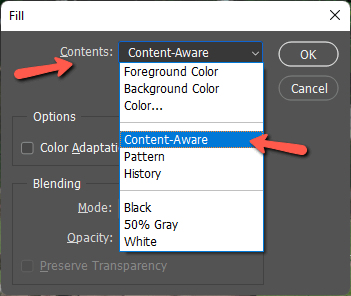
In the box that opens, click on the Contents box to open the dropdown menu. Choose Content-Aware from the list and press OK.
Wait for a second as Photoshop does its thing.
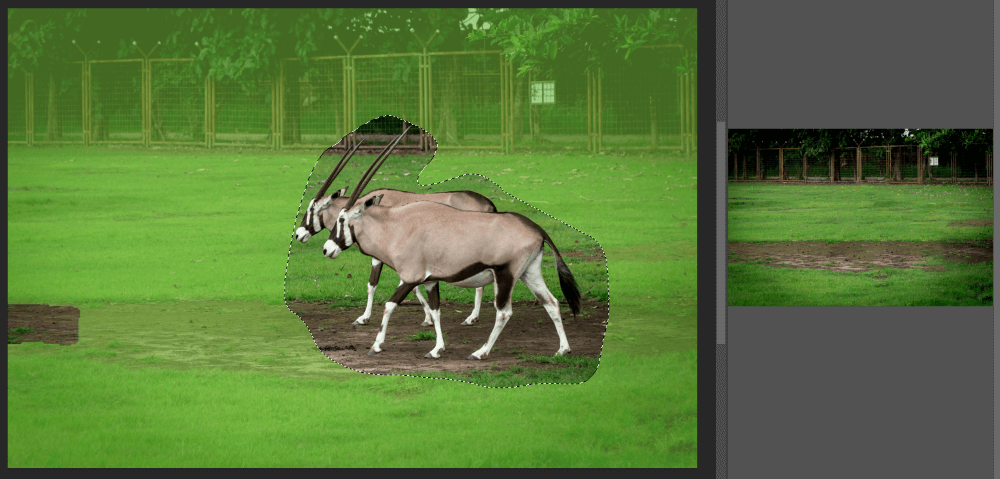
Now, this is a difficult image because of the tonal variations behind the animals. If there were a blue sky or some other more even background behind them it wouldn’t be a problem.
Even so, you can still clean this up relatively quickly with the Clone Stamp tool. Check out this tutorial to learn more about the Stamp tool.
Or we can try the slightly more complex way of using Content-Aware to see what happens!
Method 2: Content-Aware Fill Tool
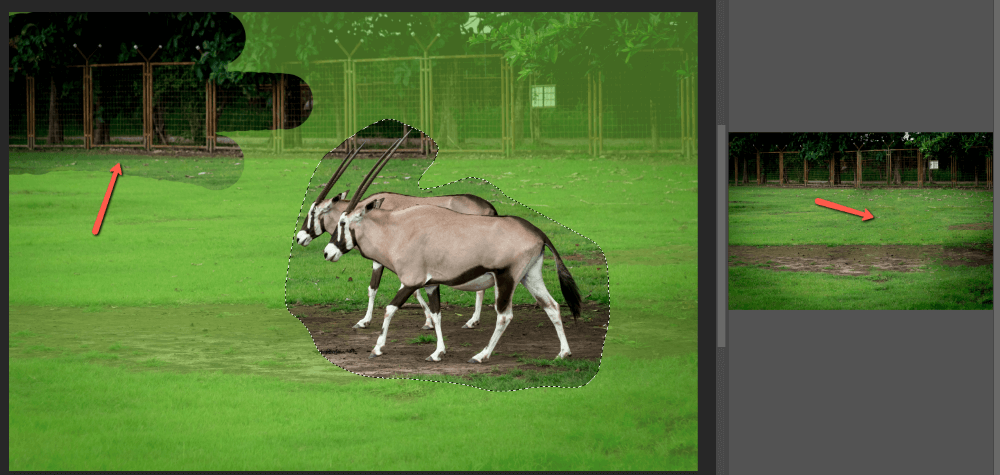
Start out the same way by making a selection around the object you want to remove. Instead of going to the fill tool and choosing Content-Aware, we’re going to open up the full Content-Aware tool.
Go to Edit and choose Content-Aware Fill, which is just a couple of lines below the Fill tool.
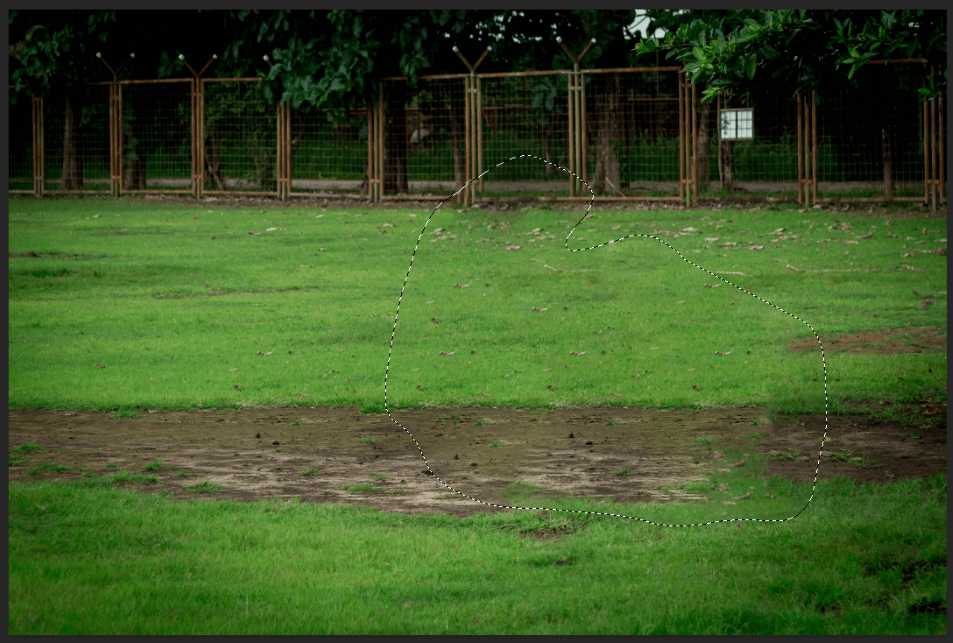
You’ll get something similar to the screen below. The green highlighted areas are the areas of the photo that Photoshop will use for the content fill. The little box on the right is a preview of what your image will look like when you finish.
There are a few tools in this section but you will rarely have to use them. The main thing we’re looking for is the Brush tool in the top left corner.
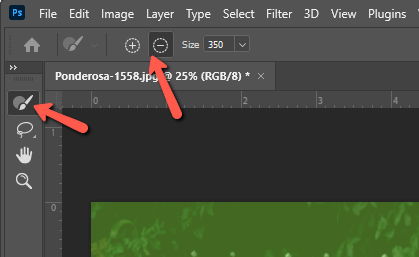
With this tool, you can add to or subtract from the green highlighted areas. Select either the plus or minus in the toolbar to add or subtract. Or switch from one to the other as you work by holding the Alt or Option key on the keyboard.
Keep an eye on the preview screen to the right as you work. Once you’re happy with the result, you’re done!
This time we get a much more natural result.
Press Ctrl + D or Command + D to deselect the selection. If there are any small blemishes that still appear, you can clean those up quickly with the Clone Stamp tool. But otherwise, you’re done!
Have fun with it! Making magic happen is always such a delight! Want to learn how to do more magical tricks in Photoshop? Check out how to change someone’s eye color here!
About Cara Koch