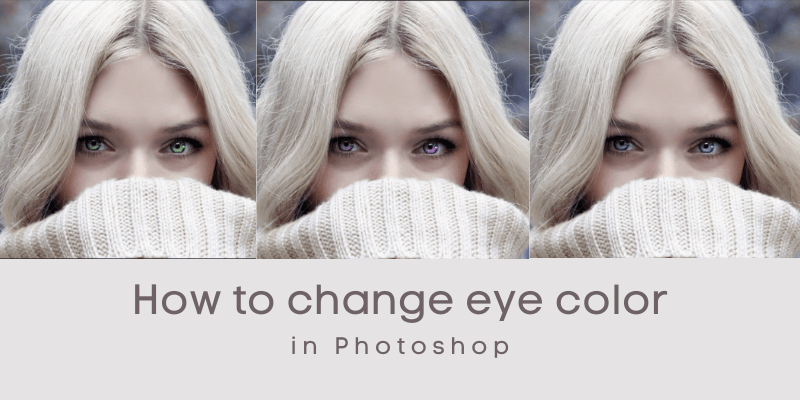
Have you ever wanted to give yourself a really cool eye color? Perhaps it was to go with your Halloween costume or something similar.
Hi, my name is Cara and as a professional photographer, I find it fun to dabble in image manipulation from time to time. Today, I’m going to show you an easy way to change your eye color in Photoshop.
Let’s get started!
Table of Contents
5 Steps to Change Eye Color in Photoshop
Note: the screenshots below are taken from the Windows version of Photoshop CC. If you are using the Mac version, they will look slightly different.
Step 1: Duplicate the Background Layer
If you’ve read our post on how to change hair color in Photoshop, you have an idea of what’s coming. The process is similar for both manipulations.
Hit Ctrl + J (Command + J on a Mac) to duplicate the background layer.
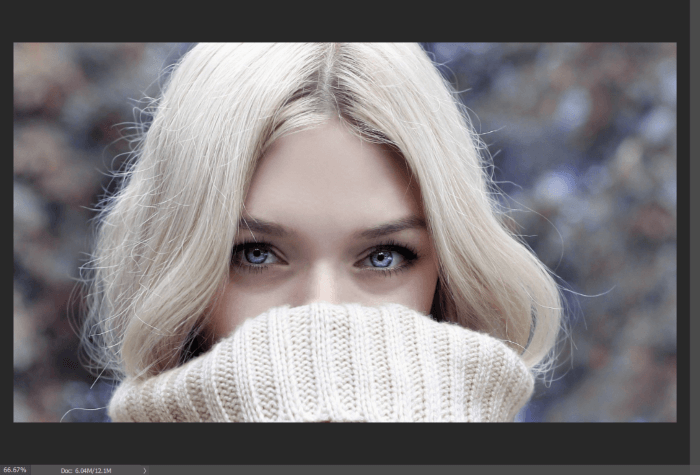
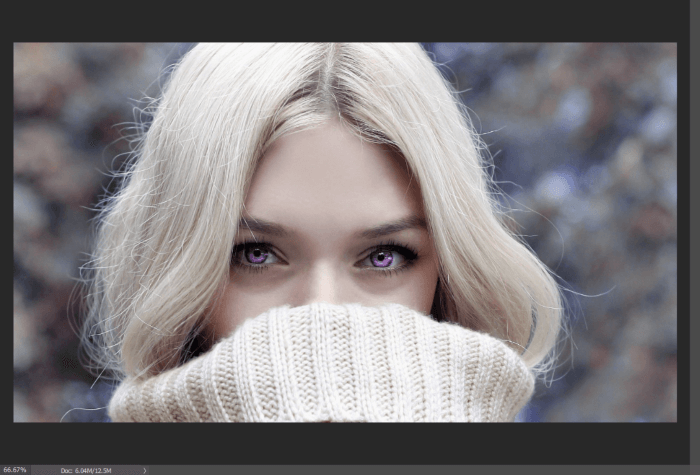
Today I’ll be working with this image. She’s already got some pretty cool eyes, but we’ll have some fun with them.
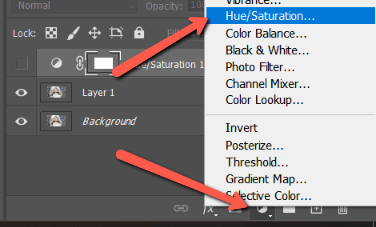
Step 2: Create a Hue/Saturation Layer
Click the half-filled circle below the layers panel and select the Hue/Saturation adjustment layer.
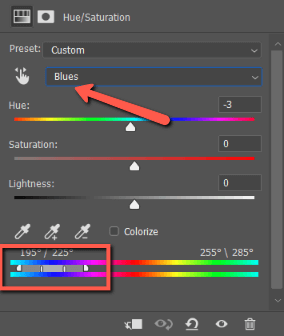
Step 3: Pick the Color
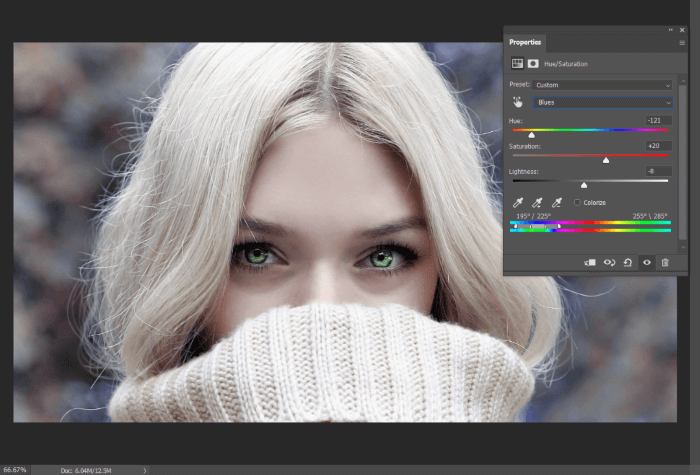
In the Hue/Saturation adjustment panel, choose the color range you want to work with. In this case, her eyes are blue so I’ll pick the blues.
This selects a color range in the blues at the bottom of the panel. You can grab the sliders and adjust them up or down to adjust the range. A bigger range will select more colors, and a smaller range will select fewer.
If you’re not sure which range to pick, click the hand icon next to the box where I selected the blues. Then click on the eyes (or whatever part of the image that you want to recolor).
Once you’ve set these values (doesn’t have to be perfect as you can adjust later) slide the Hue, Saturation, and Lightness sliders up and down to select the color you want.
It may affect other portions of the image right now, but that’s okay. Just pay attention to the eyes until you get the color you want.
Step 4: Invert the Mask
Here’s where we localize the color change to only her eyes. Hit Ctrl + I (Command + I) to invert the mask. The changes will now be applied behind the current layer so the image will revert to its original color.
Step 5: Select the Brush Tool
To make the color show through, we need to paint over her eyes with the brush. Hit B on the keyboard or select the Brush Tool from the toolbox on the left side of the screen.
Make sure that white is the foreground color as shown in the black and white boxes at the bottom of the toolbox panel.
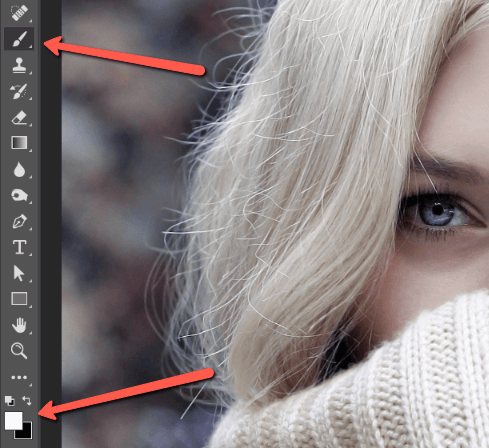
Select an appropriately sized brush for your image. Since we set the color range to blues, I don’t have to be too precise. It won’t affect her skin, lashes, or the white part of her eye since they aren’t blue.
Have Fun with Changing Eye Colors in Photoshop!
What do you think of her violet eyes? I think they’re gorgeous! I can also open up the hue/saturation panel again and adjust the sliders in a different direction to give her these lovely green eyes.
Enjoy, and be sure to check out more of our easy Photoshop tutorials for more fun!
About Cara Koch