Some tools in Photoshop have nothing to do with changing anything in the image. Rather, their purpose is to make working in Photoshop easier.
One such tool is Zoom tool. Let me tell you that in my experience as a photographer, getting up close and personal with the image you’re working on is very helpful.
Nice to meet you! I’m Cara and today I’m going to show you several ways to zoom in and out in Photoshop. Let’s get started!
Note: the screenshots below are taken from the Windows version of Photoshop CC. If you are using the Mac version, they will look slightly different.
Table of Contents
Method #1: Keyboard Shortcut
Let’s start with the quick way to zoom in on an image or your canvas is using the keyboard shortcut. With your image open, all you have to do is hit Ctrl + + (Command + + on a Mac) to zoom in. To zoom out, just hit Ctrl + - (Command + -).
To make the image jump to fit the screen (by either zooming in or out) hit Ctrl + 0 (Command + 0).
Couldn’t be simpler!
Method #2: Zoom Tool
Of course, keyboard shortcuts are handy, but it’s always good to learn the formal way of doing things as well.
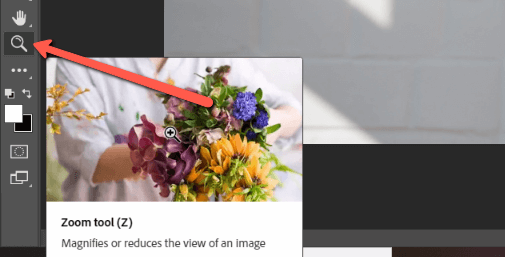
To access the Zoom tool, click on the icon that looks like a magnifying glass near the bottom of the toolbox on the left side of your screen. You can also just press Z on the keyboard for quick access.
Then, you can click on your image on the spot where you want to zoom in. Hold down the Alt (Option) while clicking to zoom out.
You can either click several times to zoom in or zoom out or you can use the continuous zoom feature. To use this feature, the Animated Zoom box must be checked in preferences.
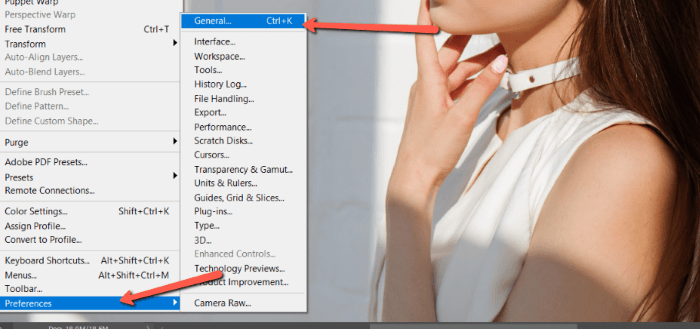
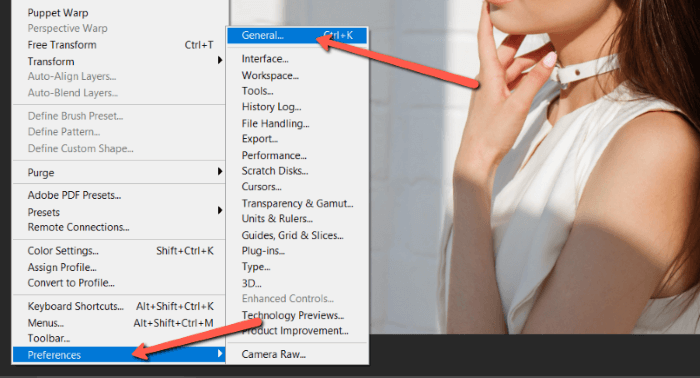
To get there, go to Edit in the menu bar at the top. Hover over Preferences and choose General.
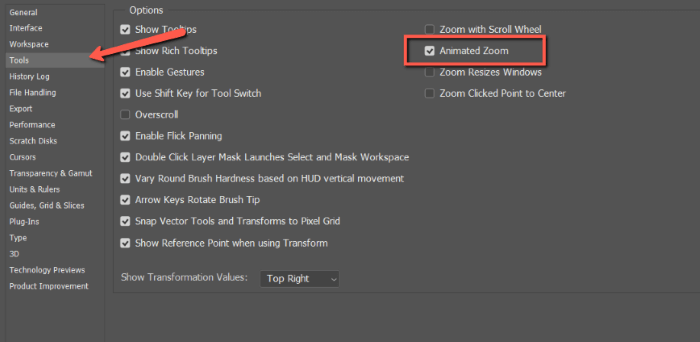
Click Tools on the left in the window that opens and make sure the Animated Zoom box is checked.
With this feature active, you can click and hold and the screen will slowly continue zooming until you let go.
Note: Not all graphics cards support this feature.
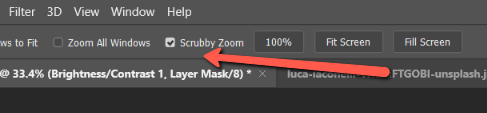
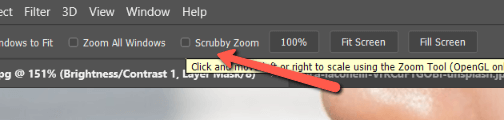
Also, when the Scrubby Zoom box in the options bar is checked, you can click and drag to the right to zoom in or to the left to zoom out.
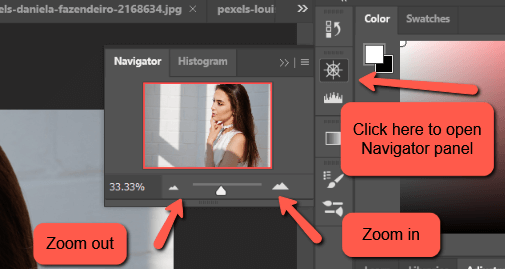
You can also zoom through the navigator panel. You can find this panel by clicking on the icon that looks like a ship’s steering wheel on the right side of your screen.
Click the big mountains on the right to zoom in, and the small mountains on the left to zoom out. Or you can move the slider to the left or right to zoom in or out respectively.
Method #4: Scrubby Zoom with Move Tool
This one might be harder to remember, but it’s handy for quick access. When the Move tool is active, you can activate Scrubby Zoom with the keyboard.
Select the Move tool from the toolbox on the left. You can also just hit V on the keyboard.
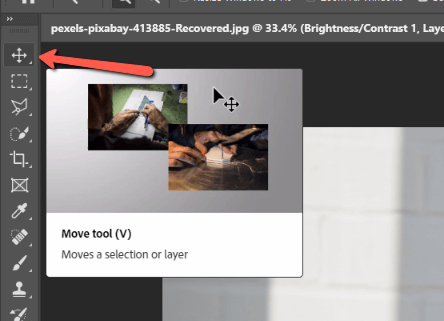
With this tool active, hold down Space + Ctrl (Space + Command) then click and drag. Dragging to the right zooms in while dragging to the left zooms out.
Method #5: Scroll Wheel on Mouse
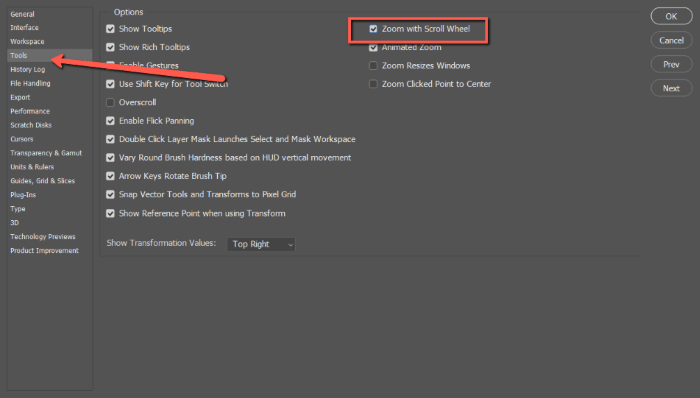
You can also zoom in and out quickly using the scroll wheel on your mouse. For this option to work, make sure the Zoom With Scroll Wheel box is checked in General Preferences.
To access this checkbox, go to Edit in the menu bar and go all the way down to the bottom of the menu to hover over Preferences. Choose General from the menu that opens.
In the window that opens, click Tools on the left. Then, check the box Zoom With Scroll Wheel.
Jump to 100%
Viewing images at 100% is the best way to get the most accurate view of an image. This display uses one monitor pixel to show one image pixel. How zoomed in the image has to depend on the size of the image.
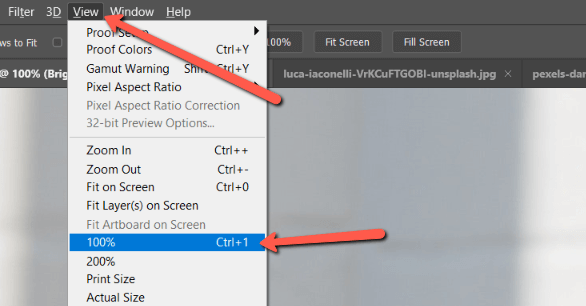
To get there quickly, double-click on the Zoom tool. Alternatively, go up to View in the menu bar and select 100%. Another quick method is to hit Ctrl + 1 (Command + 1).
Magnify a Specific Part of the Image
You can also magnify a specific selection. With the Zoom tool active, deselect Scrubby Zoom in the options bar at the top.
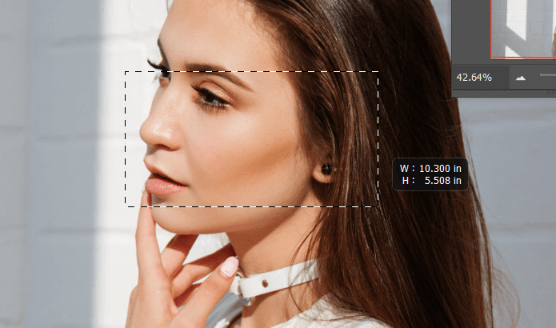
Now you can click and drag to create a box around the area you would like to magnify. When I let go of the mouse, the selection I’ve made will jump to fill the screen.
Zoom With Ease
I bet you didn’t know there was so much to know about the zoom tool, did you? Have fun zooming around Photoshop and be sure to check out more of our tips, such as how to deselect a selection!
About Cara Koch
Victor Modderkolk
Hi! One way or another, I accidentally changed my zoom-tool that its default function now is to zoom out. I have to hold down the Option-key to have it zooming-in. Would you know how to change it back, and zooming IN is the default function again?
Greetings, Victor
June
Hi Victor,
Yes the default action is to zoom in. Either way you’ll need to hold the option or alt key to zoom the other way. I think an easier solution would be using the keyboard shortcut to zoom in and out directly, so that you don’t have to switch between tools. Commad + + to zoom in and Command + – to zoom out. Hope this helps!
Peter
Hello , PS 2023, please zoom with command + is limited. I can use it only to 100 percent, not more…. why? I would like use this shortcut for larger percentage. As it was in the previous version. Thank you
June
Hi Peter, that’s strange. I’m also using the 2023 version, and I can zoom in to more than 100% using the shortcut.