Color matching is super important when creating realistic-looking composites. Mismatching colors are a dead giveaway that the photo has been manipulated.
But getting the color just right is so hard! Or is it?
Hi! I’m Cara and I love the amazing and powerful tools that Photoshop offers for us to create and modify images. Composites used to be overwhelming to me until I learned this simple method to automatically match colors in Photoshop.
Let me show you this trick that will help you match color in Photoshop in no time!
Note: all the screenshots below are taken from Photoshop CC for Windows. Other versions will look slightly different.
Table of Contents
Step 1: Open and Combine Your Images in Photoshop
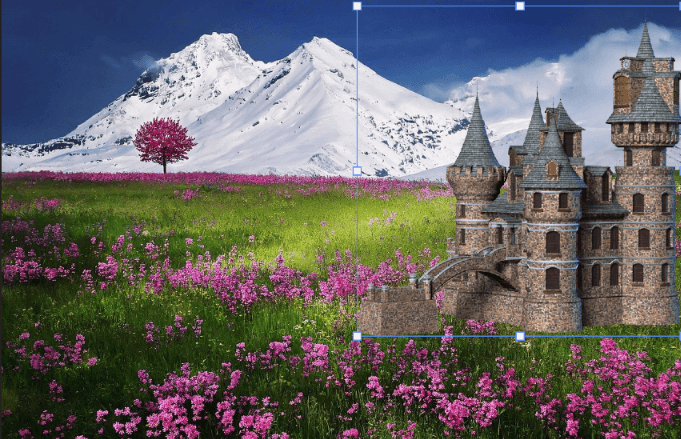
Let’s open two images in Photoshop. I’ll be working with this image and I’m going to drop a castle into the scene.
Step 2: Duplicate the Layer
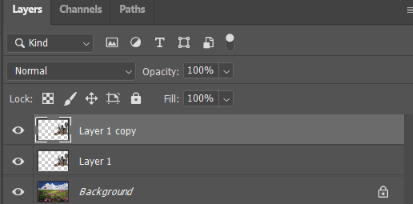
One thing to note about this technique is that it makes destructive changes. In other words, the change is permanent and you can’t go back and make adjustments later.
To that end, it’s a good idea to duplicate your layer before making any changes. That way, you’ll have an unaltered copy if you need it.
Press Ctrl + J or Command + J to copy the layer.
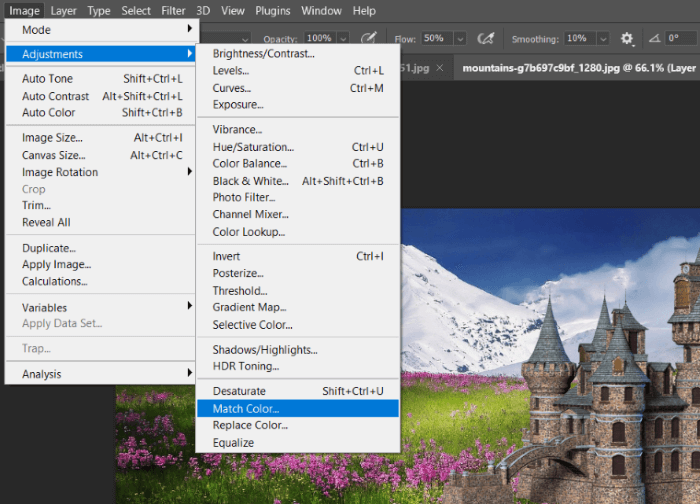
Step 3: Open the Color Match Tool
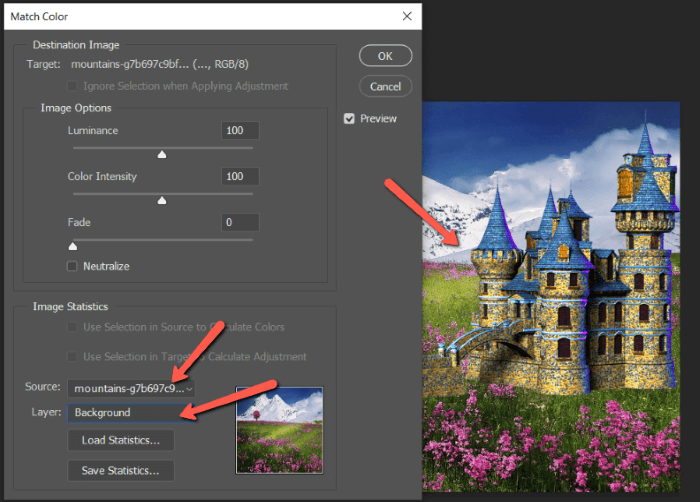
To adjust the color, we’ll use the color match tool. Go to Image in the menu bar, hover over Adjustments, and choose Match Color.
Near the bottom of the panel that appears, you find a box for Source. You can choose the document that you’re working on or another document open in Photoshop. This feature is handy because you can easily match colors with another image if you prefer.
I want to match the castle with the mountain scene so I’ll choose the image of the mountains as my source. In my layers panel, I have the background image, layer 1, and layer 1 copy. I want to match the background, so I choose Background in the Layer box.
Step 4: Fine-Tune the Edit
Notice the castle has drastically changed color. It still doesn’t quite fit so we can make a few adjustments in the Image Options section.
I’ll bring down the Luminance and Color Intensity and bring up the Fade option. Fade helps the effect to more subtly blend. Check the Neutralize box if there seems to be a color cast to your layer.
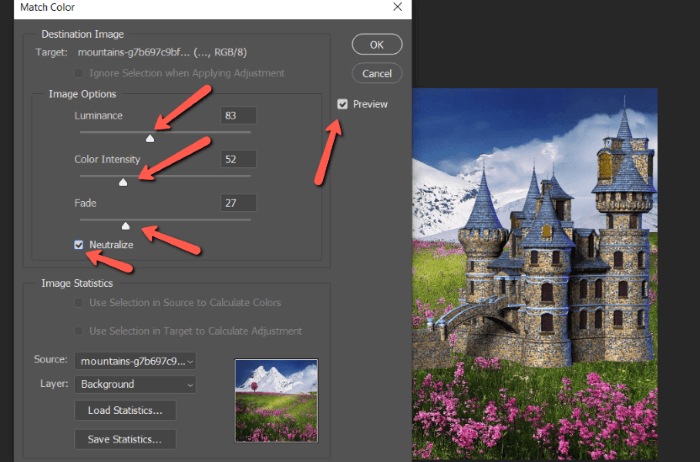
Make sure the Preview box is checked on the right-hand side to be able to preview the changes as you make them. Once you’re happy with the adjustments, click OK.
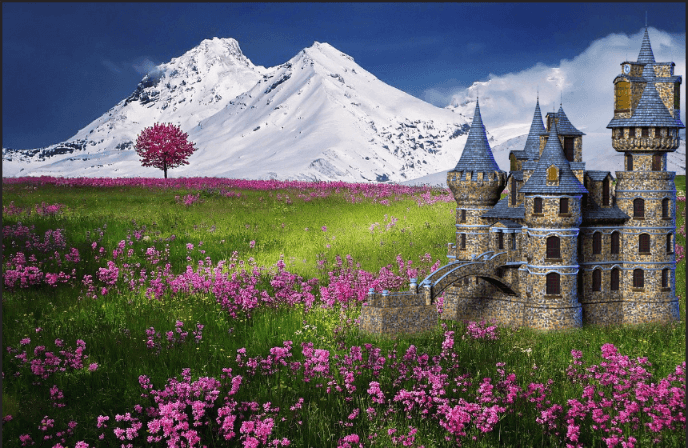
Obviously, this image will need extra elements to make it look realistic, but the castle colors are already looking quite good.
You can also add a Levels or Curves adjustment layer on top to make further adjustments to the castle. Don’t forget to use a clipping mask to limit the adjustment layer effects on the castle.
I know, you’re welcome. Compositing images just got a whole lot easier, right? Grab some images and start having fun with this technique. You’re sure to come up with something awesome!
Interested in learning more fun tricks with Photoshop? Check out how you can recolor parts of images in Photoshop with these two techniques!
About Cara Koch