White balance is tricky to figure out, but it’s simple to repair in Photoshop! The white balance in your photographs can be “right on” sometimes, and other times it’s miles off.
It’s always better to attempt to get your white balance accurate in-camera, so let me emphasize that before we get started with this guide. As a result, post-processing takes less time, and your photographs get a head start if you do need to make some white balance modifications.
Disclaimer: Using these tools will not at all change the white balance information in your photographs because you aren’t working on a RAW file in Photoshop. Instead, you are modifying a PSD, JPEG, or other colors and tones. However, the final product will have the same appearance as a white balance adjustment.
I have over five years of Adobe Photoshop experience and am Adobe Photoshop certified. In this article, I’ll teach you how to correct white balance in Adobe Photoshop.
Table of Contents
Key Takeaways
- Color adjusting is essential for all of your images.
- Multiple methods will help you to learn which way works best for you.
What is White Balance
White balance, which is assessed by looking at the colors that should be white in your image, is the balance of color temperature. The whites will look like true white when the white balance is balanced.
To get the intended image, white balance is a crucial camera setting that must be calibrated correctly. A bad white balance is to blame if you’ve ever taken a picture or a video and noticed that the colors look unnaturally blue or yellow.
Method 1: Camara Raw Filter
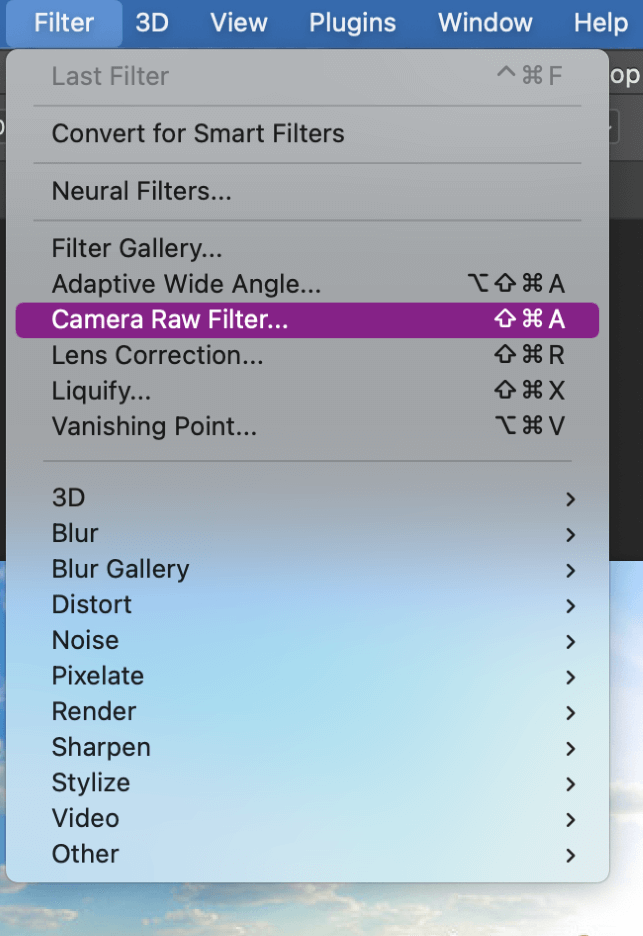
Step 1: Select your image layer in Photoshop and choose Filter > Camera Raw Filter to adjust the white balance.
To change your white balance, use the Temperature and Tint sliders in the Basic panel located on the Camera Raw window’s right-hand side. Press OK to save your changes after you’re done.
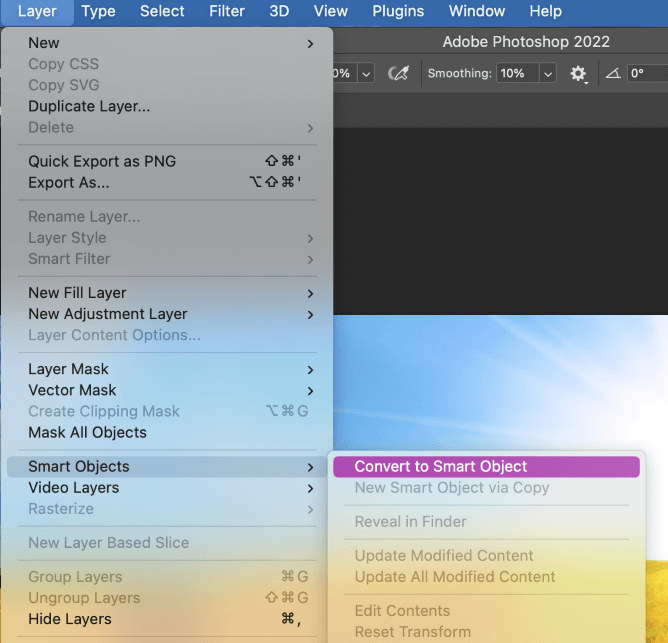
Step 2: As soon as you open a RAW image in Photoshop, Camera Raw will launch automatically. To prepare your image for various file formats, go to Layers > Smart Objects > Convert to Smart Object in the menu bar.
Step 3: Now go to Filter > Camera Raw Filter. This will bring up the window for that selection. You will see different tabs. Go ahead and click Basic to open that tab.
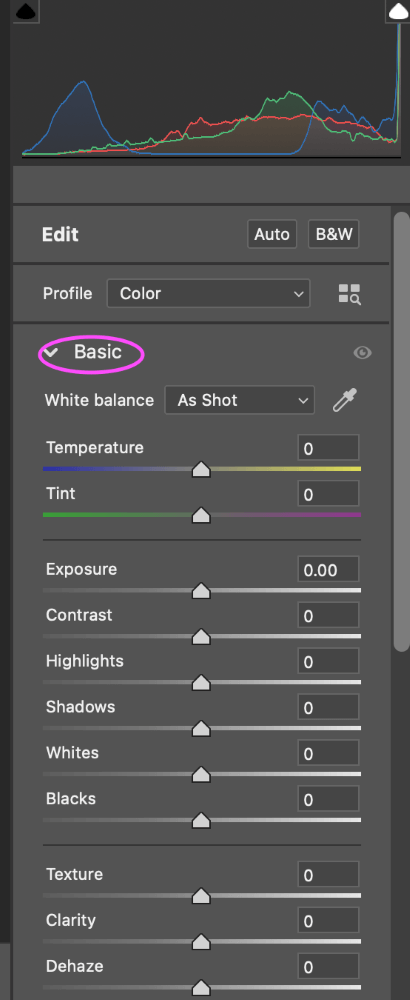
Let’s begin with the slider for temperature, which you’ll probably use the most. You should adjust the toggle in the center to the left to reduce warm tones like orange and yellow, or to the right to reduce cool tones like blue, depending on the image.
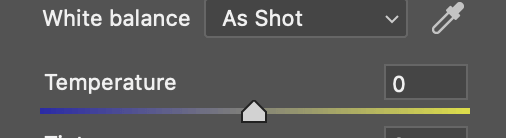
Play around with the Temperature slider, adjusting it to your liking. Sliding it left will give more blue tones while sliding to the right gives more yellow tones. It’s up to you how you would like your levels to be in your image.
In addition, you may use the Tint option, which is located just beneath the Temperature slider, to balance and fix colors in an image.
The quantity of green and purple in the image can be changed using this slider. You can also experiment with this slider. As you slide the toggle to the left to boost greens and the right to boost purples, you’ll see the image shift.
Method 2: Automatic White Balance Adjustment
Step 1: There are a few other white balance settings you may utilize in addition to the sliders we discussed before to automatically fix the color tones in your image. When Camera Raw is open and the Basic tab is selected, you will find the Auto White Balance tool and the Color Sampler there.
Step 2: The Auto White Balance selector is the fastest way to adjust the white balance in your photo. You will want to go back to the basic section of the menu and click the dropdown to As Shot or Auto and you will see a slight change in your image.
While Auto will evaluate and adjust the white balance in the image automatically, As Shot leaves the white balance as it is.
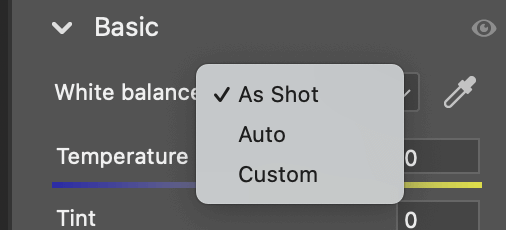
The custom option is not something to be concerned about, which brings up the last point about the white balance settings. When you move the Temperature or Tint sliders, this will automatically be chosen and displayed, thus changing it manually will not affect your image.
Bonus Tips
- Remember always to save your work always!
- As shot, Auto, and Custom are all different, meaning it’s up to you which one you prefer.
Final Thoughts
Color adjusting is essential for all of your images. By doing this, the colors you see in real life can be more accurately captured in your photographs. You can achieve realistic tones with these straightforward tools, particularly in high-contrast images.
Any questions about adjusting white balance in Photoshop? Leave a comment and let me know.
About Aly Walters