This would look so much better if the background were a different color.
Have you ever had that thought when looking at an image? I certainly have! Clean, white backgrounds are nice for isolating the subject, but they can also be a little boring.
Hello! I’m Cara and I am one of those photographers absolutely in love with color! I like my images with bold, true colors and very rarely do any of that light and airy stuff that is so popular.
Some places (like Amazon) require white backgrounds for product images. However, whenever possible I like to add a splash of color because Photoshop makes this super easy.
Let me show you how to quickly change the background color in Photoshop! Of course, you can use the same method to change the background color to white as well.
Screenshots and instructions in this tutorial are from the Windows version of Photoshop CC, if you are using the Mac version, they can be slightly different.
Table of Contents
Step 1: Select the Subject
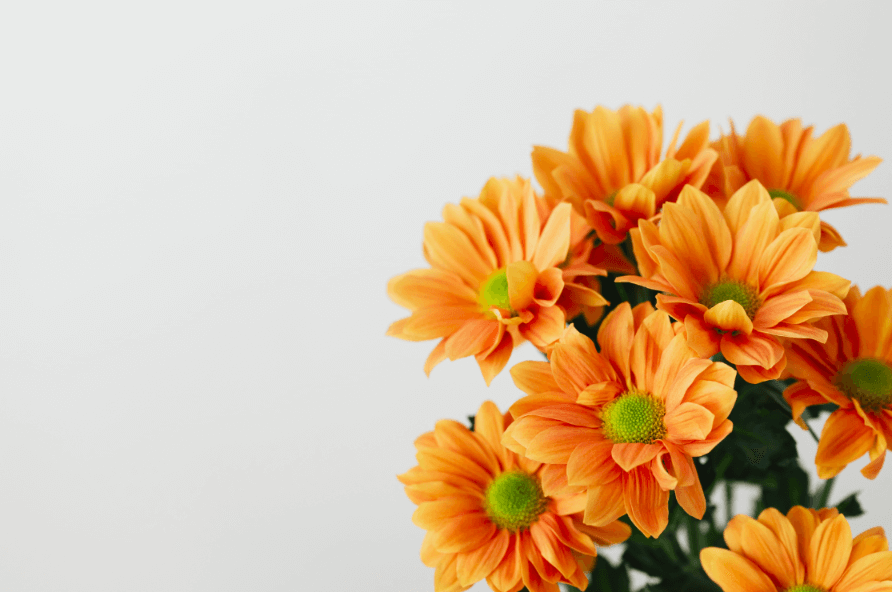
The first thing we need to do is tell Photoshop which area we want to change. Today, we’ll be working with this image from Pexels.com.
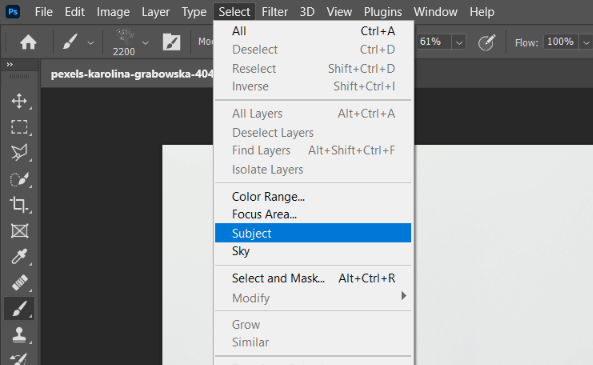
Most of the time for a subject on a white background, Photoshop can figure out the subject itself. Go to Select in the menu bar and choose Subject.
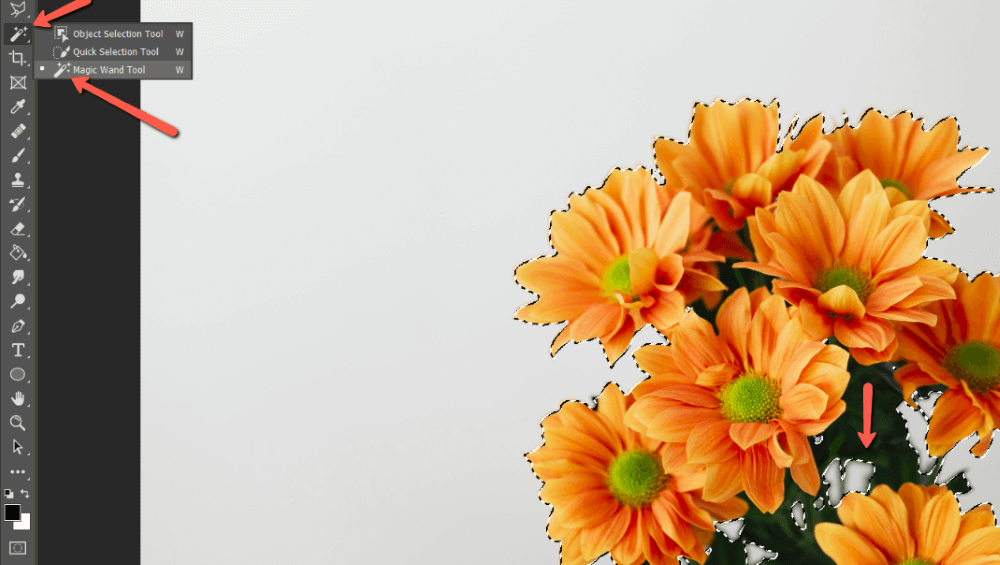
Photoshop didn’t do too bad but there are some areas to clean up. Notice there are a few spots where it missed the mark.

You can clean up the selection with any of the selection tools. Which one is best depends on your image. For me, the Magic Wand tool did great for getting all the spots between the flowers.
Step 2: Invert the Selection
At this point, we have selected the subject. This means that any changes we make will happen to the subject, but not the background. We want to do the opposite so let’s invert the selection.
Press Ctrl + Shift + I or Command + Shift + I on the keyboard. Or you can go to Select in the menu bar and choose Inverse.

You’ll notice marching ants around the outside of the image to indicate that the background is selected.
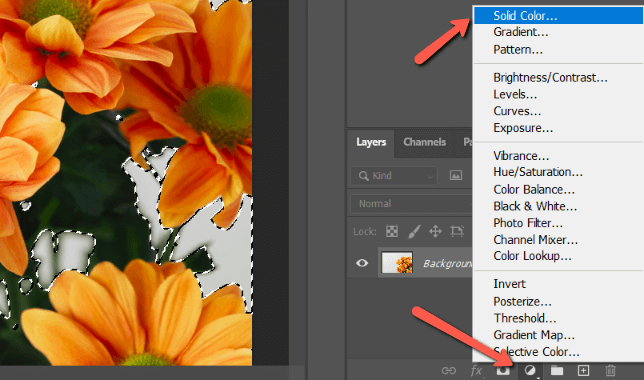
Step 3: Add a Solid Color Adjustment Layer
Click the half-filled circle icon at the bottom of the Layer’s panel to add a Solid Color Adjustment Layer. Choose Solid Color from the menu.
Choose whatever color you want from the color picker. You can click around to a few different colors and you’ll see an instant preview. Don’t be too picky about the color at this point, we’re going to change it in a moment anyway.
If you need to add a white background to the image, simply choose white and you can skip step 4.
Step 4: Change the Blending Mode
You might notice that some of the edges seem a little weird like the subject is out of place. That’s because our new colored background isn’t interacting at all with the original one.

To clean up those areas and blend the image better, we need a different blend mode. You can scroll through the various options for an instant preview until you find the one you like for your image.
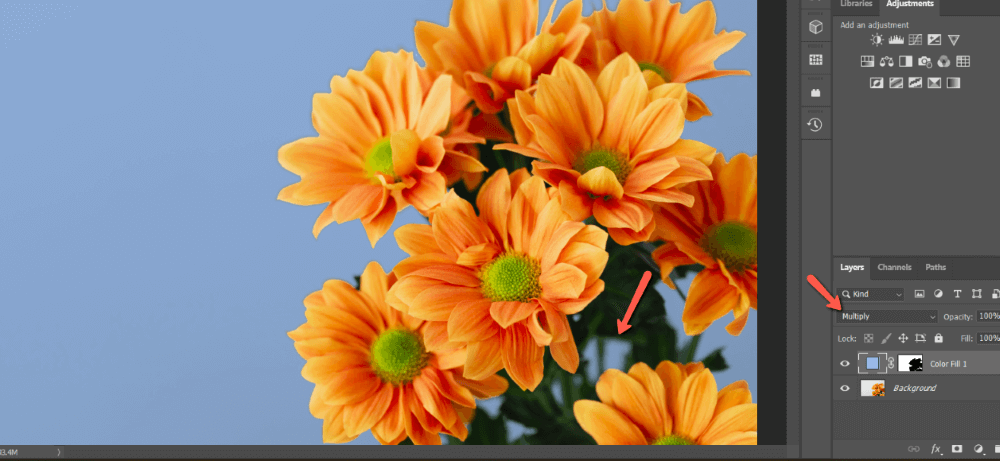
I’m going to go with Multiply. This is the one that most often works for this technique but you should also do a quick run through the others to see if one works better for your image.
Notice it doesn’t look so false around the greenery now?
Step 5: Pick the Final Color
You’ll notice that changing the blend mode affects the color of the background. That’s why I said not to stress about it too much before.
Now you can go in and choose the exact shade you want. Double-click on the solid color adjustment layer’s thumbnail.
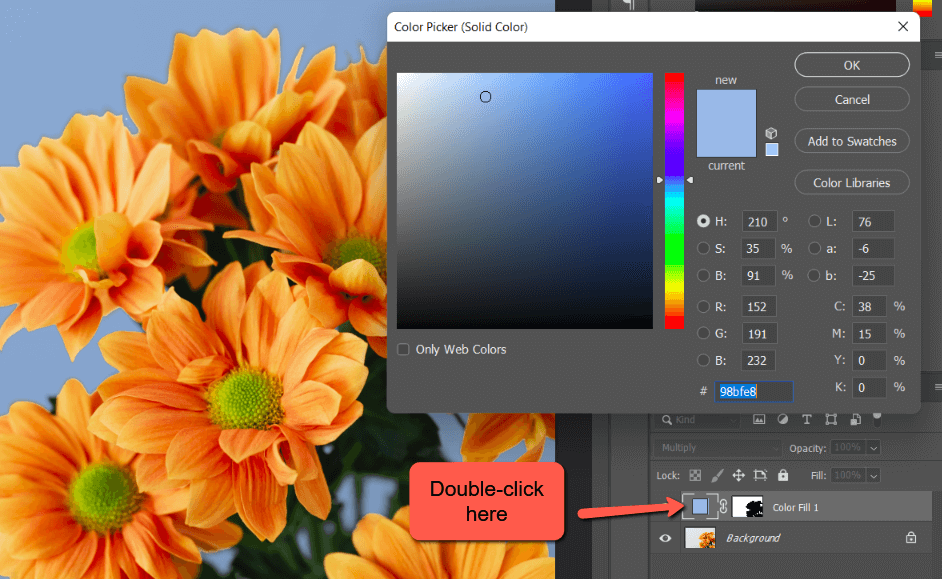
Play with different colors until you find one you like! It’s pretty cool!
Intrigued about what else you can do in Photoshop? Check out more of our tutorials, such as how to select all of one color in Photoshop!
About Cara Koch