
Wouldn’t it be nice to click a button and select only one color in Photoshop? It sure would come in handy for removing backgrounds or other elements from images!
Howdy! I’m Cara and I love playing with images in Photoshop. I don’t love wasting time, however, and making selections in Photoshop can be tedious.
When photographing for composites, I can make this job easier on myself by photographing my subject in front of a plain, single-color background. Then Photoshop allows me to select that single color and quickly cut out my subject.
How do you do this sorcery? Let me show you!
Note: all the screenshots below are taken from Photoshop CC for Windows. Other versions will look slightly different.
With the Magic Wand Tool
As with many things in Photoshop, there is more than one way to select all of one color. The Magic Wand selection tool is one option you can use.
However, I’ve already written a tutorial on how to use the Magic Wand tool. Thus, for this article, we’ll focus on another method.
With the Color Range Tool
The Color Range tool works similarly to the Magic Wand tool. However, there are some subtle differences that can make it useful in certain instances.
As always, start by pressing Ctrl + J or Command + J to duplicate the image.
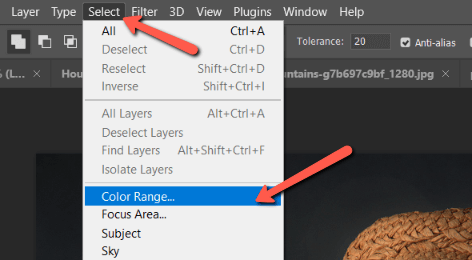
To open the Color Range tool, go to Select and choose Color Range.
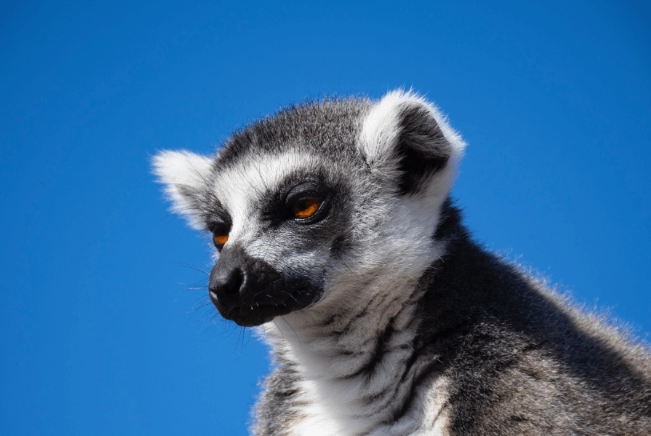
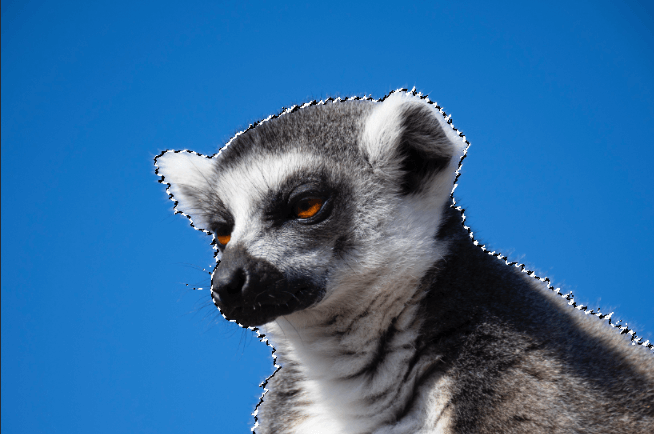
Remember, white reveals and black conceals. When you’re making your selection in Photoshop, the white part is being selected, while the black part is being removed. We want to remove the blue background from this image, so the animal needs to be white and the background black.
Make sure the Select box at the top is set to Sampled Colors.
With the Eyedropper +, click on the color in the image that you want to remove. This is adding to the selection so you’ll want to check the Invert box because you’re clicking on what you want to remove. You may have to click a few times to get it all.
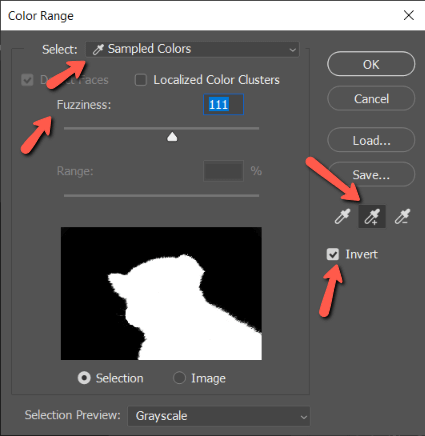
The Fuzziness slider allows you to tell Photoshop how picky it has to be. A lower Fuzziness value will select only pixels that are very close to the pixel you click on. A higher Fuzziness value will include more hues. Slide it around to find what works for your image.
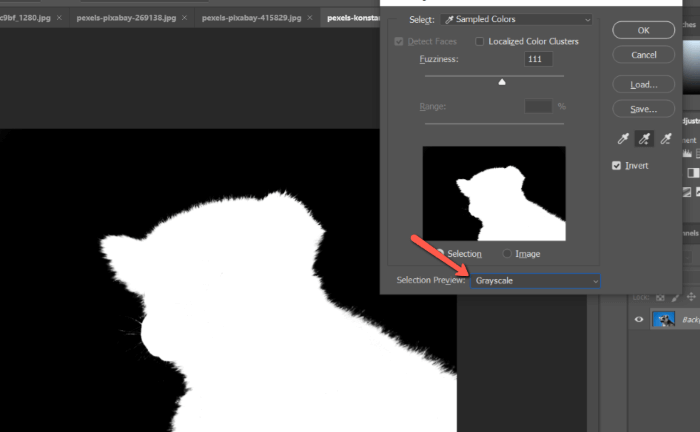
If you want to see a bigger preview of the image, change Selection Preview to Grayscale. This will make it easier to spot and fix areas you’ve missed.
Once you’re happy with your selection, press OK.
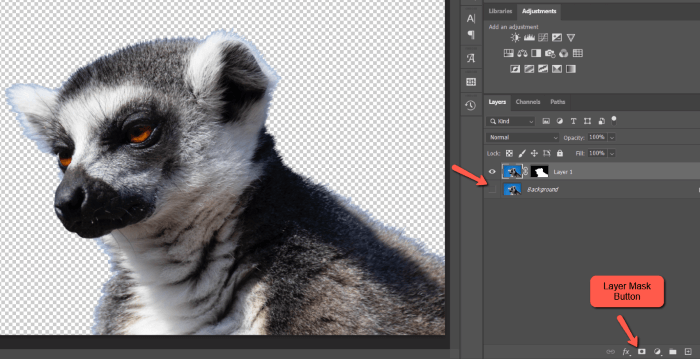
Press the Layer Mask button at the bottom of the Layers panel to mask out the background. At first, it will look like nothing happened. Press the eye icon on the background layer to hide it and reveal the mask.
There’s a tiny color cast around the animal’s fur so this will require a little more cleaning up for a clear selection. However, the heavy lifting is already done.
The usefulness of this tool is quite narrow and will only work on certain photos where the color difference is obvious. However, it’s great for quickly making selections in product photos, studio portraits, or other images where you need to select only one color.
Intrigued to learn more about what you can do in Photoshop? Check out our tutorial on how to flip a selection here!
About Cara Koch