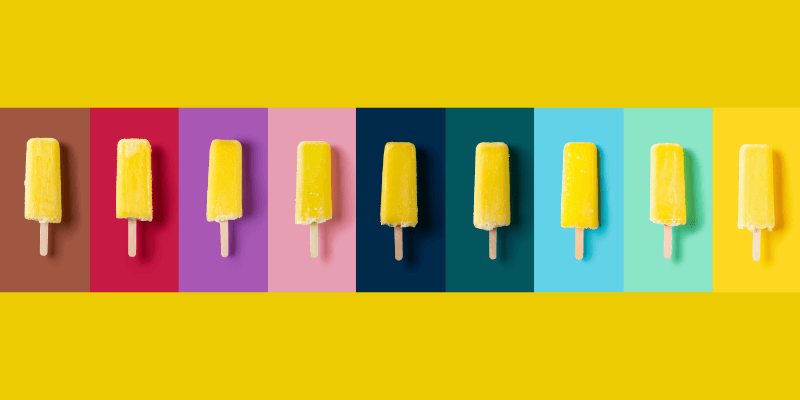
This image is perfect!…except it’s the wrong color. What do you do when you want certain elements in an image to be a different color than what they are?
Hey there! I’m Cara and I often need to change up colors when creating designs for products. Without this ability, it would be extremely hard to put different elements together and get them to match.
Doing color replacement in Photoshop isn’t too crazy. Of course, there is more than one method, and which one works best depends on the image. Let’s look at a few methods so you can fill up your arsenal!
Note: the screenshots and tutorial below are based on the Windows version of Photoshop CC. If you are on the Mac version, they can be slightly different.
Table of Contents
Method 1: The Replace Color Tool
Did you know there is a tool in Photoshop literally called the Replace Color tool? It’s a little hidden, but it’s there and is the obvious place to start in a tutorial called “how to replace color in Photoshop!”
Step 1: Open the Replace Color Tool
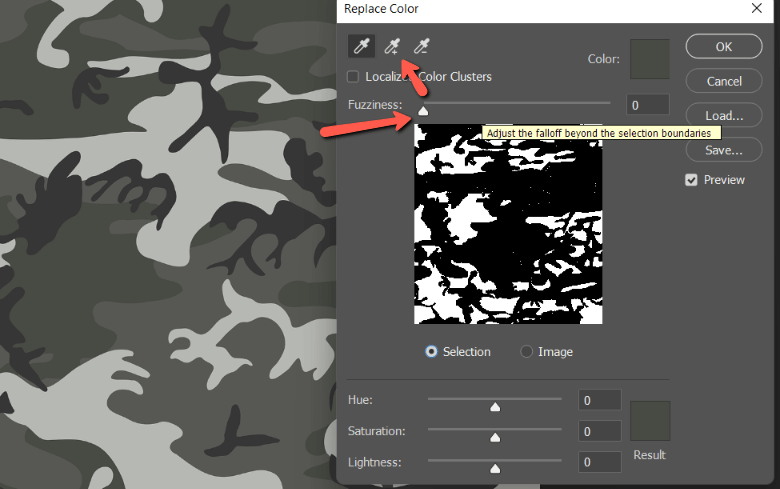
Go to Image in the menu bar, hover over Adjustments, and choose Replace Color.

The box that opens makes replacing the color super easy. Simply click on the color in the image you would like to replace. The preview box shows you what the program is selecting. Everything that is white is selected, everything that is black is not.
Step 2: Adjust the Selection
Adjust the selection with the eyedroppers and Fuzziness slider.
The eyedropper with the little plus next to it allows you to add to the selection and the one with the minus allows you to subtract from the selection. The one with no little icon next to it will create a new selection every time you click.
The Fuzziness slider controls how much range of the chosen color Photoshop will select. A higher number will select a broader color range. A lower number restricts the selection to pixels that more closely match the one you click on.
The colors in this image are uniform so I can keep the fuzziness at 0. However, if there is any color variance at all (such as shadows on the image) you’ll have to turn up the fuzziness a bit to include all the shades. Just play with your image to find what works.
Step 3: Change the Colors
You can change the color with the sliders at the bottom. The Hue slider allows you to pick the color you want. Saturation controls the color’s intensity.
Lightness controls how dark or how light the color is. Slide this slider all the way to the left and the color becomes black. All the way to the right turns the selection white.
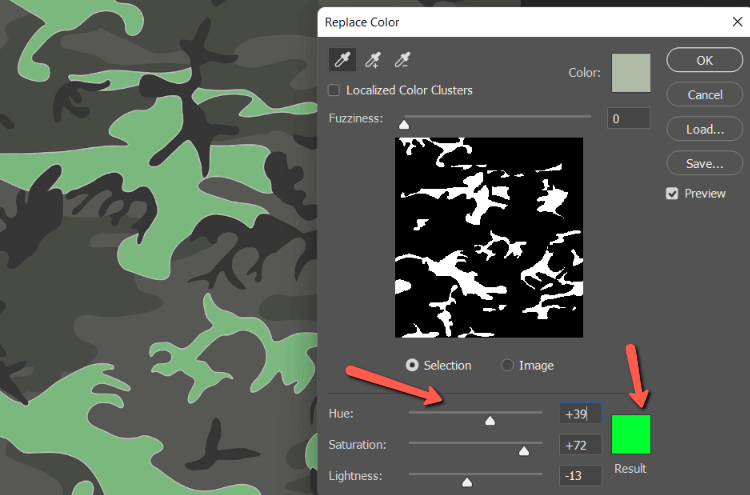
You can also choose a specific color. Click on the color swatch near the top of the box to open the color picker and choose the color you want.
Click OK once you’re happy with the changes.
Method 2: The Color Replacement Tool
The Photoshop Color Replacement tool works like a brush that you can paint over a selected color in the image. It also automatically accounts for the highlights and shadows as you work, yielding a natural result.
Keep in mind that this tool works destructively. To more easily make adjustments later, I suggest opening a new blank layer before making any changes.
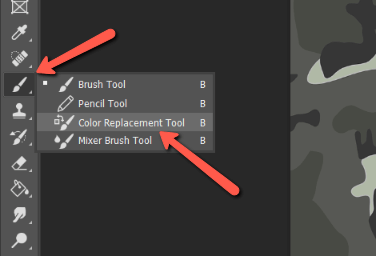
As a tool in the brush family, the Color Replacement tool is hidden behind the brush tool on the toolbar.
Choose your color by clicking on the foreground color swatch at the bottom of the toolbar. This will open the Color Picker where you can choose your color.

Place the crosshairs of your brush over the color you want to replace and start painting.

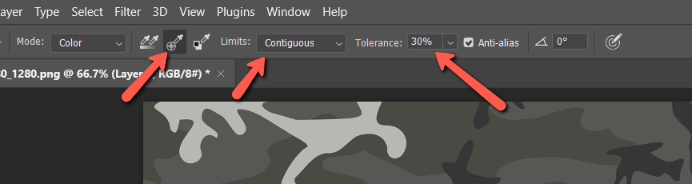
There are various options in the Options bar that help you make the tool more precise for your particular purpose. A lower tolerance will stick with replacing similar colors and contiguous limits the changes to only pixels right next to each other.
To learn more about setting up the tool to work for you, check out these detailed instructions here.
Method 3: Hue/Saturation Adjustment Layer
Another good method can be to use a Hue/Saturation adjustment layer. This is a non-destructive
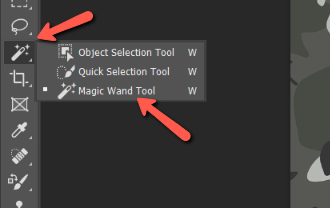
To get started, you need to make a selection. You can use the Quick Selection tool. Since we’re selecting colors anyway the Magic Wand tool can be a good option because it makes a selection based on colors.
Let’s grab the Magic Wand tool from the toolbar.
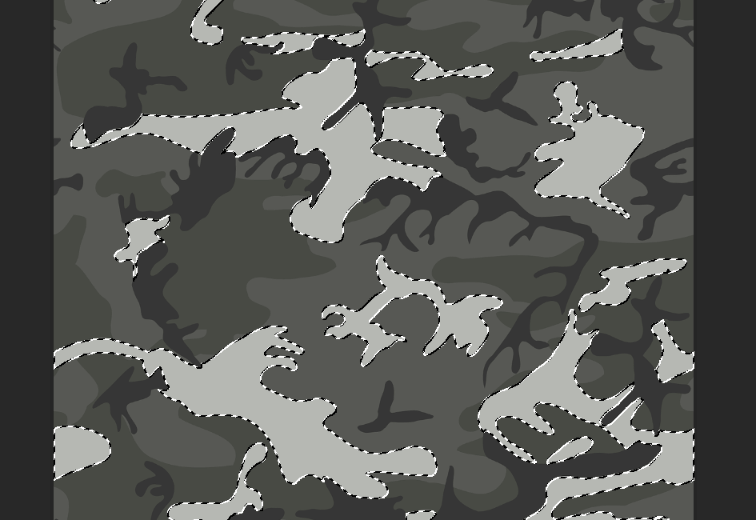
Click on the color you want to change to make a selection.
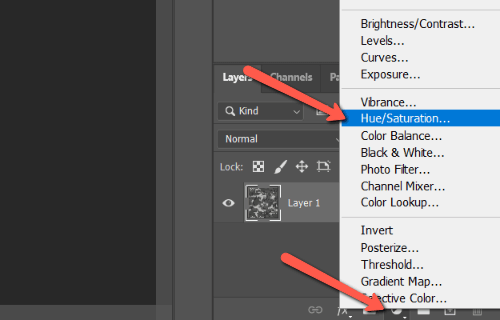
Click on the half-filled circle icon at the bottom of the Layers panel to open the adjustment layer options. Choose Hue/Saturation from the menu.
In the adjustment panel, you can use the sliders to adjust the color. If you find that the color isn’t changing the way you expect as you slide the Hue slider around, check the Colorize box. This switches the output to actual color rather than relative color (blending the new with the old color.
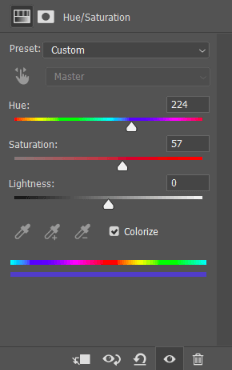
Again, Saturation controls the strength of the color and Lightness makes it darker or lighter.
Replacing Color in Photoshop
There you have it! Three simple ways to replace colors in Photoshop. You never have to be frustrated again that the colors in an image aren’t exactly what you want!
Interested to learn more about working with color in Photoshop? Check out this article on how to match color in Photoshop!
About Cara Koch