One of the most commonly asked questions in the world of Photoshop is, “How can I change the color of this object?” It’s a simple yet powerful way to demonstrate the editing power of Photoshop for new users, and it’s a technique that you’ll come back to time and time again.
While there are lots of ways of changing colors in Photoshop, many of these methods also make unwanted changes to the saturation and lightness of your colors. This can often result in an edit that looks jarring and out of place, and it can ruin a good project.
If you exclusively adjust the hue in your image without changing saturation or brightness, you’ll get a much more natural-looking edit. Here’s how it works!
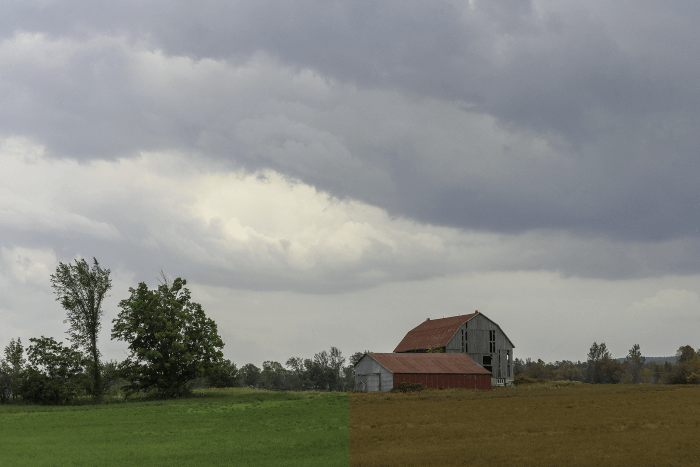
Table of Contents
Use Hue/Saturation Adjustment Layers
As with most adjustments in Photoshop these days, you can change the hue in your image non-destructively using an adjustment layer.
Adjustment layers act as filters over your image rather than changing the source pixels, and they come with their own layer masks that allow you to define where the adjustment is visible.
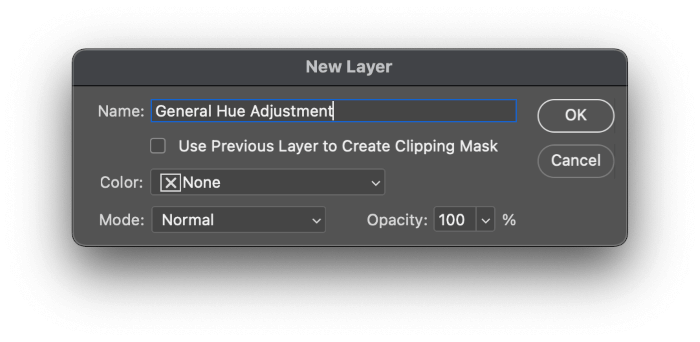
With your image open in Photoshop, open the Layer menu, select the New Adjustment Layer submenu, and click Hue/Saturation. Photoshop will open the New Layer dialog, giving you the perfect chance to practice the habit of naming your layers.
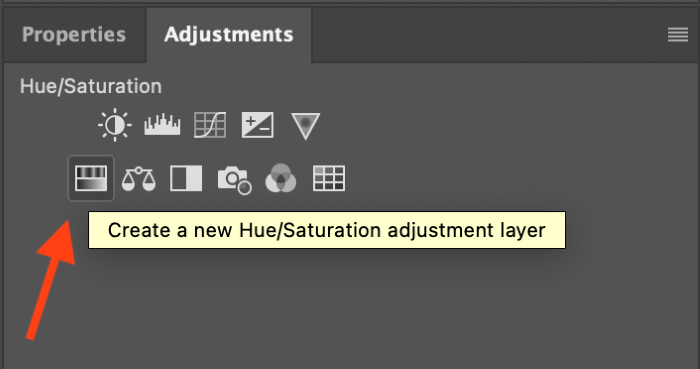
You can also create a new adjustment layer by using the Adjustments panel, which is my preferred method since it’s a bit faster. It only needs two clicks – opening the Adjustments panel and selecting the Hue/Saturation adjustment – and Photoshop doesn’t bother prompting you with the New Layer dialog.
No matter how you create it, you’ll see a new entry in the Layers panel (complete with a layer mask filled in white) and Photoshop will switch to the Properties panel so that you can set the options for your hue adjustment.
If you need to, expand the size of the Properties panel by clicking and dragging the upper and lower edges so that you can see all the settings at once. It’s always good to have a clear spot to work, even if you’re surrounded by clutter!
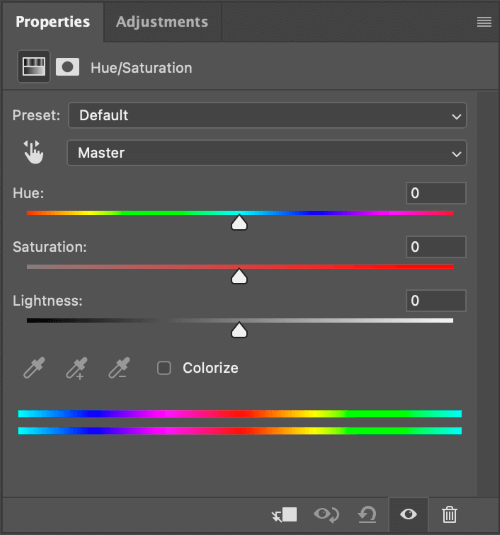
At this point, you can begin adjusting the Master hue setting of your entire image by simply adjusting the Hue slider (big surprise, I know). Master refers to the colors of the entire image as a whole, as opposed to a specific color range such as blues or yellows.
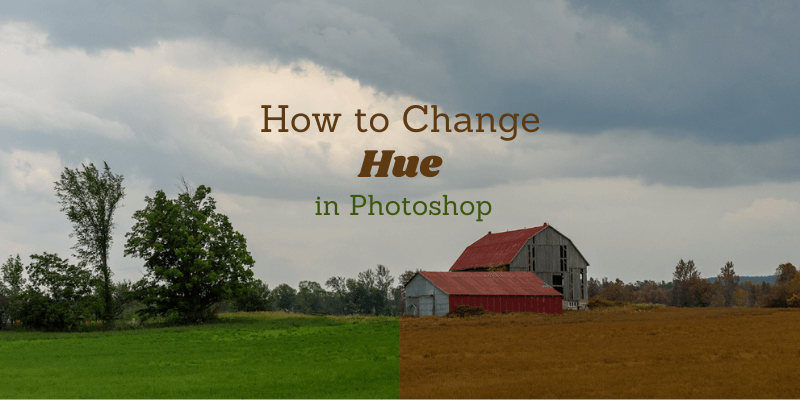
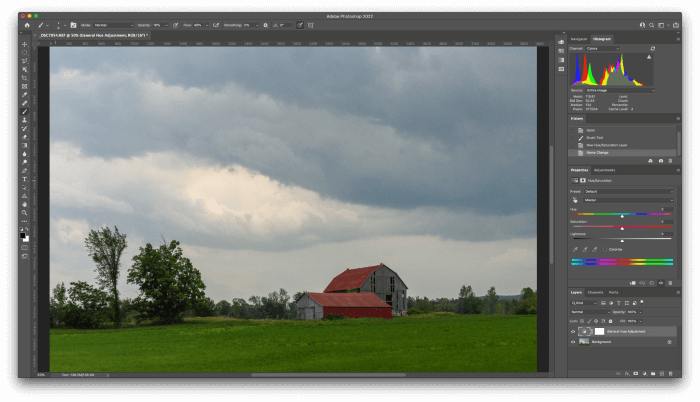
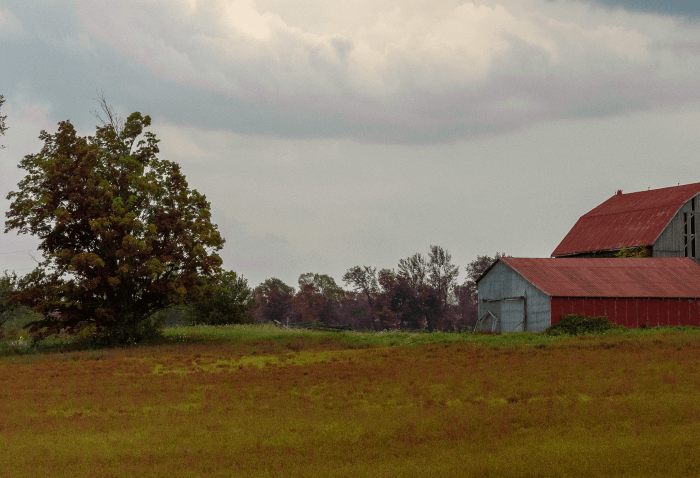
Here’s my untouched sample image, an almost brooding pastoral scene from the southern Ontario countryside along the Niagara Escarpment. It’s nice, but the vivid green makes everything look healthy and lush instead of ominous.
Adjusting the Hue slider can quickly turn this into an alien landscape with a bizarre sky because every single hue in the image will be modified by the same amount. Here’s how it looks with the Master Hue slider set to -40:
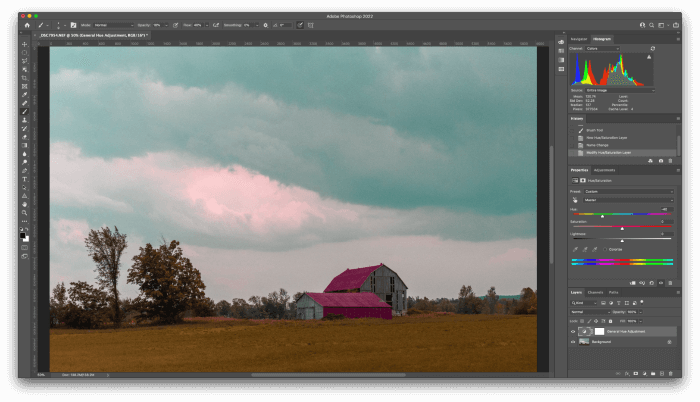
You might be able to argue that the grass just looks dried out, but that green and red sky looks completely unnatural. This effect gets even more bizarre when you get to really dramatic adjustments. Here’s how the same scene looks with the Master Hue slider set to +100:

As you’ve probably guessed, there aren’t a lot of situations where you’ll want to adjust all the colors across your entire image all at once. It’s possible to create a colored monotone image by checking the Colorize box in the Properties panel, but that’s one of the few exceptions.
It’s much more common to adjust the hue of a specific color element in your photo such as the color of a shirt, but without turning your model into an alien.
In this case, I want to adjust the grass and foliage so that looks closer to the yellow-orange tones seen during Autumn, but without changing the barn roof or the sky color.
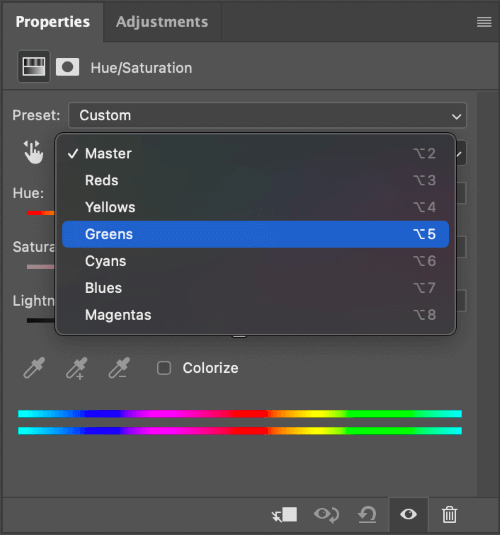
Photoshop allows you to adjust the hue of specific color ranges, which gives a much more impressive (and useful) degree of control over your hue changes.
In the Properties panel, click the Master dropdown menu and you’ll see a range of options from across the color spectrum. Since I want to adjust the grass and trees, I’ll select Greens from the list.
You’ll see an immediate change in the color range bars at the bottom of the Properties panel. Grey markers have been added indicating the color range that is being edited, and you can click and drag these to adjust the affected colors as necessary.
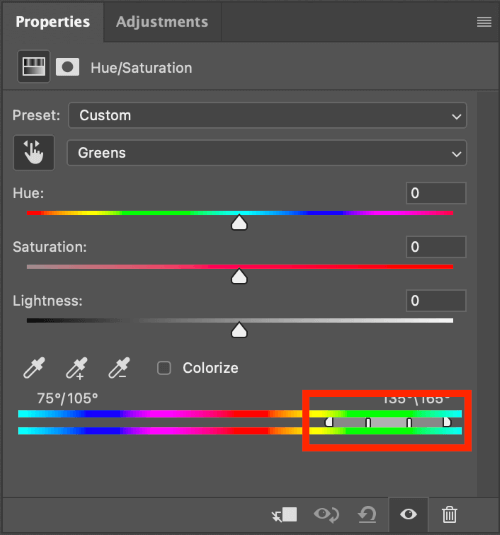
With Greens selected instead of Master, moving the Hue slider adjusts the greens of the field and trees – but you can quickly see that the adjustment isn’t quite perfect, and I’ve had to apply an extreme Hue adjustment to get even close to the change that I want.
Some of the foliage that appeared green-toned in the unedited image hasn’t been affected, because the default selected color range in the Green section isn’t quite wide enough. Even though it looks green overall in the original, there’s quite a bit of yellow tone to the grass and foliage.
A quick manual adjustment of the color range markers will fix this! Once the color range sliders are expanded in the Properties panel to include more of the yellow hues, the grass and foliage adjustment looks much more natural.

There’s no limit to the size of the custom color range you can create, but if you make them overlap each other too much, you’ll find yourself getting confused very quickly.
The amount of yellow in the original green grass surprised me, demonstrating that it’s not always easy to isolate the specific range that you want to edit using just your intuition.
Fortunately, the Properties panel has a couple of helpful tools that can simplify the process: the eyedroppers!
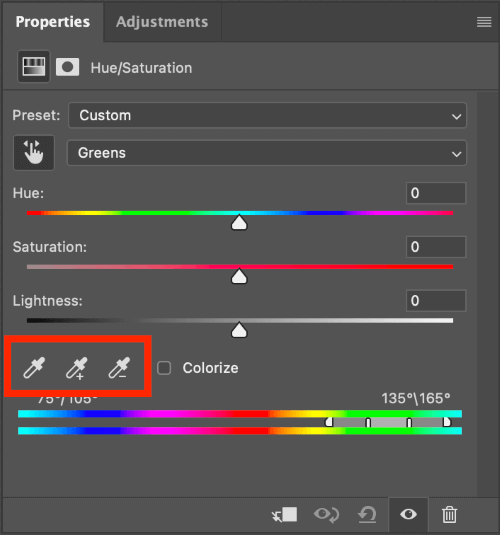
Instead of struggling to select the correct color ranges manually, click the eyedropper icon in the bottom left of the Properties panel, and then click directly on the image element you want to adjust.
Photoshop will automatically adjust the color range you’re editing to include your selected color. You can also expand or contract this color range using the eyedropper plus and minus icons to add and subtract additional color points from your image.
Precision Hue Changes With Layer Masks
When you want to get really precise with your hue adjustments, you’ll often find that adjusting specific color ranges still isn’t getting the job done. That’s when your trusty adjustment layer mask enters the picture!
Layer masks on Hue/Saturation adjustment layers work just the same as other layer masks in Photoshop, except instead of controlling pixel visibility, they control the visibility of your Hue/Saturation adjustments.
White pixels on the layer mask show the adjustment at 100% opacity, black pixels completely hide the adjustment, and greyscale tones allow for all the values in between, allowing for gentle gradients and smooth transitions.
If you want to use your layer mask to control your Hue adjustment, click the layer mask thumbnail in the Layers panel. The Properties panel will update to show the Layer Mask properties instead of the Hue/Saturation adjustment settings. Click the Invert button to set your mask to all black, hiding the effect.
Next, switch to your Brush tool using the keyboard shortcut B. Set your foreground color to white, and then paint with white over the areas where you want your hue change to be visible.
If you’d rather not use the Brush tool, you can also use any selection tool you want and then simply fill your selection with white to achieve the same effect.
A Final Word
Congratulations, you now know how to change hues in Photoshop! As with all things in Photoshop, there are several different ways that you can achieve similar results, but the Hue/Saturation adjustment layer is the best method for most situations.
Do you have a different method for changing hues in Photoshop that you think is better? Let me know in the comments below and I’ll try it out!
About Thomas Boldt