If you don’t know how to use clipping masks in Photoshop yet, prepare to have your mind blown! This powerful tool allows you to add and limit effects to certain layers or command any type of layer to take the shape of the layer it is clipped to.
Hey there! I’m Cara and I’m about to show you one of those things in Photoshop that will have you lying awake at night thinking about the possibilities! Curious to learn more? Check it out!
Note: the tutorials and screenshots below are based on Photoshop CC Windows, they might look slightly different if you are using the Mac or other versions.
Table of Contents
What Is a Clipping Mask?
You may already be familiar with the term Layer Mask in Photoshop. In fact, if you’ve worked with Photoshop for any length of time, you’ve probably used them before. If you’re still fairly new, you can learn more about layer masks here.
A clipping mask is something different. This type of mask will limit an adjustment to affect only the layer it is clipped to. This technique can be useful in many applications.
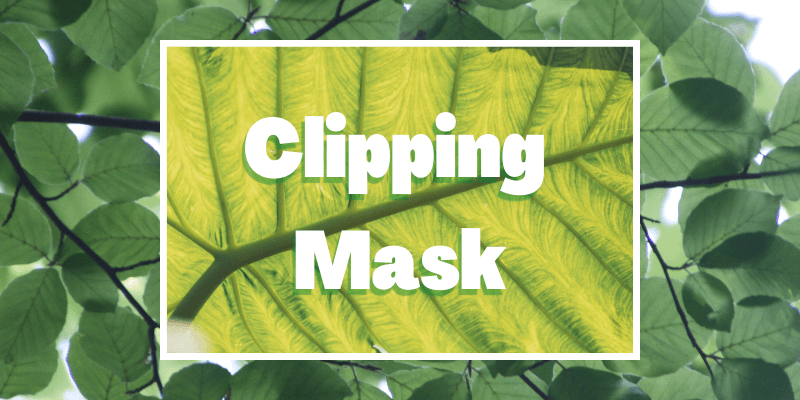
Let’s take this image for example.

When clipped to a text layer will limit the image only to the text.
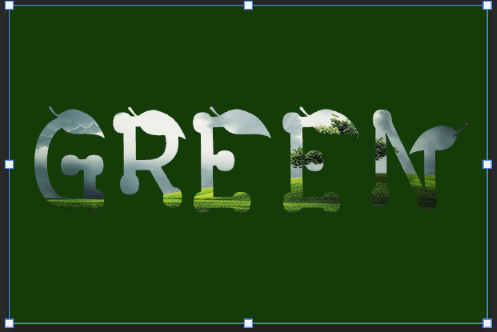
Clipping masks are very useful when creating composites. As you add layers to an image, you may want to make adjustments to the colors, brightness, etc. Clipping masks allow you to add adjustment layers and limit their effect to a single layer.
How to Make a Clipping Mask in Photoshop
There is more than one way to create a clipping mask. I’ll show you several ways and which method you choose is up to you!
At the Bottom of Your Adjustment Layer Panel
If you’re adding an adjustment layer, you’ll see the clipping mask icon at the bottom of the control panel.
For example, here’s a Black and White Adjustment layer panel. The default is for the clipping mask icon to be inactive which is indicated by the arrow being crossed out.
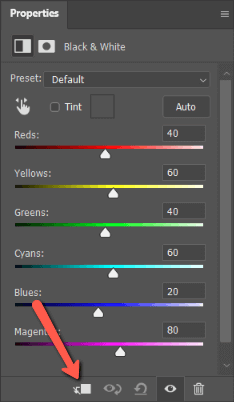

All you have to do is click on the icon to activate it. The crossed-out part will disappear and the icon will be highlighted. Now the black and white adjustment will only be applied to the layer directly underneath it in the layers panel.
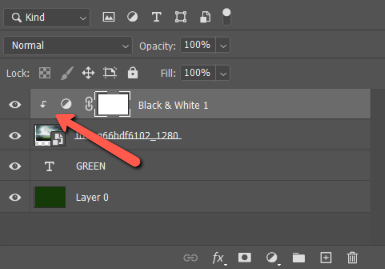
An active clipping mask is indicated in the layers panel by a 90-degree bent arrow pointing down.
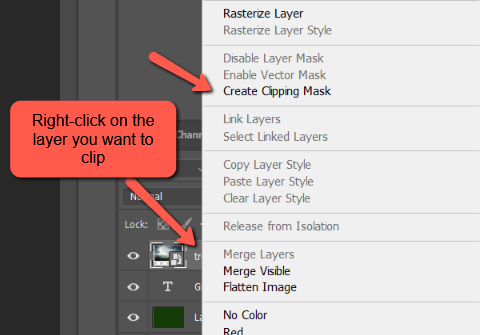
Right-Click on Layer
Another way to add a clipping mask is to right-click on the layer you want to clip. Then choose Create Clipping Mask from the menu that appears.
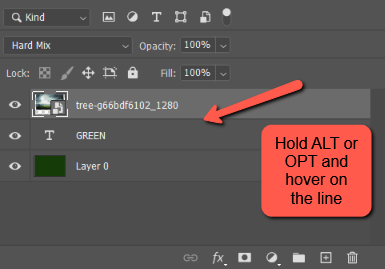
ALT or OPTION
Another alternative is to hold down the Alt or Option key and hover the mouse over the line between the layers you want to connect. The cursor will turn into a little box with the 90-degree arrow pointing down. Left-click to apply the mask.
Keyboard Shortcut
The final (and fastest) way to create a clipping mask is with a keyboard shortcut. With the layer that you would like to clip highlighted, press Ctrl + Alt + G or Command + Option + G on the keyboard.
Removing a Clipping Mask
If you want to remove a clipping mask, follow any of the previous instructions for creating one.
However, this time when you click the clipping mask icon at the bottom of an adjustment panel, it will deactivate the already active mask. When you right-click to open the menu, you’ll see Release Clipping Mask instead.
When you hover holding ALT or OPTION your cursor will turn into a crossed-out clipping mask. And if you hit Ctrl + Alt + G or Command + Option + G, it will remove the active mask.
Super simple!
Sit with that and let those creative juices start flowing. Let us know what amazing things you create with this handy Photoshop trick!
Want to learn even more tricks? Check out our amazing tutorial on how to feather a layer in Photoshop!
About Cara Koch