
How do I get a nice, soft edge?
When you make a selection in Photoshop and cut it out, you get a crisp, hard edge. It looks like it would if you make the cut with scissors. While this is desirable for some editing, other times you may want a softer edge.
Hello! My name is Cara and I’m excited you’re here today to learn about feathering layers or smoothing edges of a selection in Photoshop. As a product photographer, I have sometimes run into images that I wanted to combine without a hard edge between the two.
You can do this with a soft brush or you can use this quick method I’m about to show you. It depends on what works best for your image!
Note: the screenshots below are taken from the Windows version of Adobe Photoshop, if you’re using the Mac version, the navigations may look slightly different.
Table of Contents
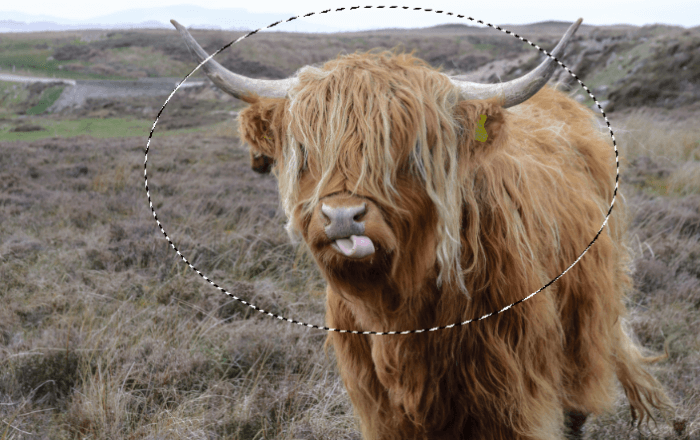
Step 1: Make a Selection
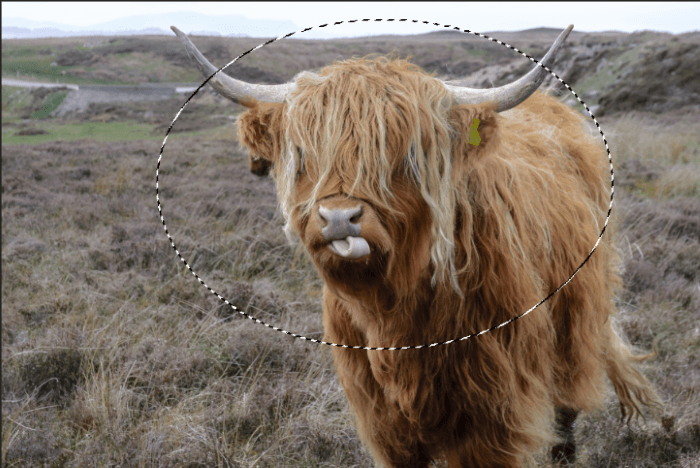
Now you need to make a selection around the part of the image you want to cut out. Which tool you use will depend on the type of selection you need to make. For odd-shaped cutouts, you might use the Lasso Tool or the Polygonal Lasso tool.
For basic shapes like circles, ovals, squares, or rectangles, either the Elliptical or Rectangular Marquee tool is perfect. That’s what we’ll use for this example today with this image.
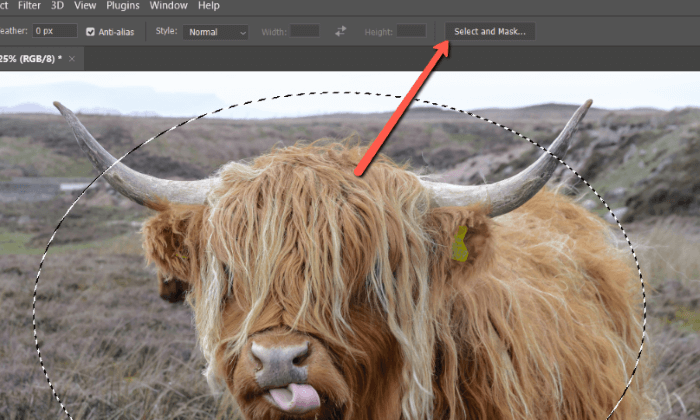
Step 2: Feather the Edges
With the selection active, click on the button Select and Mask in the options bar at the top.
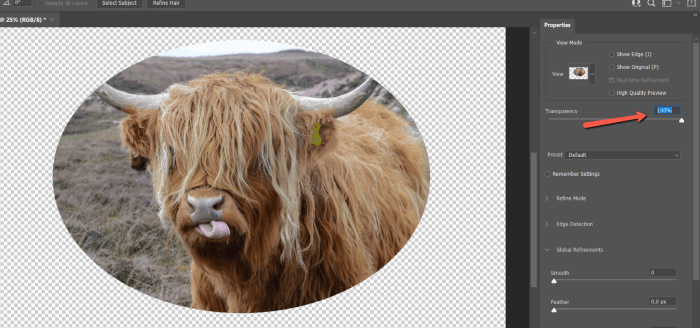
A preview window will pop up with a few settings along the right side. If you’re still seeing part of the background make sure the Transparency is set to 100%.
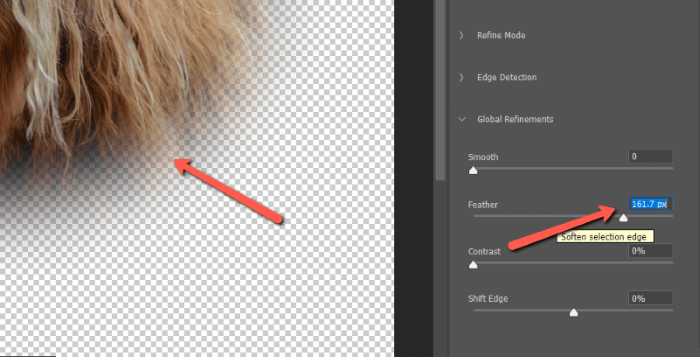
To affect the feathering, go to the Feather tool on the right. At 0.0 pixels, you get the hard edge we see here.
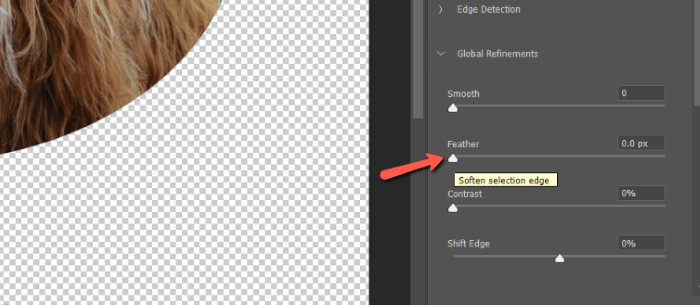
The farther you drag the bar to the right, the more drastic the feathering effect. Notice when I take it up to 161.7 pixels, the edge becomes quite soft.
Hit OK at the bottom or press the Enter key to accept the changes.
Step 3: Make a New Layer
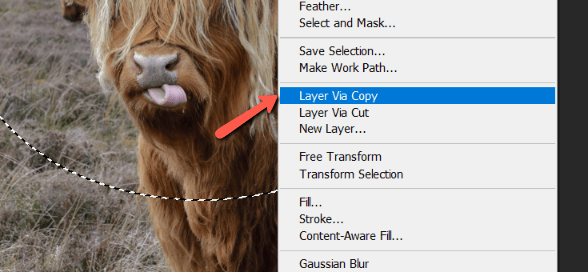
When you come out of the preview mode, you’ll go back to this screen and wonder what the heck happened!
You have to put your selection on its own layer to make it visible. Right-click on the image and select Layer via Copy.
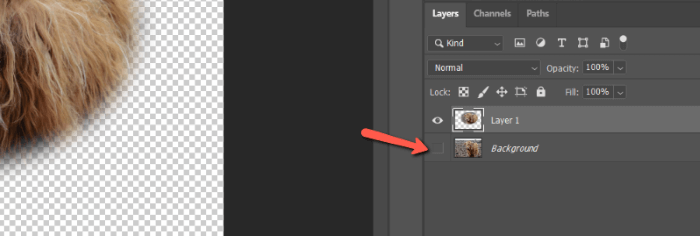
You still won’t be able to see the changes because you have an identical background layer behind your selection. Turn off the background layer by hitting the eye icon to the left of the layer thumbnail.
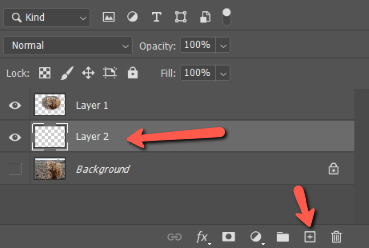
Step 4: Add a Background
Now you have your selection visible on its own layer. If you want to fill in the background, create a new layer with the Add Layer button at the bottom of the Layers panel. Grab the new layer and drag it under your selection layer.
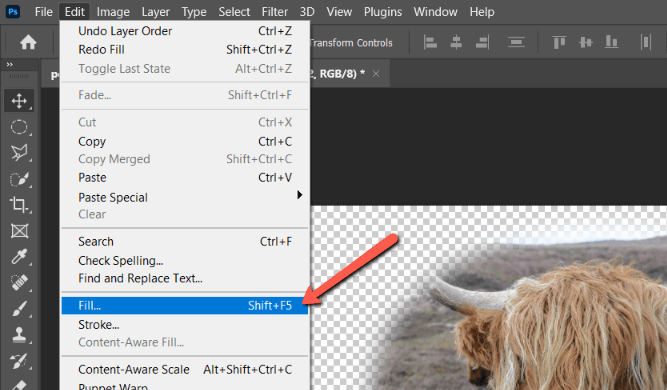
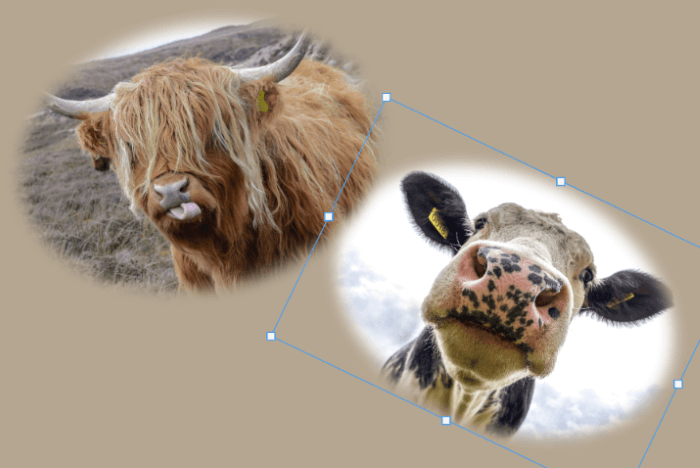
Go to Edit in the menu bar and select Fill. Then you can fill in the background with the color of your choice. You can also put another image behind the selection – whatever works for your project!
Get creative and have fun with it!
Interested in learning more Photoshop tricks? We have lots of content to help! Check out how to move a selection here!
About Cara Koch
Adomas
Thank you, thank you Dear Cara!
It’s the first time when after reading tons of instructions about feathering, i came across this wonderful post of yours and at last have understood how to do that!
The best luck in your professional career!
June
Hi Adomas,
Glad you find the tutorial helpful! I’ll surely pass your feedback to Cara 🙂