In Photoshop, you may need to export your layers as separate files for a variety of reasons. Unfortunately, merging your layers into a single document is the only thing that happens when you export a file from the application normally.
You must use a different export procedure if you want to export each of your layers as a separate file.
My name is Aly, I have been using Photoshop for over five years, and I am Adobe certified. In this tutorial, I am going to be showing you how you can export layers in Photoshop.
How to Export Layers in Photoshop
This method can be used to save icon collections or other Photoshop documents with a lot of layers. Follow the steps below to export layers in Photoshop.
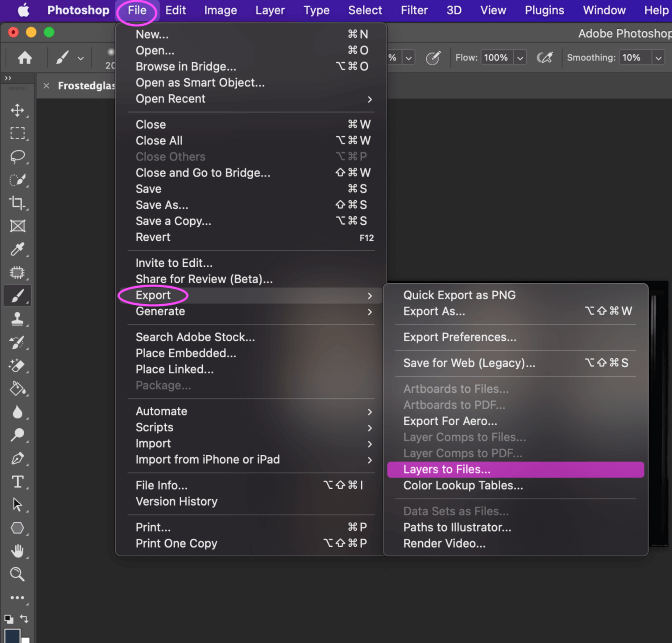
Step 1: Once your project has all the necessary layers, select File > Export > Layers to Files from the top menu.
Step 2: You will now see a dialogue box with a variety of export options. The File Type option in the export window is where you want to choose the file format in which you want to export the layers.
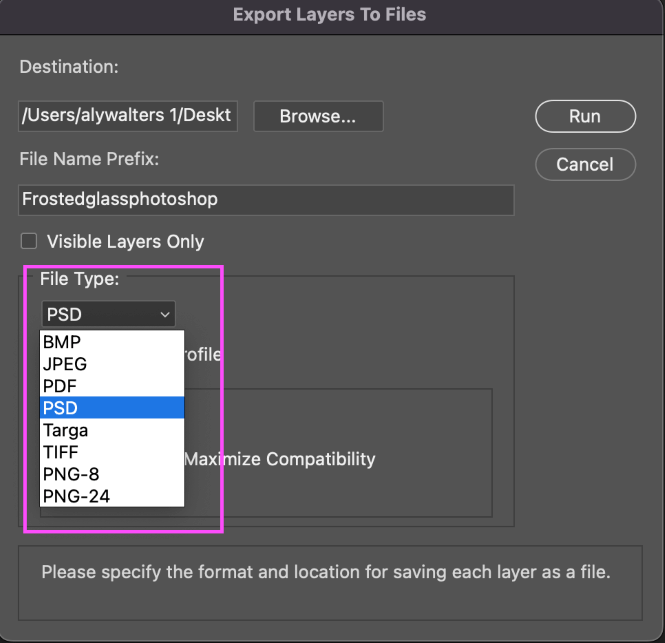
Since there are quite a few different file formats I will tell you what each one does and is used for.
.PSD
PSDs and how they function are already familiar to you if you frequently use Photoshop. PSD, which stands for Photoshop Document, is the accepted file format for preserving Photoshop work.
When you just use Photoshop and want to have access to your work to make further alterations, this is the best file type to utilize. Every time you work on a project, I advise that you always save a PSD so that you can always go back and make adjustments.
.TIF
Another kind of layered file is the TIF, which comes in a more widely recognized format. Ideal for users who might open documents in programs other than Photoshop.
If you’re dealing with customers and want to be able to share your layered documents without worrying about compatibility, the TIF format is perfect.
Because the maximum file size is 4GB, you might still need to save larger, more detailed projects in a huge document format like PSB. You may frequently save and back up your work without losing any layer information by using TIFs, just like PSDs.
.JPEG
JPEGs, the most popular picture file type, are photos that have been compressed and are great for sharing and displaying on the internet. Since the images in this format have been flattened, they are empty of layer information.
Additionally, they are compressed, which results in some information being lost.
The most versatile approach to exporting your photographs from Photoshop is via JPEGs. There are several compression modes available, allowing you to preserve a certain amount of quality when necessary.
Images can also be changed to sRGB, which is the color space that web browsers use to display image data.
.PNG-8 and 24
The PNG term’s numbers often relate to the bit level that computers can support. PNG 8 thus allows 8-bit colors, but PNG 24 supports 24-bit colors.
Be aware that a file format with higher bit support does not necessarily mean that it is of higher quality than a file format with lower bit support. You might need to use lower-bit files in some circumstances.
PNG 8 can only offer a maximum of 256 colors in terms of color detail. On the other hand, PNG 24 may make use of more than 16 million available colors.
PNG 8 is therefore best used for little graphics that don’t need a lot of color detail, like computer icons and straightforward graphic images. For more detailed web photos, PNG 24 works best.
.TARGA
A Truevision Graphics Adapter image file has the TGA file extension. The acronym TARGA, which stands for Truevision Advanced Raster Graphics Adapter, is often used to refer to the file.
For icons, line drawings, and other simple images, the Targa Graphic format may save images in their raw form rather than compressed. Images used in video games are frequently seen in this manner.
.BMP
Microsoft created the BMP file format, which stores raster graphics images. A Bitmap Image File is its complete name.
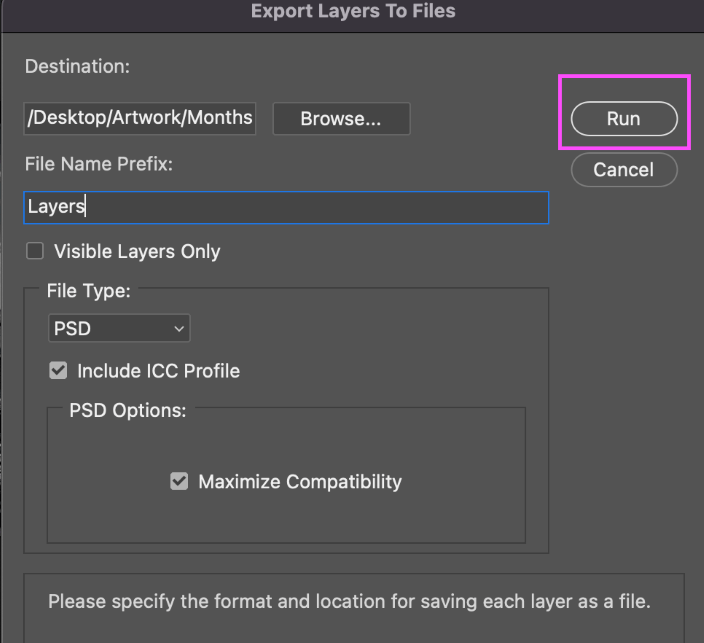
Step 3: Select the location where you wish to save your exported layers after choosing a file type. In order to choose a location from your computer, click the Browse option.
Choose File Name Prefix after that to change the names of your exported layers. If there are numerous layers, Photoshop will add 1, 2, and 3 after this prefix to make the name of each layer.
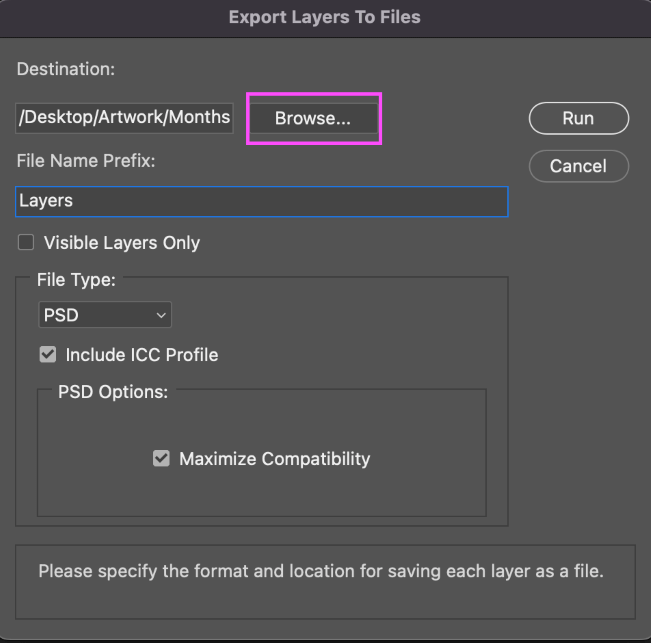
Step 4: Click Run to export your layers now. All of your layers will be converted into the desired file type by Photoshop, which will then be saved in a specific folder on your computer.
After exporting, look in your save place to find your files. Make sure everything was exported correctly a second time, and you’re ready to go!
Final Thoughts
Now that you are aware of one straightforward export technique, you can easily export your layers to separate files in Photoshop. This is useful if you want to share a project template so that someone else can construct it or if you need to use specific layers repeatedly in subsequent projects.
Any questions about exporting layers in Photoshop? Leave a comment and let me know.
About Aly Walters