How do I get that to rotate? When you are adding elements together, you will often need to reposition them.
Hey there! I’m Cara, and in my work as a product photographer, I’ve run into this need more than once.
Wouldn’t it be nice if we could just think about something and Photoshop would do it? Maybe someday, but, for now, let me show you how to do it with commands. Don’t worry, it’s so easy it’s nearly like thinking about it and watching it happen!
Note: the screenshots below are taken from the Windows version of Adobe Photoshop, if you’re using the Mac version, the navigations may look slightly different.
Step 1: Select the Layer
Photoshop needs to know which layer you want to rotate so the first step is to select it.
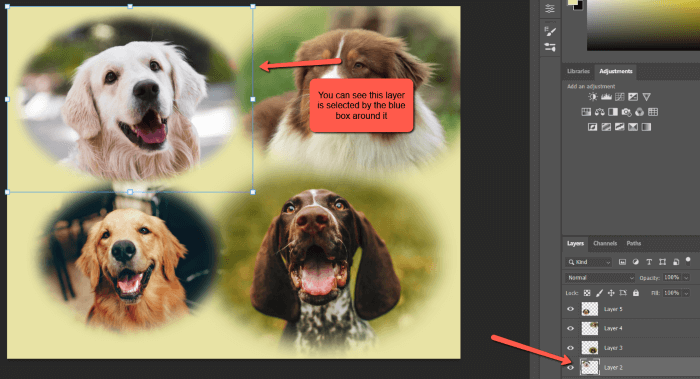
In this image I’ve created, I want to rotate the dog in the top left. He’s on Layer 2, so I’ll select that in the layers panel by clicking on it.
Step 2: Rotate the Layer
Rotating from here is super easy. There are several ways you can do it.
One method is to hover your mouse near the outside edge of the blue box. You’ll see it turn into a bent arrow. Click and drag to rotate the layer.
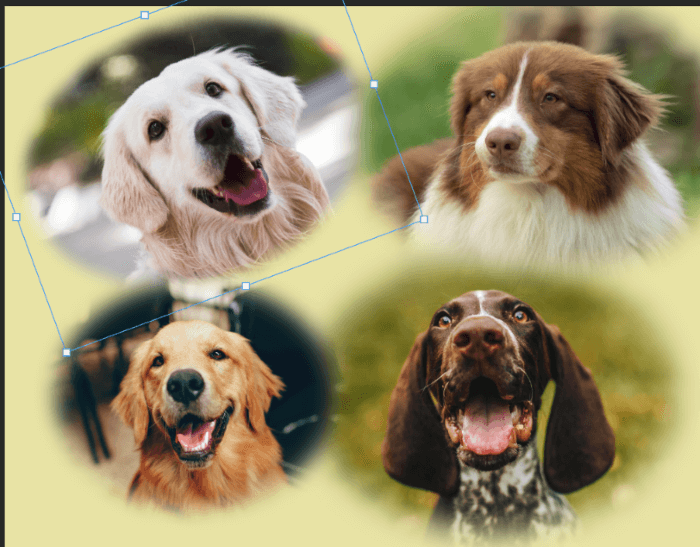
The default setting will rotate the image slowly in 0.1-degree increments. Hold the Shift key while rotating and the layer will jump in 15-degree increments instead.
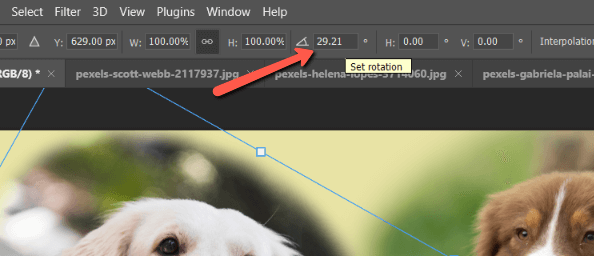
You can also choose an exact angle and type it into the angle box in the options bar.
You can also select a preset angle by right-clicking within the image. You can select to rotate 180 degrees or 90 degrees in either direction.
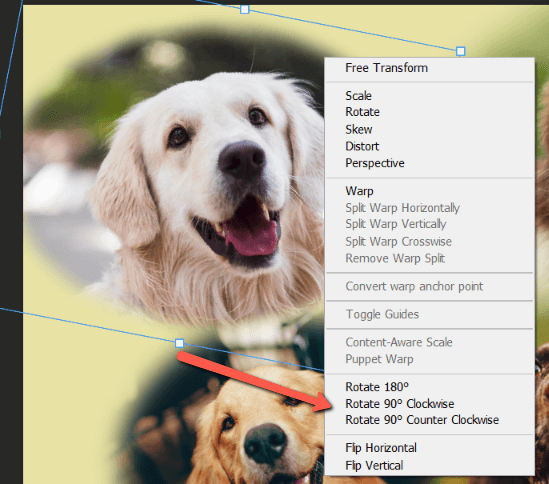
If you get the short drop-down menu below when you right-click, the Transform tool isn’t active.
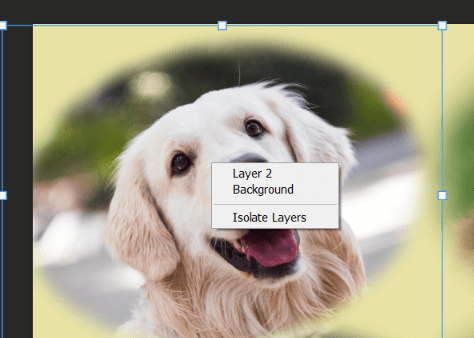
Activate it by hitting Ctrl + T or Command + T on the keyboard, or rotating the image a tiny bit by clicking and dragging.
Once you’re happy with the position, hit the Enter key to accept the changes.
Rotate Multiple Layers Together
What if you want to rotate multiple layers? Instead of doing each one individually, you can rotate them together.
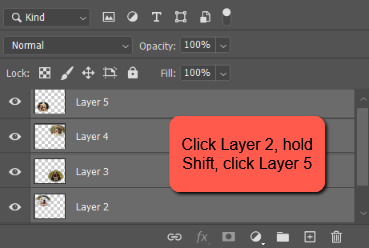
Simply make a selection of all the layers you want to rotate. Do this in the layers panel by clicking on the first layer in line, holding the Shift key, and clicking the last layer.
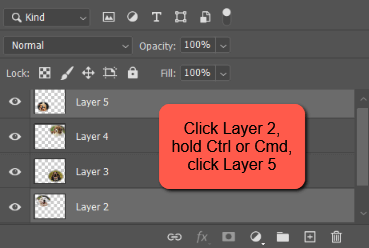
You can also pick and choose layers individually by holding the Ctrl or Command key.
Once you have your layers selected, proceed with any of the methods I just described. Hover near the outer edge, click, and drag. Hit Enter to accept the changes.
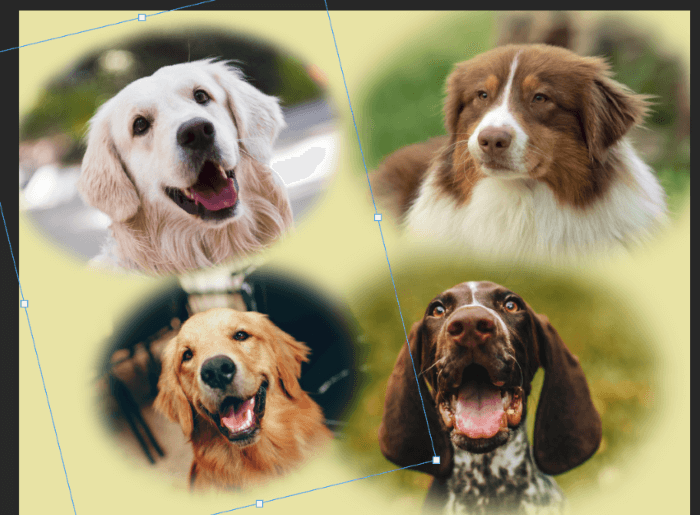
Pretty nifty, right? Now, get out there and make some of your own Photoshop magic! Drop a comment below if this article was helpful and check out more of our tips like how to overlay images in Photoshop.
About Cara Koch