
Have you ever cut and paste an object from one photo to another and been frustrated that it doesn’t look real?
If you want to make a composite realistic, you have to pay close attention to the details. One of those details is the jagged edges you often get when cutting out objects in Photoshop.
Hello! I’m Cara and exploring the world of Photoshop is my jam. Come with me as I show you a technique that will take your composite images from “meh” to “amazing!”
Table of Contents
Why Does My Selection Have Rough Edges?
First, does this happen with every selection you make? If not, why does it happen?
Jagged edges can happen for a few reasons. Selections involving hair or fur pretty much always have rough edges. The selection tools just aren’t sophisticated enough to perfectly cut out stray hairs etc.
Another cause can be that the source file is low resolution. The edges could be jagged simply because they’re pixelated.
A third cause might be the low contrast between the subject and the background it was cut out of.
Regardless of the cause, it’s something to keep an eye out for. Though rough edges are not usually overly obvious, they do contribute to making the added object look out of place in the new image.
Let’s look at some methods for smoothing selections.
Note: the screenshots below are taken from Photoshop CC for Windows, if you are using the Mac version, they can look different but the steps should be similar.
Method 1: Anti-Aliasing
The first is the most simple. Photoshop will automatically give you a helping hand as you work. Simply check the anti-alias box in the Options bar before making your selection.
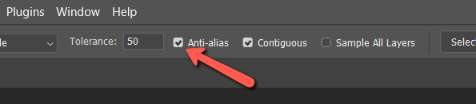
Of course, as usual with automatic help like this, it doesn’t work in all situations. It also doesn’t work with all selection tools. This option is only available with the following tools:
- Lasso
- Polygonal Lasso
- Magnetic Lasso
- Magic Wand
- Elliptical Marquee
Finally, you must remember to check the box before making your selection. You can’t go back to applying it later.
Method 2: The Select and Mask Workspace
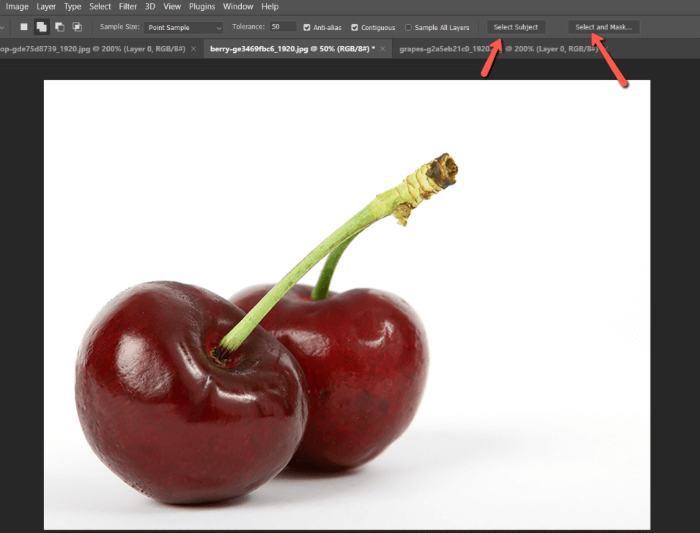
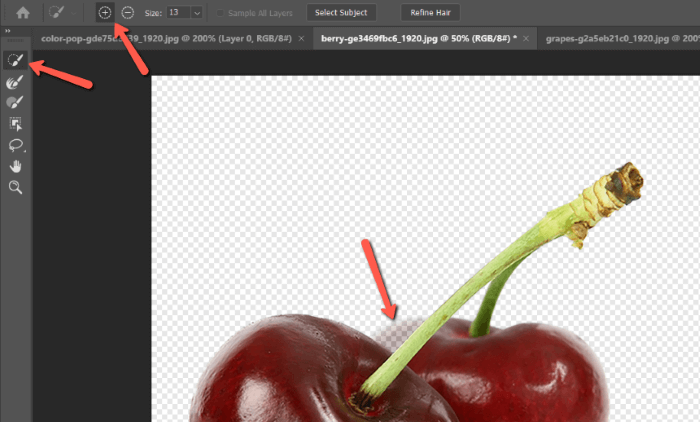
Let’s jump into the Select and Mask workspace to see how we can manually smooth out the edges while making the selection. We’ll use this photo of a pair of cherries that I got from Pixabay.com as an example.
Make a Selection
To get Photoshop to help us with the selection you can either click Select Subject or Select and Mask in the Options bar. If you don’t see these options, make sure you have a selection tool like Quick Selection Tool or one of the Lasso tools active.
Select Subject will make an automatic selection based on Photoshop’s best guess. Select and Mask will take you straight into the Select and Mask workspace. Let’s head there.
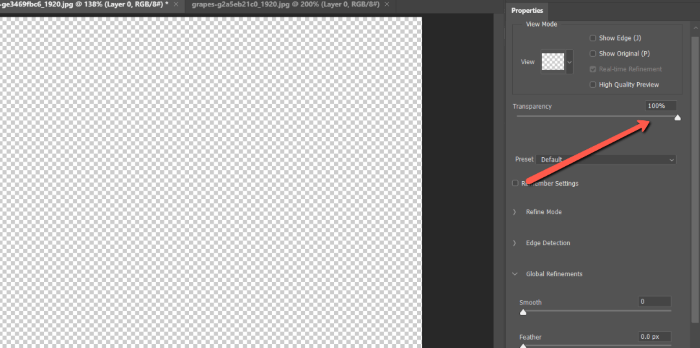
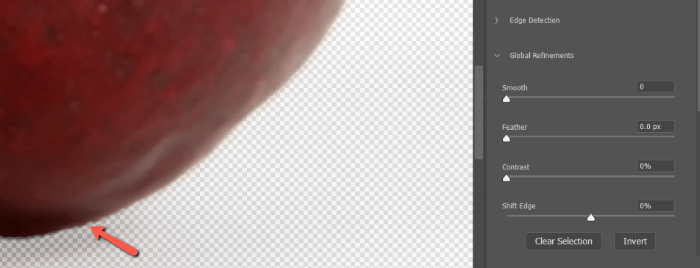
Your image might disappear when you enter the Select and Mask task space. A solid color may appear over the top of the checkered transparency indicator as I have. Bring the transparency slider down on the right to allow the image to show through.
Choose one of the selection tools available in the workspace. You can either use this tool to make a selection or press the Select Subject button that appears in the Options bar.
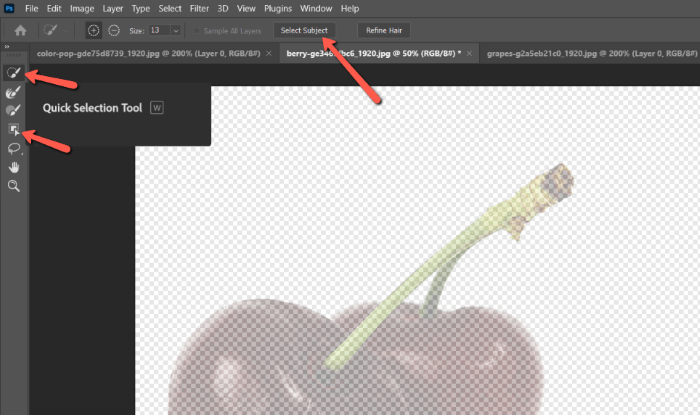
It might not make a perfect selection but you can make adjustments with the selection tools. For example, grab the quick selection tool and choose whether you want to add or subtract in the options bar. Then, click and drag around the areas you need to fix.
Smooth the Edges
Zoom in on your selection and you’ll see the jagged edges. We can smooth those out with the sliders to the right.
First, change the view mode near the top right of the screen to make it easier to see the edges of your selection. You can either select the mode from this dropdown menu or press the corresponding key on the keyboard. I want the black and white mode, so I’ll press Black & White (K).

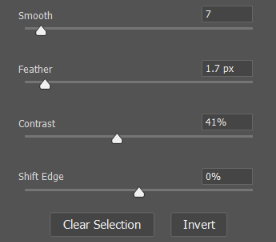
Bumping up the smooth slider to 7, we can see that the edge softens a bit.


Another cool technique is to add feathering in this black and white view. The feathering appears gray. Then bring up the contrast and everything moves toward either white or black, creating a very defined edge.

Here are my final settings for reference.
Method 3: Use a Channel
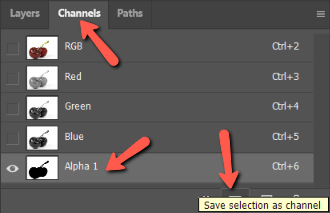
We can also smooth the edge in Photoshop with channels. To do this, make your selection with whichever selection tool you like.
Then, choose the Channels tab to the right of the Layers tab at the top of the Layers panel.
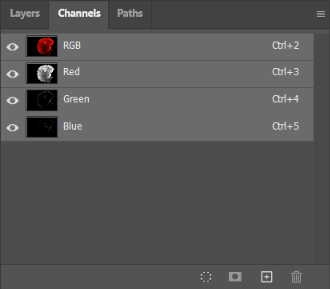
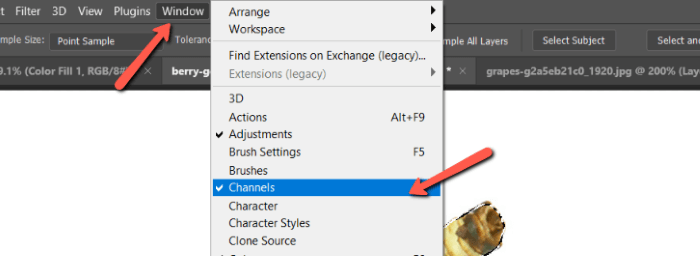
If the Channels tab isn’t there, go to Window and choose Channels from the menu. A checkmark next to the word Channels indicates when the panel is active.
Once there, press the layer mask button to mask off your selection.
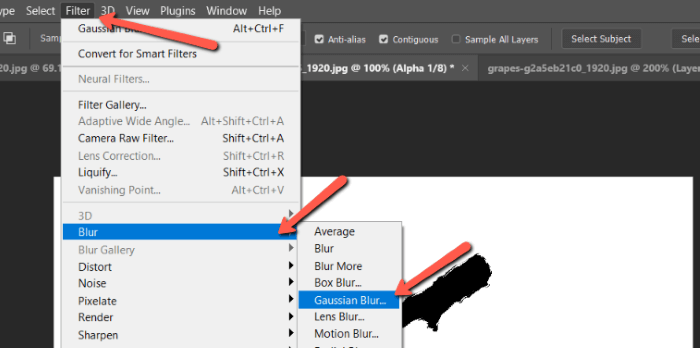
Select the layer mask that appears. Then go to Filter in the menu bar, hover over Blur, and choose Gaussian Blur.
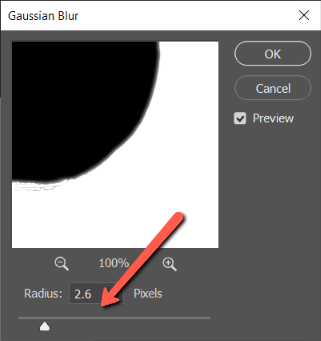
In the box that appears, bring the Radius slider up until you see a smooth edge along the edge of the selection. It will look fuzzy also, but that’s okay. Click OK when happy.
With the layer mask still selected, press Ctrl + L or Command + L to open the levels.
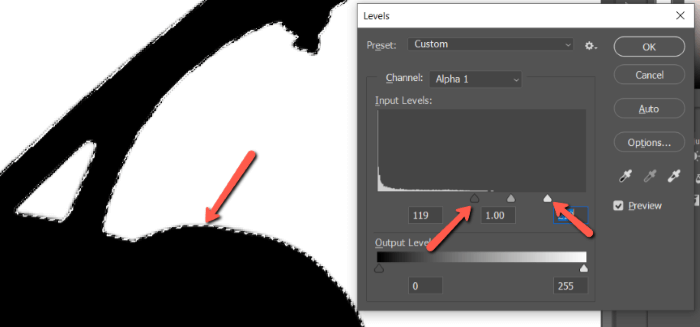
Bring the sliders toward the center to up the contrast in the image. You’ll see that the line at the edge of your selection morphs into a sharp line between black and white. Click OK when satisfied.
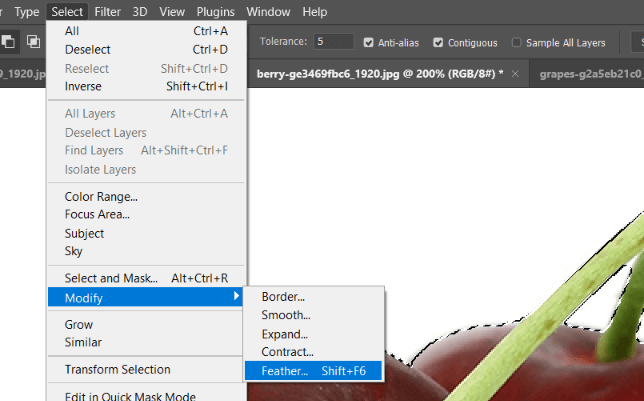
Method 4: Feather the Edges
If you just need a quick method to clean up the edges a little bit, feathering the edges is a simple way to do it. Feathering too much will cause a loss of detail but using this technique with a light hand can produce a serviceable result depending on your needs.
Make a selection around your object. Then go to Select, hover over Modify, and choose Feather.
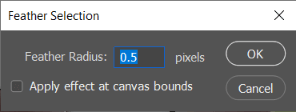
Choose the strength of the feathering and click OK. Be careful not to choose too high of a number or the edges will look soft or slightly transparent, not smooth.
Playing it Smooth
Smoothing edges in Photoshop is an important technique to learn if you plan to be doing a lot of composites. Without it, you will struggle with getting your composite images to look natural.
Intrigued about what else you can do in Photoshop? Check out how to make a photo look like a drawing here!
About Cara Koch
Marcus Enene
Thus content is very helpful. Excellent lesson note.