Have you ever wished you could hand-draw a portrait of your favorite person or pet to proudly display on the wall? The thing is, drawing is hard work and you need a considerable amount of talent, patience, and practice to get to that point.
Or do you?
Hey there, I’m Cara! I love creating digital art in Photoshop and I love that Photoshop lets me do things with my images that I could never do with a pencil or brush.
Are you tracking with me? Yes? Then let’s dive in and I’ll show you how you can turn a photo into a realistic sketch in Photoshop!
Note: all the screenshots below are taken from Photoshop CC for Windows. Other versions will look slightly different.
Table of Contents
- Step 1: Prepare the Image
- Step 2: Invert the Image
- Step 3: Add Gaussian Blur
- Step 4: Change the Blend Mode
- Step 5: Add a Levels Adjustment Layer
- Step 6: Add a Black and White Adjustment Layer
- Step 7: Create a Snapshot
- Step 8: Add a Glowing Edges Filter
- Step 9: Add a Paper Texture Effect
- Step 10: Play with the Results
Step 1: Prepare the Image
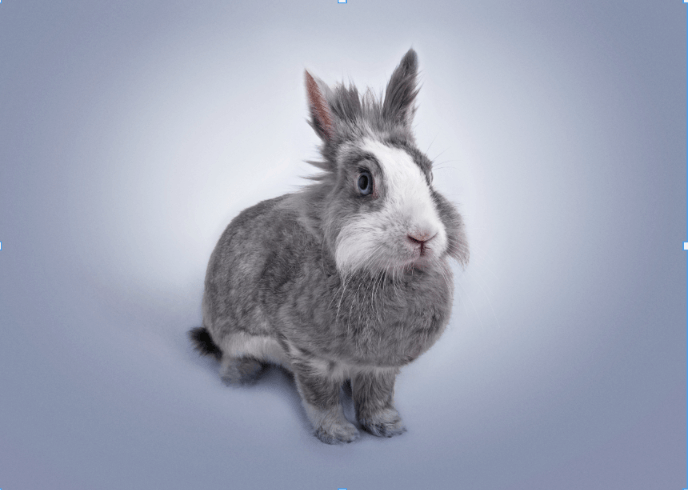
Open your image in Photoshop and duplicate the background layer with Ctrl + J or Command + J. This gives us something to come back to if we mess up.
Here’s the cute but slightly crazed-looking bunny we’ll be working with today. I got this image from pexels.com.
Then, right-click on the layer to open this menu. Choose Convert to Smart Object.
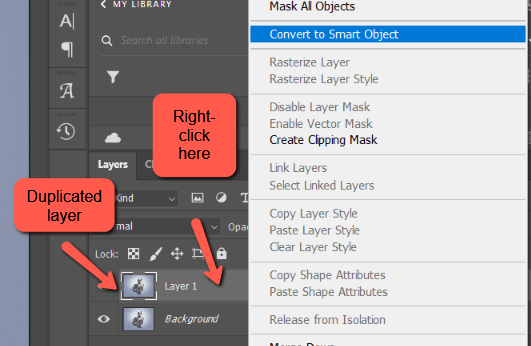
There are several benefits of using smart objects. In this case, we’ll be applying filters and the smart object allows us to go back and adjust those filters at the end.
Step 2: Invert the Image
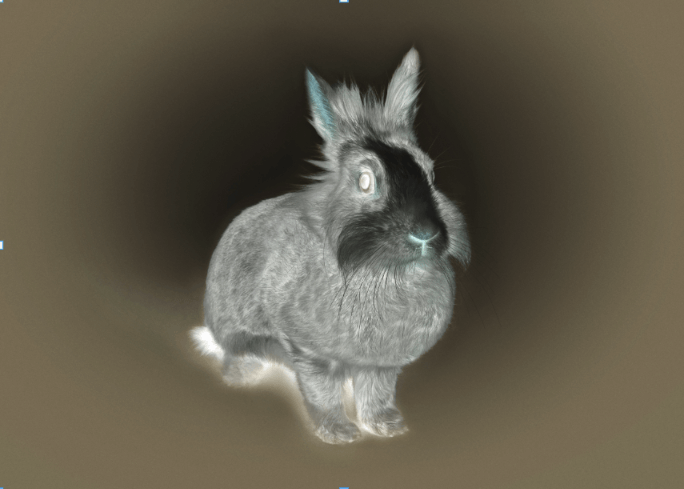
This one looks weird, but go with it, I promise it will work out. Hit Ctrl + I or Command + I to invert the image.
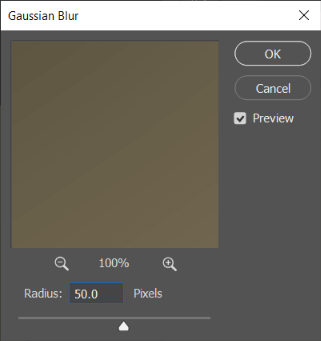
Step 3: Add Gaussian Blur
Now go to Filter in the menu bar, hover over Blur, and choose Gaussian Blur.

We want a significant amount of blur so let’s start with 50 pixels. Because of the smart object, we can come back and change this value at the end to see how it affects the look of the final image so it doesn’t matter too much what you pick at this point. Click OK.
Step 4: Change the Blend Mode
Change the blend mode of the image layer to Color Dodge.
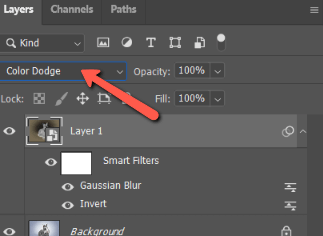
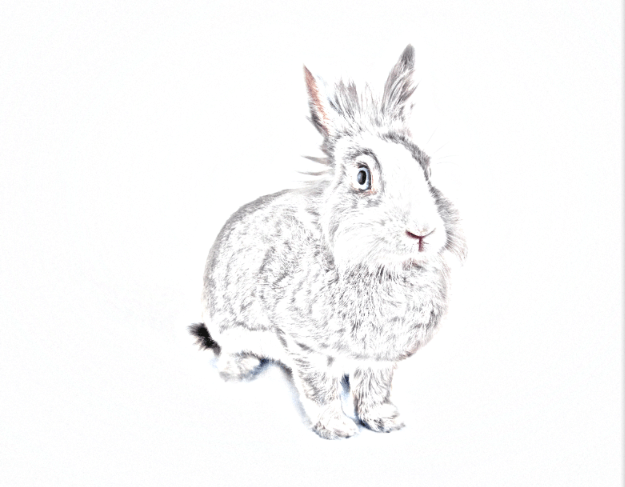
Now you should see the beginnings of the sketch look.
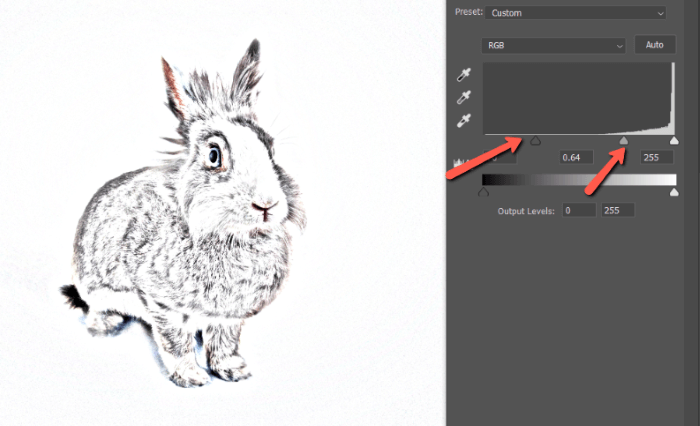
Step 5: Add a Levels Adjustment Layer
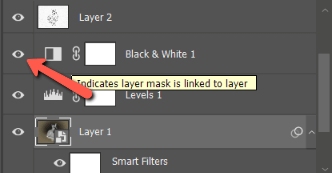
The sketch looks a little anemic, so let’s add some contrast. Click the Adjustment Layer icon at the bottom of the Layers panel. It looks like a half-filled circle. Choose Levels.
Bring up the dark and mid-tone values to see some definition and contrast in your image.
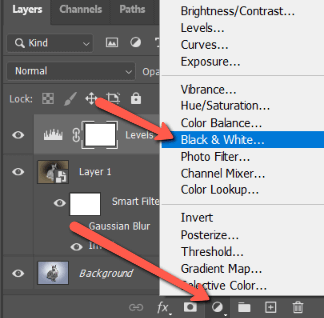
Step 6: Add a Black and White Adjustment Layer
If you want to go for the graphite pencil look, let’s add a black-and-white adjustment layer. Go to the Adjustment Layer again, but this time choose Black and White. If you want to go for a colored pencil sketch, you can skip this step.
Step 7: Create a Snapshot
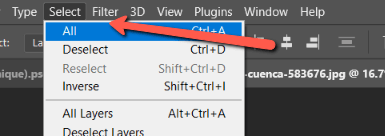
We need to bring everything together so we can apply a new filter to the collective image. Hit Ctrl + A or Command + A to select all. Or go to Select in the menu bar and choose All.
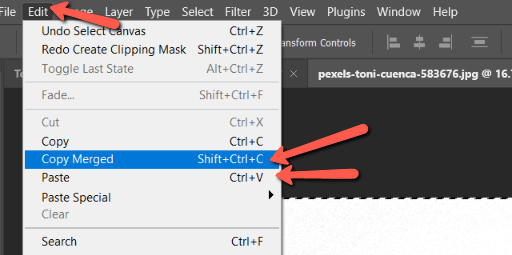
Then go to Edit and choose Copy Merged or hit Shift + Ctrl + C or Shift + Command + C. Finally, place the snapshot by selecting Paste or hitting Ctrl + V or Command + V.
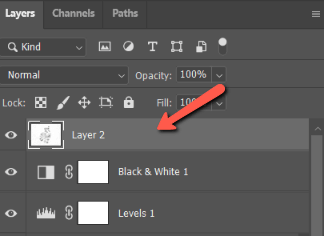
You should see the combined layer appear at the top of the layer stack.
Step 8: Add a Glowing Edges Filter
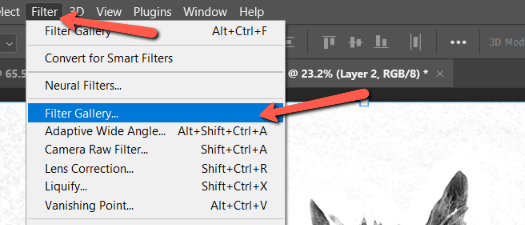
Go to Filter and open the Filter Gallery.
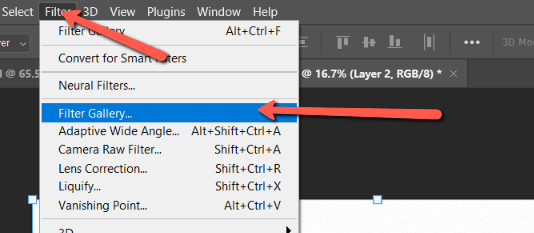
Open the Stylize folder and choose the Glowing Edges filter. On the right, choose the minimum Edge Width and the maximum for both Edge Brightness and Smoothness. Click OK.

Whoa! Things are looking a little funky again!
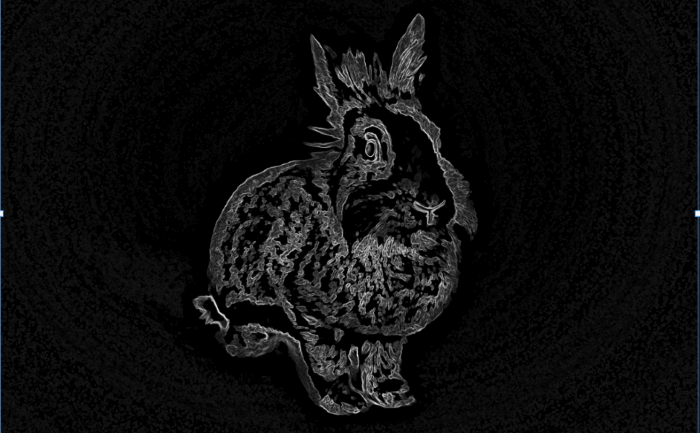
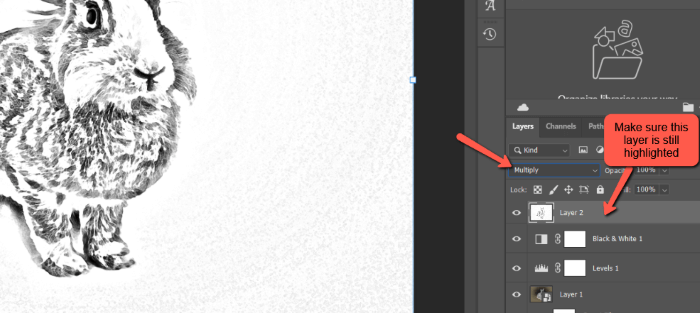
Hit Ctrl + I or Command + I to invert the image again. Also, change the blending mode to Multiply.
Step 9: Add a Paper Texture Effect
To make the drawing look more authentic, let’s add a paper texture to the image. The easiest way to do this is with a filter on a solid color fill layer.
Click the Adjustment Layer icon at the bottom of the Layers Panel and choose Solid Color.
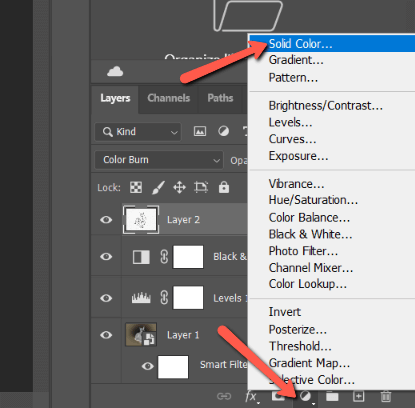
You can pick whatever color you want from the color picker that opens, but let’s go with white. It’ll cover your image but don’t worry.
With the color fill layer highlighted, go to Filter, and choose Filter Gallery.
This warning will pop up. Choose Convert to Smart Object if you want to be able to change the color later. If you plan to keep it white, you can just hit Rasterize.

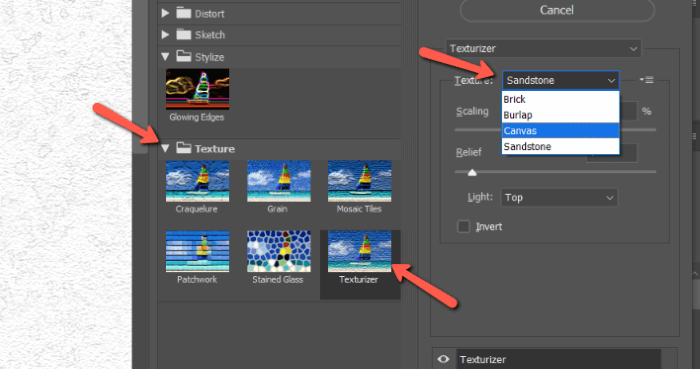
Switch to the Texture folder and choose the Texturizer filter. In the Texture box on the right, you have four options. Both canvas and sandstone give your image a paper-like texture. You can play with them and the scaling and relief options to find the look that you like.
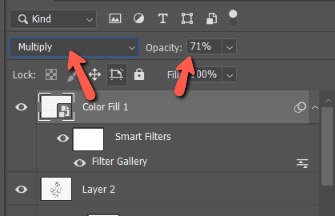
To bring the image through, change the blend mode to Multiply and reduce the opacity of the color fill layer to around 70%.
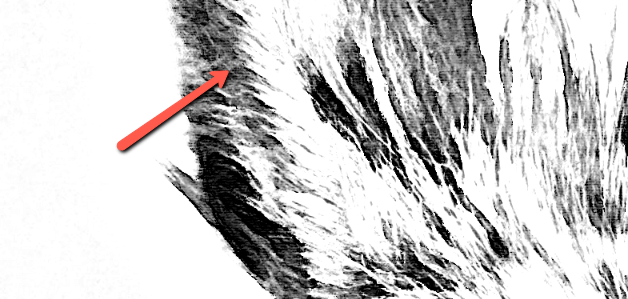
You’ll have to get up close on your screen to see it, but notice how there is now a slight texture to the image?
Step 10: Play with the Results
You can either leave your sketch as it is or you can tweak things a bit to see what you like better. Hit the eye icon next to the black-and-white adjustment layer to turn off the visibility. This will bring color back into your image and you can decide which version you prefer.
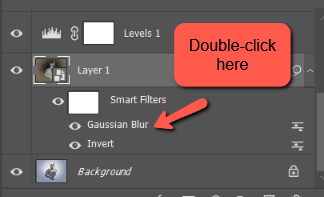
You can also try tweaking the Gaussian blur value. Scroll back down to Layer 1 and Double-click on the Gaussian blur filter. (Here’s where using a smart object comes in handy).
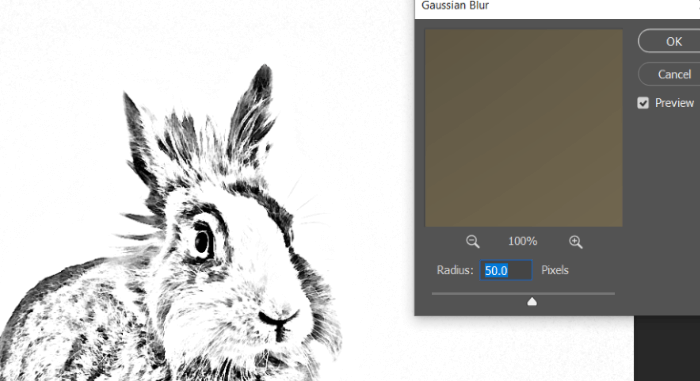
Here’s what it looks like at 50 pixels.
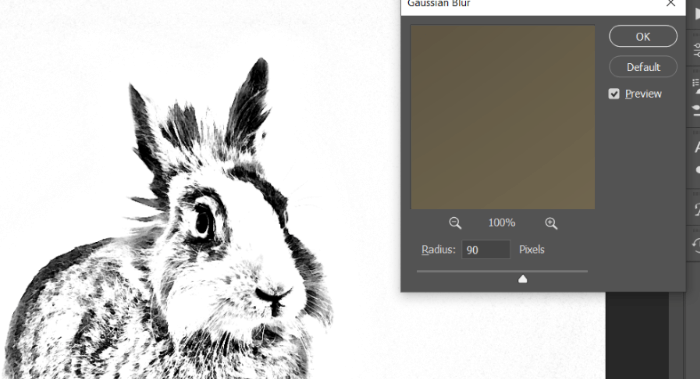
Compared to 90 pixels.
Have fun playing with it to see what you like and what works well for your image!
Interested to learn more fun things you can do with Photoshop? Check out our tutorial on creating a watercolor painting from a photo here!
About Cara Koch
Esther
Thanks Cara, am really learn from your content.
June
You’re welcome, Esther!
Coloring Pages
Wow, what an incredible tutorial! I never thought it was possible to transform a photo into such a stunning drawing using Photoshop. The step-by-step instructions were easy to follow, and the before-and-after examples were simply mind-blowing. This tutorial has unlocked a whole new world of creativity for me. Thank you so much! Martin Williamson