
Even though it’s not intended as a drawing app, Photoshop has an impressive range of drawing and illustration tools available, from the ever-popular and multi-talented Brush tool to the Mixer brush to the Pen tool.
If you’re not comfortable working with freehand drawing, or you don’t have a graphics tablet to make the action more natural, you can use the Pen tool to draw vector shapes and lines. Here’s how it works!
Please note: all screenshots from this tutorial are taken from the Adobe Illustrator Mac Version. Windows version can look different.
Table of Contents
The Quick Guide To Curved Lines In Photoshop
If you’re already familiar with vector drawing principles but you’ve never used them to draw curved lines in Photoshop before, this should get you started.
- Step 1: Switch to the Pen tool and set the Path type to Shape.
- Step 2: Click in your document to place your first anchor point.
- Step 3: Click and drag to place the endpoint of your curve.
That’s the basic principle, but Photoshop can do a lot more than just a basic curved line. If you want to follow the steps in more detail, as well as learn how to customize the appearance of your line and even use it to paint brushstrokes, then read on!
The Detailed Guide to Curved Lines in Photoshop
Drawing with vector paths is a much easier way of creating precisely curved lines than freehand drawing. We can’t all be masters of freehand precision like Leonardo da Vinci, after all – although I think he probably would have loved Photoshop.
Step 1: The Pen Tool
To start drawing curved lines, switch to the Pen tool using the toolbox icon or the keyboard shortcut P.

In the options bar at the top of the main document window, make sure that the type dropdown menu is set to Shape, not Path (see below).
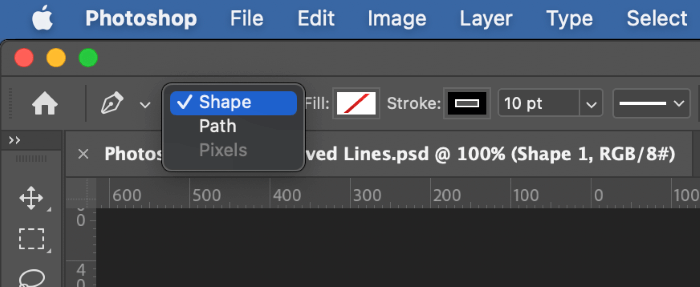
Make sure that the Fill color swatch is set to None (represented by a white background with a red diagonal line across it), or else you’ll create a shape instead of just a line.
You can set the Stroke color to whatever you want for your line, adjust the thickness of your curved line in Points, and even turn it into a dashed or dotted line if you want. All of these options can also be changed after you’ve finished drawing your line, so feel free to experiment.
Step 2: Creating Your Curved Line
With your Pen tool set up, it’s time to actually draw your line. With the Pen tool active, click anywhere in your document to set the first anchor point of your line. Click again to set a second anchor point, but this time, drag while you click to see the straight line instantly curve.
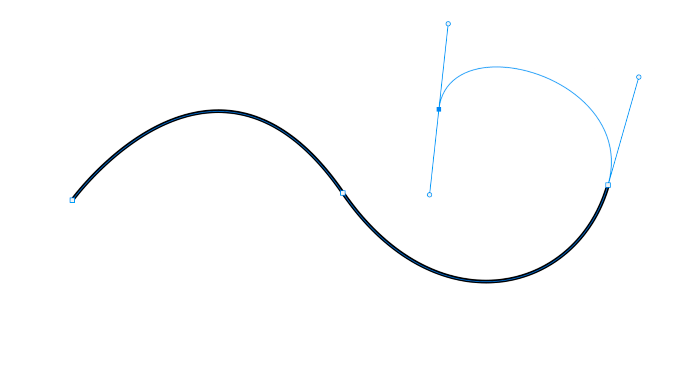
Repeat as many times as necessary until your curved line is complete. Remember that because you’re creating a vector shape, you can edit it later on if you want to tweak the placement or the angle of the curves.
Step 3: Editing Your Curved Line
While some people may be gifted with the ability to place their anchor points perfectly the first time, I tend to want to move mine around and adjust the handles to get everything exactly the way I want.
You can use the Direct Selection tool to modify your anchor points and adjust the handles, but switching between tools can break the flow of your drawing, even when you use keyboard shortcuts.
Instead, with the Pen tool still active, hold down the Command key (use the Ctrl key if you’re on a PC) and you’ll see your cursor switch to the white arrow of the Direct Selection tool. Unfortunately, I can’t take a screenshot of the cursor change, so you’ll have to see it for yourself.
You can also hold down the Option key (use Alt for PC) while you mouse over an anchor point, and you’ll see the outline arrow of the Convert Point tool, which allows you to quickly switch an existing point between a curve and a sharp corner point.
Bonus Technique: Brush Strokes Along Paths
If you’re not satisfied with a vector shape as your line, it’s also possible to use a path as a guideline for a stroke using any of Photoshop’s brush-based tools.
When starting out with the Pen tool, set the type to Path instead of Shape, and then draw your line as normal. Instead of adding a stroke to your path automatically, you’ll be creating an invisible guide.
Once you’re happy with the shape of your curved line, open the Paths panel. If you’re not familiar with it, it’s nested in the same tab group as the Layers panel in the bottom right corner of the interface.
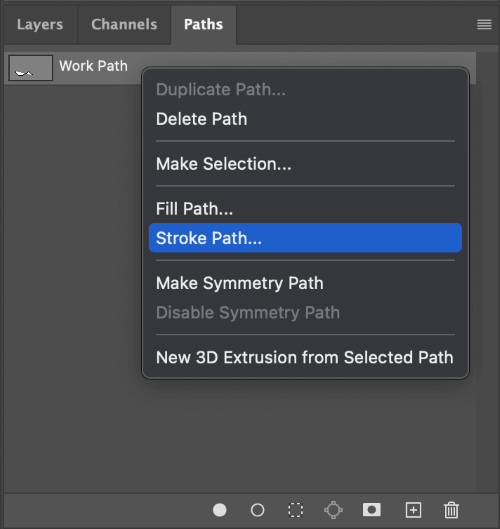
In the Paths panel, you should see your active path, probably with the default name Work Path. Right-click it, and select Stroke Path from the popup menu.
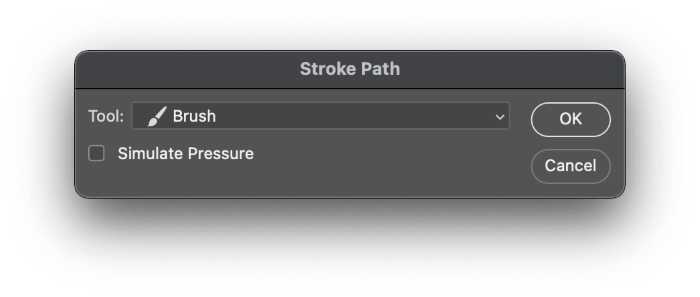
Photoshop will open the Stroke Path dialog box, which allows you to select from an impressive list of brush-based tools, as well as ask it to simulate the effects of a pressure-sensitive drawing tablet.
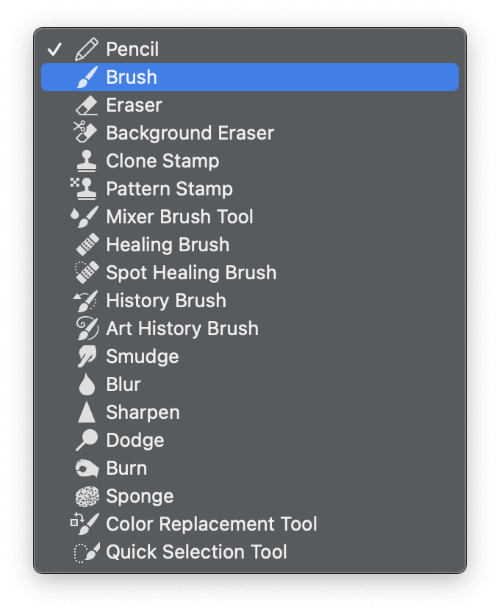
A list of all the tools that can be used to stroke a curved line in Photoshop
Select the tool you want to use, and click OK. Photoshop will use the settings that were last used with the selected brush tool, or your current foreground color, whichever applies.
You’ve just drawn a perfectly curved line with a brush tool, hands-free!
A Final Word
That’s just about everything you need to know to draw curved lines in Photoshop, plus a little bit extra on top.
While it’s nice to be able to draw in Photoshop, remember that it’s not really intended as a drawing app. There are plenty of other programs out there that have better features for drawing and sketching, and there are even some great free options such as Krita, Autodesk Sketchbook, and MyPaint.
Happy drawing!
About Thomas Boldt