
One of the most popular phrases here at PhotshopBuzz is that there are always lots of different ways to accomplish a task in Photoshop, and drawing arrows is no exception! Each way is pretty simple, but they each have their own strengths and weaknesses.
Table of Contents
1. Drawing Arrows With The Line Tool
If you want to draw an extremely simple arrow without any fancy flourishes or hand-drawn touches, the Line tool is a decent quick option.
The Line tool allows you to attach an arrowhead to either end of the line with just a few clicks, although there isn’t much in the way of customization options.
To get started, switch to the Line tool using the toolbox or the keyboard shortcut U.
Photoshop actually nests the Line tool along with a few others, so don’t worry if you don’t spot it at first. The Rectangle Tool, the Ellipse Tool, the Triangle Tool, the Polygon Tool, the Line Tool, and the Custom Shape Tool all share the same shortcut, as you can see below.

You can right-click on the current tool icon to see a popup menu or press the keyboard shortcut Shift + U repeatedly to cycle between each tool in the group.
Once you’ve got your Line tool selected, locate the tool options panel, usually located along the top of the main document window. Click the small gear icon (shown below) and you’ll open the Path Options popup menu.
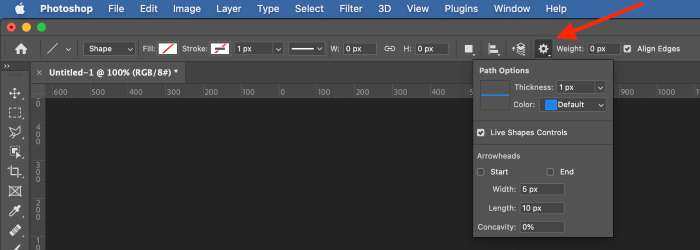
This menu allows you to add arrowheads to the start and/or the end of your line segment automatically, along with some minor size customization options.
Be sure to handle all these customization options before you draw your actual line! Photoshop will create the arrow as a shape layer, but any changes you want to make after drawing the arrow will have to be done by hand using the Direct Selection tool to move your anchor points.

You may have to draw a couple of arrows to refine the size and shape of the arrowhead a bit, but that’s easy enough to do!
2. Drawing Arrows With The Custom Shape Tool
One of the tools I mentioned briefly in the first method is the Custom Shape tool, and this is probably the best way to draw arrows in Photoshop.
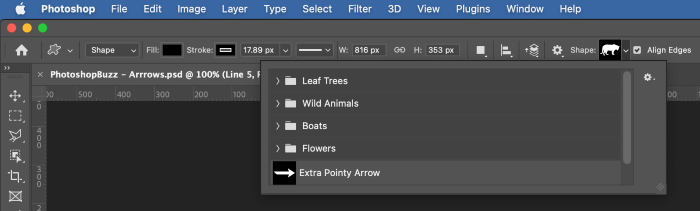
Cycle through the shape tools using the shortcut Shift + U until you’ve got the Custom Shape tool selected. In the tool options panel above the main document window, you’ll see the preset custom shapes available.
The latest version of Photoshop has some very odd shape categories enabled by default, but there’s an entire hidden section filled with arrow shapes – you’ll just have to enable it yourself for some reason. Adobe sure has been making some odd user experience choices lately…
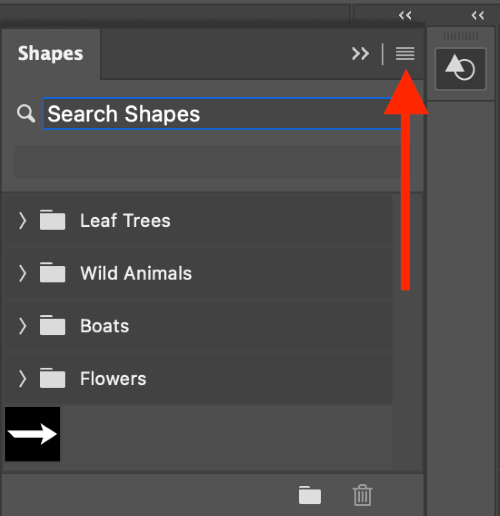
Open the Window menu, and select Shapes to open the Shapes panel. With the panel expanded, click the small hamburger menu icon in the upper right corner of the panel (shown below).
In the next popup menu, select Legacy Shapes and More.
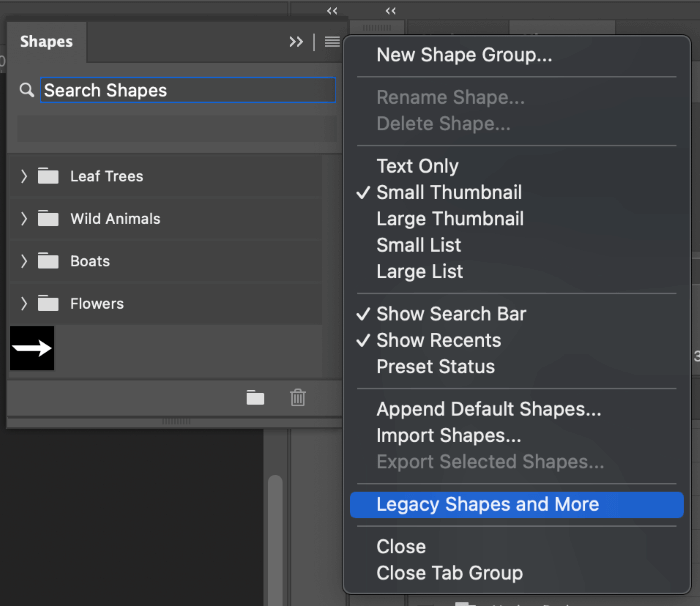
This will add all the old shapes found in previous versions of Photoshop to your Shapes menu. I’m not sure which brilliant Adobe executive decided that having shapes for leaf trees and boats was more important than having arrow shapes, but I hope they get a pie in the face pat on the back for that winner of an idea.
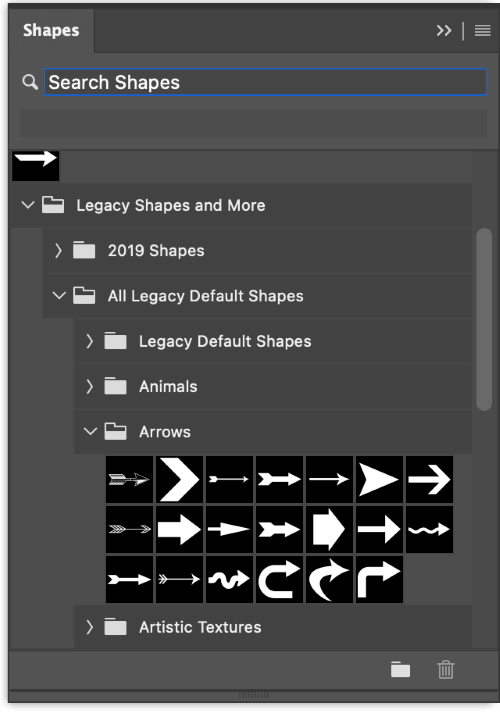
You can find the Arrows section using the search box, or browse your selection by opening the following folders: Legacy Shapes and More > All Legacy Default Shapes > Arrows, as shown above.
Once you’ve selected the arrow you want, simply click and drag on your canvas to create the custom arrow shape. You can adjust it using the transform tools or the Direct Selection tool as needed until you’re happy with the results.
Creating Your Own Custom Shape
If you have a particular style of arrow that you like best (hey, we’ve all got our quirks!), you can draw one in your desired style and save it as a custom shape that you can easily reuse later.
To get started, switch to the Pen tool using the toolbox or the keyboard shortcut P and create your chosen arrow shape by clicking on the canvas to set anchor points.
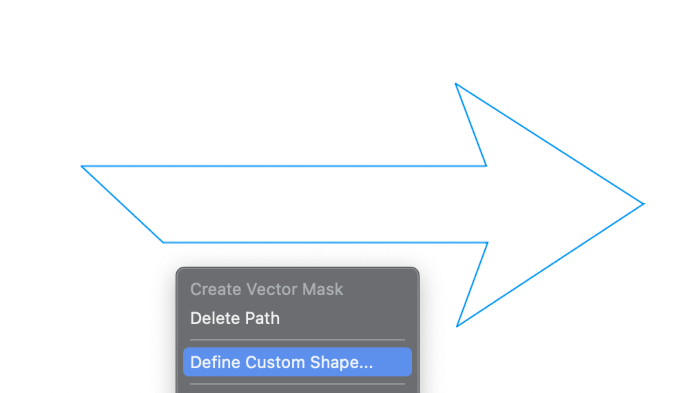
Once you’re happy with the shape of your custom arrow, right-click anywhere on the canvas and select Define Custom Shape… from the popup menu. Photoshop will open another window where you can name your shape. Give it a descriptive name and click OK.
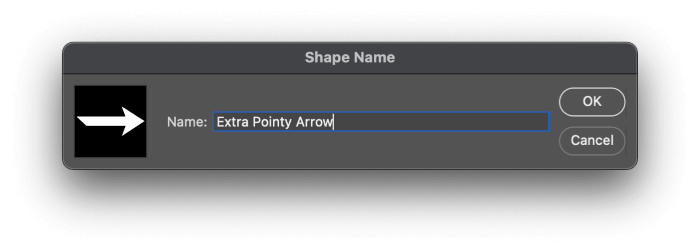
The next time you open the custom shape menu, your custom arrow should be available at the bottom of the list, and you can use it just like any other custom shape without having to redraw it with the Pen tool every time.
3. Drawing Arrows By Hand
Last but not least, you can draw your arrows by hand! This isn’t a great method if you’re using a standard computer mouse, but if you’ve got a drawing tablet, you can easily create a hand-drawn style arrow using the Brush tool.

Switch to the Brush tool using the toolbox or the keyboard shortcut B. Set the brush size to whatever you’d like, and then simply start drawing! This is probably my least favorite method because I’m not very good with hand drawing, but it can add an essential personal touch to certain projects.
A Final Word
Those are all the different ways to make arrows in Photoshop! No matter what your style requirements are, one of these methods will let you create the perfect arrow for your project.
Happy Photoshopping!