The Levels tool is a powerful, but often overlooked tool in Photoshop. If you don’t know how to use it, you’re missing out on tricks that could really give your photos that little extra something you’re looking for.
Hello! I’m Cara and I love helping you expand your Photoshop knowledge (as can be seen by all the tutorials available here on Photoshop Buzz!) Today, we’re going to look at how to use levels in Photoshop.
It might not seem as exciting as learning to add fire to your images, but I promise it will be an effective technique that will help you up your editing game.
So let’s dive in!
Note: I use the Windows version of Photoshop. If you are using a Mac, the workspace will look slightly different from the screenshots displayed here.
Table of Contents
What Does the Levels Tool Do in Photoshop?
First off, it’s good to have a quick understanding of what this tool does. It allows you to adjust the tonal range and color balance of your images. You can work with the image’s shadows, highlights, and midtones separately.
This allows you to fix an unwanted color cast in your image or add contrast in a realistic way.
Where is the Levels Tool in Photoshop
There are a few ways to get to the Levels tool. You can find it by going to Image, hovering over Adjustments, and choosing Levels from the menu. To open it the same way faster, use the keyboard shortcut Ctrl + L or Command + L.

This will open up the Levels tool but notice this – it doesn’t put your edits on a new layer. This means that if you want to come back and make adjustments to your Levels adjustments, you won’t be able to.
So, I recommend adding Levels as an adjustment layer over in the Layers panel. There are multiple ways to do this.
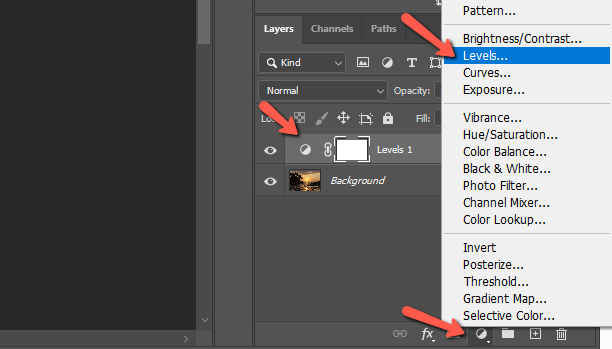
From the Adjustment Layers Icon
Click the half-filled circle icon that represents your adjustment layers. Choose Levels from the list.
Now, you’ll notice there is a new Levels layer added on top. You can always come back and access the same Levels of adjustments and make any further adjustments that you like.
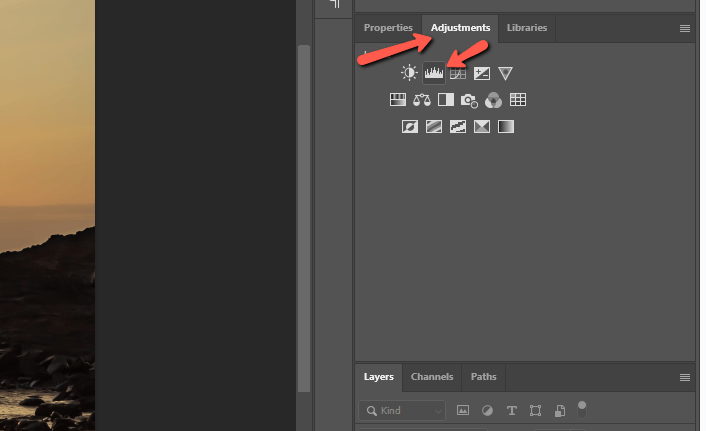
From the Adjustments Panel
Depending on your Photoshop workspace layout, you may have the adjustments panel available. Both the Photography and Essentials layouts have it on the right side above the Layers panel.
Click the Adjustments panel tab and select the Levels icon from the hieroglyphics listed. (I wonder what future generations would think if they saw these icons scribbled on a cave wall!)
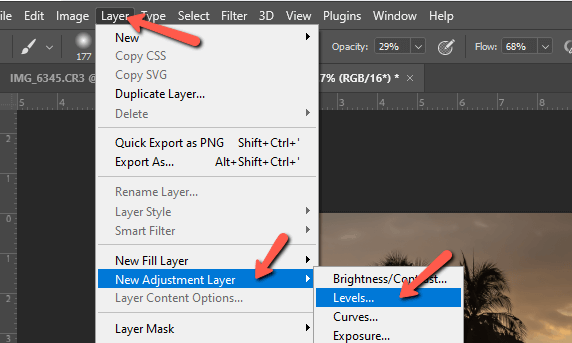
Another way is through the Layer menu instead of the Image one. Go to Layer, hover over New Adjustment Layer, and choose Levels.
Set the Black and White Points
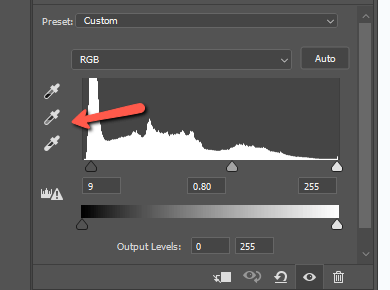
However you get there, you’ll see the same thing – a histogram of your image’s tonal range with adjustment sliders.
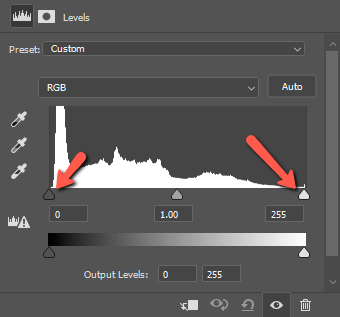
Let’s look at the black-and-white points first. These are controlled by the little triangular sliders at either end of the histogram. When you slide them up or down, Photoshop adjusts the pixels to match.
My histogram goes all the way across, but if yours doesn’t, you should bring the black point up or the white point down until they just touch the ends of your histogram. This will adjust the contrast in the image and make it crisper.
For a visual demonstration of which parts of the image are pure white and which parts are pure black, hold the Alt or Option key while dragging on the sliders. Photoshop will give you a preview of the image.
The triangular slider in the middle adjusts the midpoint of the image. This will make it brighter as you slide down or darker as you slide up.
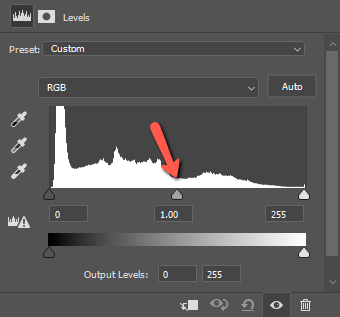
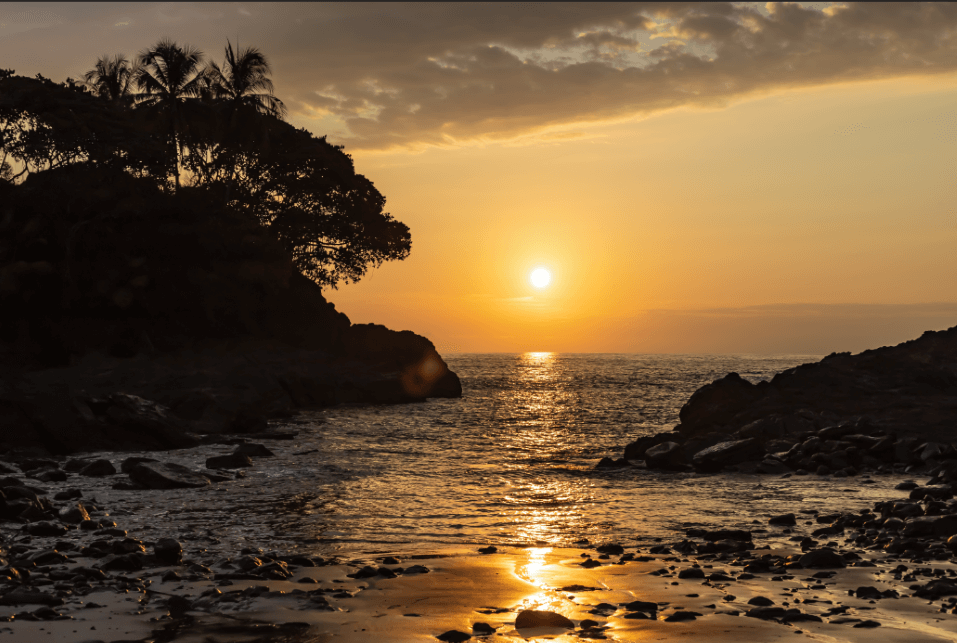
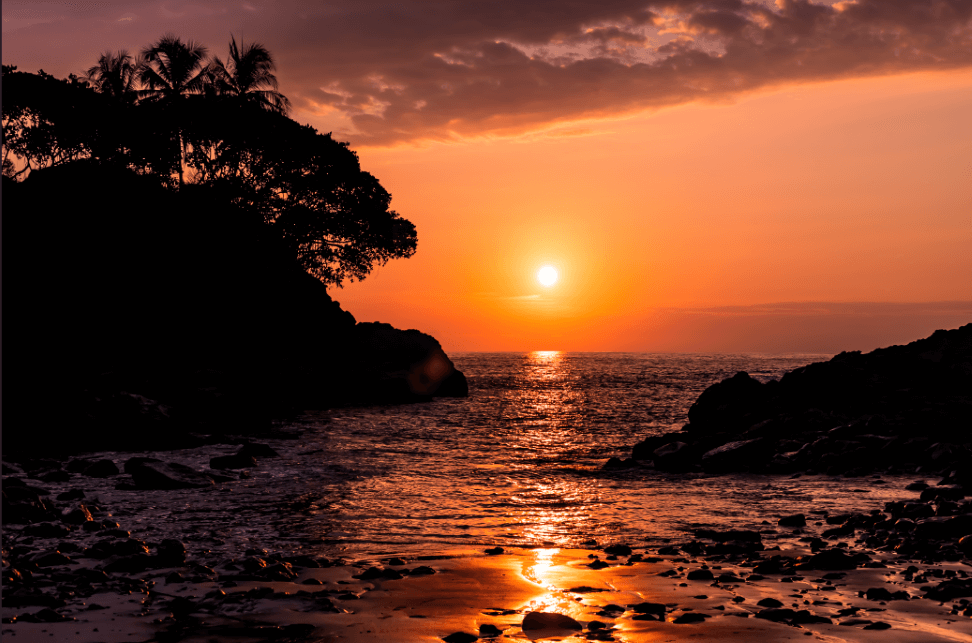
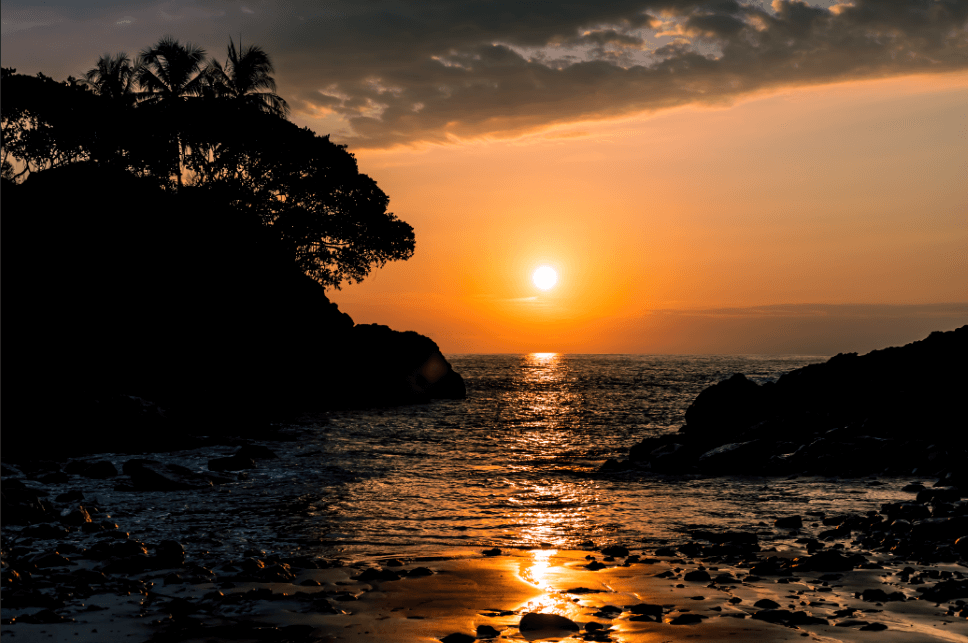
Here’s my original image. Since my histogram stretched all the way across, I decided to leave my black-and-white points alone.
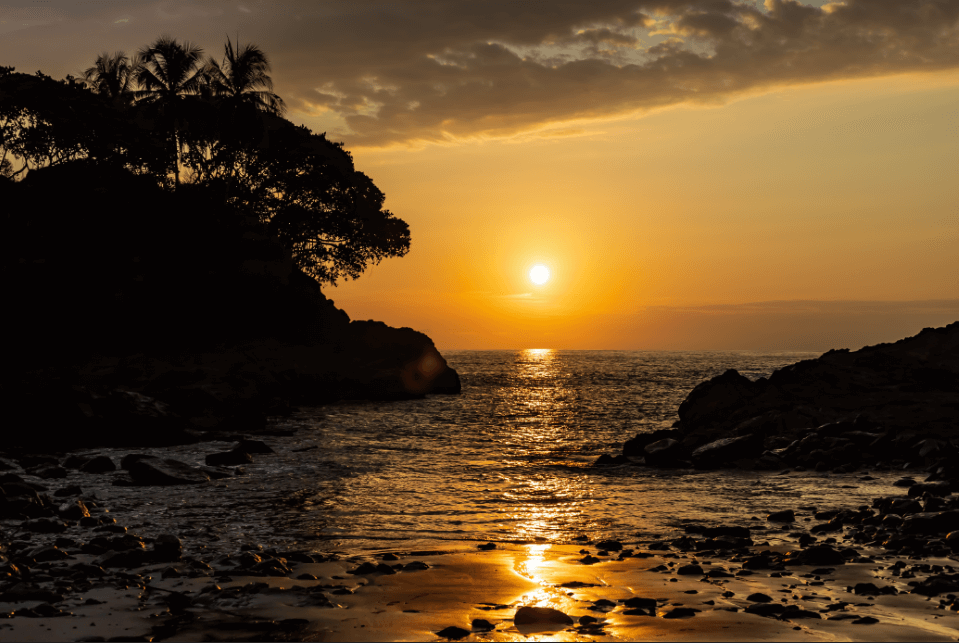
However, I did slide my midpoint up a little bit to darken it. Here’s the change.
Using the Eyedroppers
You can also use the Eyedropper tool to ask Photoshop to set the levels automatically based on points in the image.
Use the white (bottom) Eyedropper to set the white point. Use the black (top) Eyedropper to set the black point. Use the gray (middle) Eyedropper to set a neutral gray point in the image. This is helpful for removing color casts.
Working in Color Channels
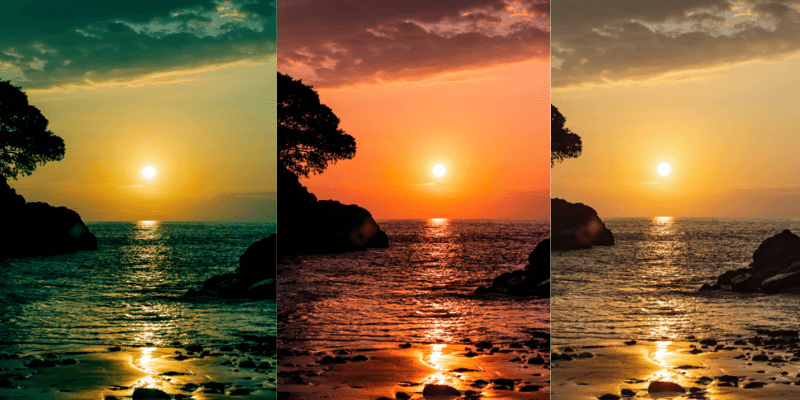
Photoshop also lets you adjust the levels in the blue, green, and red color channels separately. This is quite helpful when you want to adjust the colors. Watch how these affect my sunset image. Let’s start with the Red channel, which we access by clicking the RGB dropdown.
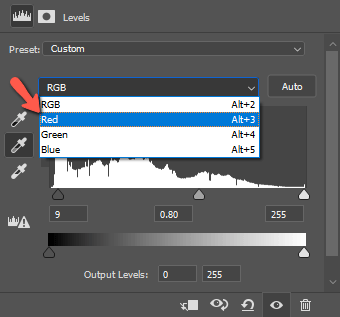
You add red to the highlights by dragging the white point slider down.
You take red out of the shadows by bringing the black point slider up.
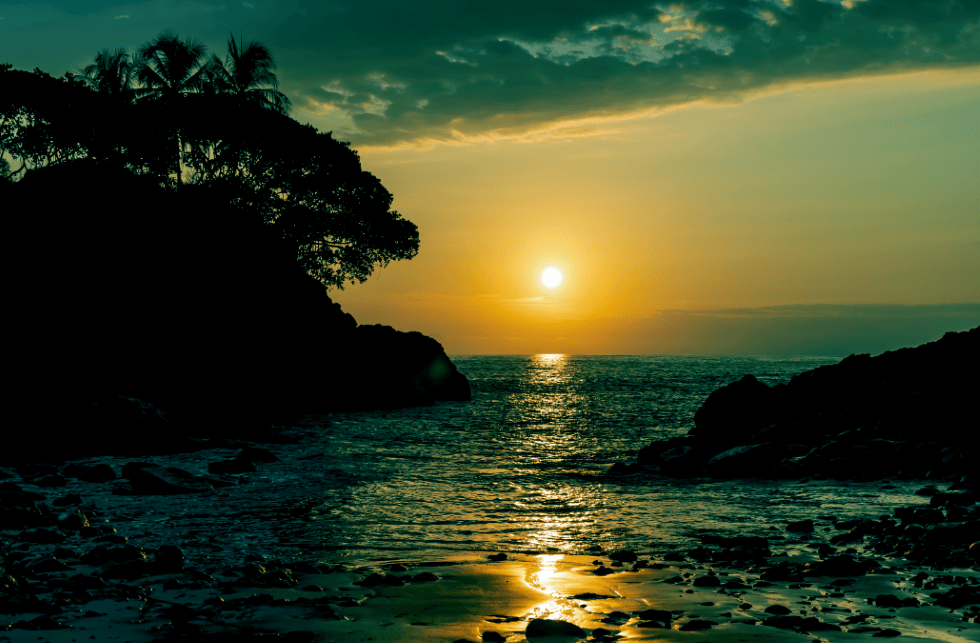
A similar effect happens with the Green and Blue channels. Adjust these points to get the color look you would like.
Saving Levels Presets
If you find yourself using certain Levels settings frequently, you can turn them into a preset to speed up your workflow.
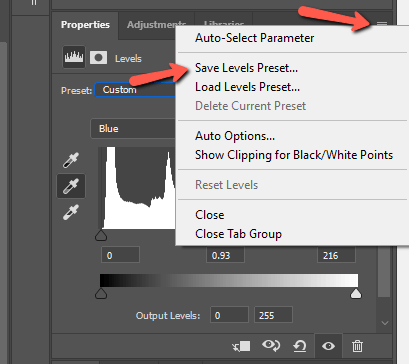
Click the three horizontal lines at the top right corner of the Levels’ properties panel. Choose Save Levels Preset from the dropdown menu. Give your preset a name and Photoshop will save it in the appropriate spot.
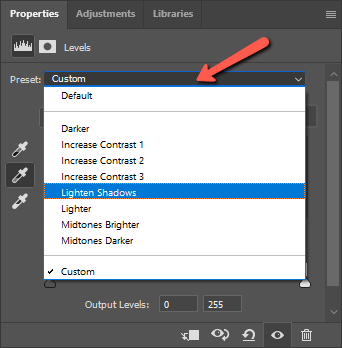
There are also a few default presets you can access right off the bat. Click in the Preset box to open the options and choose one from the dropdown menu.
And that’s about all there is to it! For some images, adjusting the levels will make all the difference as that extra touch of contrast or color adjustment will really make them pop!
Try experimenting with Levels and let us know how it goes in the comments! Interested in learning how to use other powerful adjustment tools in Photoshop? Check out how to use Curves here!
About Cara Koch