Do you want to heat things up in your images considerably? Adding a fire effect is a really fun way to do it. And the effect is surprisingly easy to create!
Hello, I’m Cara, here once again with something that seems super complicated to do. However, once you know which buttons to push, Photoshop does the heavy living and you end up with a great image. So let me show you how to add a fire effect in Photoshop!
There are actually two effective methods for creating realistic fire in your images. Which one you’ll use depends on the final effect you want as well as your preferences. You may find one method easier than the other.
Note: I use the Windows version of Photoshop. If you are using a Mac, the workspace will look slightly different from the screenshots displayed here.
Table of Contents
Method 1: Create a Composite
For this method, we will be blending a couple of images together to create the fire effect. Follow the steps below to see how it works.
Step 1: Select Your Images
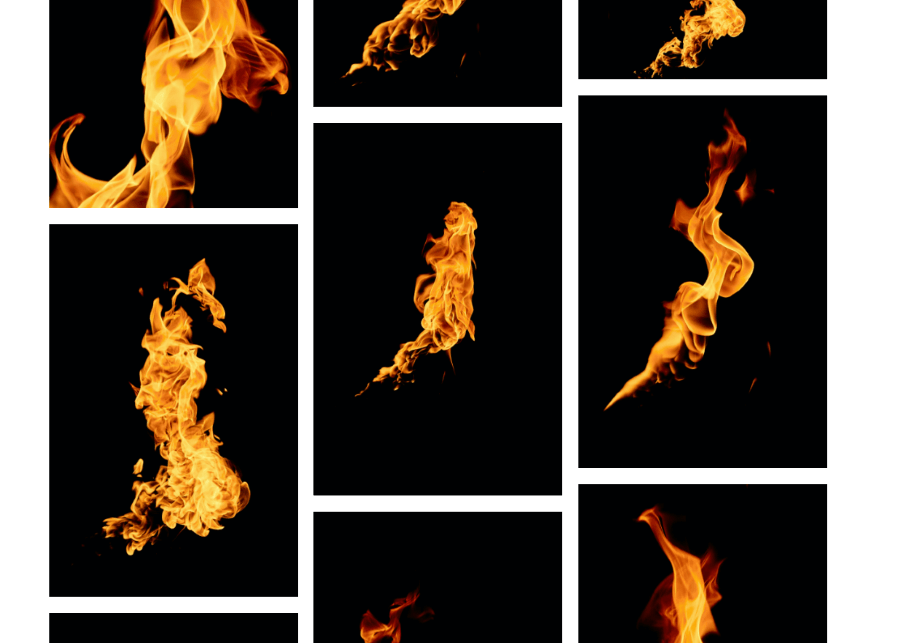
We’ll start with creating a composite. Find a stock website like Pexels.com and search fire effect or something similar. You’ll end up with a bunch of images like these. Grab a few, keeping in mind the shape of your final effect.
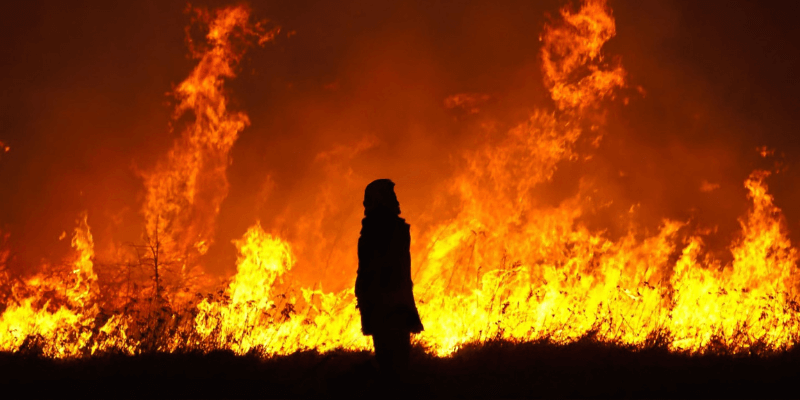
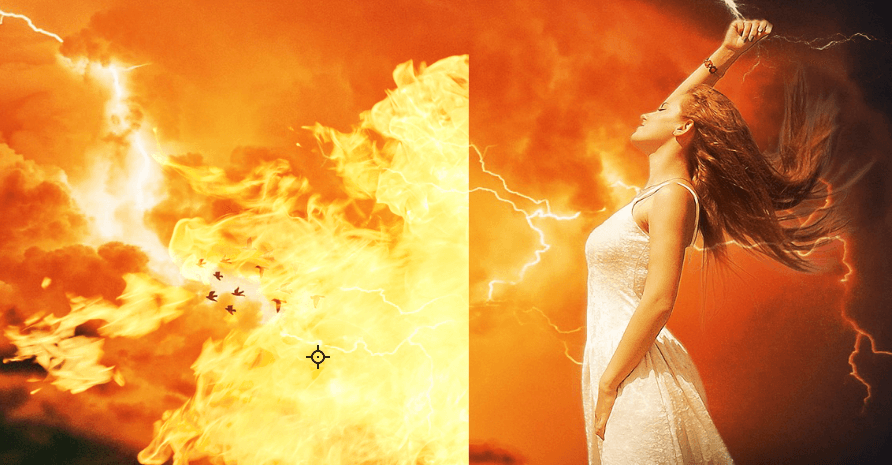
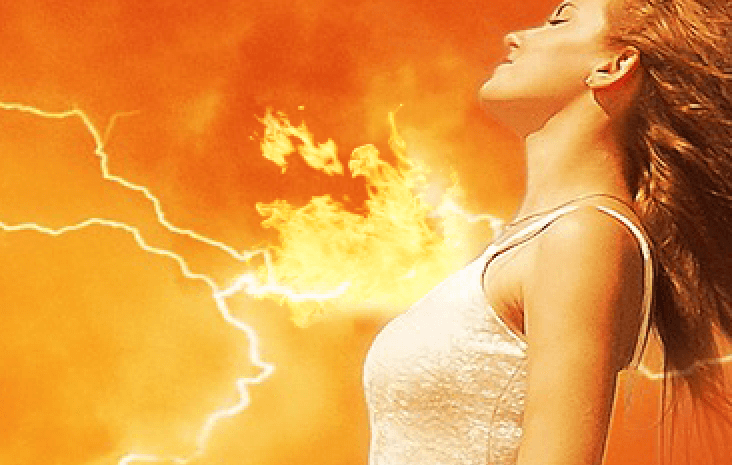
I downloaded a few of these, as well as this one from Pixabay as my base image. I’m going to add some fire pouring out of her chest because, why not?
Step 2: Load Images into Photoshop
We’re going to be using all these images as individual layers in the same project. So let’s load them all at once instead of opening each one individually.
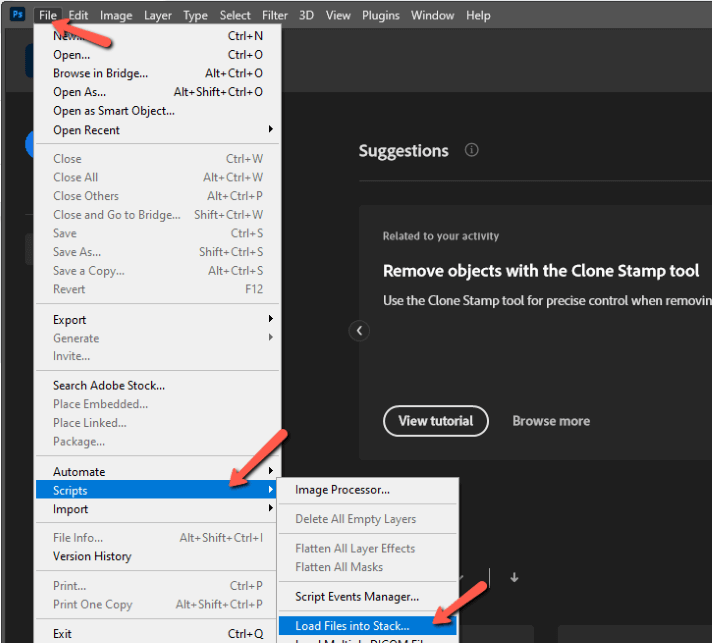
Go to File, hover over Scripts, and choose Load Files into Stack.
Click the Browse button, which will open your computer files. Navigate to and choose all the images you want to load. They’ll appear as a list in the box on the left.
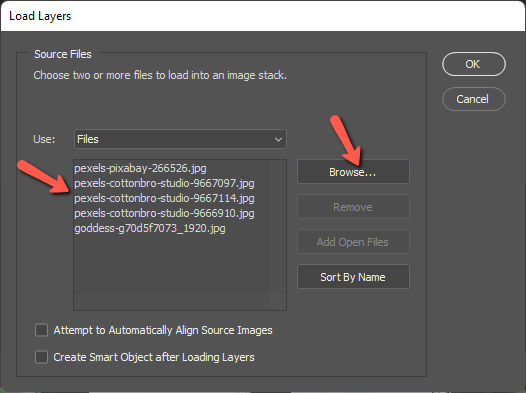
Press OK when you’re ready. The images will all appear on top of each other in your Layers panel.
Step 3: Crop the Base Image
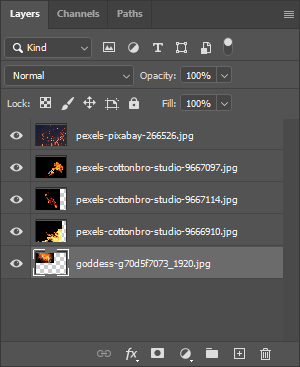
Photoshop creates a canvas the size of the largest image. To see the size of your base image in comparison to the other layers, turn off the visibility of all the flame layers. Click the eye icon on the left side of the layers to toggle visibility.
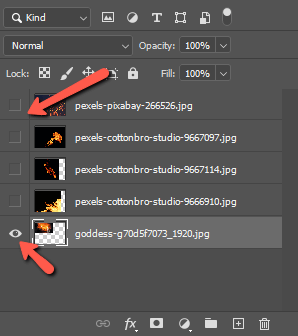
You’ll be left with the base image and whatever excess space is around it. In my case, the flame images are larger than the base image I chose. I’ll need to trim the excess canvas space.
But before I do that, I need to select each of the flame layers and activate the Transform tool by pressing Ctrl + T or Command + T on the keyboard. If you need help using the Transform tool, check out this tutorial.
Resize the layers to fit inside the base image layer. Otherwise, when you crop, you’ll cut off the excess of those images.
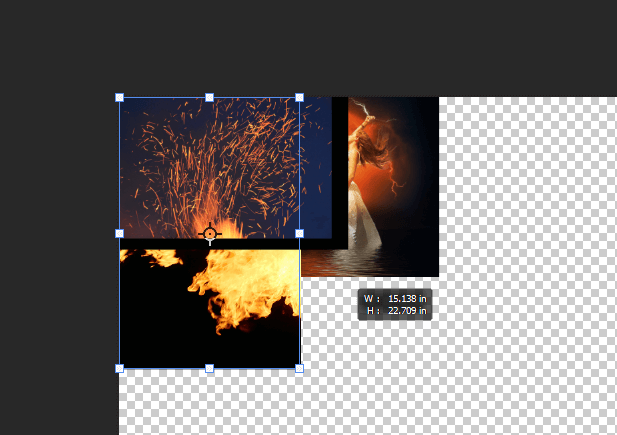
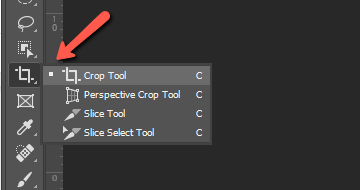
Once they’re safely within the bounds of the base image, press C on the keyboard to access the Crop Tool or select it from the toolbar on the left.
Grab the white handles and crop the canvas to fit your image.
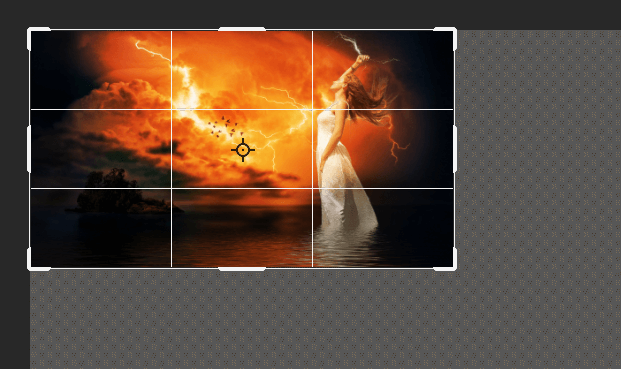
Press Enter, Return, or click the checkmark in the Options bar to accept the changes.
Step 4: Change the Blending Modes
Let’s turn back on just one of the flame layers to work with them individually. It will be easier to see what we’re doing that way.
You’re going to notice right away that the dark background behind the flames is a problem.
That is until we magically make it go away by choosing a different blend mode. Click the fire layer and change the blend mode to Screen. Click the dropdown box that says Normal near the top of the Layers panel and choose Screen from the list that appears.
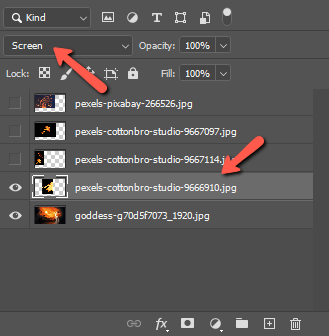
This keeps all the bright parts of the image and gets rid of the dark parts. Voila! You’ll have to do this for each of the fire layers as you work.
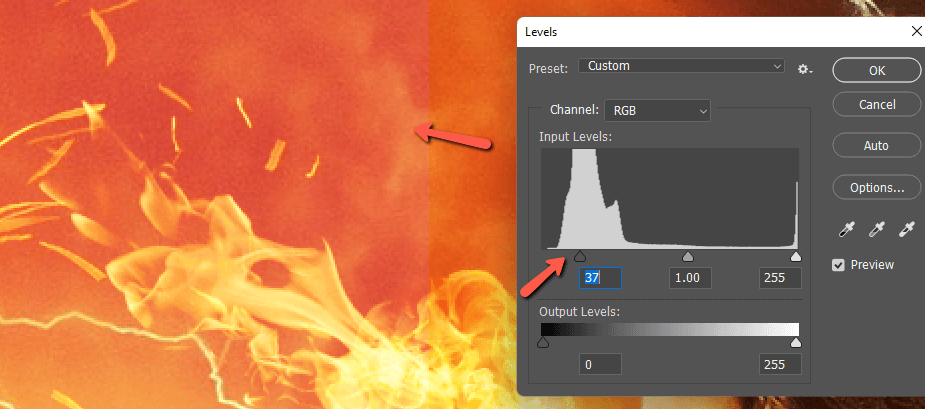
What if you run into this problem with one of the layers? The black background didn’t entirely disappear!
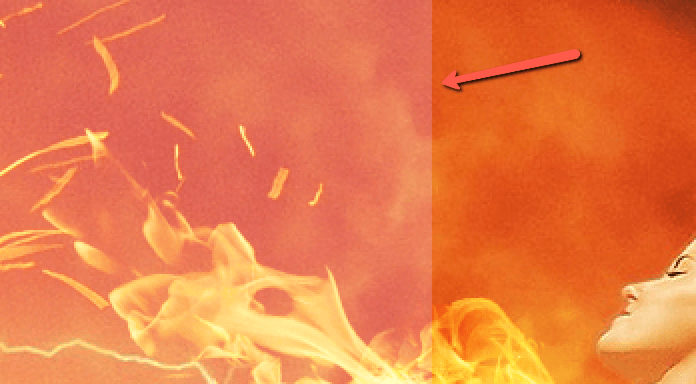
That’s easily fixed with a trip to the Levels tool. Press Ctrl + L or Command + L or go to Image in the menu bar, hover over Adjustments, and choose Levels.
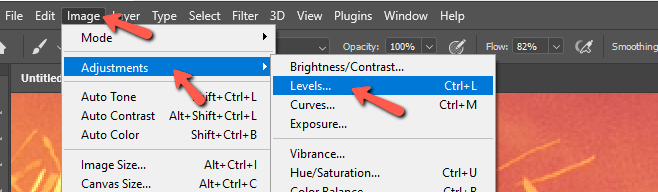
Then slide the shadows slider up until the dark background completely disappears.
Step 5: Position and Shape the Fire
Let’s activate the Transform tool again with Ctrl + T or Command + T. We need to resize and reposition the fire to look as we want.
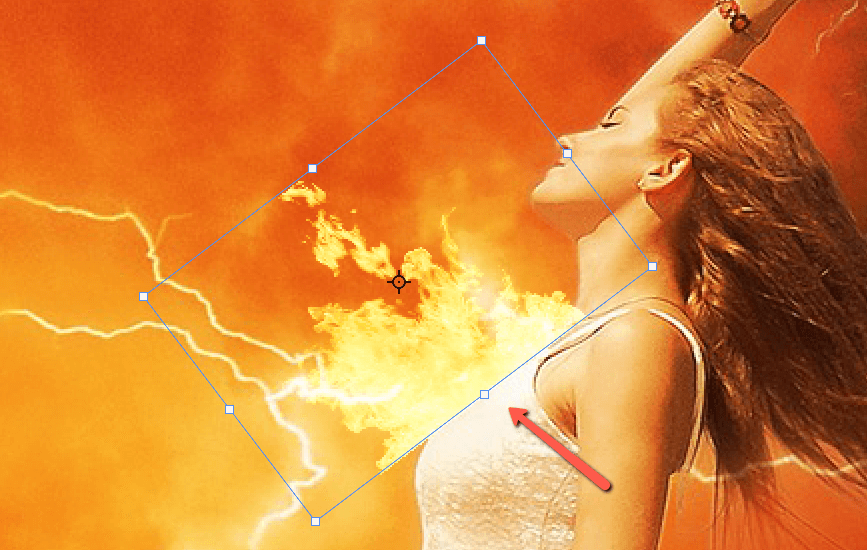
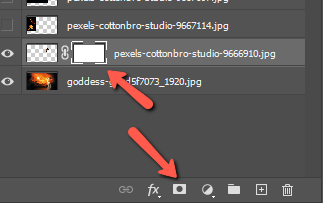
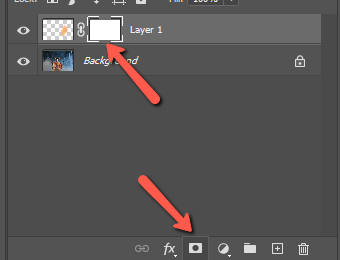
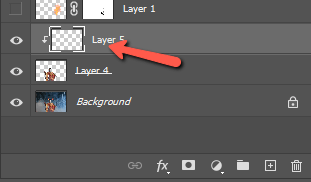
We have some extra parts of the flames that we don’t want for this image. So press the Layer Mask button at the bottom of the Layers panel. It looks like a rectangle with a circle in the center. A layer mask will appear on your fire layer.
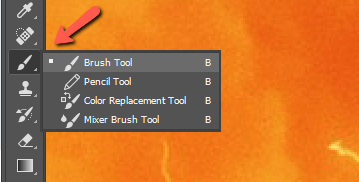
Press B to activate the Brush Tool, or select it from the toolbar on the left.
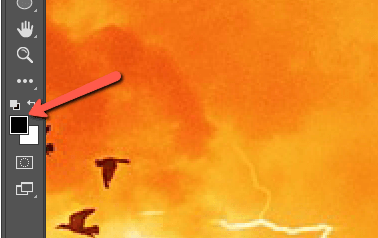
Make sure your foreground color is set to black. Remember black conceals, white reveals.
And paint away the areas of the flame that you don’t want. You’ll need to change the size and possibly the flow and/or opacity of the brush to get the most natural results. If you’re not familiar with the Brush Tool in Photoshop, check out this tutorial.
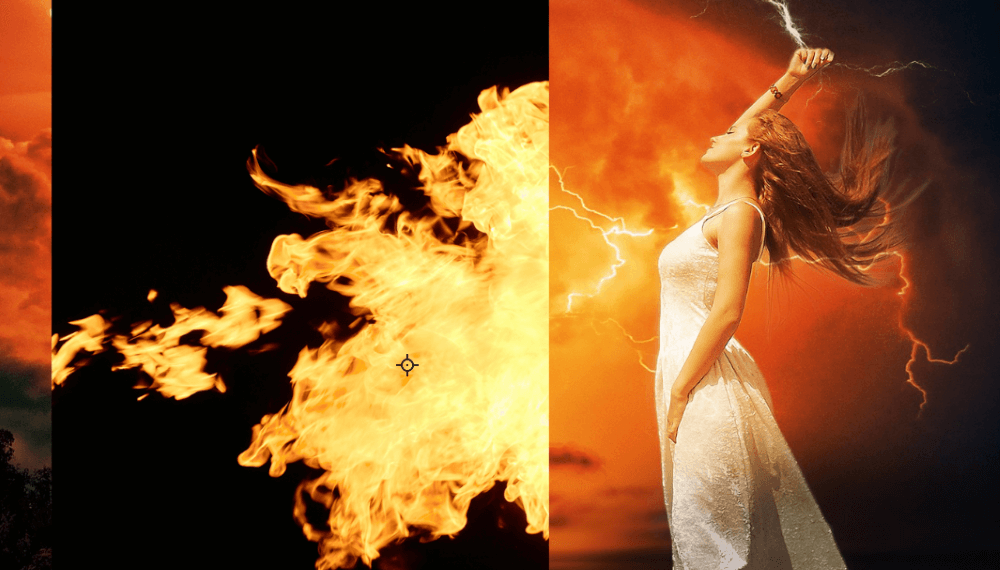
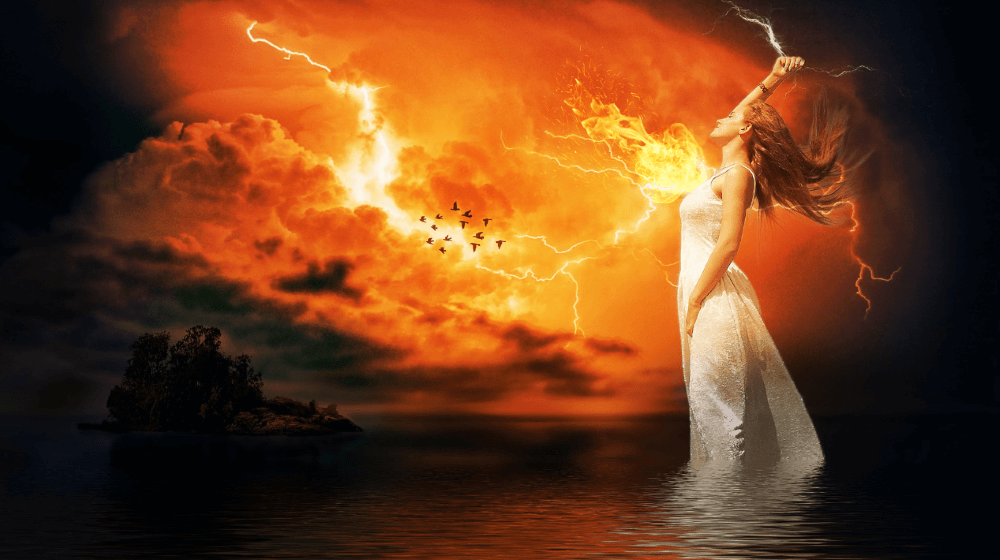
Repeat these steps for all the other fire layers. Here’s my final image!
Method 2: Generate Fire in Photoshop
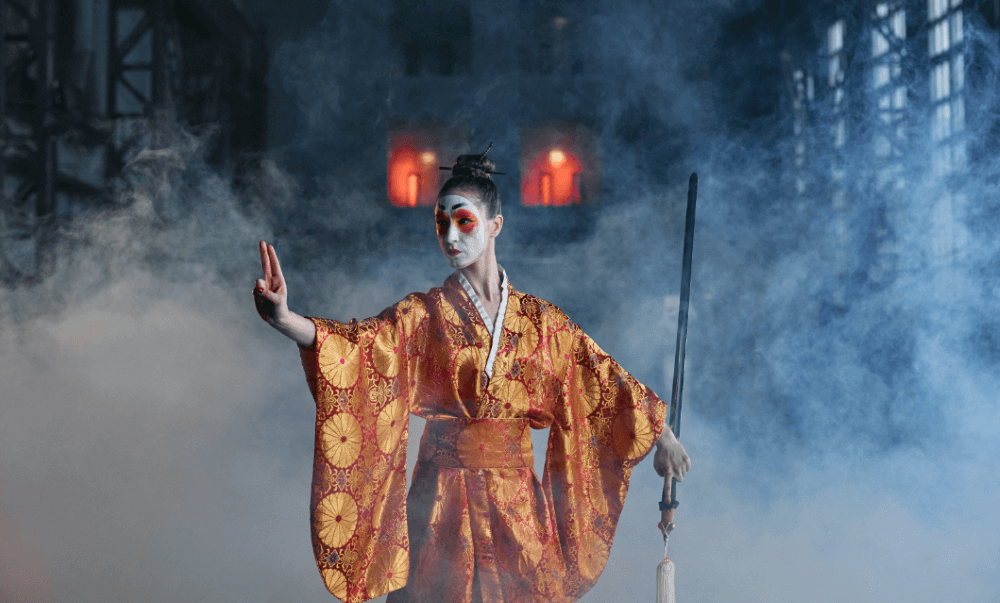
What about generating fire in Photoshop? This method is great for when you want lots of control over the shape of the fire. For example, if you were going to wrap tongues of fire around letters or run them along a sword as we’ll do with this image from Pexels.
Step 1: Draw the Fire Path
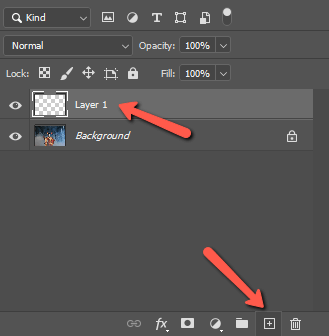
Press the New Layer icon at the bottom of the Layers panel. This allows us to work nondestructively.
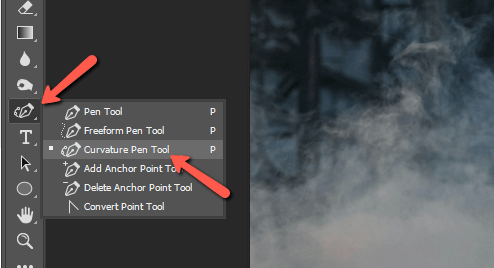
Now press P on the keyboard, or choose the Pen Tool from the toolbar on the left. For the snaking effect, we want to create, the Curvature Pen Tool is the best choice. Choose it from the menu once and this tool will activate every time you press the P key.
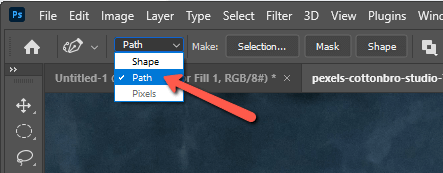
Make sure the tool is set to Path in the Options bar.
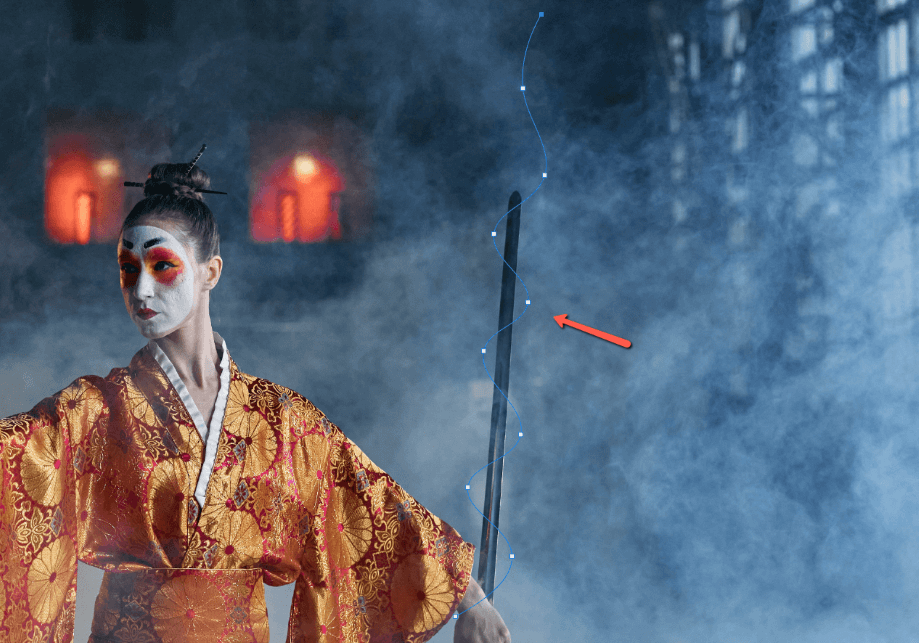
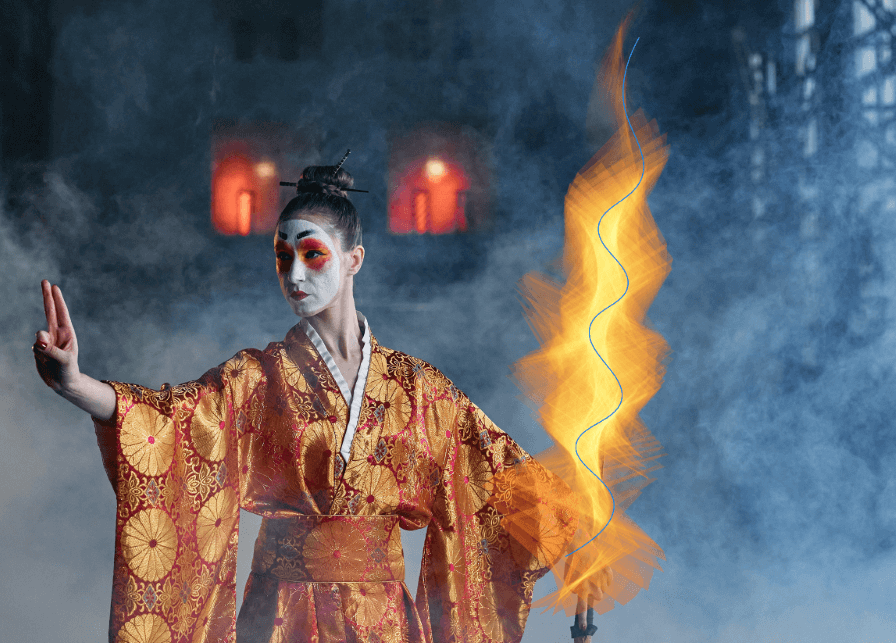
Drop some points along the sword in a zigzag pattern. The path will automatically curve around your points. This is the path your flame will follow. If you need to reposition any of the points after dropping them, simply click and drag the point to its new location.
Step 2: Generate Fire
Now go to Filter in the menu bar and hover over the Render option. Choose Flame from the list.
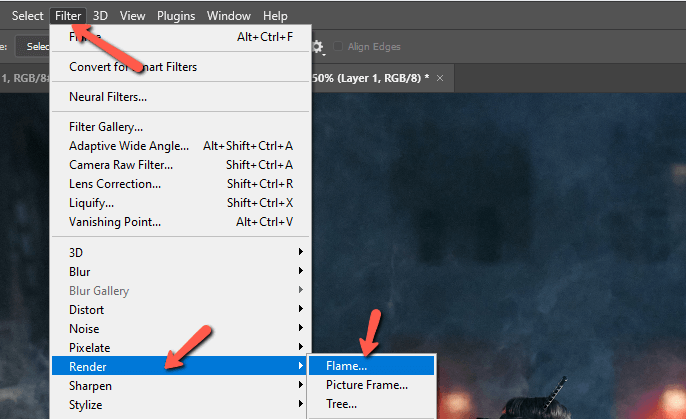
Here is where you create your fire. Start with the Basic tab.
Pick the Flame Type from the dropdown. I’m going to choose One Flame Along Path for this effect. Play with the other sliders to see how they affect your flame in the preview window on the left.
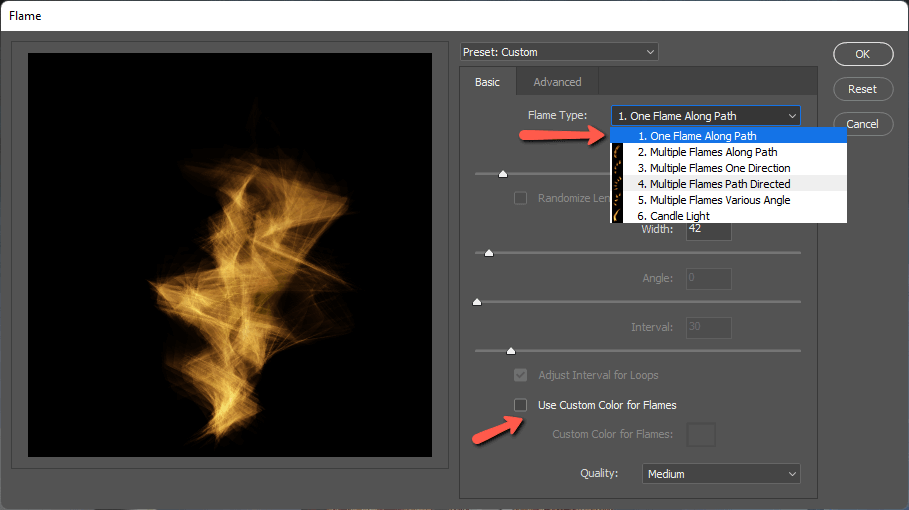
If you want to use a custom color for your fire, check the Use Custom Color for Flames box and choose a color from the color picker.
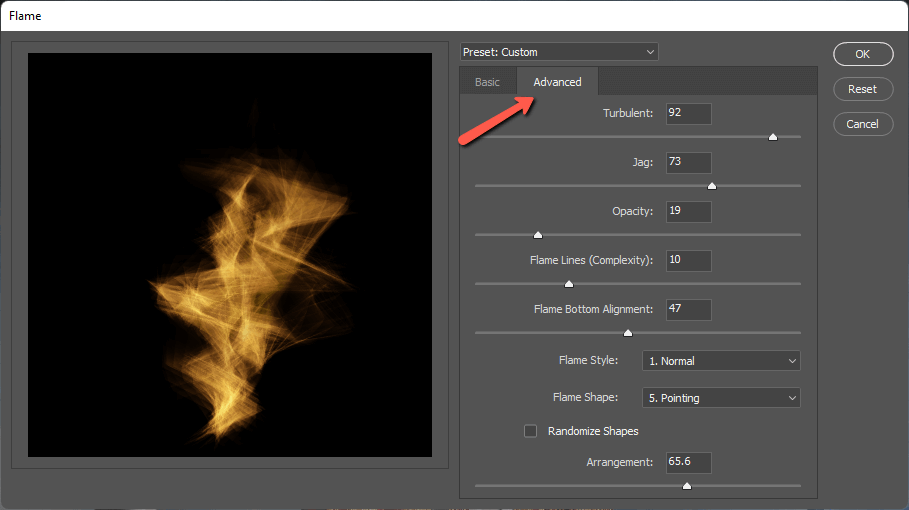
To further refine your flame, click the Advanced tab. You’ll find a whole bunch of settings here that will change the appearance of your flame. Play around until you find something you like, then press OK.
Photoshop will add flame to your image. However, it will need some work to look realistic.
Step 3: Adjust the Flame
We want the flame to snake around the sword but at this point, the flame is obscuring it completely. Click the Layer Mask button at the bottom of the Layers panel. Remember, it looks like a rectangle with a circle in the center.
Open the brush tool using B or select it from the toolbar. With black as the foreground color, paint over the areas where you would like to remove the flame.
Press X to toggle the foreground colors between black and white. Use white to fill back in any areas you mistakenly remove.
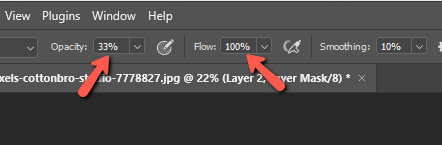
Remember, you can change the Opacity and Flow in the Options bar. You may want to paint the flame back in over the sword with a low opacity to give the sword the orange tinge it would have if there were really flames curling around it.
Work carefully until you get a look you like.
BTW, if your path line is still visible, press Ctrl + H or Command + H to hide it.
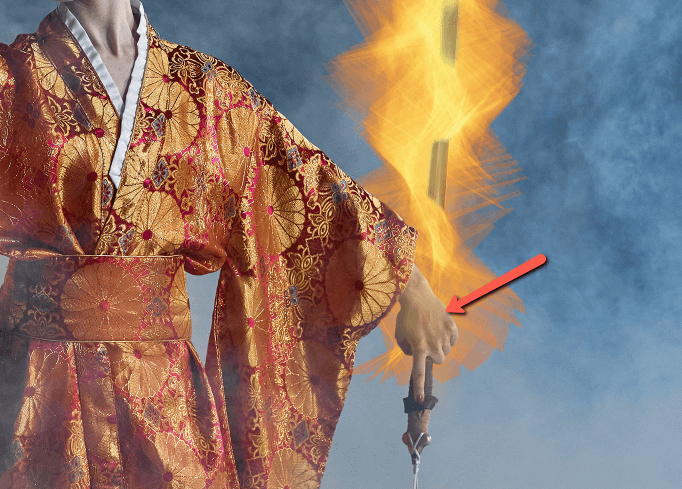
Step 4: Add Firelight
The final step is to add a touch of firelight. If she really were holding a flaming sword, there would be warm firelight on her hand and body. So let’s fix that.
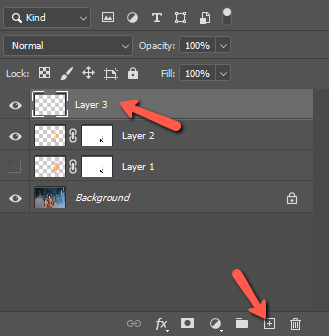
Press the New Layer button to add a new layer on top.
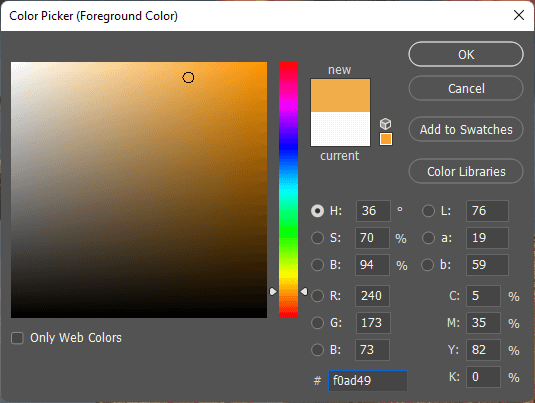
Double-click on the foreground color to open the color picker.
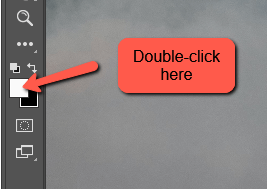
Choose an orangeish hue.
With a low Flow and Opacity paint on the image anywhere you want to add the firelight.
We want to add the firelight to just her body, having it spill onto the background behind her wouldn’t make sense. So let’s make a selection around her body.
I’ll let Photoshop make the selection by choosing one of the selection tools and pressing the Select Subject button in the Options bar. Make sure to have the background image layer selected and not one of the fire layers we’ve been working with.
Press Ctrl + J or Command + J to duplicate the selection. Then press the New Layer button to place a new layer on top of your selection.
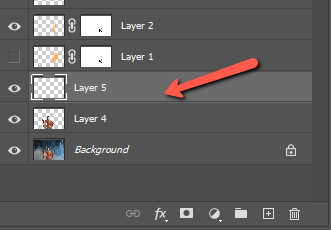
Clip the empty layer to the selection layer by holding the Alt or Option key while hovering between them. Click to clip. Learn more about clipping masks here.
Just as before, paint with an orangeish color, but this time your changes will be limited to the selected area.
Notice that color is only applied to her body and not the background where the flame wouldn’t reach.
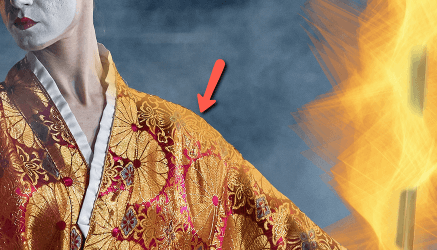
I just wanted you to be able to see, but this orange is too strong. I’m going to back off the opacity and do it again, painting the side of her head and neck and everywhere the firelight would naturally touch.
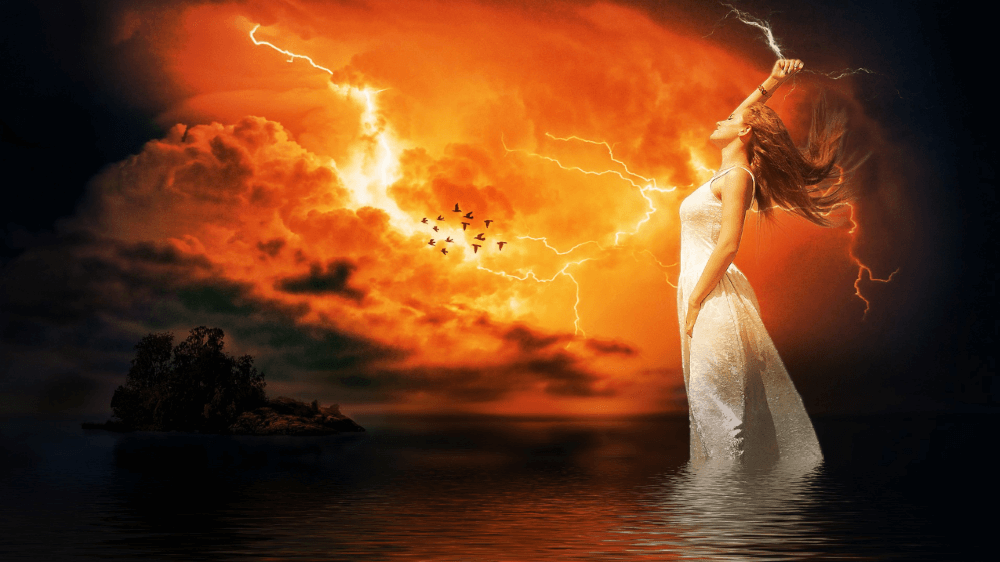
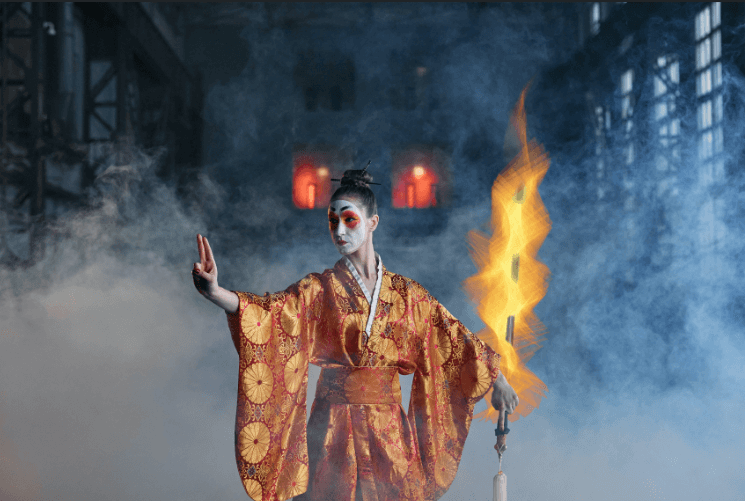
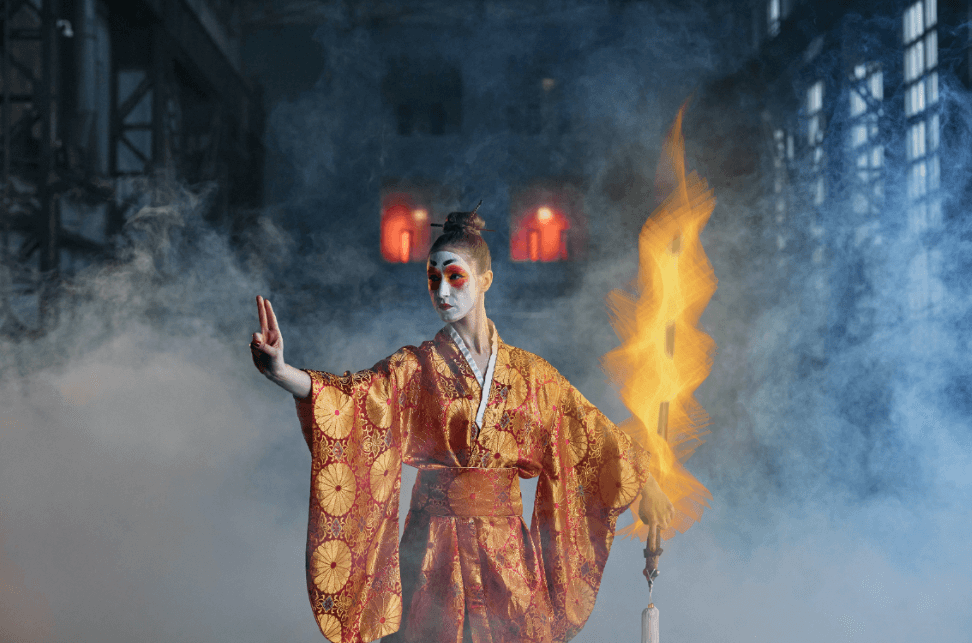
Here’s the final result!
Would you ever have imagined adding flames to an image to be so simple? Now you can really have some fun! Curious about other effects you can add? Check out how to add lightning here!
About Cara Koch