In graphic and web design, frosted glass is a common design element. It may give a touch of elegance to any website or paper, and Photoshop makes it quite simple to design.
You may make frosted glass for your future projects in a variety of sizes and shapes by using this simple technique. The results will be striking whether you term it a fuzzy glass effect, opaque glass, or just frosted glass.
My name is Aly, I have over five years of Photoshop experience. I’m Photoshop certified and I will be showing you how to create a frosted glass effect in just a few steps.
How to Create a Frosted Glass Effect in Photoshop
Creating a frosted glass effect works best on images that already have glass in them, such as a vase, window, car, etc.
If you want to alter the form of a glass or increase the strength of the frosted look, this approach can be useful.
Step 1: Open your desired photo in Photoshop and then right-click to duplicate the image.
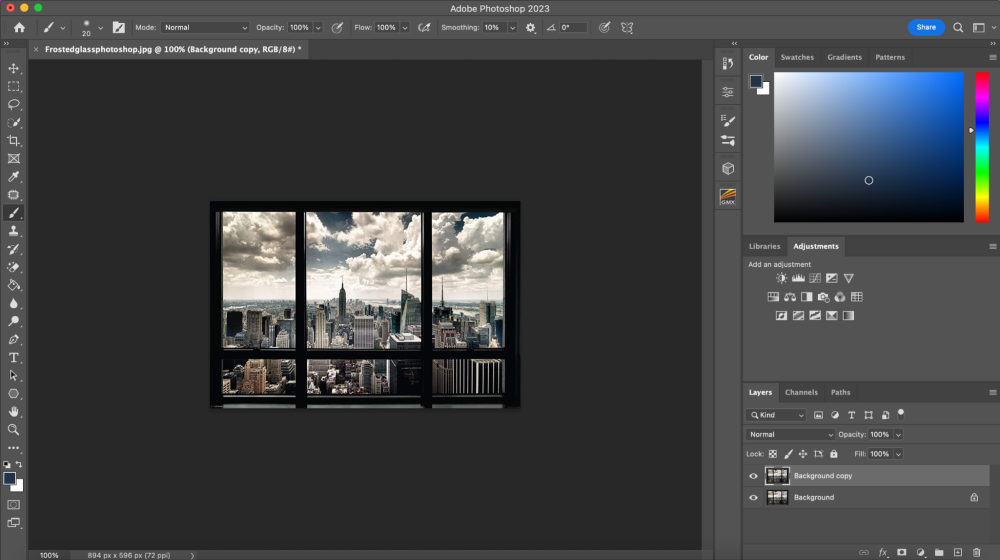
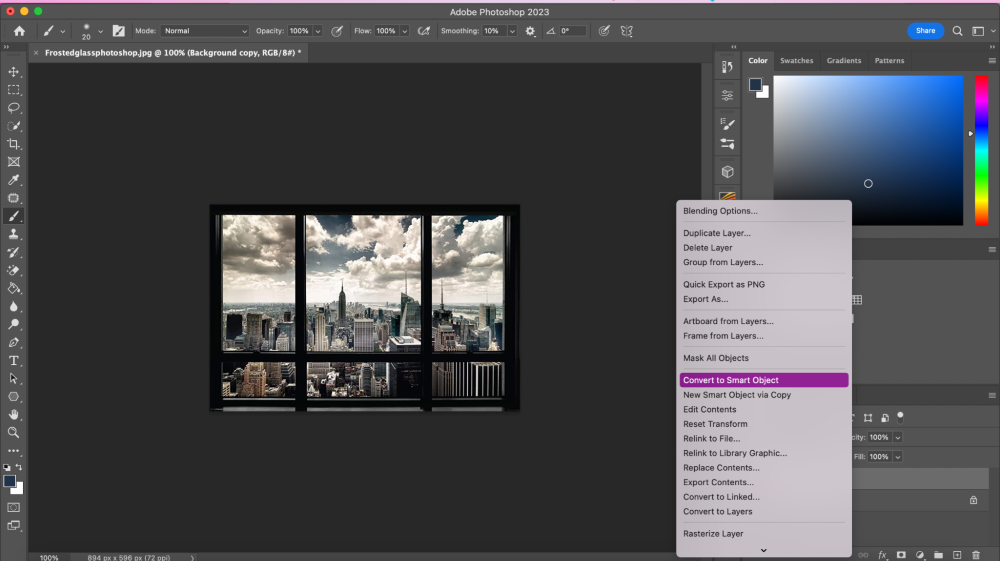
Step 2: On the duplicate layer, right-click again, and click Convert to Smart Object so that you can be working non-destructively on your image.
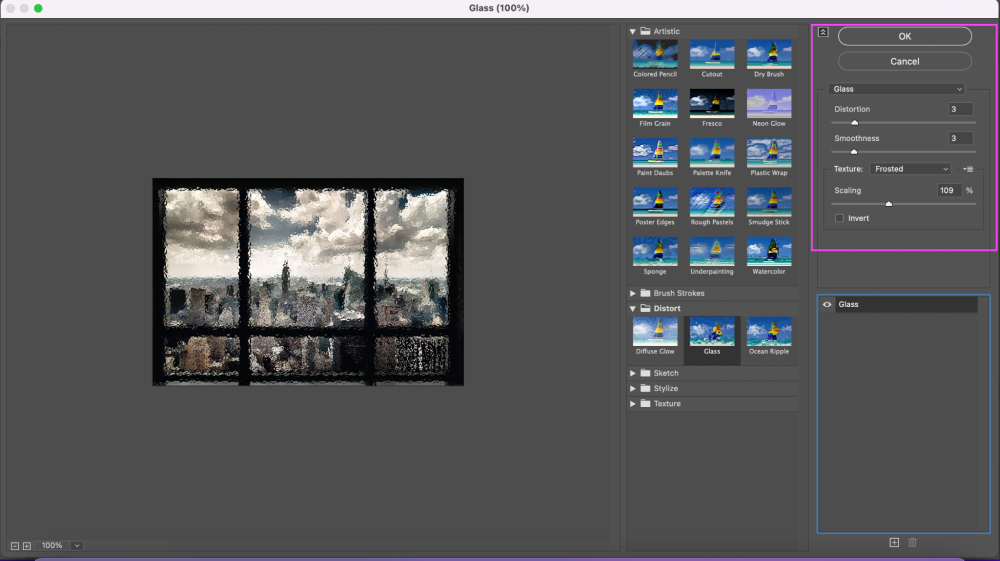
Step 3: From this point, go up to Filter on the top menu bar, and then click Filter Gallery. Under Distort and find the option Glass.
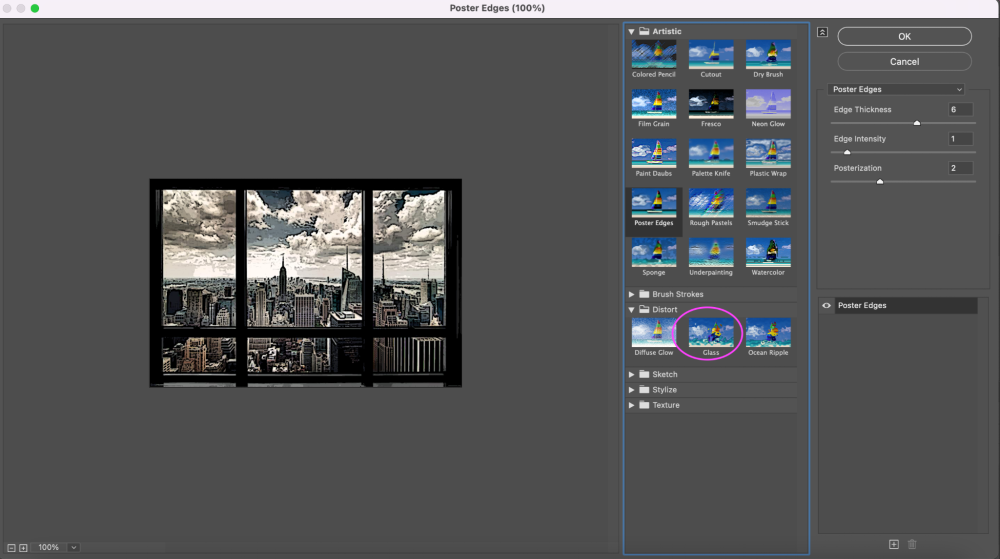
Step 4: A menu box will appear after clicking on the glass option. Make sure to select Frosted from the texture dropdown box. Feel free to play with the settings as you see fit. Personally, for my image, I like how my photo looks with the settings I choose. Press OK when you’re done.
The image to the left is the preview image of what the final image will look like after you choose the settings.
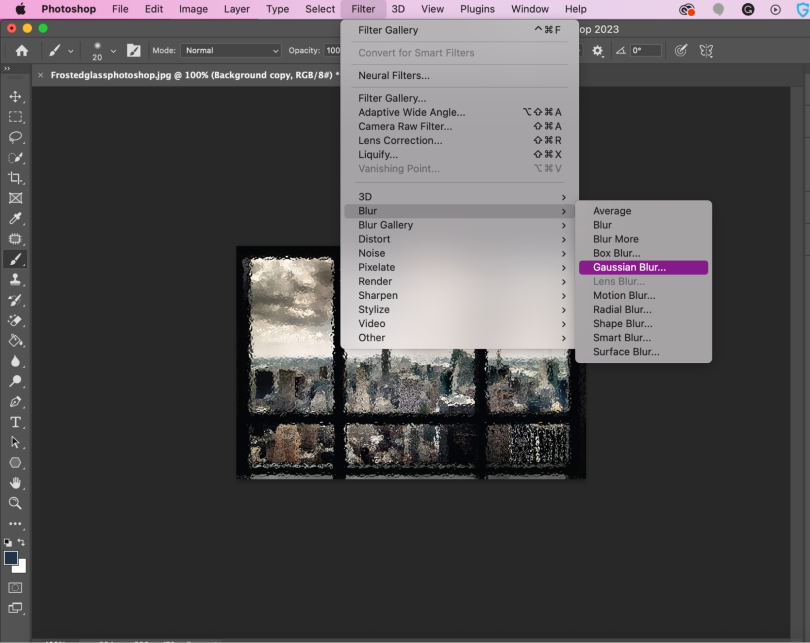
Step 5: Now your image has a frosted glass effect. But some areas may seem too harsh. To fix this go ahead and go up to Filters > Blur > Gaussian Blur.
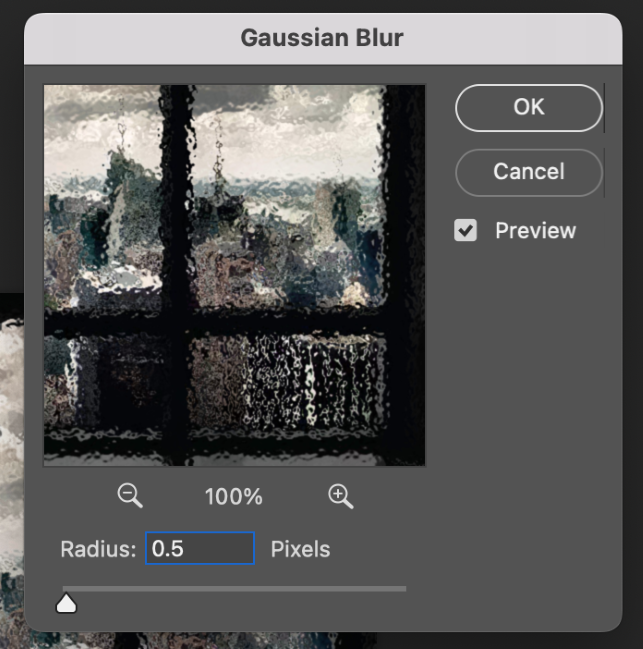
Step 6: After the menu box pops up go ahead and change the radius pixels to 0.5 and click OK.
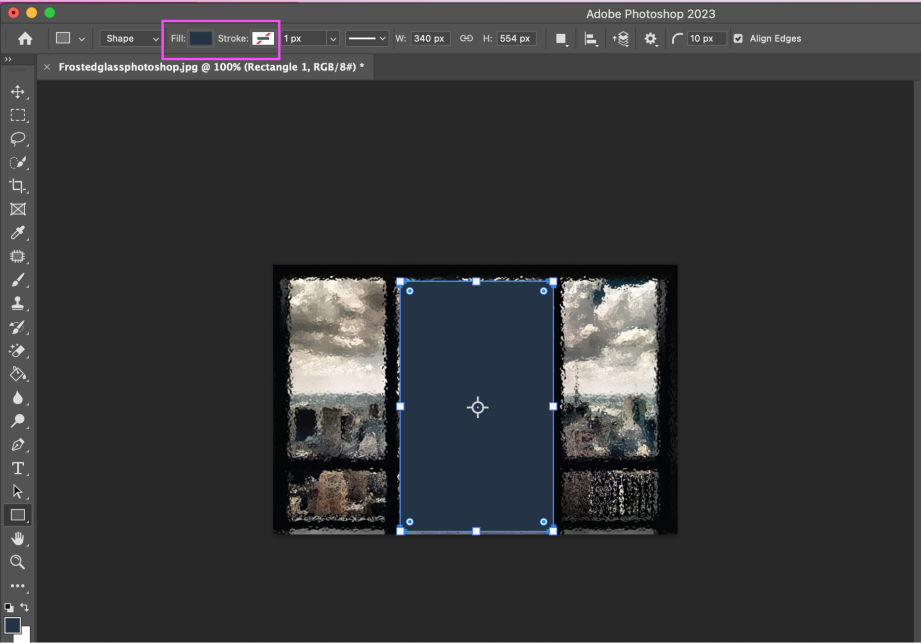
Step 7: Next, you will want to find the Rectangle tool, located on the side menu. Once you find the rectangle tool, go ahead and drag it on the image to create a rectangle as shown.
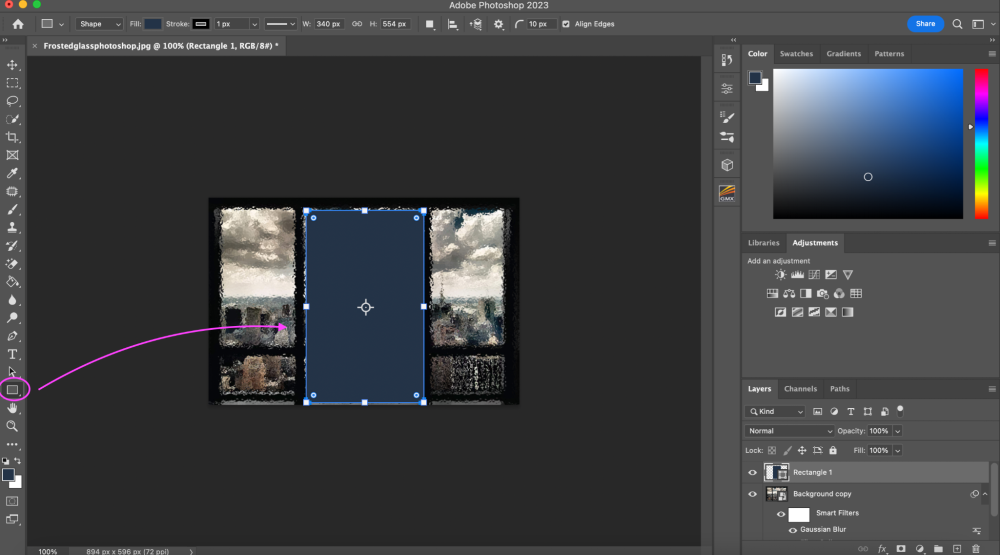
Step 8: Set the Stroke to none, and the Fill to any color, it doesn’t matter at this step.
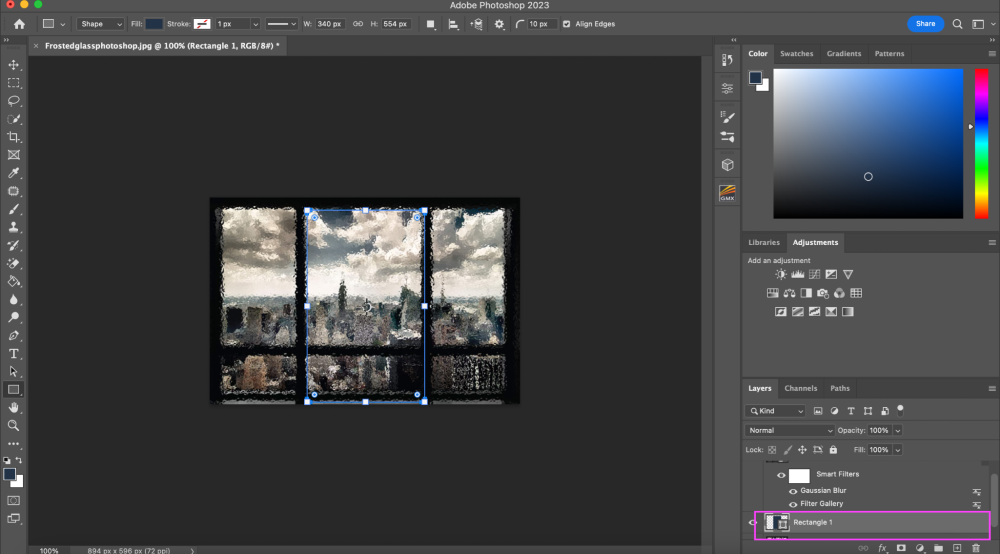
Step 9: Now, in the layers panel, click and drag the Rectangle layer and bring it underneath the Smart Filters layer as shown.
Step 10: Hold down the Alt or Option key until you see a little cursor icon. Click once to create a clipping mask.
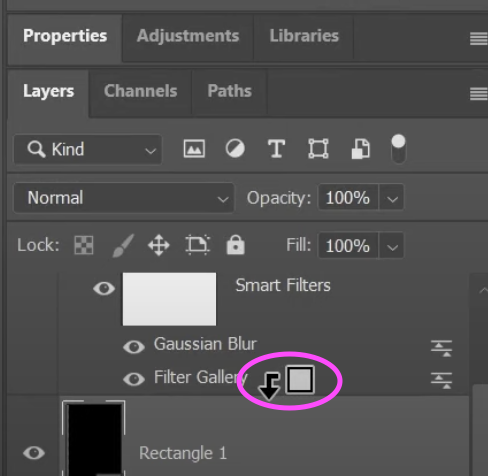
After that, press the Enter/Return key to confirm.
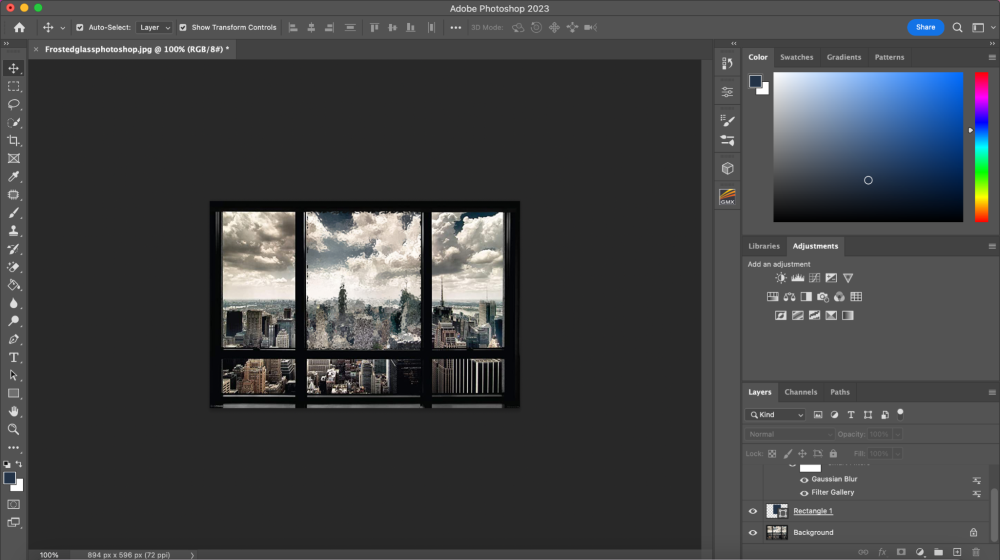
Step 11: As you can see the frosted glass effect is only in the rectangle now. Now, you can alter the size, rotate, and move the rectangle around to your area of choice. As you can see I just wanted the top middle of my window to be frosted. So I dragged the rectangle there.
Now that the glass effect is complete, you can move the Glass Shape layer wherever you like inside the design, and the effect will follow that shape’s placement.
Additionally, you may expand the Glass Effect smart filters, double-click on either of the two effects we used and make any necessary adjustments.
Then, just click OK, and the effect will be updated on your design.
Bonus Tips:
- If you want the frosted glass to have more effects, go back up to filter while the rectangle layer is still selected and play around with options such as Drop Shadow or Inner Glow.
- If the area you are wanting to put the frosted glass filter in is not a rectangle shape, instead of choosing a rectangle, choose a circle, or square, or create a custom shape.
Final Thoughts
Creating a frosted glass filter effect is one of my favorites to learn. I think it’s fun to be able to change the settings to your personal liking. Although it seems like more than a few steps, creating a frosted glass effect is fairly simple even a beginner can do it.
Any questions about creating a frosted glass effect in Photoshop? Leave a comment and let me know.
About Aly Walters