Have you ever tried to create a favicon? Adding a favicon to your website is a handy little cherry on top of your branding.
However, favicons are so tiny that if you’ve tried to put one on your website, it might not have looked right. So let’s look at how to create a favicon in Photoshop so you can take your website branding up a little notch!
Note: I use the Windows version of Photoshop. If you are using a Mac, the workspace will look slightly different from the screenshots displayed here.
Table of Contents
What is a Favicon?
First, let’s back up and look at what a favicon is. If you’re like me, you didn’t know that these little icons even had a special name!
Favicons are those little bitty icons that appear on your internet browser tabs visually indicating an active web page.

Creating one isn’t difficult, often people will simply use their logo. But just resizing it to fit doesn’t quite create a favicon. These icons are so tiny that the logo may not appear clearly.
Depending on your logo, you may opt to use just a part of your logo or create a new image that compliments your branding.
So, here are the steps to make a favicon in Photoshop.
Step 1: Open a New Document
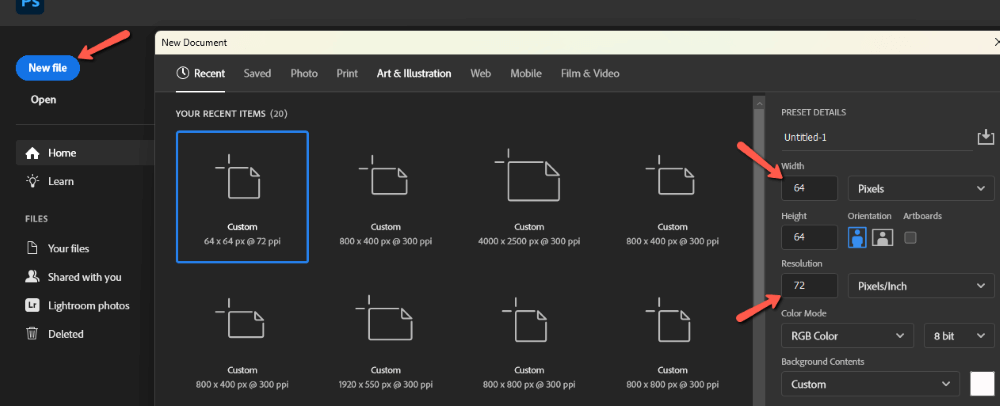
To get started, open Photoshop and create a new document. Favicons are 16 x 16 pixels, but because this is so small you might want to work with a bigger canvas at first, like 64×64 or so. We’ll resize it later when we export it for web use anyway.
Click New File and choose a size of 64 by 64 pixels. For web use, we don’t need super high resolution as we would for printing so put 72 in the resolution box.
Step 2: Bring in Your Logo
Photoshop will open your new tiny document.
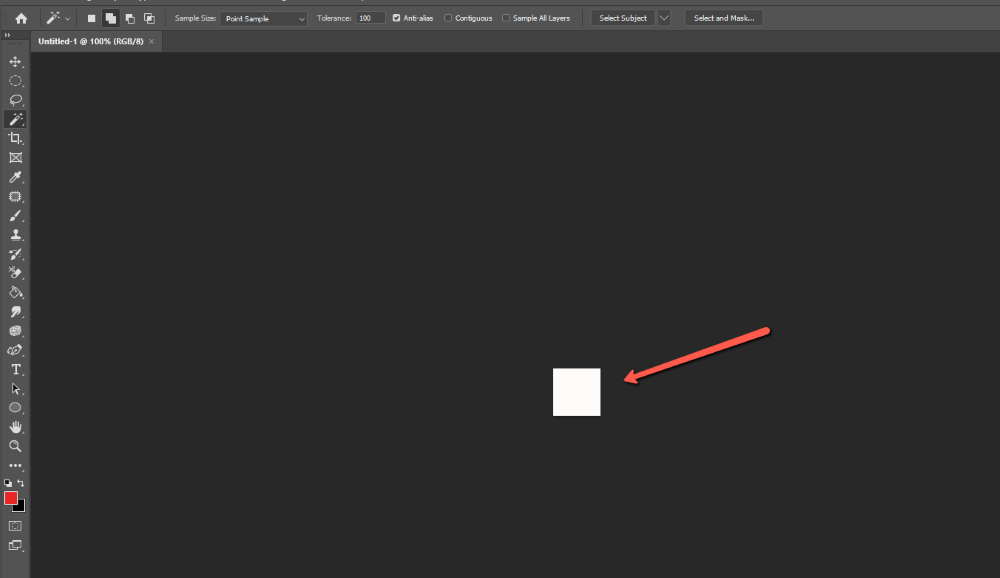
Yep, that little white square is it! To zoom in on it, press Ctrl + 0 or Command + 0 to make it jump to fill your workspace.
Now go to File and click Place Embedded.
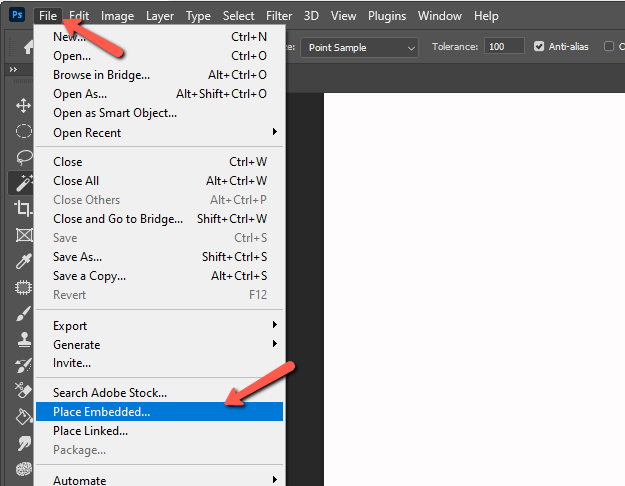
In the window that opens, browse to wherever you’ve saved your logo, select it, and click Place.
Now, because we’re working with such a tiny document, you might see something like this.

There just aren’t enough pixels to create a clear image when we have it this big. Notice that if you zoom out and make the logo tiny, it looks better, but it’s also pretty much unreadable due to its size.

So you’ll want to pull an element of your logo or create a new image that compliments your branding. Keep in mind that when you have your tiny image blown up big on your screen, it will always look pixelated so zoom out as you work to see how it will look.
Step 3: Convert to a Favicon
Once you’re happy with your image, it’s time to export the document and convert it to a favicon.
To do this, go to File, hover over Export, and click Save for Web. In the box that opens, you can use the PNG-24 preset. Make sure to change the image size to 16 by 16 and then press Save.
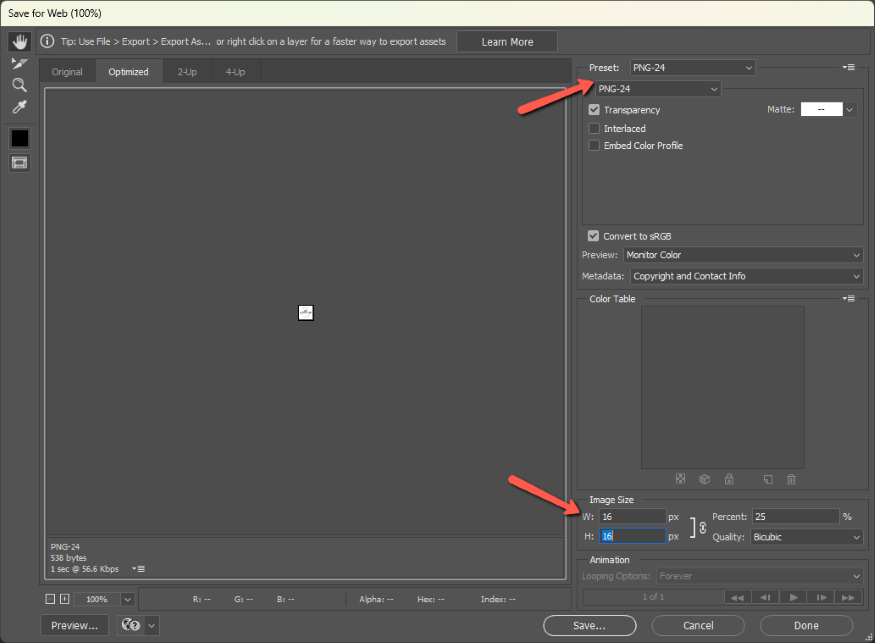
Name your favicon however you like and find a spot to save it.
Step 4: Convert to an Icon
The final step is to convert the image to an icon. You can do this easily with free icon converters on the Internet. I typed Icon Converter into Google and grabbed the first result.
Note: I am not endorsing this converter. Always check sites like this to ensure you are using a safe one that won’t introduce a virus or other problems to your computer.
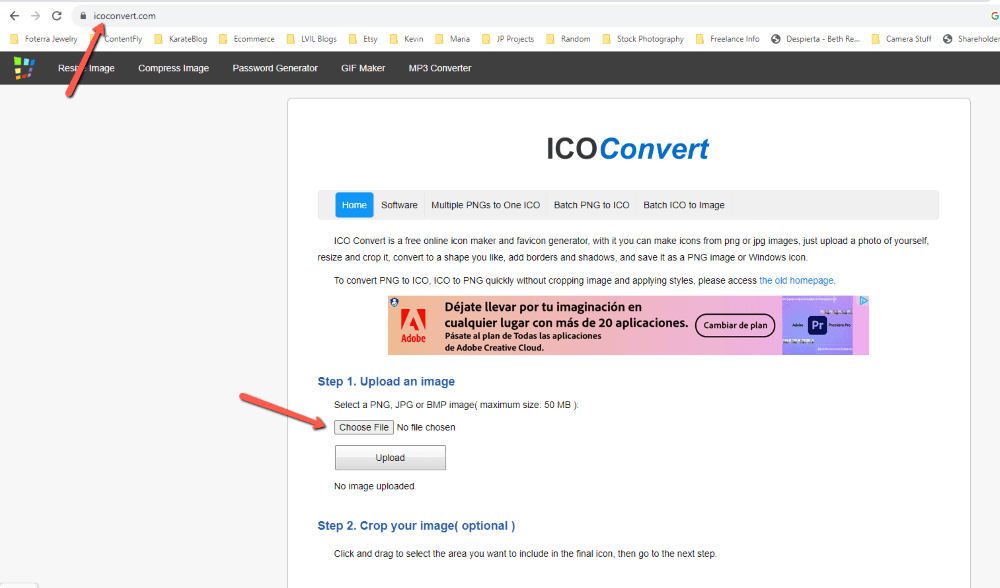
Then you can upload your favicon and choose the settings. In this converter, I checked the box Favicon icon for your website.
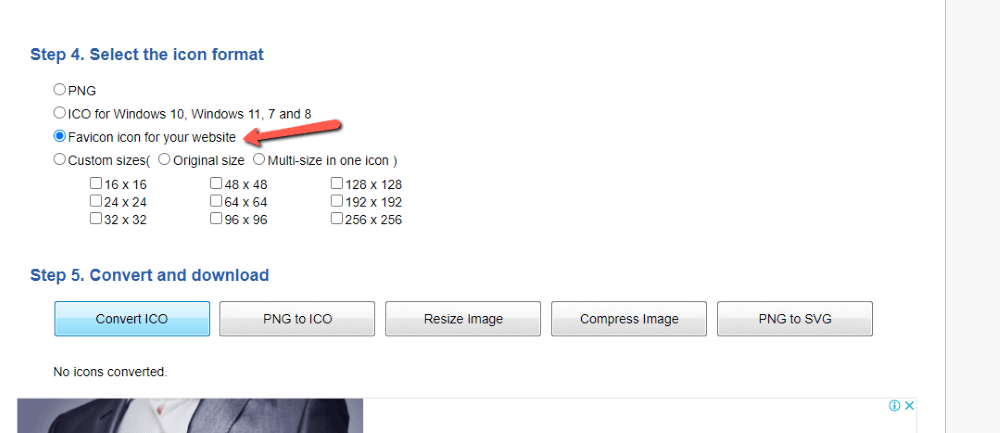
Then convert it and you’re all set. The converter will change it to an ICO file which you can then upload to your website!
Exploring More in Photoshop
Your logo and special touches like favicons are super important for your branding and help make your website more professional. Want to learn more about logo design? Check out our basic tips for how to make a good logo here!
About Cara Koch