
Ever wanted to select only the background in Photoshop? Maybe you want to add a particular effect only to the background and not to the subject. Or maybe you want to remove the background entirely. Regardless, selecting the background is simple, though perhaps not obvious.
Hey there, I’m Cara. As always my goal today is to make the mystery of Photoshop a little bit less mysterious. Today, we’ll be looking at the three major steps to select background in Photoshop.
Note: I took these screenshots from the Windows version of Photoshop CC. If you are working with a Mac you will find that the workspace looks a little different!
Table of Contents
Step 1: Find the Select Subject Tool
For example, I’m going to only select the background of this image.

The easiest way to select the background is to let Photoshop do all the heavy lifting. We do that by using the powerful Select Subject tool.
Since we’re trying to select the background, you might be wondering why we would need a tool that selects the subject but don’t worry, it will all make sense. This method is much easier than trying to manually select the background yourself.
The Select Subject button is found in the Options bar at the top of the workspace. However, it isn’t always there. It becomes available when certain selection tools are active.
So, let’s choose the Quick Selection Tool from the toolbar on the left.
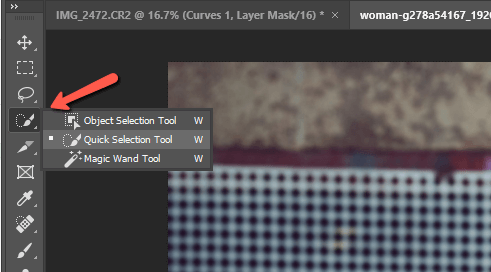
With this tool active, you should see the Select Subject button available in the Options bar.
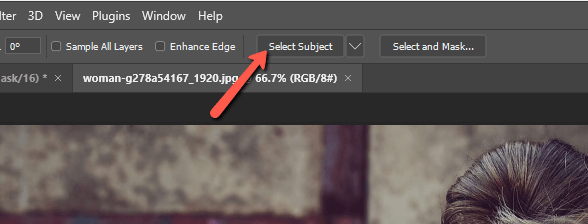
Click it and let Photoshop analyze the subject and make a selection.
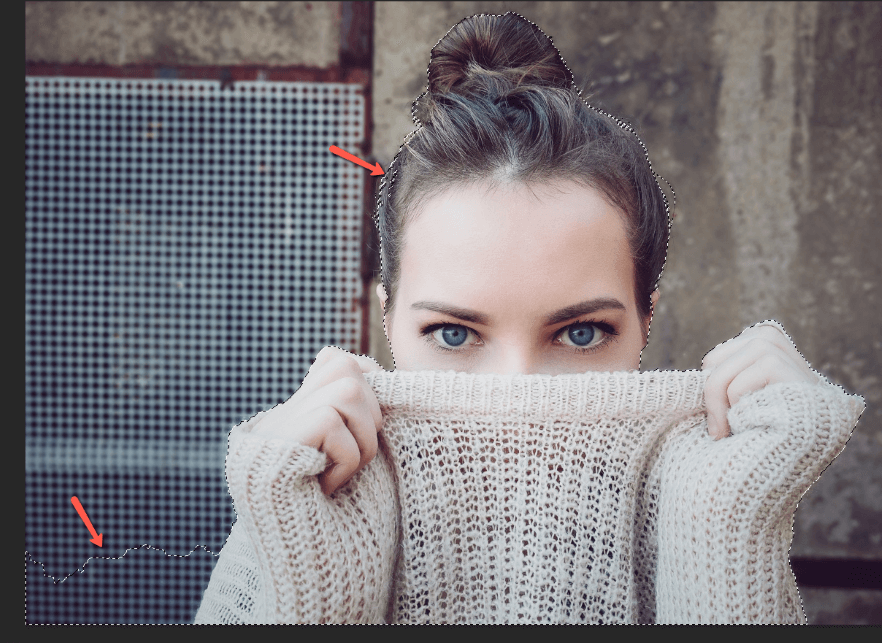
In my image, Photoshop did pretty well. There’s a little bit extra selected in the lower left corner and a couple of spots in her hair. But this is a great starting point and just saved up a ton of time.
Step 2: Refine the Selection
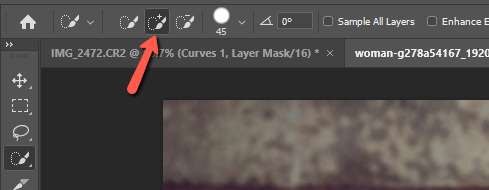
We’ve already got the Quick Selection tool active, so let’s use that to fix up the goofy parts. If the tool is in the Add mode, hold the Alt or Option key to subtract from the selection. Click and drag normally to add to the selection.
With a couple of quick adjustments, we get this.

Step 3: Invert the Selection
Now, at this point, everything inside the marching ants line is selected. If we tried to delete or add an effect, it would be applied to the girl, not the background.
To switch it, we need to invert the selection. Press Shift + Ctrl + I or Shift + Command + I. Or go to Select and choose Inverse.
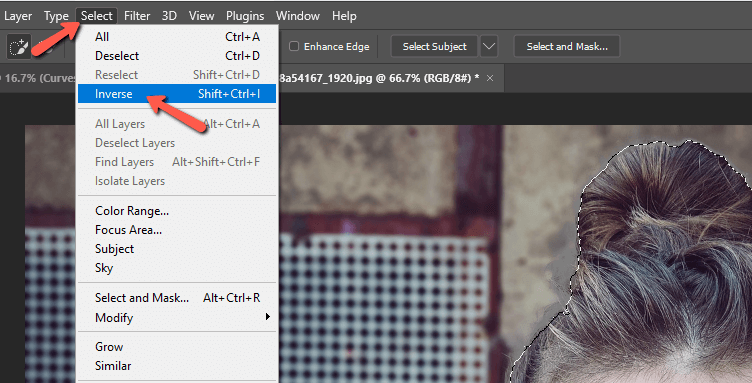
Voila! The selection inverts and now instead of only the subject being selected, everything but the subject is selected.
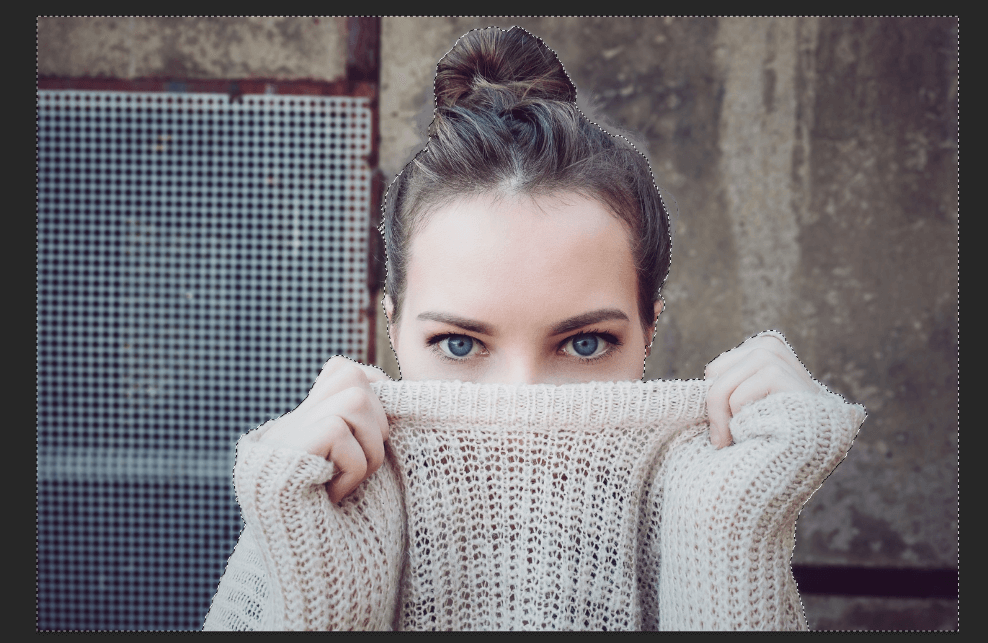
You can tell the background is selected by checking for the marching ants around the edges of the image.

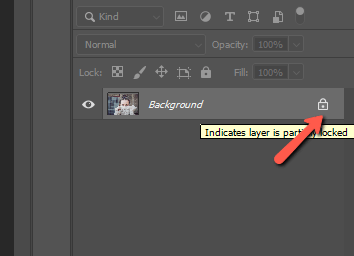
Now you can proceed with whatever you want to do with the background. Keep in mind you won’t be able to do certain functions (like delete) if your image is a background layer. You can turn it into a normal layer by unlocking the layer.
Simply click the lock icon on the right side of the layer.
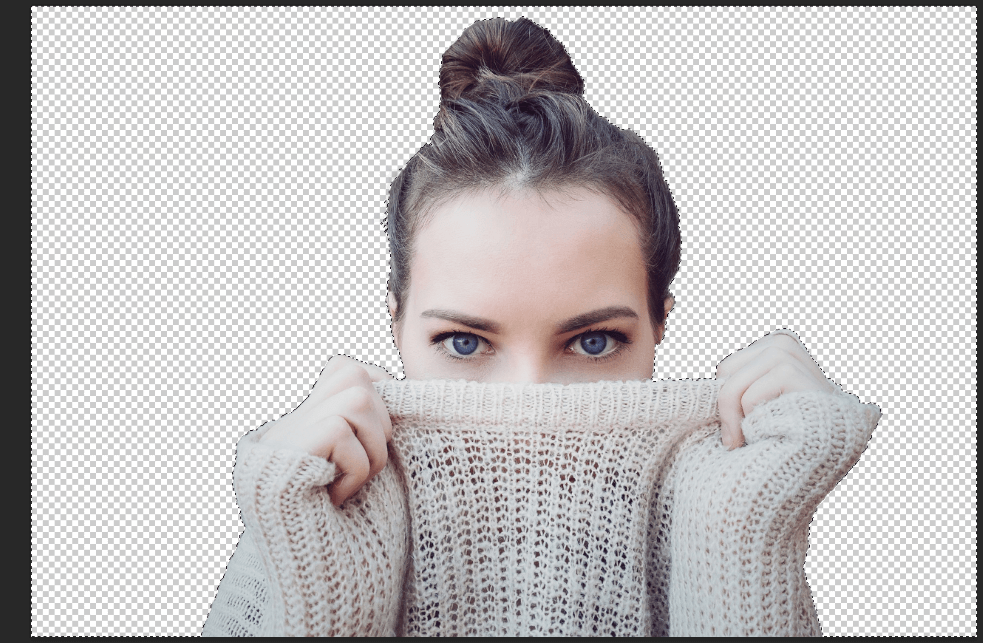
Now you can delete the background as I did here or add the desired effect.
See? I told you it was super easy. Curious about some effects you can use on the background? Check out how to blur a background here!
About Cara Koch