What’s a big difference between amateur portraits and professional portraits?
The answer is: The professional ones are blurry.
Wait, what? Don’t you go to the pros to get photos that are in focus? Of course! But you also go to the pros to get photos that are a step above what you can get with your smartphone.
A beautiful, blurry background makes the subject pop out of the photo. Thus, this is one of the techniques that professional photographers often use.
Hello! My name is Cara and as a professional photographer, I often use this technique called bokeh to isolate my subject. Typically, I do this in-camera by using a wide-open aperture when I take a picture. But, on occasion, I might not have the right lens on hand to get the effect I want.
Thankfully, I can easily create this blur effect in Photoshop. Read along to find out how!
Note: the screenshots below are taken from the Windows version of Photoshop CC. If you are using the Mac version, they will look slightly different.
Table of Contents
Why & How to Make Backgrounds Blurry?
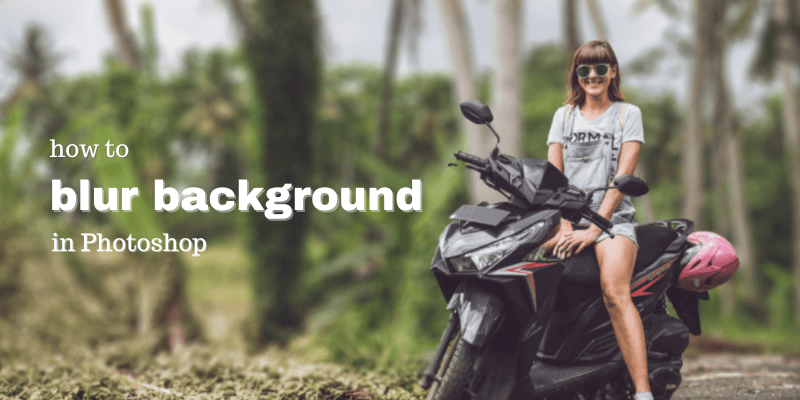
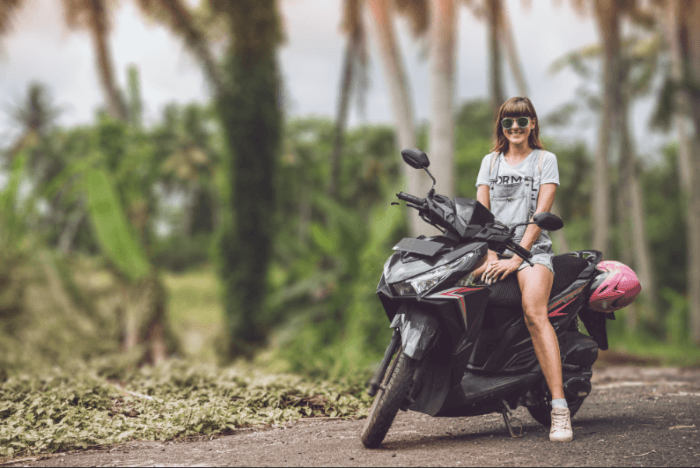
Today, I’m going to be using this photo from Pexels.

The photo is lovely, but the girl and her scooter would stand out so much more if the background were blurry. This would make the trees less busy and help the eye focus solely on her and the bike.
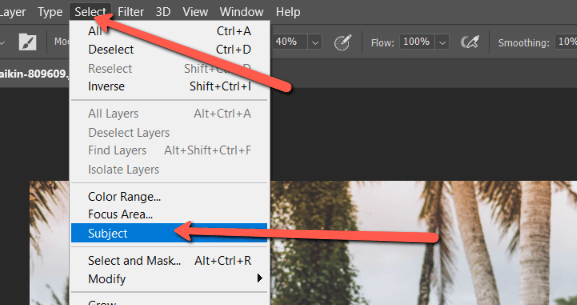
Step 1: Select the Subject
The first step is to select the part of the image you don’t want to be blurry, which is the girl and her bike. Photoshop makes it a cinch to do this by simply going to Select in the menu bar and choosing Subject.
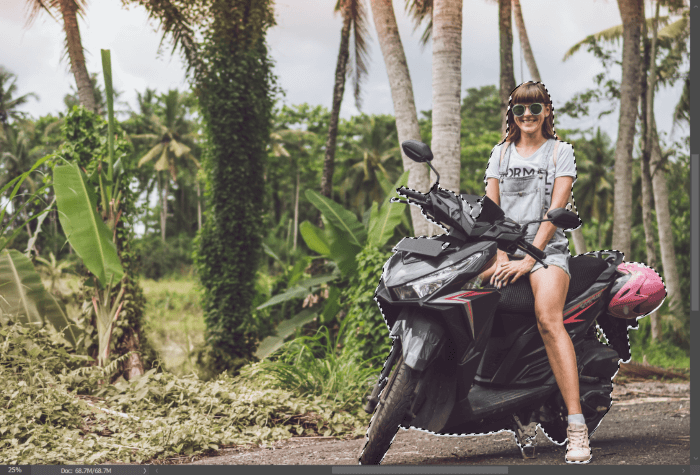
As you can see, Photoshop does a pretty amazing job of making a selection. I’ll have to clean up a couple of parts like the mirror and the handlebars. But Photoshop took care of the heavy lifting for me.
To refine the selection, I can use the Quick Selection Tool which I choose from the toolbox on the left.
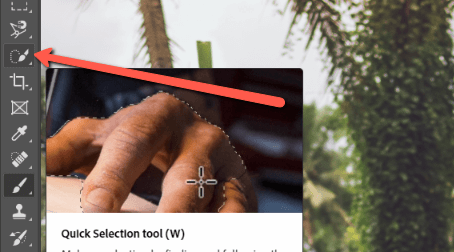
Simply drag the tool around areas you want to include in the selection. Hold down the Alt or Option key while dragging to remove areas you don’t want.
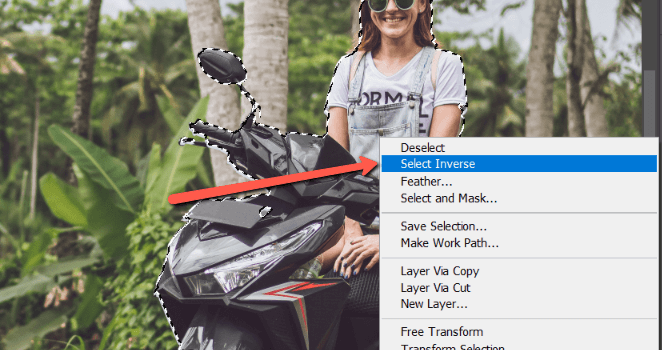
Step 2: Select the Background
Now we have the subject isolated, but we don’t want to make changes to the subject. We want to affect the background. In other words, everything but the selected part of the image.
To invert the selection, right-click within the selection and choose Select Inverse from the dropdown menu.
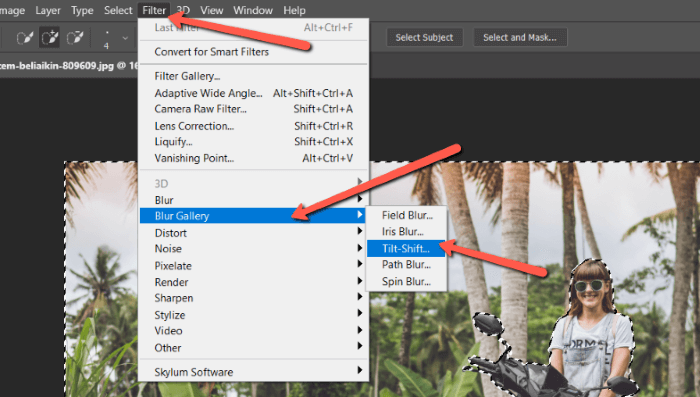
Step 3: Blur the Background
Now let’s add some lens blur to that background. There are several blur tools in Photoshop. Go up to Filter in the menu bar, hover over Blur Gallery, and select Tilt-Shift from the dropdown menu that appears.
I’m going to choose this type of blur because I don’t want to blur the entire background. Everything that is on the same plane as her should not be blurry. In this case, the road underneath her and some of the grass off to the left.
If I blur the entire background, the girl and the bike will look like they have been placed in the image. Like this:
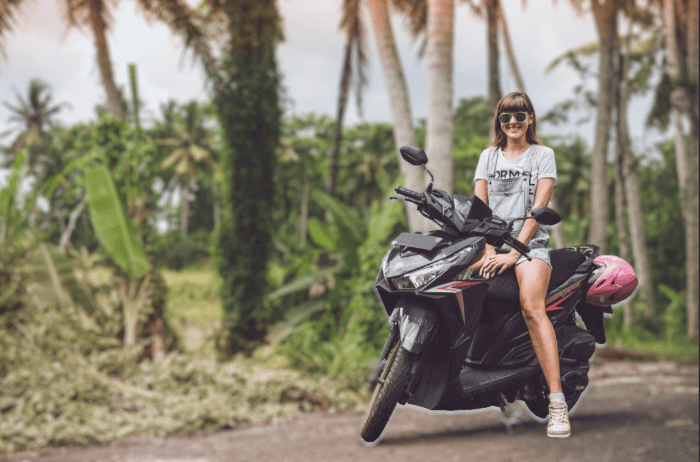
Check that out around the tires and her feet. Looks super weird, right?
Step 4: Set the Plane of Focus
So with the Tilt-Shift blurring mode, I get these lines that appear with a circle in the center.
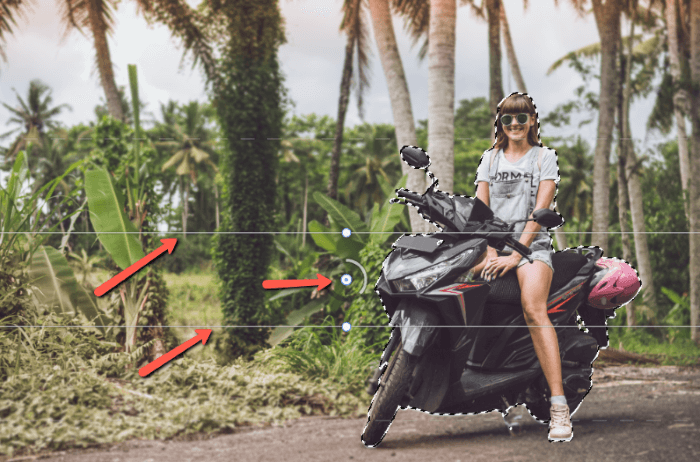
The lines represent the plane of focus. I need to click on the circle and drag the plane of focus to the appropriate spot. In this case, at the bottom of the picture.
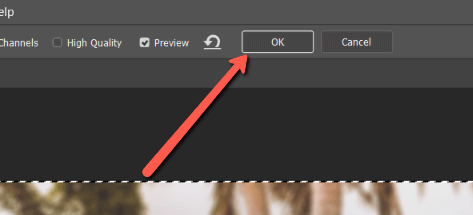
I can also adjust the amount of blur at this point by moving the sliders on the right side of the screen.
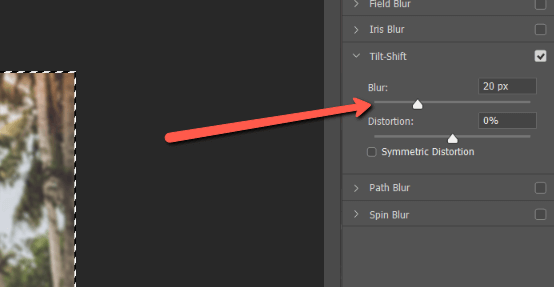
Once you’re happy with the results, click OK at the top.
Look at that! Now, the eye is more drawn to her as the most important part of the photo. The background is still complimentary, but less distracting.
Pretty easy, right? Check out more simple, yet effective Photoshop tricks in our other posts!
About Cara Koch