
Do you want to create an eye-catching design with text? Why not s t r e t c h your text or make text taller in Photoshop? The unusual look is sure to make people stop and take a second look.
Hey there! I’m Cara and one of the many reasons I love Photoshop is that it allows you to do almost anything you can dream up. You can even stretch out individual parts of a message to make it stand out more.
Allow me to show you how to stretch text in Photoshop!
Note: the screenshots below are taken from the Windows version of Photoshop CC, if you’re using the Mac version, they may look slightly different.
Table of Contents
Step 1: Add Your Text
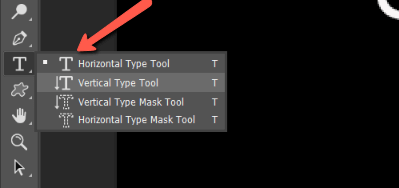
Open up a new document in Photoshop. Choose a size and resolution that works for your project. Choose the Horizontal Type Tool and click anywhere in the document to add your text.
Click the checkmark in the Options bar when satisfied with the text. Press V to access the move tool and place your text where you want it.
Step 2: Stretch with the Transform Tool
At this point, if you want to spread your text across the document, press Ctrl + T or Command + T to access the Transform tool. With this tool, you can click and drag the handles on the blue box to stretch out the text.
Hold Shift while dragging to avoid maintaining the aspect ratio.

However, we want to take things to the next level so let’s keep going.
Step 3: Convert Text to Shape
Stretching with the Transform tool just allows you to pull the letters out (or up or down) uniformly. We want to stretch only pieces of the letters for this effect.
To do that, we need to convert the text to a shape.
Right-click on the text layer and choose Convert to Shape. Make sure you have your text positioned and sized correctly before doing this. It becomes more difficult to reposition and resize the letters as a whole after this.
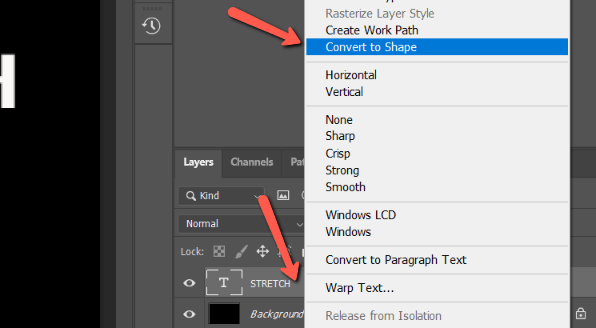
A bunch of blue lines and little squares will appear around your text as if you had used the Pen tool to make a selection.

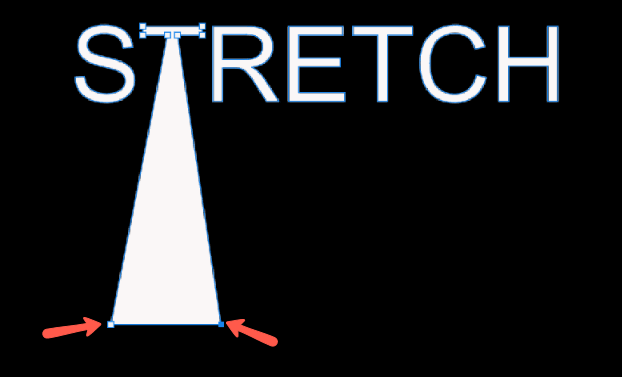
Step 4: Select the Letters
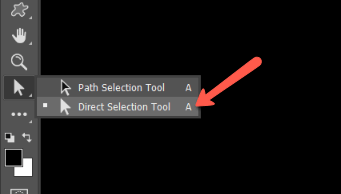
To grab and stretch pieces of the text, choose the Direct Selection tool.
Click on the letter you want to stretch to select it.

If you want to select more than one letter at a time, click and drag over the letters you want to select.
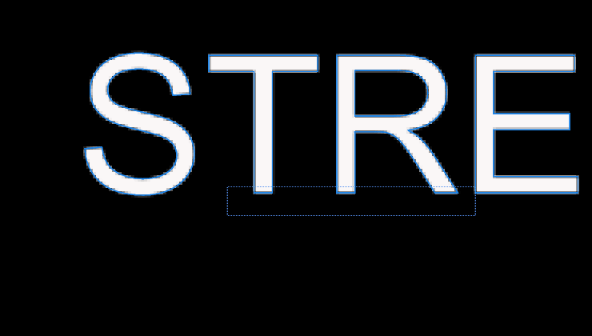
Click on the line (not the blue boxes) to pull the letter down (or up). Hold Shift while dragging makes it easier to keep the stretching letter perfectly straight.

You can also stretch and distort in different directions by pulling on the blue boxes.
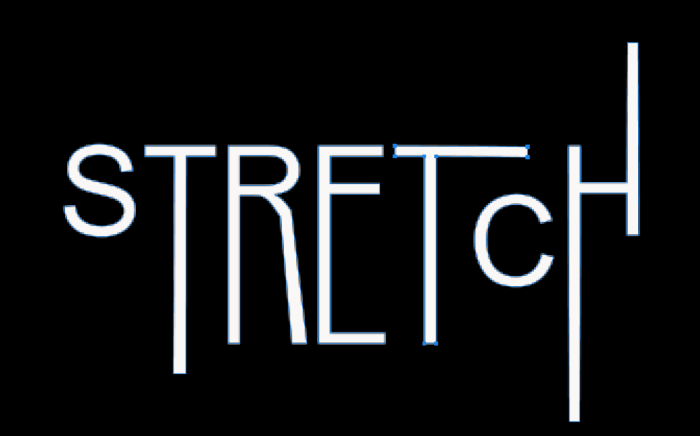
Have fun with this, there’s a lot you can do with stretching letter/text in Photoshop!
Intrigued to learn more Photoshop tricks? Check out how to add strokes to text in Photoshop in this tutorial!
About Cara Koch