
The right font is essential for creating the right feel with your design. For example,

Hello, I’m Cara! As a photographer and digital artist, I understand the necessity of being able to change fonts in Photoshop. The good news for us is that there are a few options for changing text and all are simple to do. Let me show you how!
Kindly note that the screenshots/steps below are based on Photoshop CC for Windows, other versions will look different.
Table of Contents
Method 1: In the Options Bar
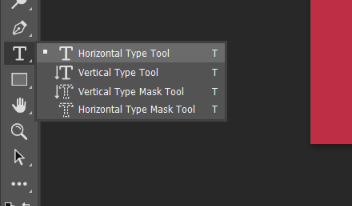
With a document open in Photoshop, choose the Horizontal Type Text tool from the toolbar.
Click on the document to add some text. Before you touch your keyboard to add letters, you’ll notice that the default “Lorem Ipsum” shows up and is highlighted.

This means the text is already selected. Without touching anything on the keyboard yet, go up to the Options bar. Click on the little arrow next to the Font box. This will open up the font options available in Photoshop. Simply choose the font you want from the list.
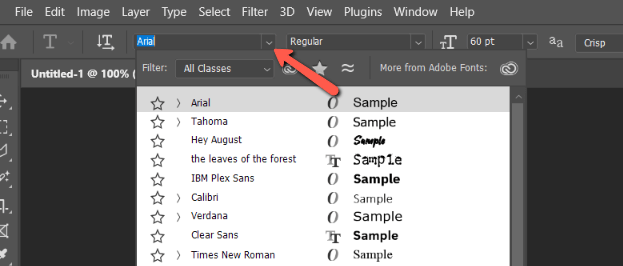
If you’ve already written your text, you’ll have lost the highlighting. That’s not a problem, simply triple-click or click and drag on the text to highlight it all.
If you know the name of the font you want, you can type it into the box directly. You’ll also get a shortened list to pick from as you type.
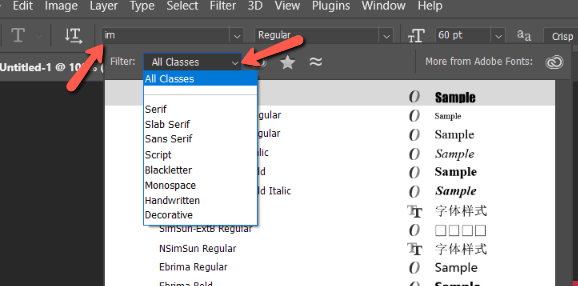
If you’re looking for a specific type, click the arrow by the Filter box to limit results to certain types of font.
Once you’ve chosen a font, click the checkmark on the right side of the Options bar or hit ESC to accept the changes.
Method 2: Character Panel
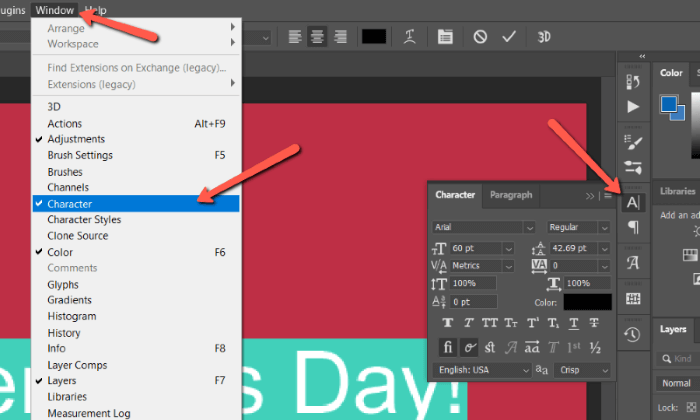
You can also change the font using the Character panel. The location of this panel depends on the layout you’re using in Photoshop. The best way to find it is to go to Window and click Character. A checkmark will appear next to it and the Character panel will open.
Choose the text layer you want to change in the Layers panel to select the text.
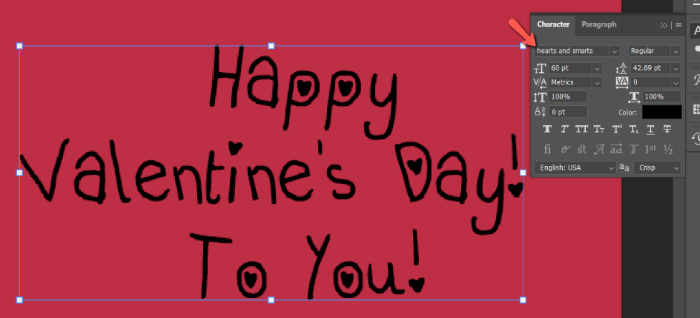
Then you can change the font in the box on the upper right of the Character panel.

Method 3: Changing the Font in Multiple Text Boxes
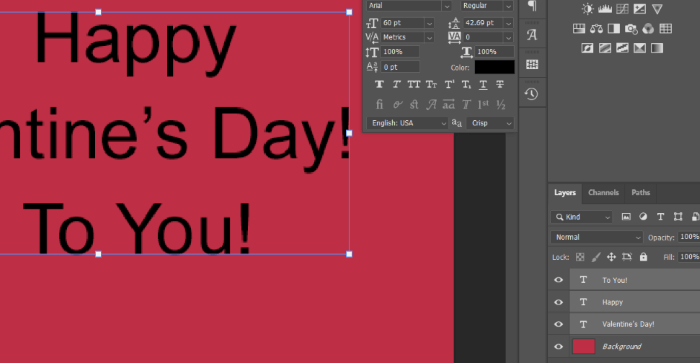
What if you’ve got multiple text boxes holding the text that you’d like to change? It’s a major time-waster to click on each one individually and change the text.
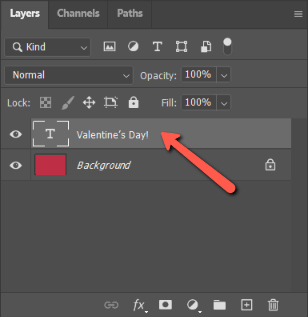
Instead, select all the text layers in the layers panel first. If they are all in a line, you can click on the first one and then hold Shift while clicking the last one to select them all at once.
If you have other layers between your text layers, there is an easy way to get them all in a line. Click the T near the top of the layers panel. This will filter the layers and only show the text ones. Notice that my background layer disappeared.
The red dot on the right indicates that text filtering is on.
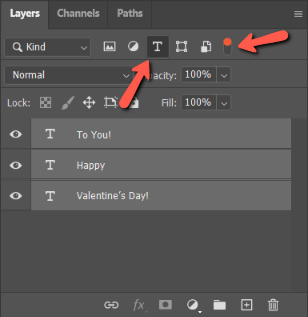
Once you’ve got all your layers highlighted, change the font in the Character panel to change them all in one fell swoop!
Changing fonts couldn’t be easier! For more great tips, check out more of our text tutorials in Photoshop such as how to add stroke to text!
About Cara Koch