
Different strokes for different folks. There’s more than one way to dress up your text for your designs. Adding a stroke to text in Photoshop is quite simple and has an impactful effect.
Hey there! I’m Cara and when I’m designing ads for clients, I don’t want everything to look exactly the same. Changing up the font, colors, positioning of text, and adding a stroke are all great ways to make it more exciting.
Not sure how to get the stroke you want? No worries! Follow me in this tutorial and I’ll show you how. Plus, I’ll show you how to add multiple strokes to text in Photoshop, something that is not readily apparent.
Table of Contents
Step 1: Open a New Document and Add Text
Let’s get something to work with. Open a new document with Ctrl + N or Command + N. Choose whatever size and background color you want.
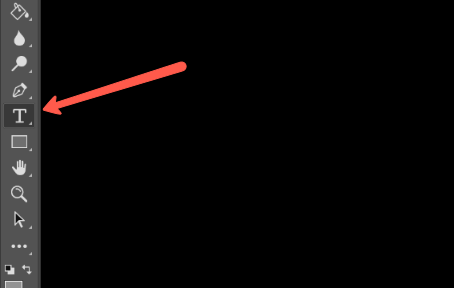
Now open the Text tool by hitting T on the keyboard or choosing the Horizontal Text Tool from the toolbar.
Write whatever text you want.
Step 2: Add the Stroke
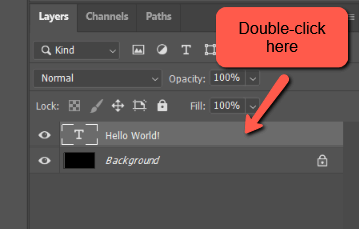
Double-click in an empty space on your text layer to open the Layer Styles panel.
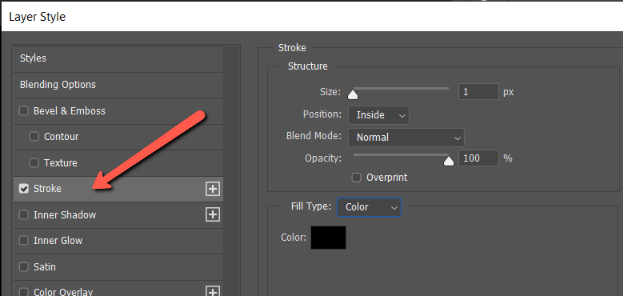
When the panel appears, check the Stroke box. To the right, a list of options and settings will appear so you can customize how the stroke looks.
Step 3: Refine Your Stroke
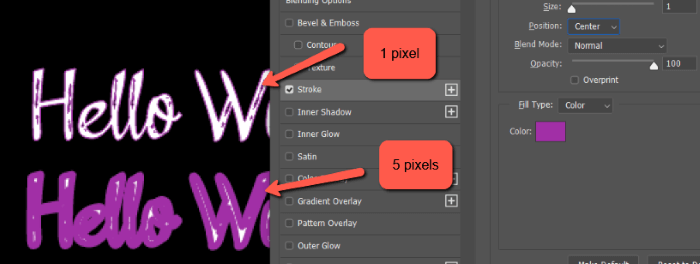
Size allows you to choose the thickness of the stroke in pixels. Below, compare 1 pixel vs 5 pixels.
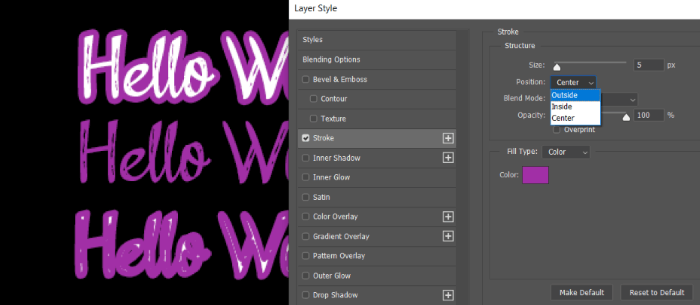
The Position affects where the stroke will sit on the letter. From top to bottom here’s outside, inside, and center.
The Blend Mode lets you access the 27 Photoshop blend modes and you can control the opacity of the stroke with the slider.
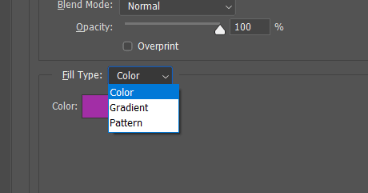
Fill Type lets you choose color, gradient, or pattern for the stroke. We’ll stick with color and I’ve chosen a purple color. Double-click on the color swatch to open the color picker and choose your color.
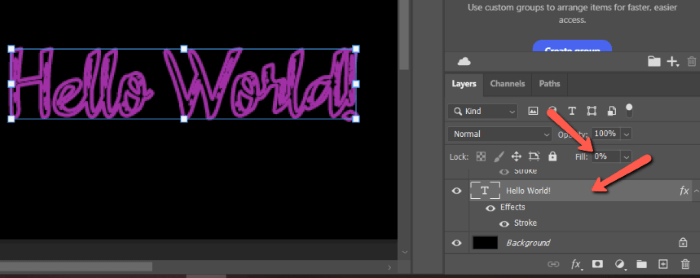
What if you want to turn off the text and leave just the outline? You could lower the opacity of the layer, but that will lower the opacity of the layer effects as well, which means the stroke would disappear.
Instead, highlight the text layer and lower the Fill in the Layers panel.
Adding Additional Strokes
What if you want to add more than one stroke to the letters? You can only add one stroke using Photoshop’s overt controls, but you can add additional strokes with this sly trick.
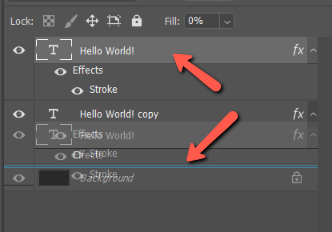
With the text layer highlighted, hit Ctrl + J or Command + J to duplicate the layer.
Double-click on the new text layer to open up the layer styles. Click Stroke on the left. Make the pixel size bigger than the first stroke and change the position to Outside. Double-click on the color swatch to pick a different color. Click OK.
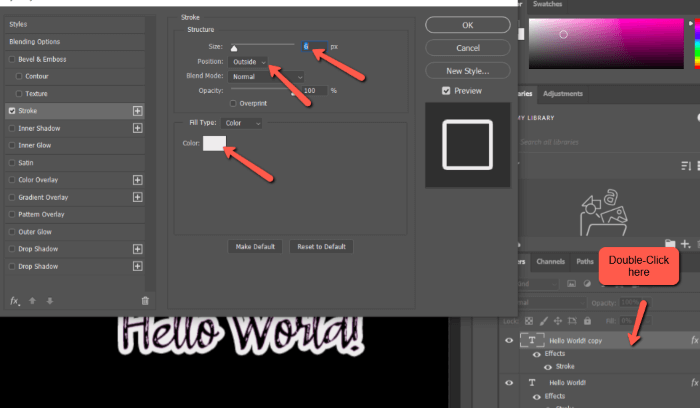
Now, remember that whatever layers are higher in the Layers panel are on top. In my case, I have the larger stroke sitting on top so that’s the only one we can see. Click and drag the layer with the larger stroke to place it beneath the layer with the smaller stroke.
The double blue lines will appear to let you know where you’re placing the layer you’re moving.
Check it out!

You can keep going however many times you like adding larger strokes to the outside and placing them under the smaller layers. It’s such a fun, easy way to put a stroke on text in Photoshop!
Interested to learn more cool text effects? Check out how to warp text in Photoshop here!
About Cara Koch
kirumira isma
great job to the world
June
Thanks, Kirumira!