Intriguing fonts are fantastic for adding a certain aesthetic to your design. Besides the type of font you choose, how you display it also makes a huge difference.
Hey there! I’m Cara, and as a photographer sometimes I am tasked with creating eye-catching social media-friendly designs with my images. Photoshop lets us do a ton of cool effects with text so there’s a lot to play with here.
Let’s start by learning how to bend and warp text in Photoshop. It’s super easy and there are a million and one ways to customize your design. Let’s take a look!
Table of Contents
How to Use the Warp Effects in Photoshop
As with many things in Photoshop, there is more than one way to warp text. The method I’m going to show you is the easiest and most certainly the fastest method.
Plus, the text remains 100% editable. You can change the wording at any time as well as make adjustments to the warp effect. This is a huge advantage to some of the other methods that are more restrictive.
To get started, let’s look at this logo I’m playing around with.
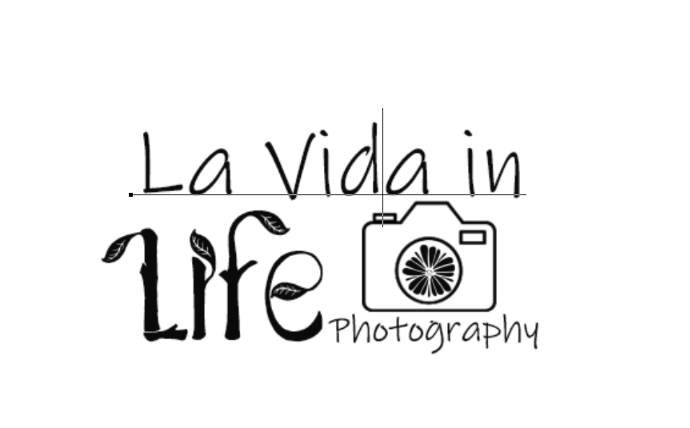
As you can see, I’ve got the text broken up into three different text boxes: “La Vida in”, “Life”, and “Photography.” This means I can manipulate each of these sections individually.
Let’s start with “La Vida in.”
Step 1: Open the Warp Effects
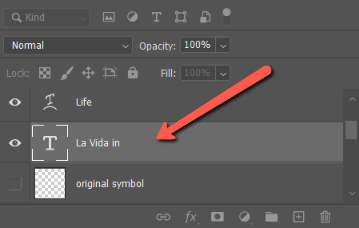
Select the “La Vida in” layer in the Layers panel to tell Photoshop this is the one you want to work with.
Right-click on the image and select Warp Text from the menu that appears.
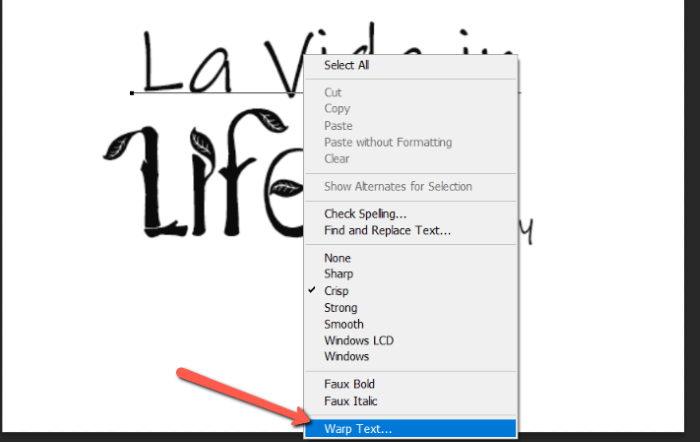
Alternatively, you can right-click on the layer and choose Warp Text.
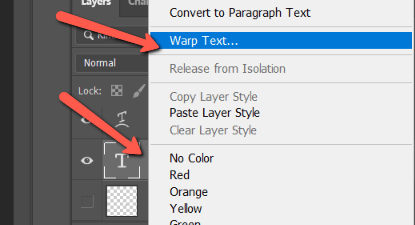
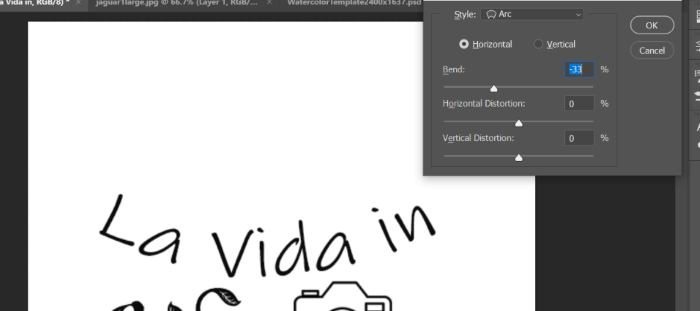
Whichever way you get there, you’ll end up with this menu.
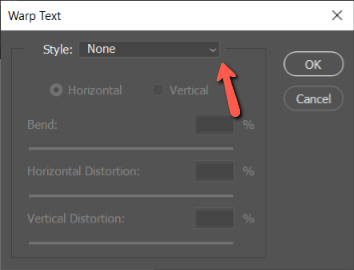
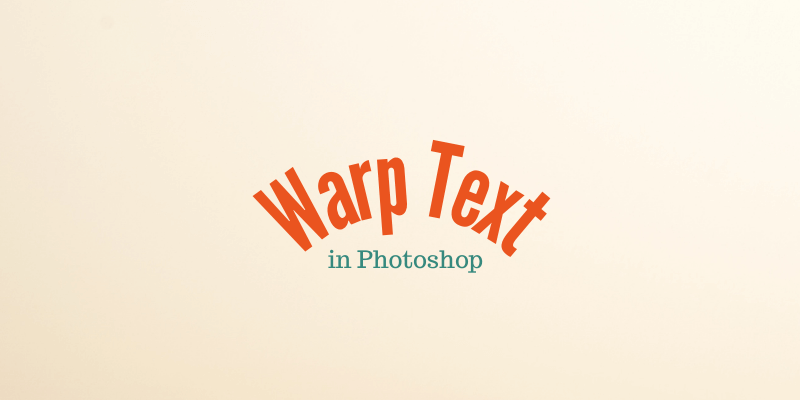
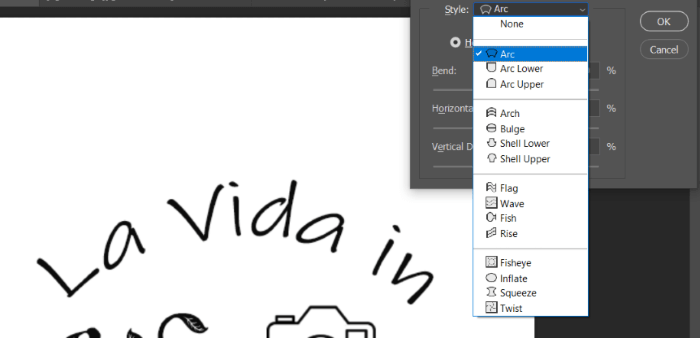
Click on the dropdown arrow in the Style box. You’ll get a list of different warp effects to choose from. I selected the Arc effect and notice how the words “La Vida in” have turned into a neat little arc.
Step 2: Refine the Effect
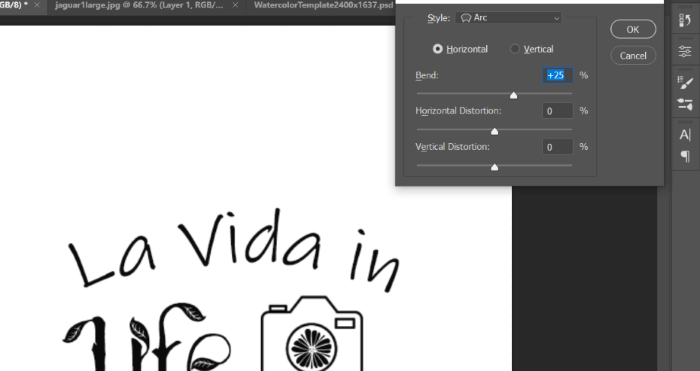
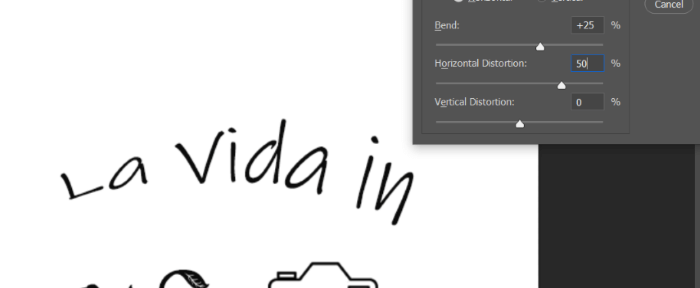
What if the effect is too much for your design? We can use the sliders to adjust the strength of the effect.
By default, the Bend starts out at 50%. Look what happens when I lower it to 25%. We get a gentler curve.
If you want to bend the effect in the opposite direction, pull the slider to the left until the percent becomes negative.
Horizontal Distortion allows us to make the text larger on one side than the other. A positive percentage makes it larger on the right. A negative percentage makes it larger on the left.
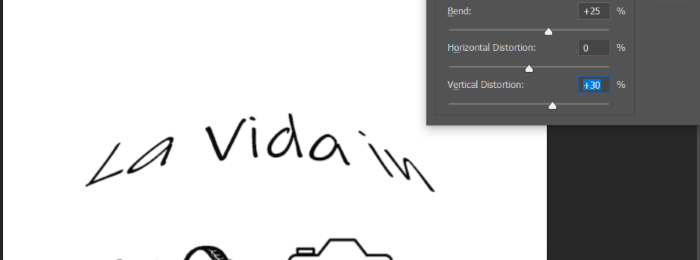
A positive percentage in the Vertical Distortion box makes the text bend backward. A negative percentage makes it bend forward.
You can try out all the warp options to get the ideal result for your design. If you don’t want to use the effects, you can also manually warp text into a shape in Photoshop.
How to Warp Text into a Shape in Photoshop
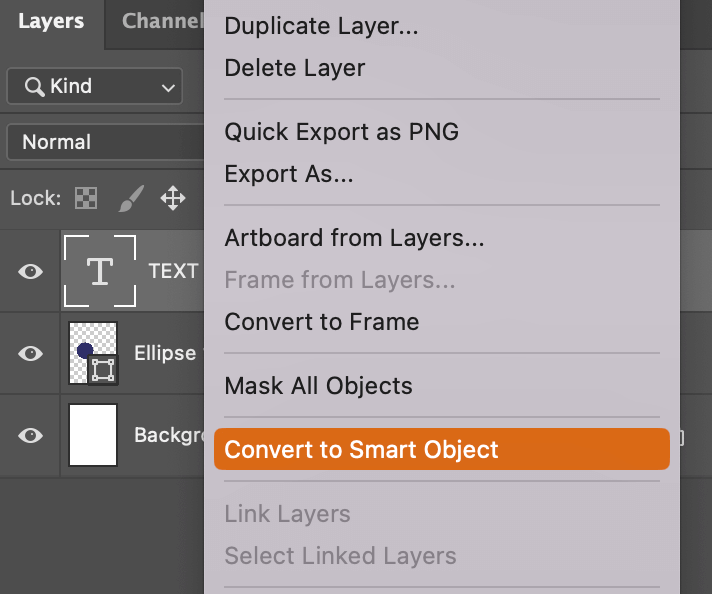
If you want to warp text into a shape, you’ll need to convert the text into a smart object, and then use the Warp tool to transform the smart object, in this case, the text.
I’ll show you an easy example of warping the text in the circle.

Step 1: Go to the Layers panel, right-click on the text layer, and choose Convert to Smart Object.
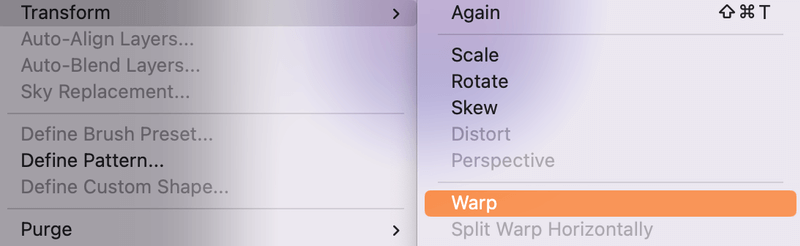
Step 2: Select the smart object layer, in this case, the text. Go to the overhead menu and choose Edit > Transform > Warp.
Now you’ll be able to click and drag on the smart object to transform its shape.

You can warp the text around a circle or freely warp it anyway way you want.

Wondering how to get your background transparent so you can turn your design into a logo or watermark? Check out our tutorial on how to do it here!
About Cara Koch