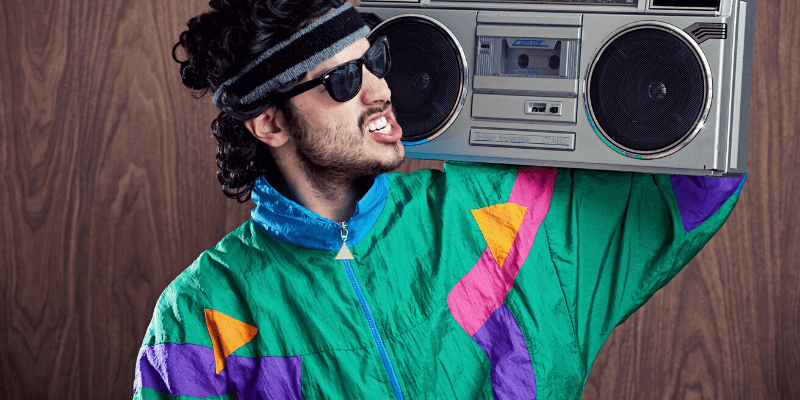
Many artists strive to recreate the appearance of the 1990s in their work. Photoshop makes it possible to achieve that 90s style. There are a few things you can do to your images to make them appear more like they were taken in the 1990s if you want to create a ’90s effect in Photoshop.
The nostalgic and edgy mood a vintage aesthetic provides can improve a photograph’s composition while adding charm and personality! It makes sense why classic photo effects are still popular, even after so many years.
My name is Aly, I am Adobe Photoshop certified, and today I will be showing you how to make a picture look 90’s in Photoshop.
Table of Contents
Key Takeaways
- Retro looks can add a little flair to your existing image and make it seem like it is an old photo.
- Learning effects are important, you will want to pay close attention to the effects being made.
- Make sure you save your work every so often to ensure you don’t lose your work.
10 Detailed Steps to Create a 90’s Effect in Photoshop
I’ll walk you through how to use the Camera Raw Filter as a smart filter to keep the “90’s photo” impression from becoming damaging. This will prevent the effect from becoming permanently incorporated into the image. The original photograph will not be altered in any way.
Follow the steps below to create a 90’s grunge look on your image.
Step 1: Open your image in Photoshop. You can use any image you like for this effect, just make sure it does not have any other filters on it.
Step 2: Once your image is ready to go in Photoshop, go to the bottom right-hand corner and find the Layers panel. Then, right-click on the Background image layer and select Convert to Smart Object as shown in my example below.
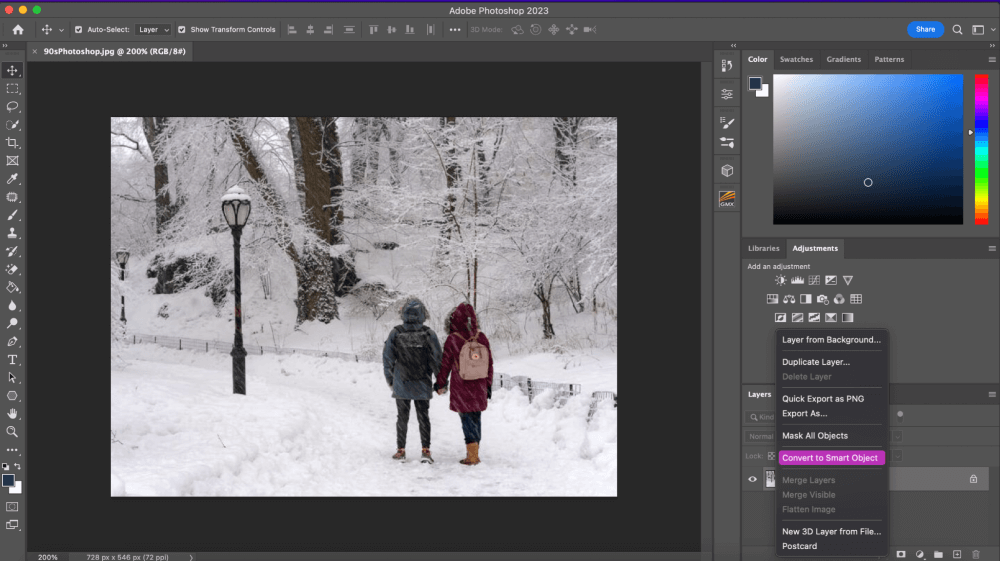
In Photoshop, a smart object is the pinnacle of non-destructive layers. Smart object edits are never permanently embedded into the layer; they may always be undone or revisited.
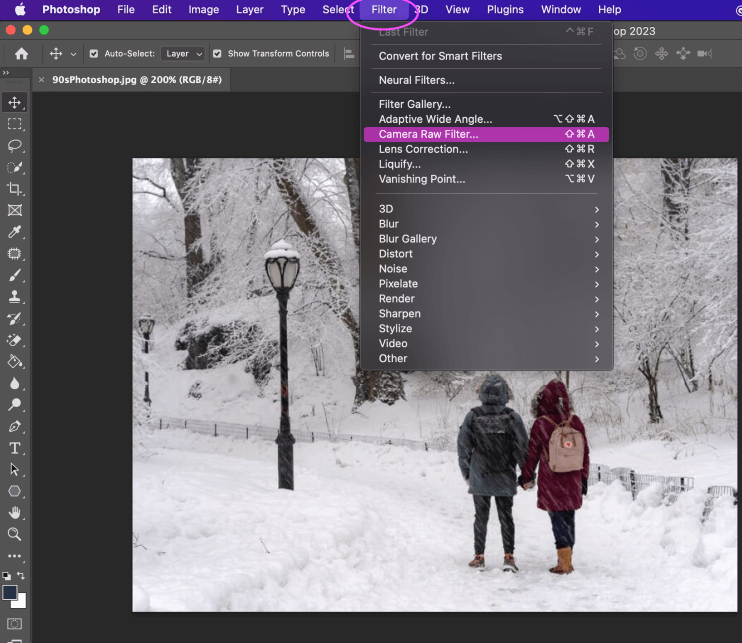
Step 3: Now that you have your image as a smart object, we will go up to the top menu, and find Filter > Camera Raw Filter.
Step 4: Apply the following settings that I have set to the basic tab after expanding it in the Camera Raw window. For reference that is Highlights = -50, Shadows = +40, Whites = -20, Blacks = +20, Clarity= +3, Saturation = -5.

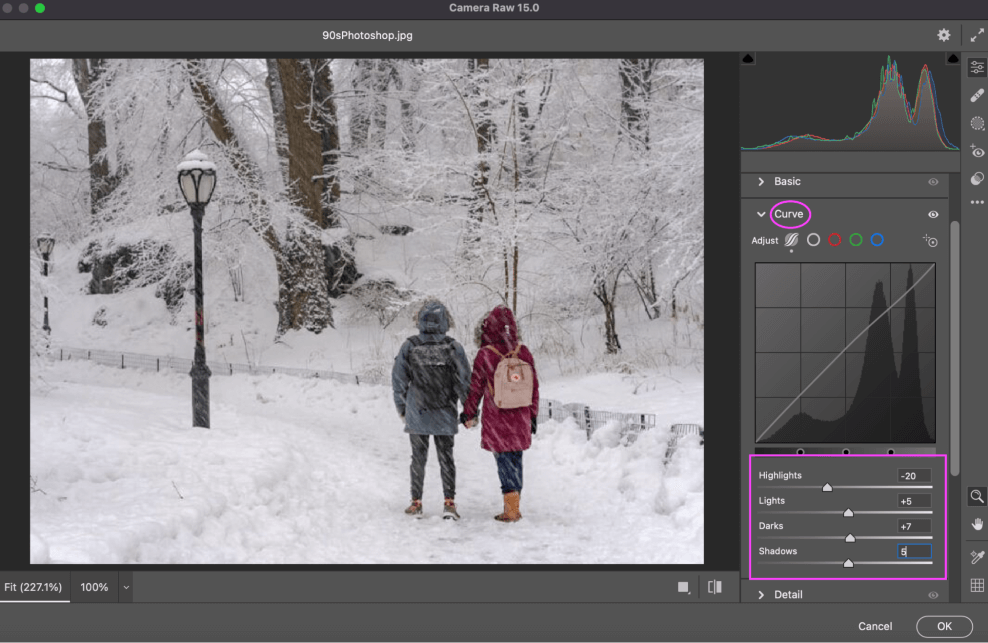
Step 5: Open the Curve tab. You can find the curve option by going back up to Filter > Camera Raw Filter as we did in the previous steps.
Step 6: Once you have clicked on the camera raw filter, scroll down and you will see Curve. Enter the values I have listed below. Highlights = -20, Lights = +5, Darks = +7, Shadows = +5, and click OK once you are done.
Step 7: You should start to notice that your image is changing quite a bit but we aren’t quite done just yet. Repeat the process of going back up to Filter > Camera Raw Filter once more.
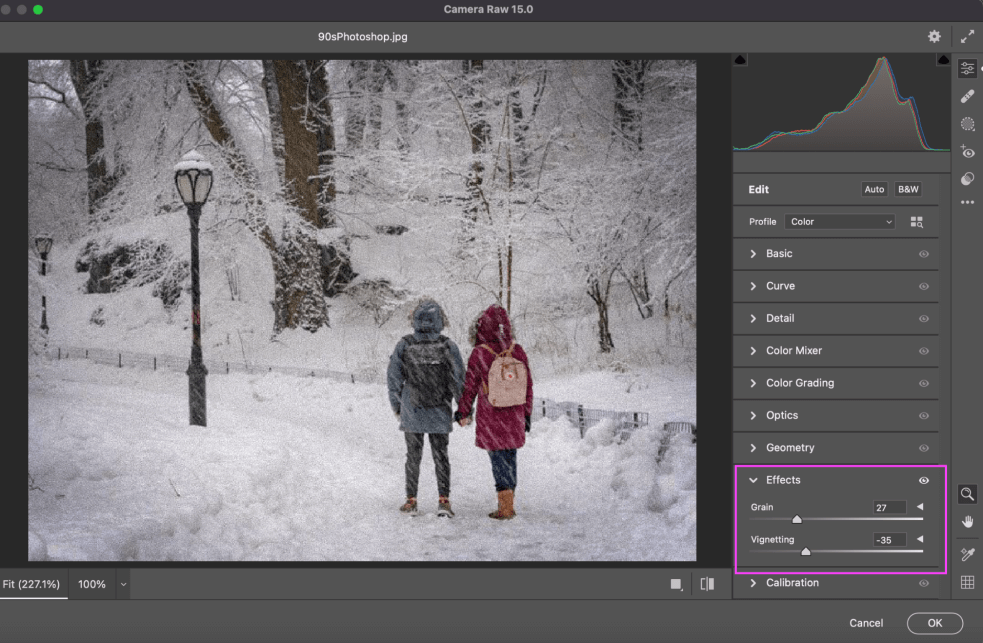
Step 8: Now, back in the camera raw filter, scroll down to the bottom and you will see Effects. Click effects and you will see Grain and Vignette. These are the settings that I thought made my photo look best but feel free to play around and see what looks best for your image. Once you’re done, press OK.
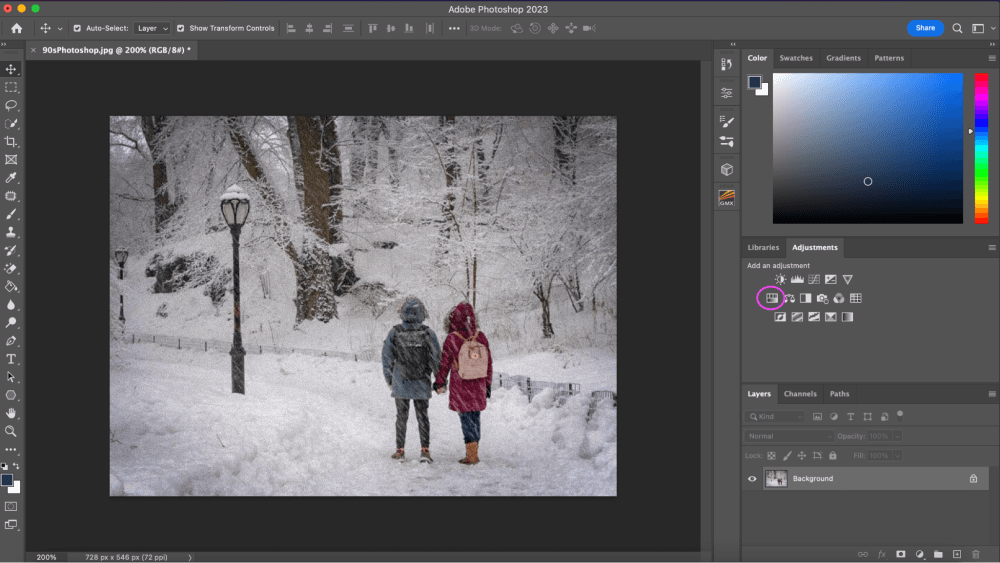
Step 9: Go back to your adjustments above the Layers panel, find and select Hue/Saturation.
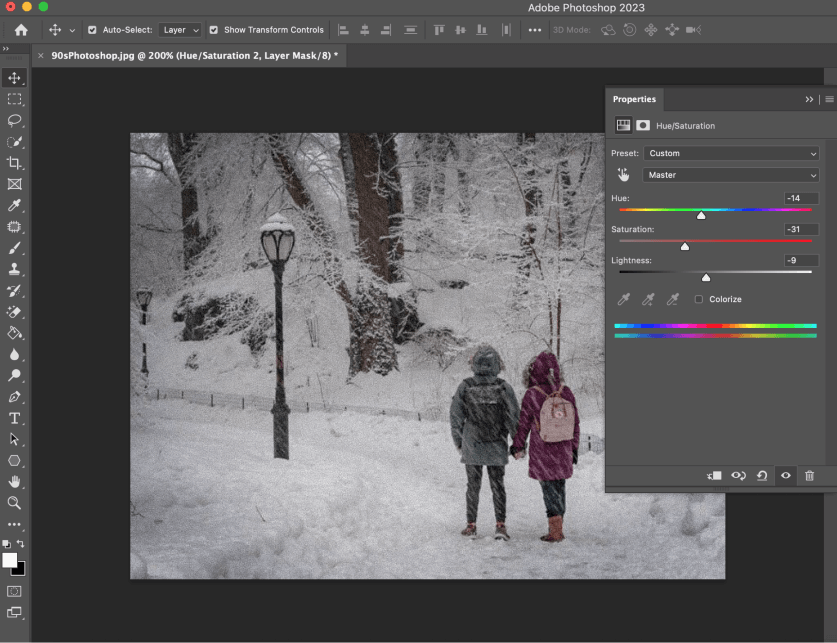
Step 10: Now you will be in the hue/saturation menu, explore the levels of each option, and see what makes your photo look best to you. Personally, I like to lower the saturation a tad and maybe increase the hue to whatever color pops best.
I also decreased the lightness for my photo by -9 to give it a more retro grunge look like the 90’s. Each image will be different and that is why it is important to explore these levels for your specific image.
Pro Tips
- If your image isn’t as grainy as you’d like, go back to the camera raw settings and add another layer of grain. I did this for my image and I think it looks much better.
- Hue/Saturation will really pull the image altogether. I like to change the hue based on the colors in the existing image, adding a touch of color or even diminishing it if you prefer.
Final Thoughts
Any image may be given a classic look by applying a 90’s effect in Photoshop. Some photographers even prefer the aesthetic of older photographs to that of fresh ones.
Creating the 90’s look on an image in Photoshop is a great way to explore filters and get to know level adjustments as we did in this tutorial. If you are new to Photoshop it’s a great way to learn what works and what doesn’t work especially creating new filters, plus it’s fun to do!
Any questions about creating a 90’s effect on an image in Photoshop? Leave a comment and let me know.
About Aly Walters