How could I ever create that amazing image? Have you ever had that thought? Perhaps when looking at some awe-inspiring image on Instagram or the internet.
A lot of the awe-spiring images we see are actually a combination of two or more images in Photoshop. This is known as a composite image. For those new to Photoshop, creating a composite can seem like an insurmountable task. But is it really?
Hey there! I’m Cara and I promise, especially if you’ve been following my tutorials for a while, creating a composite image isn’t as hard as you might think. It’s simply a matter of knowing how to cut out your components, combine them, and blend them together so they look natural.
If you’re still feeling overwhelmed, come along with me as I walk you through how to create a simple composite. With the tools you’ll learn, you’ll be well on your way to creating complex images. Complex composites, after all, are simply a matter of repeating the same steps!
Note: I use the Windows version of Photoshop. If you are using a Mac, the workspace will look slightly different from the screenshots displayed here.
Table of Contents
Step 1: Choose Your Images
Choosing the images you want to piece together is the fundamental step of creating a composite.
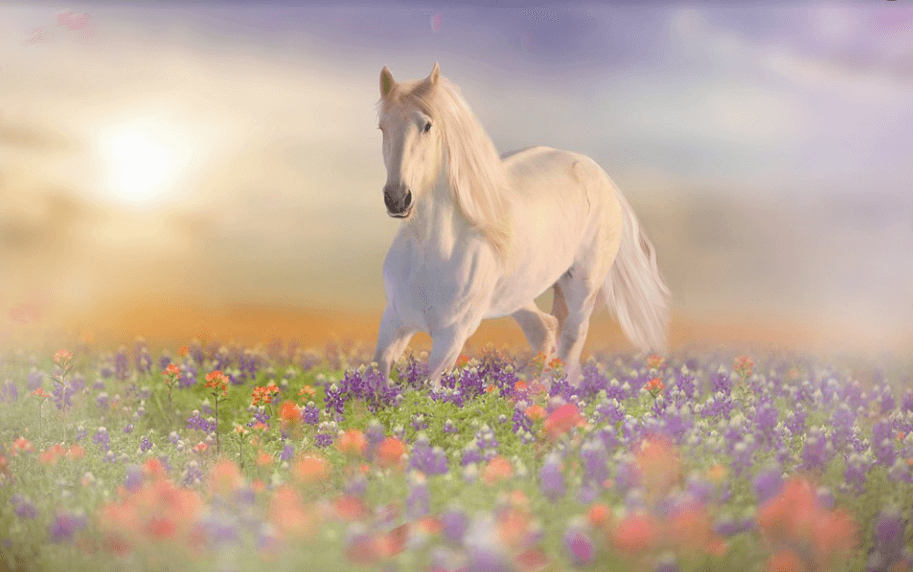
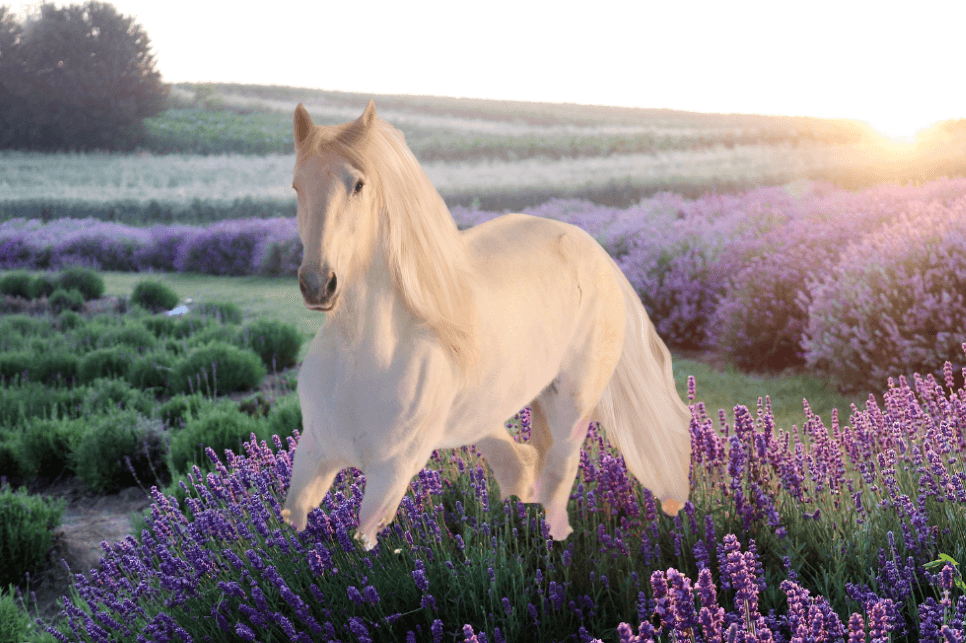
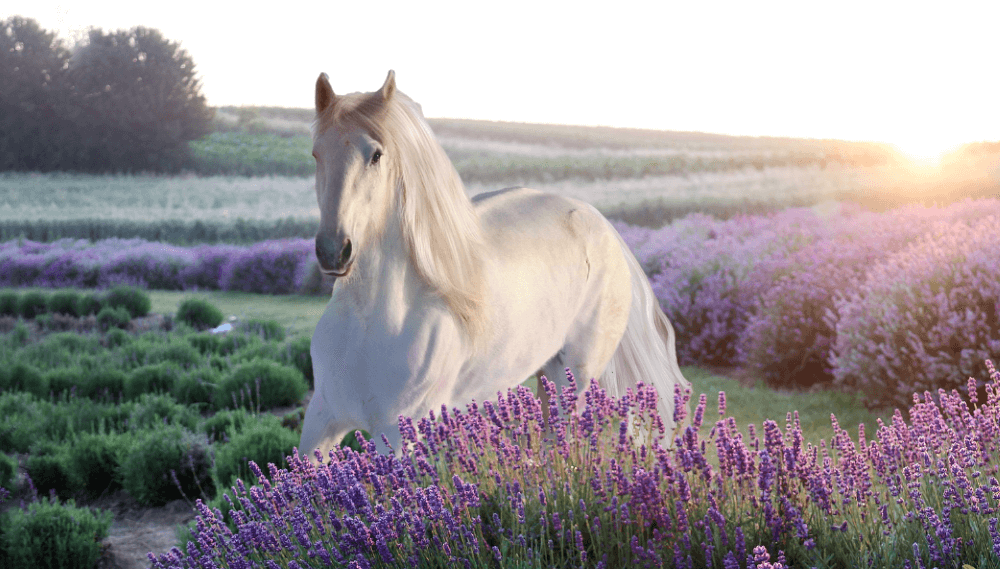
For this example, I’m going to create a whimsical scene using the horse from this image I got from Pixabay.com.
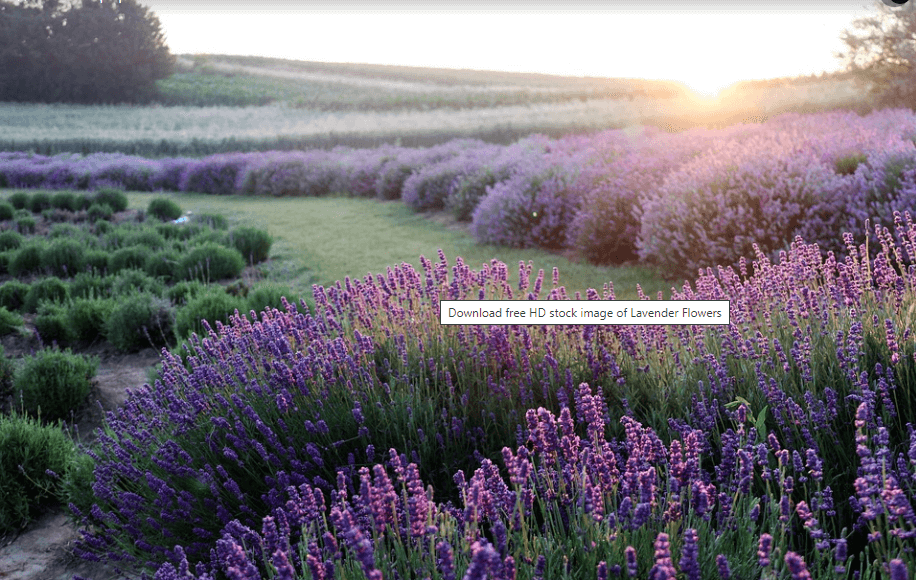
And I’m going to add the horse to this image, also from Pixabay.com.
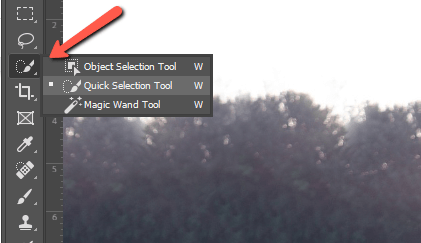
Step 2: Cut Out Your Subject
Cutting out a subject used to be a time-consuming and tedious task. However, as Photoshop has improved over the years, so has its ability to help you with this task.
Now, it isn’t difficult to cut out most subjects, it’s mostly a matter of knowing which tool to use. Check out this article for a list of selection tools and when it’s more appropriate to use which tool.
To make this selection, I used the Select Subject button in the Options bar. The button appears after activating a selection tool like the Quick Selection or Object Selection tools. Then I refined the areas it missed with the Quick Selection tool.
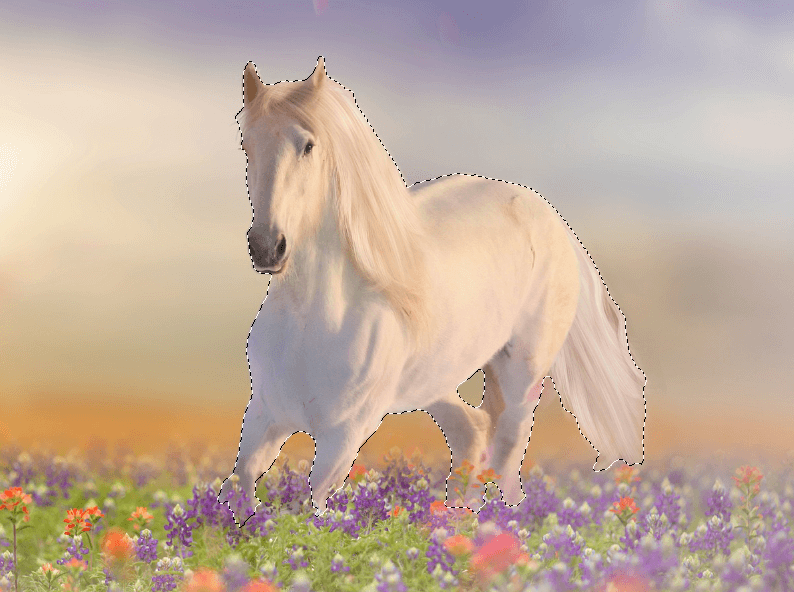
Press Ctrl + C or Command + C on the keyboard to make a copy of the selection. We’ll move to our second image in Photoshop and press Ctrl + V or Command + V to paste the selection onto the new image.
Step 3: Position Your Subject
We can’t see the horse’s legs in the original image, so when we move him over, he’s obviously got some anatomical problems. But it’s fine because we want to put him behind that lavender bush anyway.
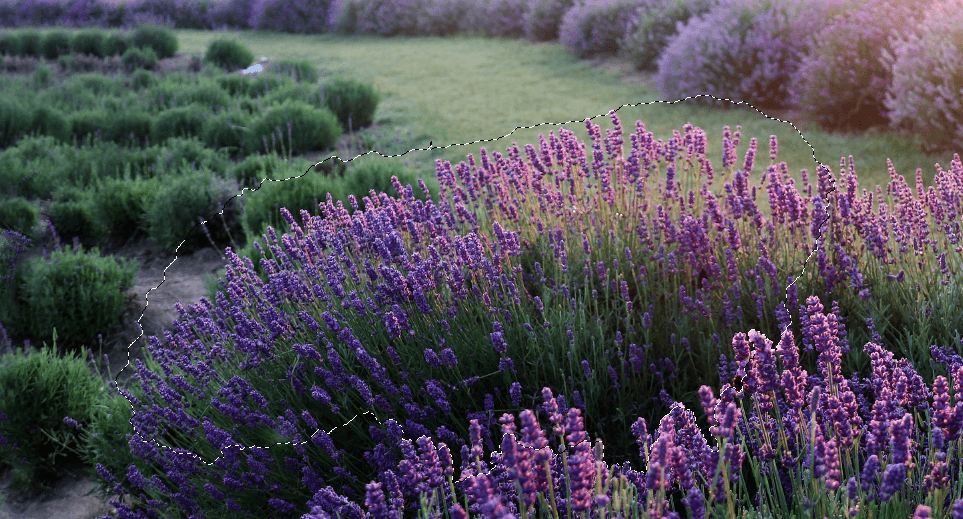
To do that, move the horse out of the way with the Move tool or by turning off the visibility on the left side of the layer in the Layers panel. Then, grab the Quick Selection tool from the toolbar on the left.
Make a rough selection around the lavender bush behind which we want to place the horse. It does not have to be perfect. Just make sure all the tips of the lavender flowers are included in the selection.
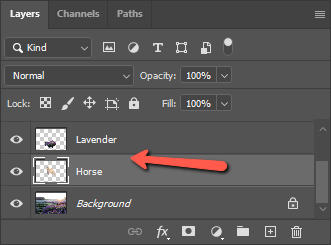
Press Ctrl + J or Command + J to make a copy of your selection. Bring the horseback and position him where you want him using the Transform tool (Ctrl + T or Command + T) and dragging him into place.
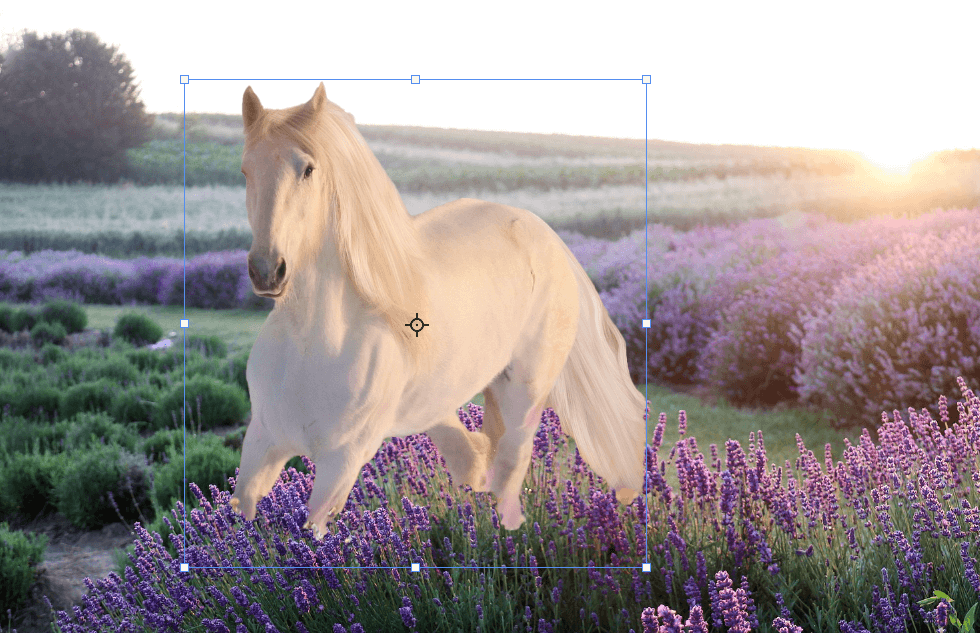
In the Layers panel, drag the copied section of the lavender above the horse to place the horse behind it in the image.
Using the Magic Wand tool, I’m going to select the green grass around the lavender tips that I need to remove. Check out this tutorial to learn more about the settings to use with this tool for the results you want.
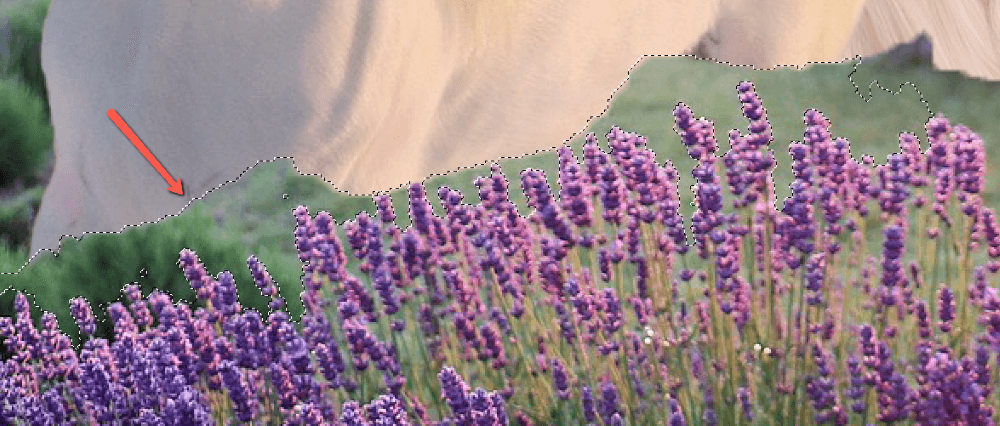
Press Backspace or Delete to remove the selected parts. Remember, you can press Ctrl + D or Command + D to deselect.
You’ll also want to zoom in on your subject to check the edges. If you did a good job with your selection, you shouldn’t have too many problems. But there may be a couple of weird bumps here and there.

Fix those by adding a layer mask to the horse layer. Then press B on the keyboard or choose the brush tool from the toolbar and brush away the extraneous areas.
Step 4: Blend Your Subject
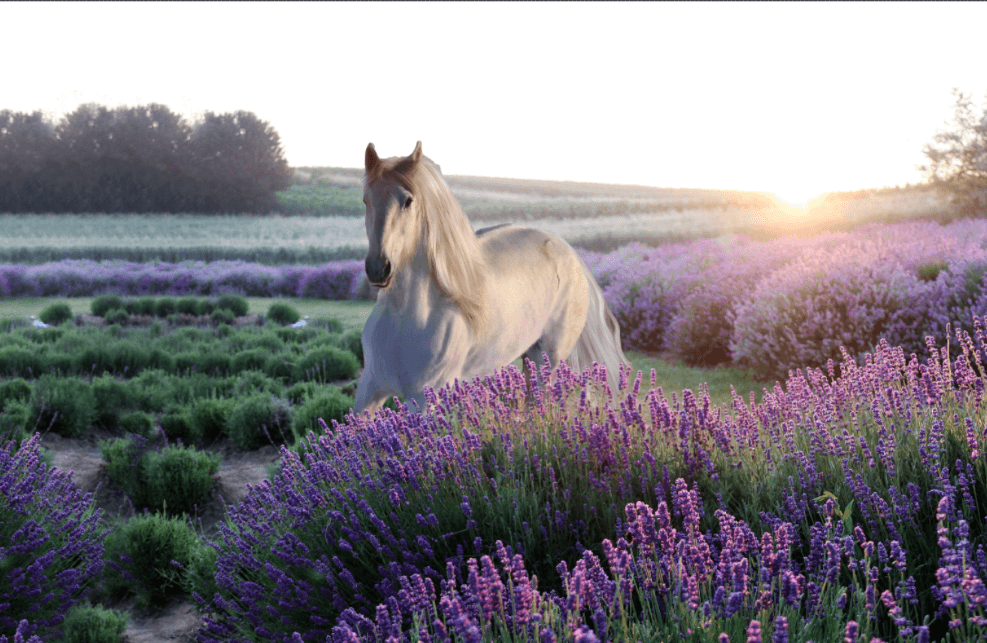
At this point, my horse’s position looks good. He looks like he could actually be running along behind those lavender bushes. However, the lighting is all wrong so he still sticks out like a sore thumb.
In the past, blending the color and lighting was a lot of work and this was a big part of what made creating composites difficult. But, Photoshop has come a long way, and now there is a powerful tool that will handle most of this work for you.
To try it out, go to Filter in the Menu bar. Choose Neural Filters from the menu.
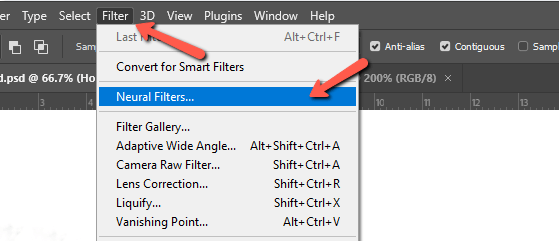
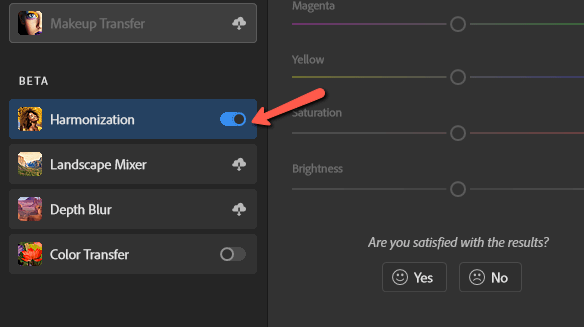
You have to download and install the neural filters so do that first by clicking the cloud icon on the right side of the Harmonization filter. If you’ve already done this, just click the toggle switch to activate the tool.
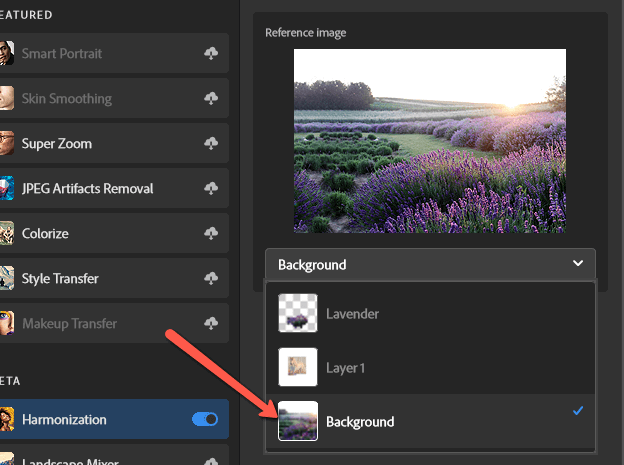
Select the layer you want to use as the reference image, which is the background layer.
On the left side, you’ll get a preview of how the look of your subject will change. You can adjust the Strength and other sliders on the right to fine-tune the look as you wish. Choose whether you want the effect to be added directly to the subject layer or be output onto a new layer.
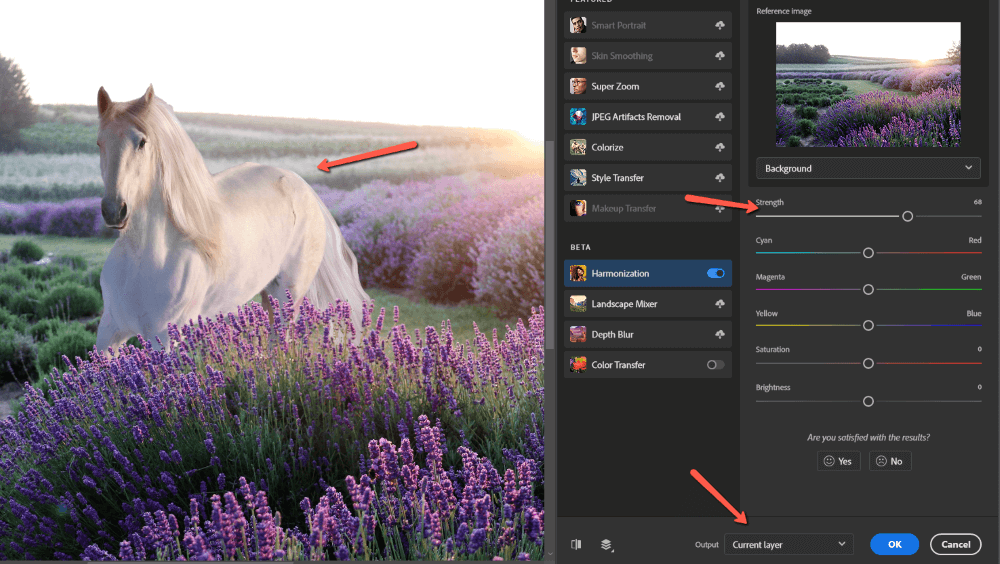
Press OK when happy with your changes.
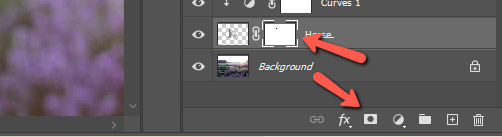
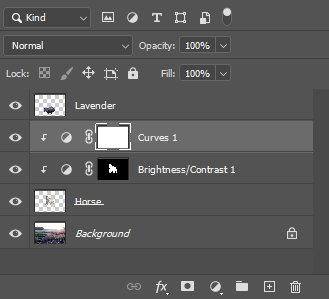
This is looking much better. Remember you can always make adjustments using adjustment layers if you feel the subject still looks a little out of place. I think the horse is a touch too bright still so I’m going to add a Brightness/Contrast adjustment layer.
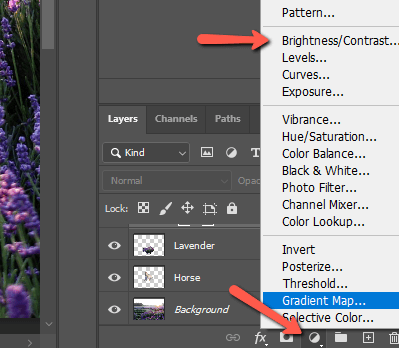
Click the half-filled circle icon at the bottom of the Layers panel. Choose Brightness/Contrast from the menu.
You only want it to affect the horse, so drag it directly above the horse layer and click the clipping mask button. Now when you adjust the sliders, the changes will only affect the horse.
To deepen the shadows and get the contrast to match a little better, I’m going to add a Curves adjustment layer too.
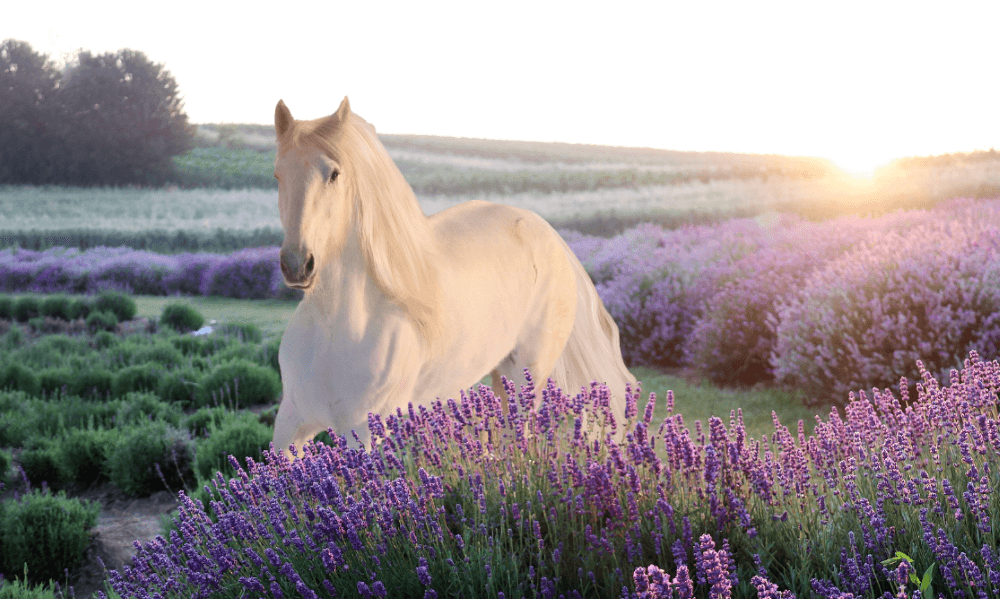
Now he looks more like he belongs!
Step 5: Repeat to Add Other Elements
Now, you can stop here with your composite or you can keep adding more elements. Different elements will require different blending methods and adjustments so let’s look briefly at a couple of situations you might run into.
Adding Blur
For example, I added this castle using the same steps I showed you with the horse. However, it needs to be blurry because it’s so far in the background.
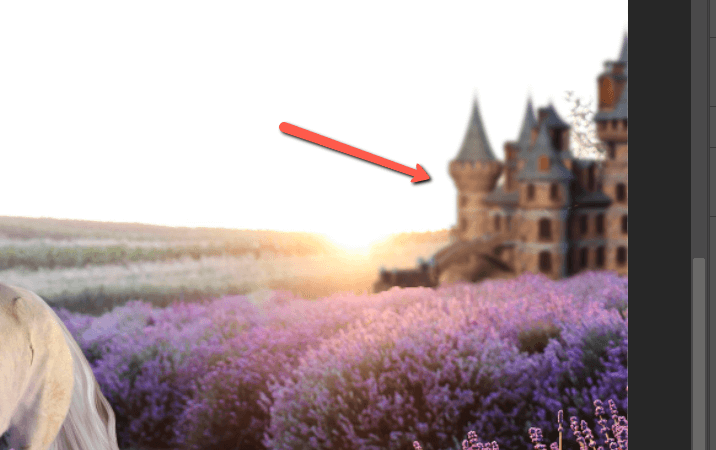
Adding the blur is simple. Just go to Filter, hover over Blur, and choose Gaussian Blur from the menu.
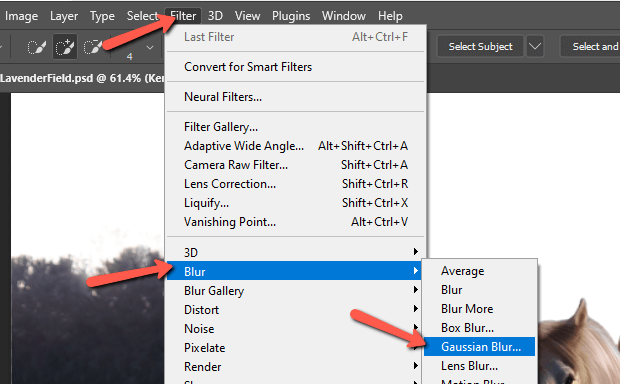
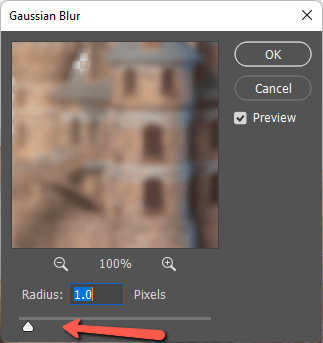
Then use the slider to choose the amount of blur to add.
Add a Shadow
Another common adjustment you will need to make is to adjust the lighting and shadows. For example, to add a rider to the horse, there will need to be shadows in front of the rider’s leg.
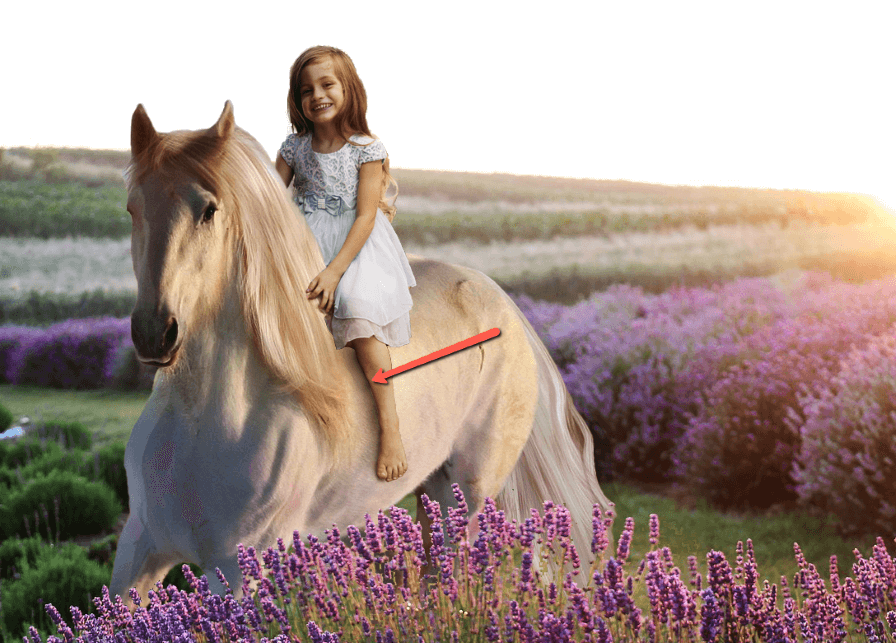
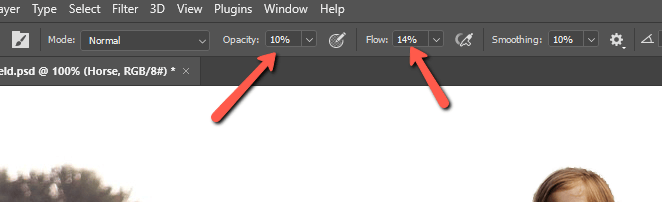
To do this, select the horse layer in the Layers panel. Then press B to activate the brush. Bring down the Opacity, Flow, and Hardness of the brush and slowly paint with black, building and layering the shadow darker near her leg and blending it as you come forward.
Shading and Lighting
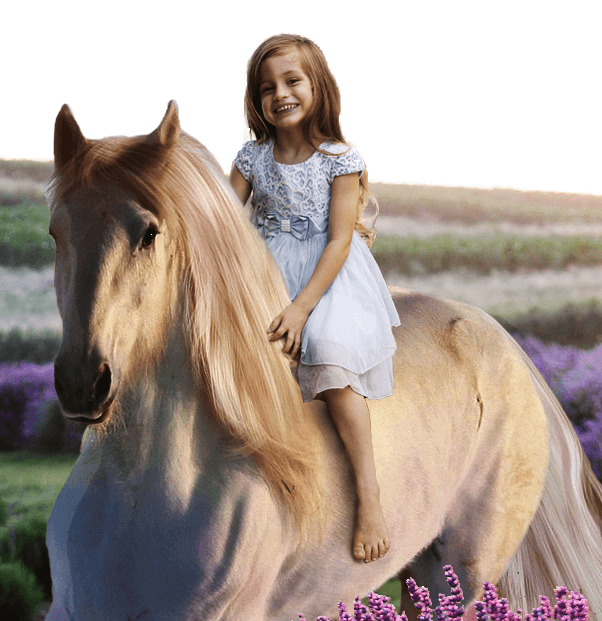
I also need to adjust the shadows on her body. The side away from the sun needs to be darker and the side facing the sun needs to be warmer and brighter.
To do that, select the layer with your subject in the Layers panel. Press the Select Subject button in the Options bar. With a selection around your subject, your brushstrokes will only be applied to the subject (and not the sky or the horse as in this example).
As we did for the shadow, grab the Brush tool and turn down the Opacity, Flow, and Hardness. Paint the shadow side with black and choose a lighter orangish color to paint the warm side.
Check out the before and after:
For this image, let’s also add some color to the sky. You can see how to make the sky bluer by following this tutorial.
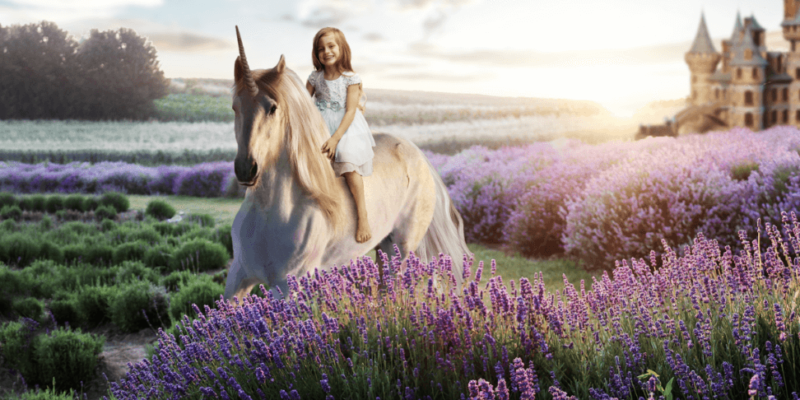
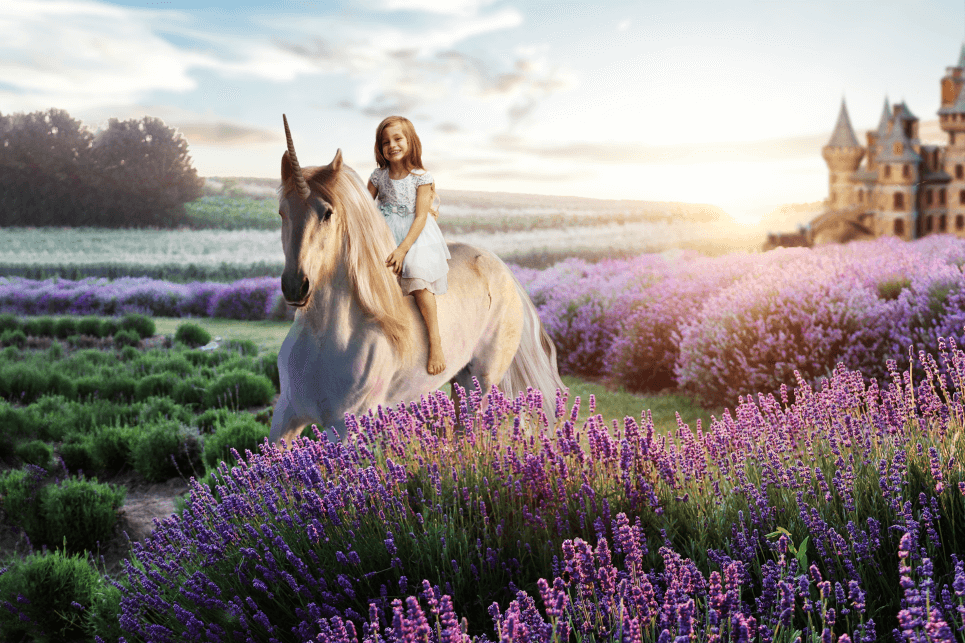
And here is my final image!
Once you learn how to create composite images, there is no limit to what you can create! It can seem a little overwhelming at first, but just remember to stick to these basic steps.
And if you run into anything that you don’t know how to do, feel free to search through our tutorials here on Photoshop Buzz. We’ve probably got an article here somewhere on what you’re trying to figure out how to do!
About Cara Koch