Wouldn’t it be nice if the sky was always blue and beautiful when you were taking pictures? Unfortunately, that isn’t always the case and it’s a bummer when you’re traveling and only have one opportunity to photograph a certain place.
Hello, I’m Cara and I’m here to remind you that in the photography world, there are lots of problems that Photoshop can fix. That includes enjoying a nice blue sky in your epic travel images.
So let me show you how to make the sky bluer in Photoshop!
Note: I use the Windows version of Photoshop. If you are using a Mac, the workspace will look slightly different from the screenshots displayed here.
Table of Contents
Step 1: Find a Blue Sky
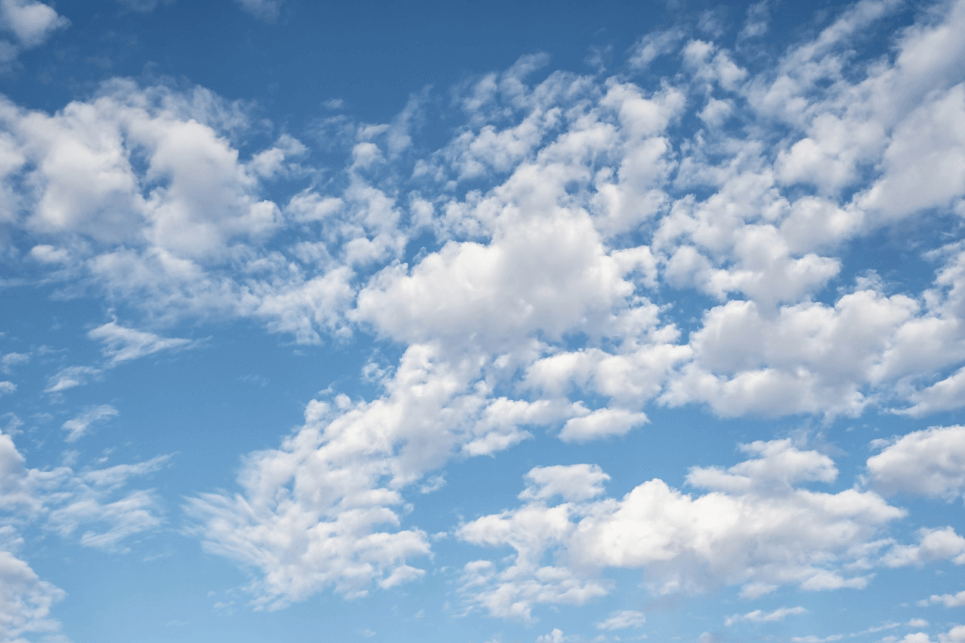
The first step is to find a blue sky you like. On nice days, you might take a few blue sky pictures to build a personal library of skies. Or you can look through a stock image website to find one you like. I found this one on Pixabay.com.
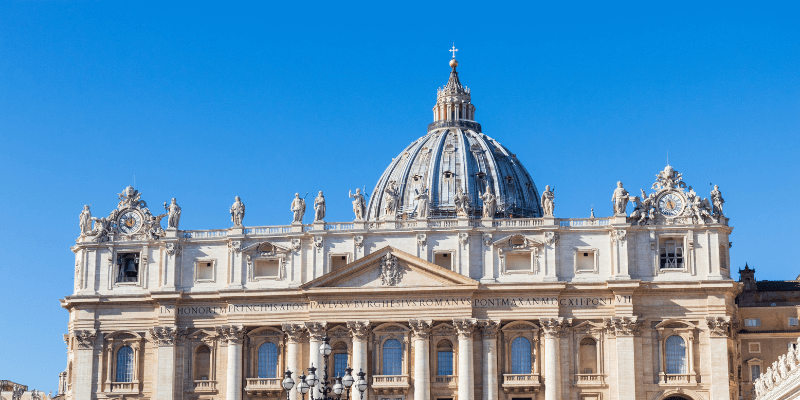
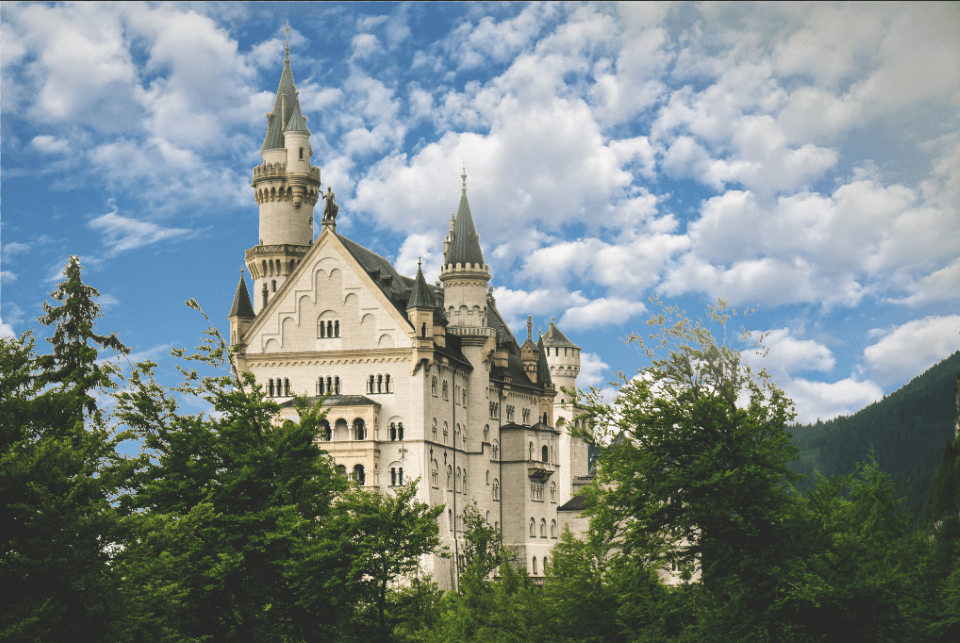
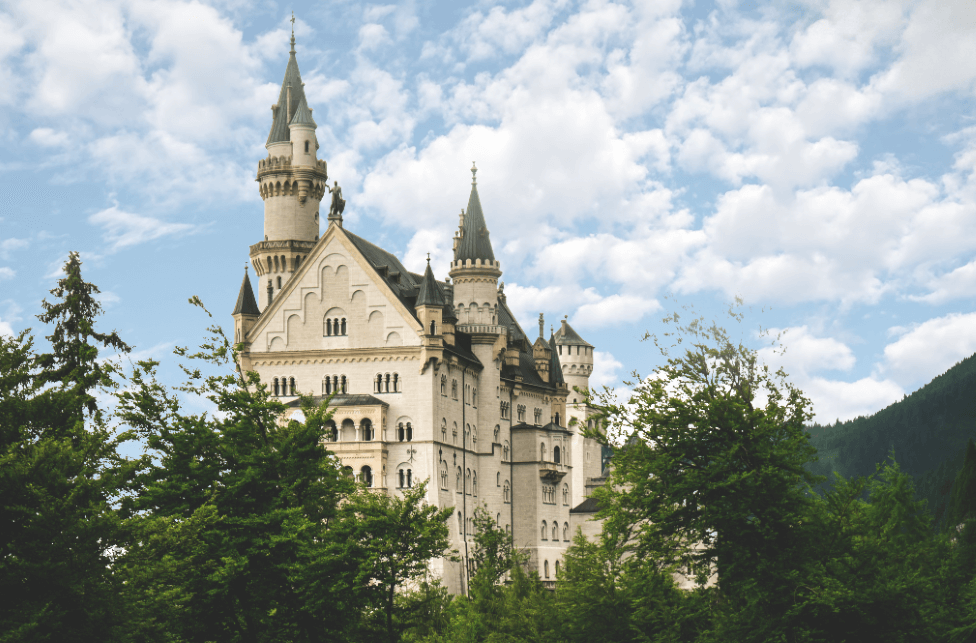
We’re going to use it to bring some much-needed life to this epic, though depressing, an image of a castle I downloaded from Pexels.com.

Step 2: Find Your Blending Channel
We’re going to blend the new sky into the castle image using the Blend If command. For the best result, we need to know which channel offers the most contrast.
You can check the channels by clicking the Channels tab in the layers panel.
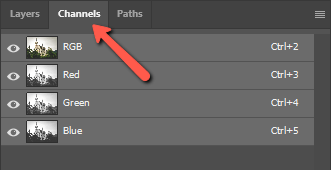
If the Channels tab doesn’t appear here in your workspace view, go to Windows in the menu bar. Pick Channels from the list. The checkmark will appear when the window is active.

Now turn off the visibility for all the channels, and turn each one back on individually. You’re looking for the channel that has the most contrast between your subject and the sky. Since we’re talking about the sky, this usually will be the blue channel.
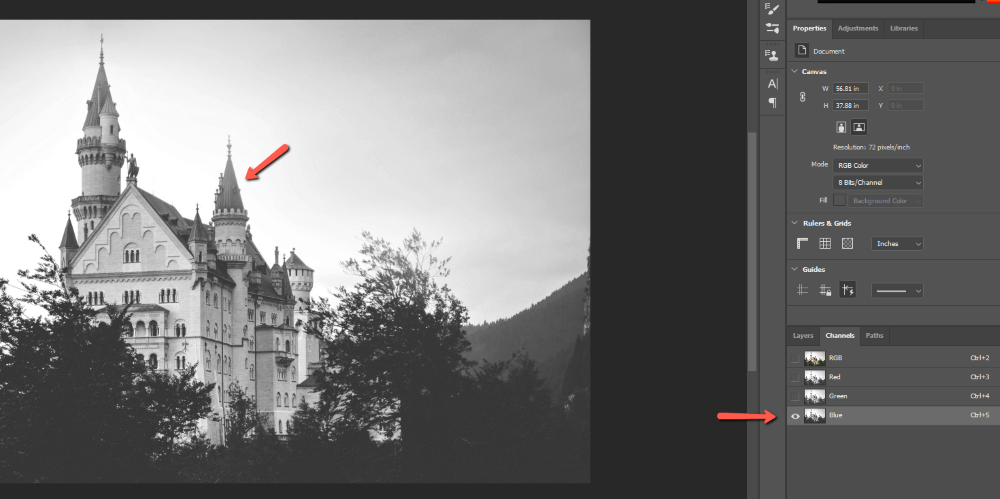
Pro tip: Use the shortcuts Ctrl or Command + 2, 3, 4, or 5 to jump from one channel to another. Clicking the visibility icons is a little clunky.
Once you’ve picked the channel you’re going to use, turn everything back on and return to the Layers panel.
Step 3: Bring in the Sky
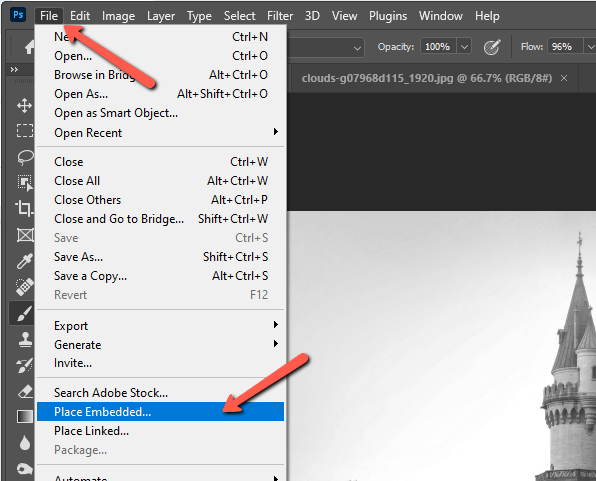
Add the sky on top of your image by going to File and choosing Place Embedded. Navigate to your sky image and click Place.
Or if you have the sky open already in Photoshop, just press Ctrl + A or Command + A to select the whole image. Then press Ctrl + C or Command + C to copy it. Go back to the castle image and press Ctrl + V or Command + V to paste it on top.
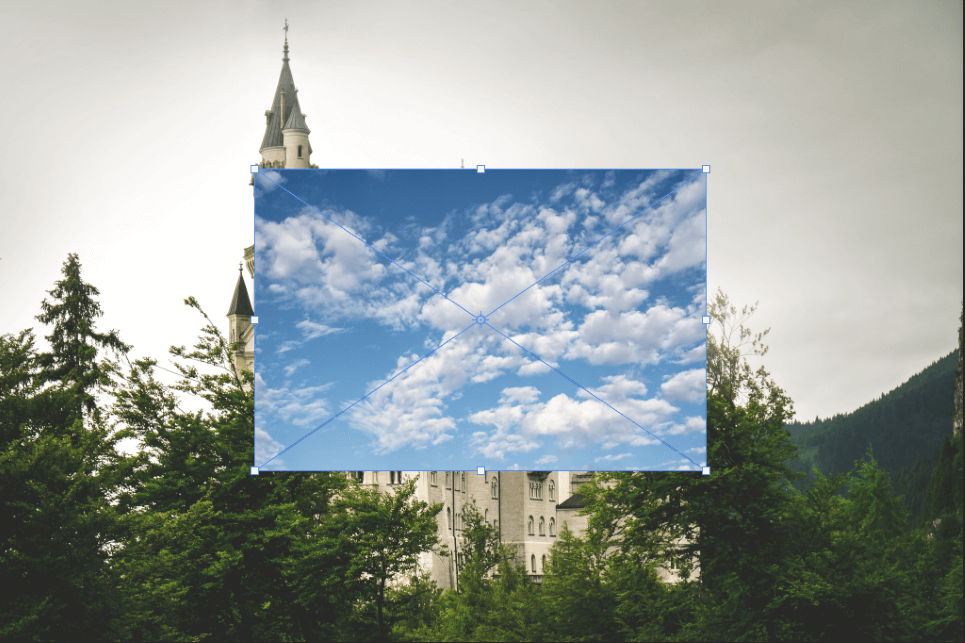
My sky image is smaller than the castle image so let’s resize it with the Transform tool. Activate it by pressing Ctrl + T or Command + T if needed. (When using the Place Embedded command, the image is inserted with the Transform tool already active).
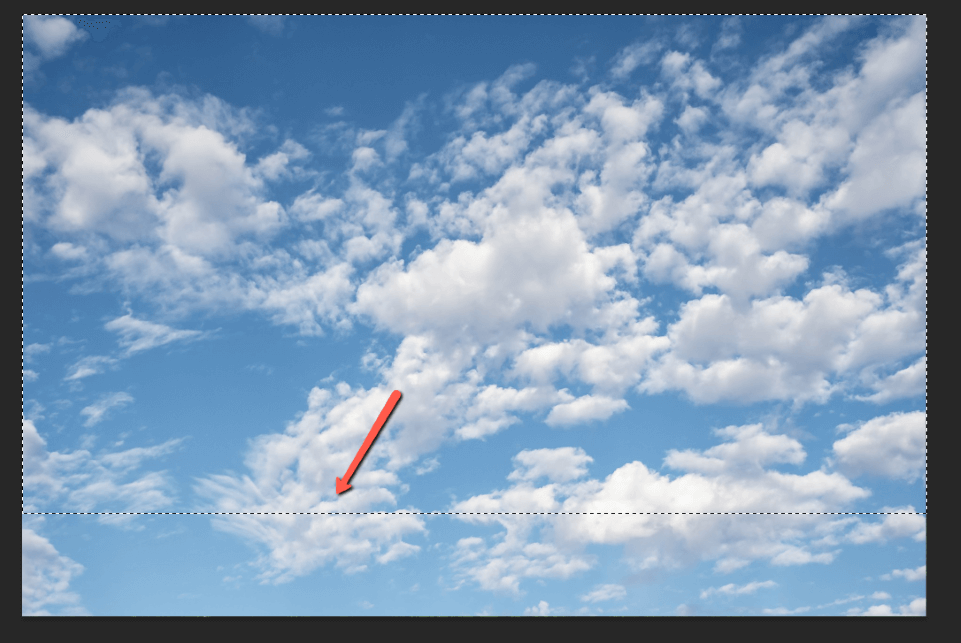
We don’t need the bottom part of the sky, since the castle and trees will cover that anyway. So grab the Rectangular Marquee tool and select the portion you need.
Then press the Layer Mask button at the bottom of the Layers panel to hide the unselected portion. It looks like a rectangle with a circle in the center.
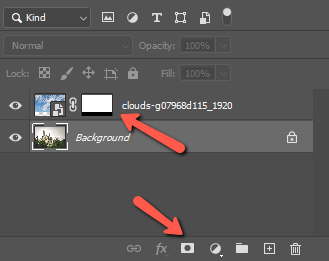
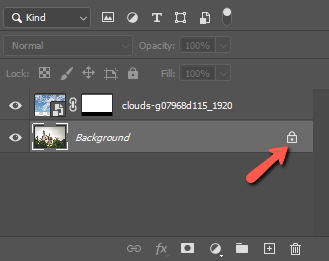
Finally, we’ll grab the castle image and drag it to the top of the layers panel to hide the sky behind it. If it’s your background layer, like mine, you’ll have to unlock the layer to move it. Just click the lock icon on the right side of the layer.
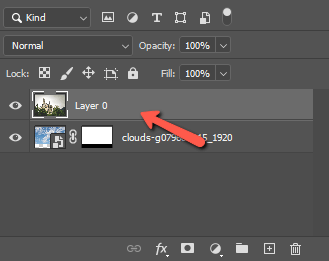
Then, drag it to the top.
Step 4: Blend If
Here’s where the magic happens. It’s time to bring the blue sky through.
But before we do that, let’s duplicate the image layer that we’ll need later. With the castle layer selected, press Ctrl + J or Command + J to make a copy. Click and drag to place it on the bottom out of the way.
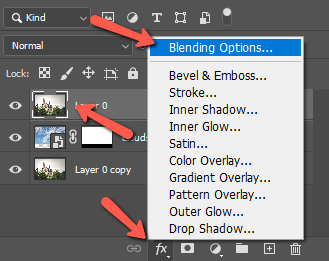
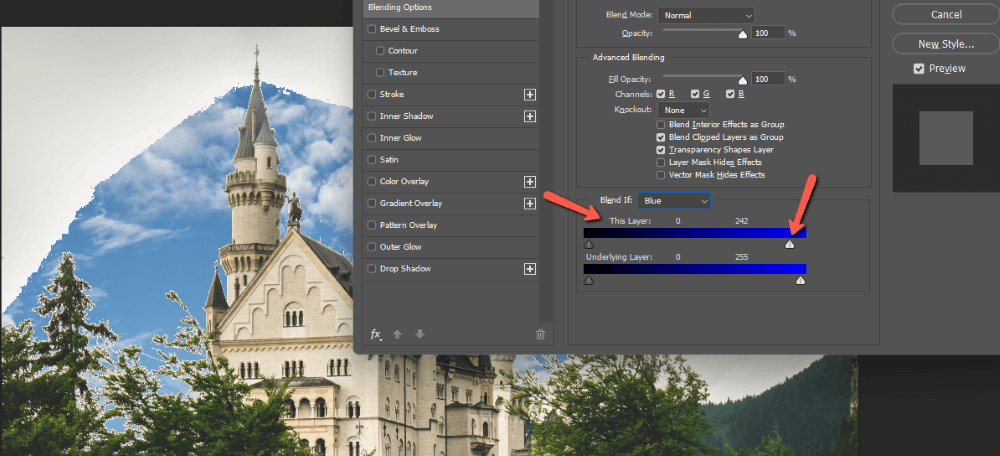
Go back and select the top castle layer, then click the fx button at the bottom of the Layers panel. Choose Blending Options to open the Layer Styles panel.
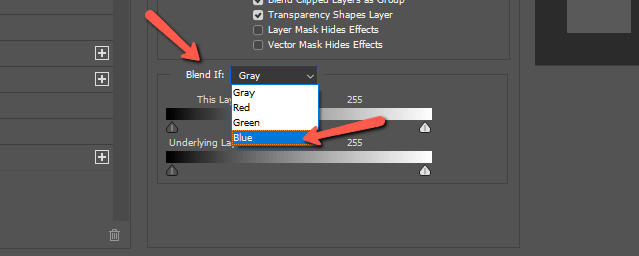
Find the Blend If box near the bottom of the panel. It will say Gray but we decided we wanted to use the blue channel. Click in the box to open the dropdown and choose Blue.
Now start sliding down the highlights on This Layer and watch the sky magically peek through!
To make the blending softer, hold the Alt or Option key and click on the slider to break it apart. Now it will blend over a range instead of a hard line.
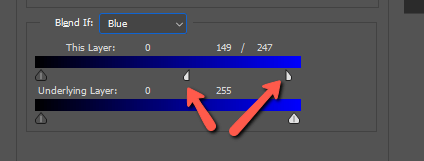
Play with the sliders until you get a good look. We lost some of the brightest parts of the castle, but we’ll fix it. The main thing is that we got nice coverage around the trees or any other elements that are difficult to mask.
Step 5: Bring Back the Foreground Elements
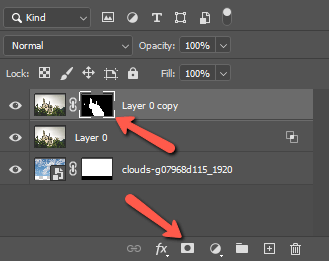
We need to bring back the parts of the castle we lost, but that’s super easy. Remember that background copy we made? Let’s drag it back to the top of the layers panel.
Grab the Quick Selection tool from the toolbar on the left or press W on the keyboard. Drag a rough selection around the castle or click the Select Subject tool in the Options bar.
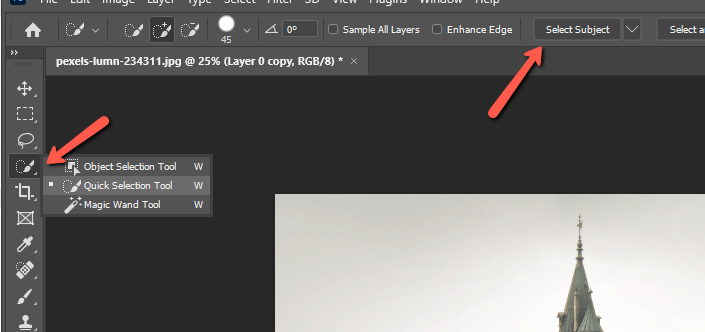
Fine-tune with the Quick Selection tool, making sure that everything you want to keep is included in the selection. Learn how this tool works here.
Once you’re happy with your selection, press the Layer Mask button at the bottom of the Layers panel.
Step 6: Adjust the Luminosity
The only trouble now is that the sky looks out of place. The luminosity of the sky is different from that of the castle so it looks wrong.
But we can fix that too!
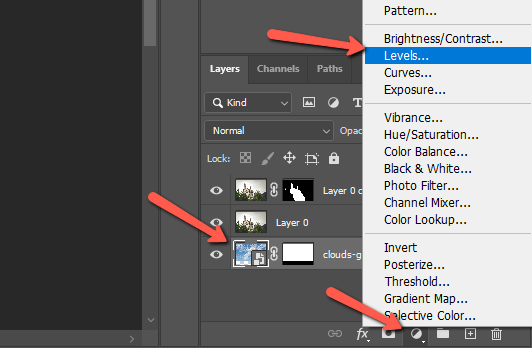
With the sky layer selected, click the adjustment layer icon at the bottom of the Layers panel. It looks like a half-filled circle. Choose Levels from the menu that appears.
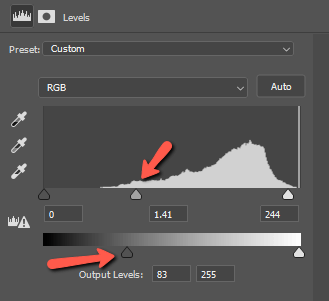
Adjust the sliders in the Properties panel until the luminosity of the sky matches that of your image.
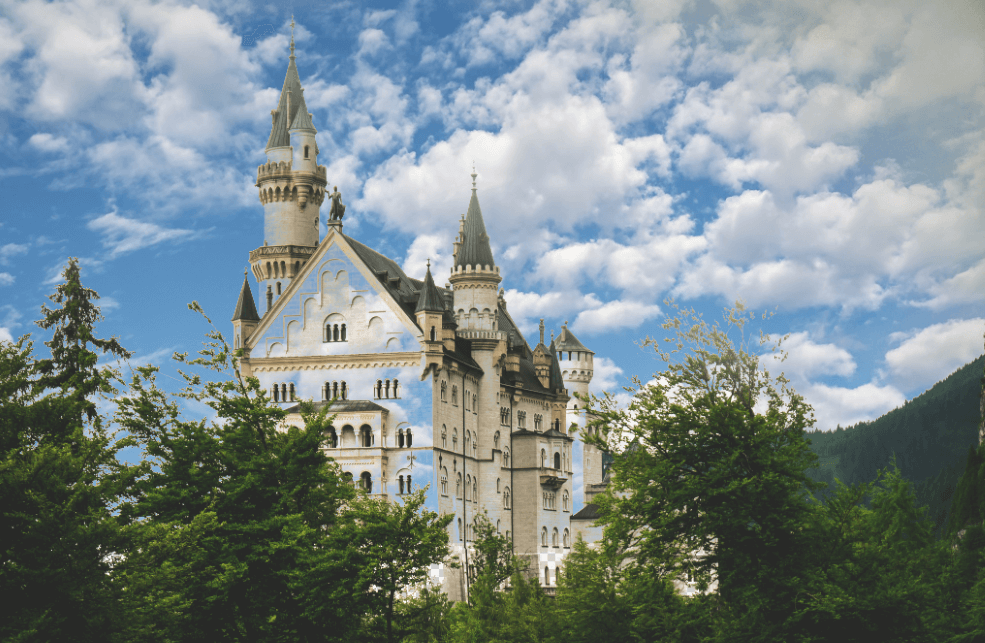
And here’s the final result! So much more cheerful!
Curious about other exciting things you can do in Photoshop? Check out this tutorial on how to add a vintage texture effect to any image!
About Cara Koch