Ever wished you could just wipe away an element in your image? You can with the eraser tool!
Hello! I’m Cara, a photographer who likes to dabble in image manipulation. Today I’m going to show you how to use one of the most basic tools in Photoshop to erase part of your image.
Check it out!
Note: the screenshots below are taken from the Windows version of Photoshop CC. If you are using the Mac version, they will look slightly different.
Table of Contents
When to Use the Eraser Tool
Many people don’t like the eraser tool in Photoshop, preferring to use some of the other formidable tools in Photoshop’s bag of tricks. However, it’s good to know how to use it for those times it might come in handy.
The eraser tool does exactly what it sounds like – it removes parts of an image. It will either erase pixels to transparent or replace them with the background color of your choice.
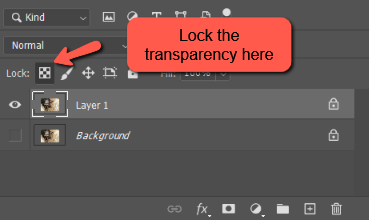
If you want to erase a color you have to be either working with the background layer or a layer with the transparency locked.
Erasing on any other layer will make the pixel transparent. If you have a duplicate layer, make sure to delete it or make the underlying layer invisible. Otherwise, it will look like nothing is happening because the underlying layer is shining through.
Finally, before you get click-happy on an image with the Eraser tool, know that this is a destructive tool. Erase means to remove or delete, the only way to get the pixels back is to hit the undo button.
Once you make too many moves to undo (or save the image) you won’t be able to undo/adjust what you erased.
How to Use the Eraser Tool
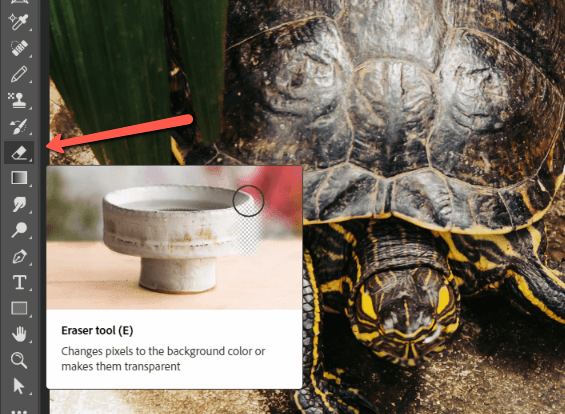
Now let’s look at how it works. Choose the Eraser tool from the toolbox to the left. Alternatively, just hit E on the keyboard to open the tool.
If I try to erase directly on the background layer, the software will replace the pixels with my background color. For example, right now it’s white.

If I want to erase a transparent layer, I have to hit Ctrl + J (Command + J on Mac) to duplicate the layer. Then delete or hide the background layer by clicking the eye icon to the left of the layer name in the layer panel.

Now when I erase in the image, the checkered pattern that indicates transparency appears.

Eraser Tool Settings
With the Eraser tool selected, you’ll notice a few settings in the Options bar under the Menu bar at the top of your screen.
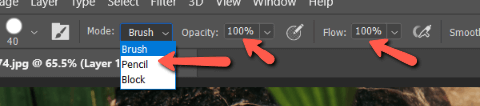
Lowering the Opacity means you won’t fully erase the image, the layer just becomes more opaque in the area where you’re erasing.
This can be helpful when you want to superimpose an element on top of your image and want parts of the image to show through.
Lowering the Flow allows you to slowly build up the effects of the tool as you work. Pass over an area once at 10% flow and you’ll only erase 10% of the opacity. Pass over it a second time and it takes another 10% and so on.
The Mode allows you to choose the shape of your tool and how hard it will be. Brush mode offers soft edges while pencil mode has hard ones. The block is a little square with hard edges that can be useful when working with straight lines.
As with other tools you can change the size and hardness of your brush. Hit [ (left bracket key) to reduce the size of your brush and ] (right bracket key) to make it bigger.
Erasing Images
That’s pretty much all there is to this basic tool. Unlike other Photoshop tools, there aren’t a lot of bells and whistles and few people love working with it. However, it’s always handy to have it there for those times when you need it.
To learn about a more effective tool for erasing backgrounds, check out our Magic Wand Tutorial.
About Cara Koch